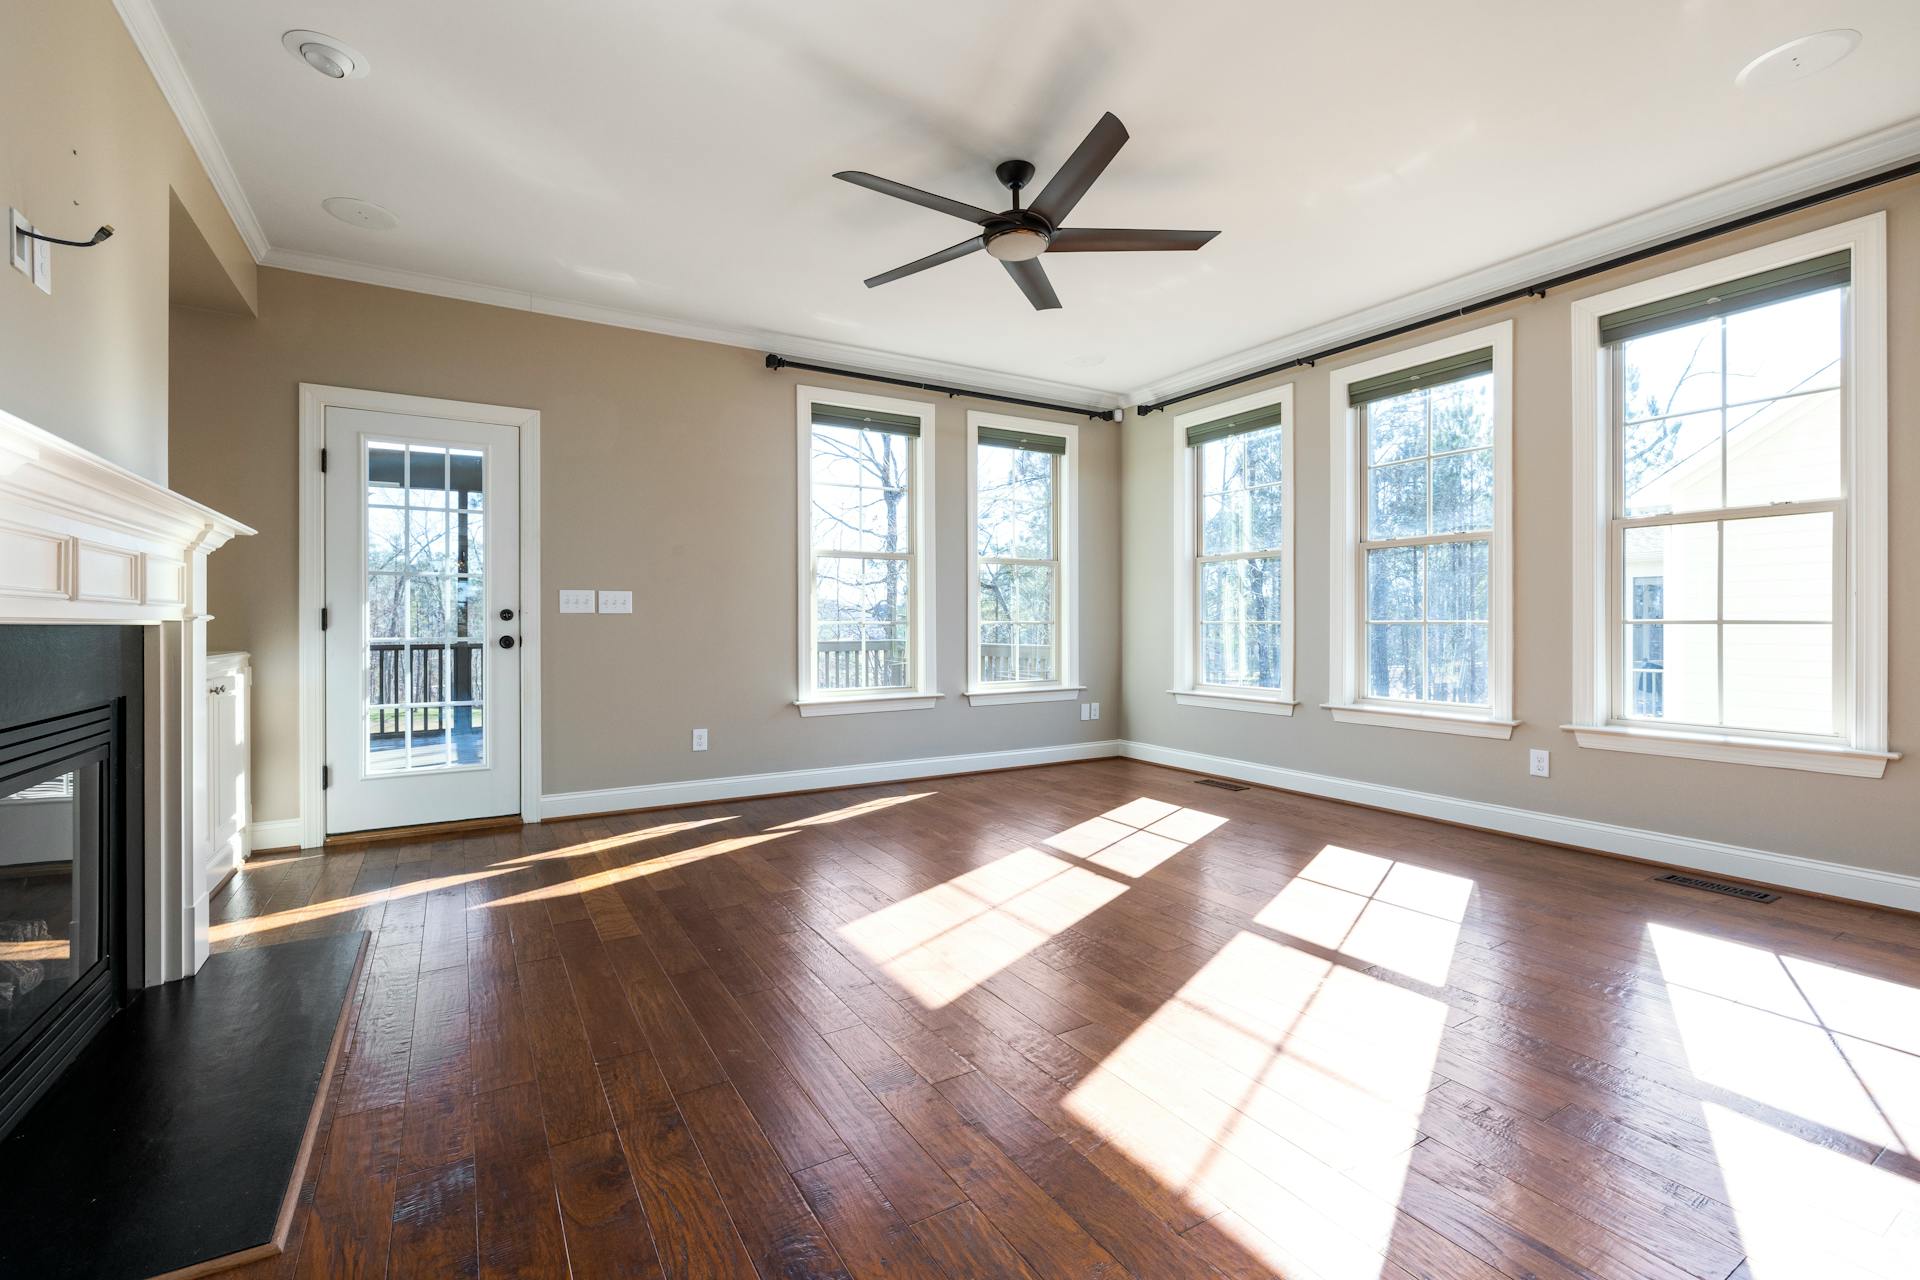
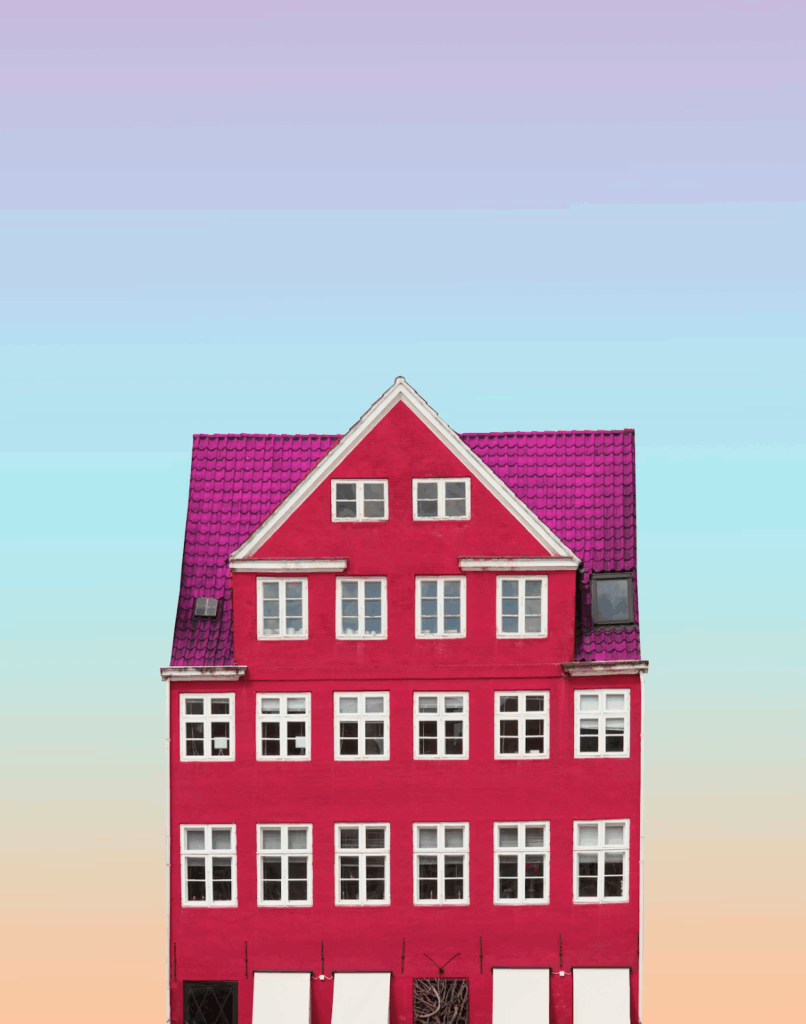
Blown-out windows are one of the most annoying artefacts that can creep into real estate photos. These make window panes look bright and washed out, contrasting negatively with interior exposures, making shots look amateurish.
Unfortunately, buyers pay a lot of attention to property photos. When pictures don’t accurately convey the quality of the property, it can put them off, causing them to skip to the next listing.
If you are suffering from blown out windows in your real estate photos, this comprehensive, step-by-step guide is here to help. It walks you through what blown out windows are, how you can edit them, common pitfalls people make when trying to capture real estate interiors, and when you should edit yourself versus using an expert. By the end, you’ll know what to do to create professional-grade interior photos.
What Causes Blown-Out Windows in Property Photos
Blown-out windows in property photos are caused by issues relating to dynamic range. When daylight is visible in an interior shot (usually via a window), it creates a large disparity between the brightest and the darkest areas of the exposure, which camera sensors find it difficult to capture in one shot.
For example, exterior brightness can be 10 to 15 times higher than interior brightness on sunny days, generating contrast regular cameras simply can’t deal with. The camera is trying to expose for long enough to keep darker interior walls and furniture visible, but then over-exposes on the windows, making them look much brighter than they should. The result is darker interiors with a murky appearance. Rooms seem dingy and unwelcoming.
Even high-end mirrorless cameras and DSLRs struggle to process the extreme contrast between the light coming in from windows and the rest of the room. They can’t compete with the dynamic range of the human eye, which is why images look odd (even if equipment is properly calibrated). .
Added to this, other factors can make blown-out window problems even worse, including:
Shooting at midday when sunlight is harshest
Shooting in program modes or auto modes
Relying too much on a single exposure
Using mixed lighting setups
When photographers fall into these traps, photos can look flat and unprofessional. They don’t spark interest, so buyers move on to the next listing, hurting the property’s performance.
Window pull editing is the art of bringing together an exposed exterior view and an interior shot for a specific room. Photographers “pull” the properly exposed portion of the view into the shot for the rest of the interior so exposure levels match in a way that the human eye would recognize.
Software tools make this possible by layering the dark exterior shots over the main interior image, using masks to blend the transition. This approach reveals the window area with more crisp details like the outside landscape, sky and sea. Meanwhile, the interior of the room remains perfectly lit, looking bright and welcoming.
Window pull editing is not magic; it’s a common technique photographers have been using for a long time. When done correctly, rooms look natural.
Editors use window pulls for virtually every listing on major platforms like Realtor.com and Zillow. However, they are particularly important for luxury listings where buyers want to view properties in context. Window pulls may not matter for small townhouses lacking exterior areas, but they do matter for properties overlooking expansive gardens, beaches, cities, or oceans since these are a major selling point for wealthy buyers..
Methods to Fix It
What can be done to fix blown-out windows in real estate photography? Here are some options:
HDR blending
High dynamic range (HDR) blending is one of the most popular approaches to deal with blown-out windows. It’s also relatively simple to do with modern tools.
Set up your camera on a tripod and then set manual mode to aperture f/7 to f/8, ISO 400 or lower. Then shoot three to five exposures.
Once you have these, use an editing tool to perform an HDR real estate editing merge. Depending on the tool, you’ll need to select specific menu options. You may be able to adjust aspects of the merge, like the level of highlight or the level of shadow. This can help to make images look more realistic.
Be careful when using HDR. Most professionals leverage the tool in cases of moderate contrast. However, it can look unnatural if there is excessive tone mapping.
Manual blending
By contrast, manual blending gives you more artistic control without relying on algorithmic HDR approaches. Many professionals believe this produces a more realistic and natural looking result. However, it is more challenging to achieve because the work has to be done manually.
Start this process by shooting your interior exposure in a properly lit room and then using a window pull exposure for the exterior, ensuring that you retain exterior detail. Then edit in and open layers in your software tool. You should have an option to edit and adjust the darker window layer. Placing this on top of the regular interior exposure and then using a blend tool brings the whole image together.
Flambient technique
Finally, you might want to use the flambient technique, which combines “flash” and “ambient” shooting. Many real estate agents see this as the gold standard for the best-looking real estate photos. You get a flash for accurate interior colors with ambient light for realism and a dedicated window pull.
Start this method by taking the ambient shot, using a middle exposure for a well-rounded light level. Then you use a flash shot that exposes the walls and any furniture enough so that they look bright. The final step is the window full pull shot. Here you turn off the lights so that the interior looks darker than the exterior.
After assembling these images, you can then edit them. You’ll need a tool that allows you to open all three images at once and then blend and mask them together. Continue adjusting things like sharpening, color balance, and vignette to the point where the image feels natural.
When fixing blown-out windows, you’ll need to avoid some common mistakes that even the pros make. Here’s what many people get wrong:
Over-reliance on a single exposure
Don’t expect one frame to enable you to create stunning interior shots for property listings on bright days. You will always need at least two exposures, and preferably three.
Poor masking
Avoid elements like reflections that make editing look obvious. Mask them using proper blending tools or AI software.
Excessive post-processing
Trying to use post-processing to remove the haze from skies can make real estate images look cartoony. Buyers are often switched off by photos that seem inauthentic so avoid excessing processing.
Skipping tripods
Don’t skip the use of a tripod for shooting interior shots. If layers are misaligned, it will become obvious in the final edit.
Incorrect white balance
If you use a flash and daylight mismatch, it can lead to yellow and blue casts. To fix this, edit in RAW first.
Flashing too much
Overflashing can lead to unnaturally harsh hotspots in your interiors. Always rely on ambient light where possible.
DIY vs Professional Editing (Important for conversion)
Knowing whether you should edit yourself or get professionals to do it for you is a significant question for real estate agents and anyone looking to sell a property.
The benefit of DIY editing is that it doesn’t cost you anything extra. You have full creative control, and you can turn around images quickly. The downside is that it’s a time sink, and the quality can be inconsistent.
Many real estate agents spend two to four hours editing a single 20-photo shoot for a property, which is often between 5-10% of their week. And even after all of that work, the final result may not be what buyers were expecting.
Professional photo editors produce consistent, high-end results, but they are much more expensive. Expect to pay between 50 cents and $2 per photo, depending on how many you want editing.
You’re scaling a business and want to reduce the amount of time spent editing
You shoot more than three properties per week
You Have a large number of photos requiring editing
You value your time more than the small cost of paying a professional to edit for you
You need to rush editing jobs to get listings on platforms quickly
You need consistent images quality that reflect well on your real estate brand
So there you have it, how to fix blown out windows real estate photos. Ultimately, window pull real estate photography is easier than you might think with proper techniques. You can fix overexposed windows interior photos with relative ease and use enhancement tools to bring out the best in all your images.
Most home buyers form their first impression of a property long before they even set foot in the place. These days, nearly all home buyers (over 97%) start their real estate search online. So, of course, the listing photos are central in encouraging them to check out properties.
Styles and techniques used in photo editing may be constantly changing, but home buyers themselves have kept their expectations consistent. They want photos to feel genuine, reliable, and enticing. That’s the main reason why some real estate photography editing tips never go out of style.
Here, we take a look at the timeless real estate photo editing standards that help boost high-performing listings. Whether you’re handling one or hundreds of listings, learning property photo editing best practices is a no-brainer.
Why Timeless Photo Editing Matters for Real Estate
Timeless real estate photo editing is a decision-making tool. Realtors need pictures online that match what people see in person. When the visuals align with the real-life showing, then deals are more likely to roll smoothly and hassle-free.
Essentially, buyers make quick decisions based on online photos. Your real estate photos convey a professional and trustworthy message. On the other hand, overly processed images send the opposite message and put potential buyers off.
Another reason timeless photo editing matters is that listings will be around for a while and across multiple platforms. The same photos will end on:
MLS
Major online portals
Social media
Emails
Even print marketing
So, while it can be tempting to jump on the latest real estate listing photo trends, there are risks. Your entire real estate portfolio suffers when you follow short-lived trends that go out of style quickly.
Following proven, timeless real estate photo editing standards makes it easier to produce consistent and effective property images across all your platforms.
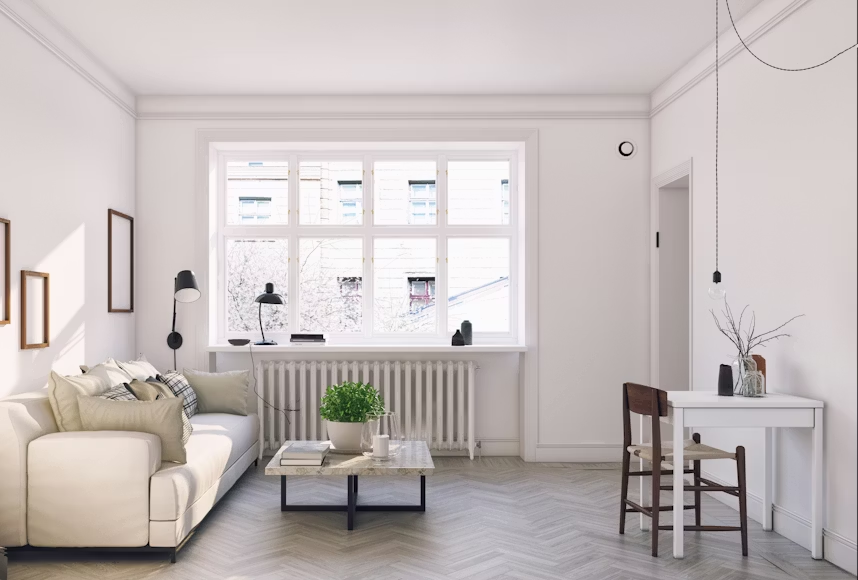
Trend #1 — Natural, Realistic Lighting
Lighting is one of the first things buyers react to. When lighting looks natural, a space feels more inviting and easier to visualize. When it doesn’t, buyers start questioning what the property actually looks like.
Real estate photo editing best practices aim for balance. Rooms should feel bright enough to show detail, but not so bright that they look artificial.
There is also a performance reason to get lighting right. Homes marketed with high-quality, professionally edited photos tend to sell faster and for more money. Lighting plays a big role in that perception. Buyers often associate clean, well-lit images with properties that are better cared for.
Real estate photography editing tips are designed to avoid extremes and focus on accurate lighting that reflects what buyers will actually see when they walk through the door.
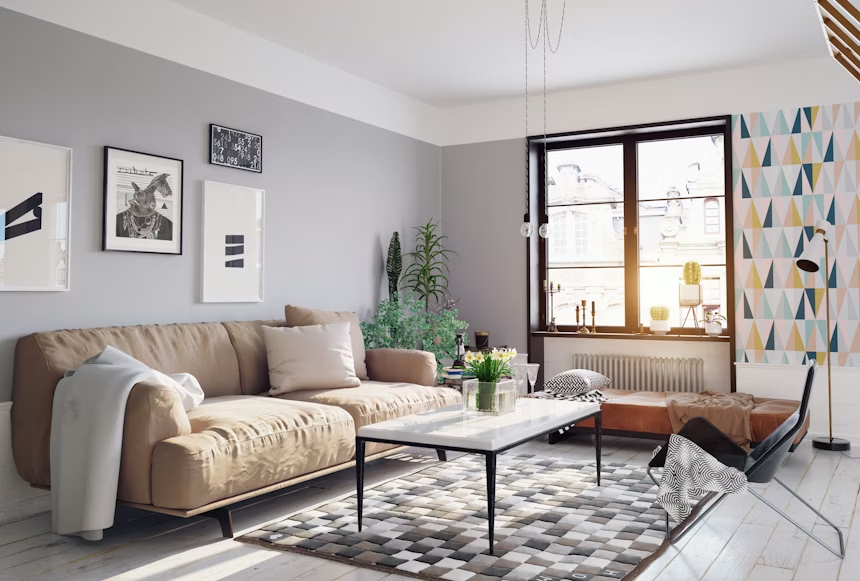
Trend #2 — Accurate Colors (No Fake Saturation)
Color inaccuracy is a red flag that buyers may notice even if they can’t put a finger on it. Most people can tell when colors feel natural and when they don’t, aka when they are oversaturated.
Oversaturated images stand out at first glance for all the wrong reasons. They look unnatural, and potential buyers inevitably start questioning if anything in the photos is real.
That’s why the key to real estate photo editing is keeping colors grounded in reality. To put it clearly, white walls should look white, wood tones should not turn overly orange, and green doesn’t need to appear neon. In other words, colors that shift too far from reality in an attempt to enhance the photo can distract and raise suspicions.
So, that’s why it’s important to understand how to use effective real estate photo editing tools to enhance lighting and contrasts without transforming colors.
Perspective issues can appear, especially if you use a wide-angle lens to fit the whole room in one shot. However, this can lead to distorted images that feel off.
Professional property photo editing best practices are here to correct vertical and horizontal lines and perspectives, so that the rooms and structure are balanced and proportional. You want to edit the photos to prevent distortions and visual inconsistencies.
Why does it matter?
Buyers can judge size and layout
Rooms look true to scale
The property portfolio looks professional and trustworthy
What are the risks of perspective issues in your photos, and how do they present themselves?
Curved lines that should be straight
Distorted proportions
Unclear depth or lack of depth
Unrealistic space perspectives
Trend #4 — Clean, Clutter-Free Rooms
Clutter can distract from a property’s actual potential. However, it’s not always easy to capture clean and tidy rooms, especially when the property is still occupied or under renovation work.
What can cause clutter in a room? A variety of things and factors can make the space appear messier and more clutter-loaded than it is:
Visible loose cabling
Bins
Too many personal objects and decorations
Too many shadows
Too much furniture
Etc.
Ideally, you’d want to physically stage the room, but this isn’t always an option. In that case, realtors frequently turn to some of the best real estate photography editing tips and tools to digitally stage a clutter-free room.
Trend #5 — Consistent Editing Style Across a Listing
There’s no denying that if you want real estate photos to look consistent across your agency, it’s important to follow the same real estate photo editing standards across the board.
But, while this sounds logical, in practice, the gallery can feel disjointed. This happens when images are edited by different people using different photo editing best practices. Additionally, different environments, such as daytime and weather, can also affect the overall presentation.
So, for timeless real estate photo editing, agreeing on exposure, white balance, contrast, and saturation will help design a cohesive and unified listing. Ultimately, buyers want to view listings without being distracted by variations between photos. This is as much a case of building a professional presence in the real estate market as a case of giving potential buyers the best information to assess the property against their needs and preferences.
Trend #6 — Soft HDR (Not Overdone)
HDR, or High Dynamic Range, is frequently used in real estate photography to balance bright areas with darker interior spaces in one image. So, this is something that is usually applied to indoor rooms with bright windows, for example.
Typically, this combines multiple exposures to recover through editing tools, detail from both the bright and the dark areas.
It makes sense to introduce soft HDR levels in property photo editing best practices to allow interior spaces to be evenly lit for enhanced detail that would otherwise be missed by the camera. This is also closer to what the human eye can actually process, so it’s a useful technique.
But bringing too much HDR can affect the output quality and credibility:
Harsh contrasts
Glowing edges
Unnatural, gritty look
Overly textured surfaces / or overly flat
Loss of depth
So, it’s important to balance HRD use and follow real estate photo editing trends for soft and realistic enhancements.
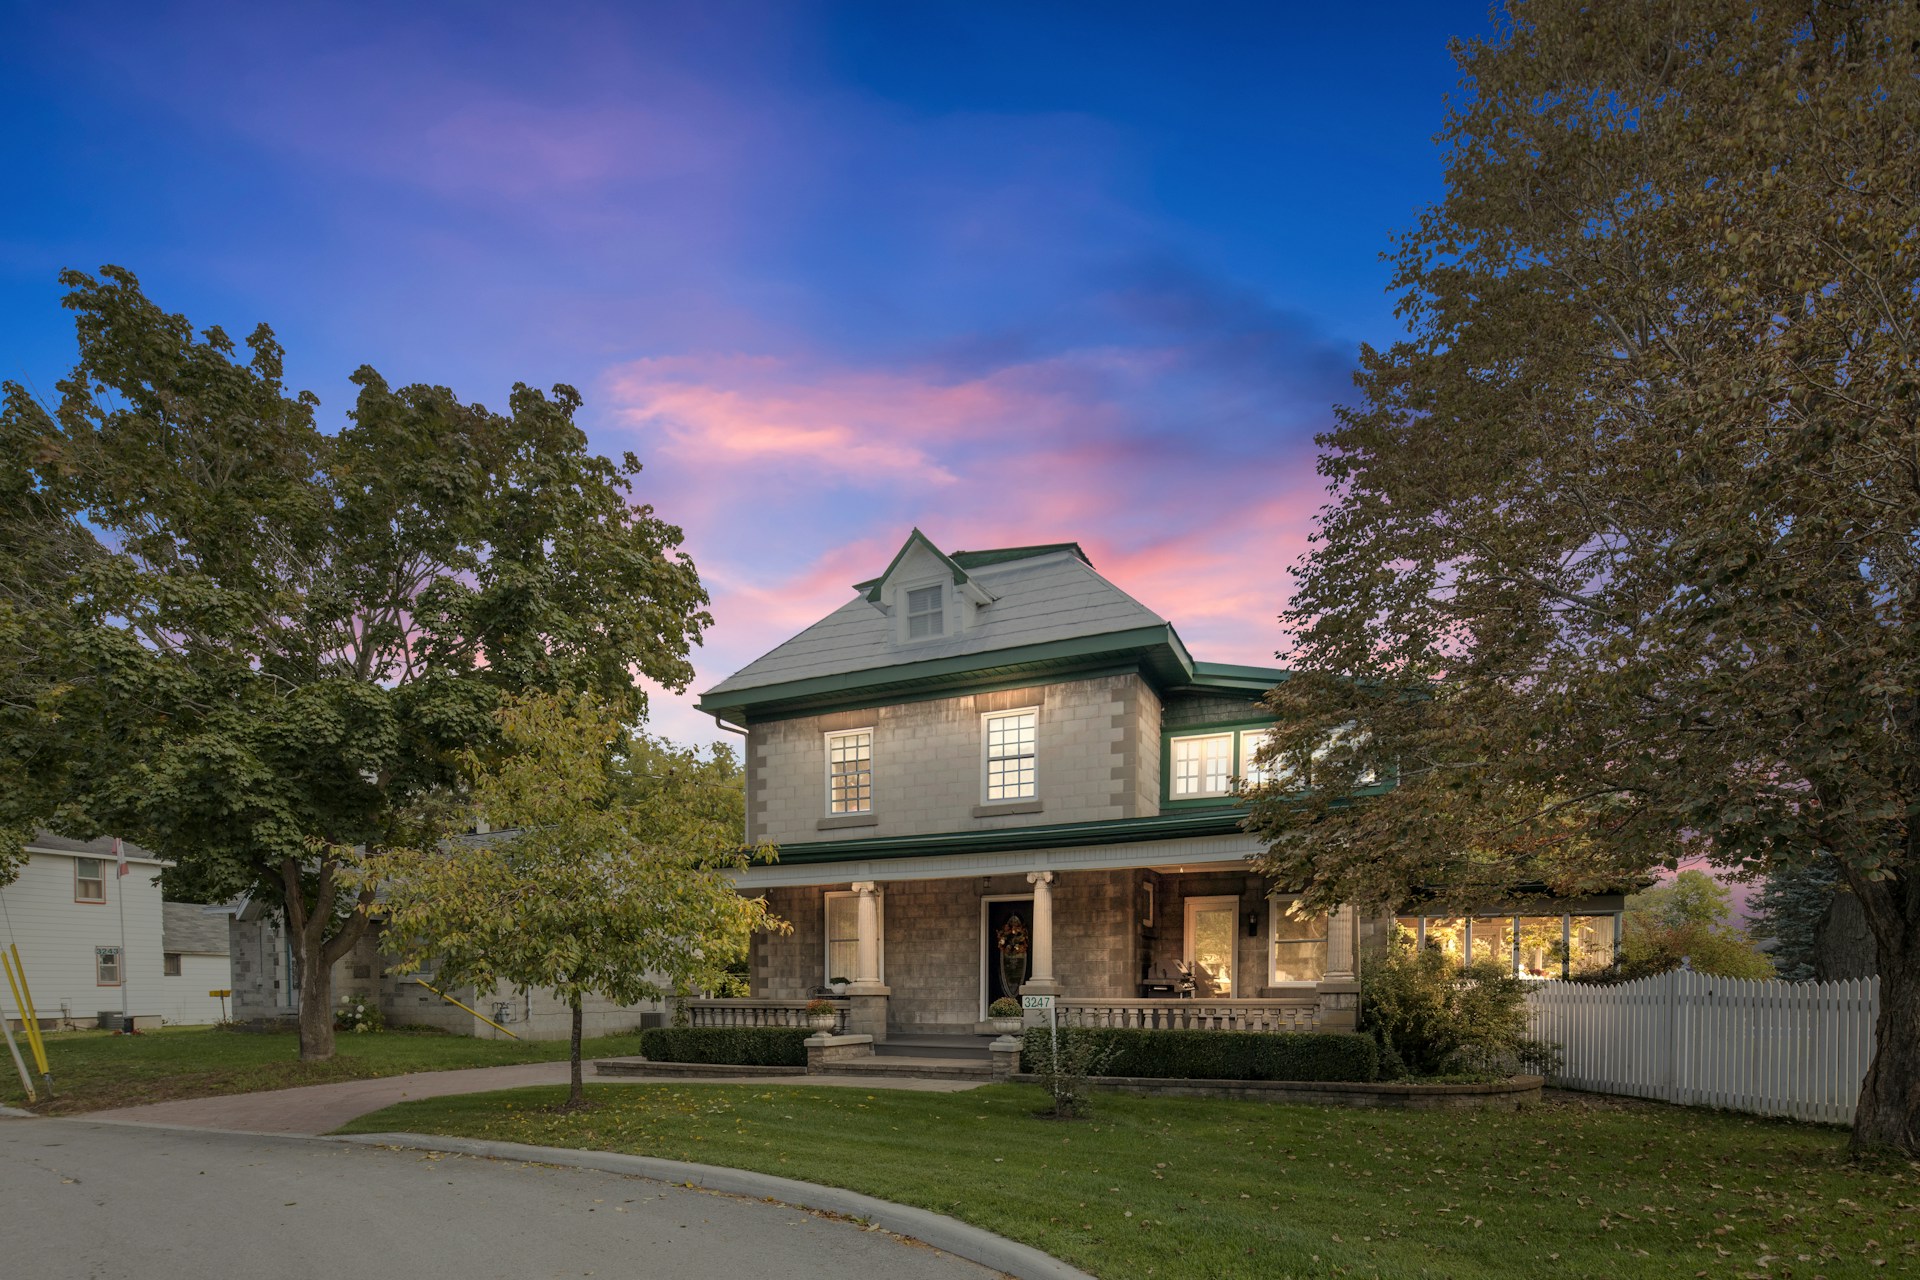
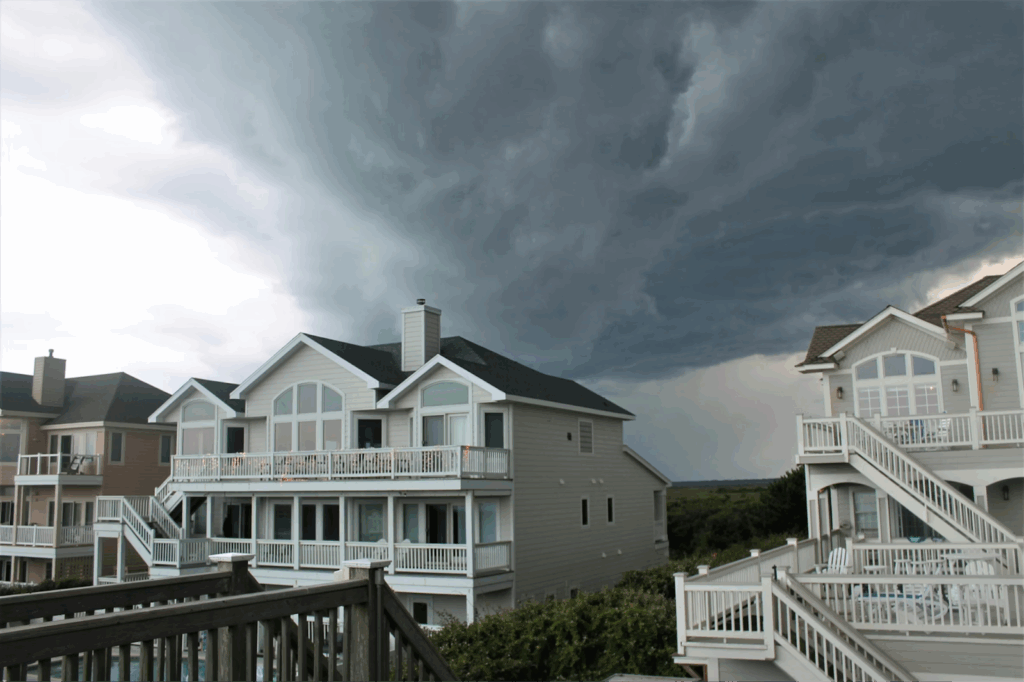
Trend #7 — Proper Sky Replacement (When Needed)
No property listing would be complete without exterior photos. But there are numerous factors outside a property that are out of your control and can deeply affect how photos will turn up.
Weather
Time of day
Seasonal light
The real question is: Does a property look just as appealing with grey skies in the background? The answer is no, even though buyers are aware that these elements have no correlation to real estate listings. But, there’s no denying that the quality of outdoor light will change how the property appears in photos and how potential buyers will consider it.
So, that’s why you want to use the best timeless real estate photo editing tips to replace the sky. This can help restore balance to the image without making any modification to the property itself. Sky replacement is to be used with care to improve the clarity and lighting without making it unrealistic.
You can also use this to show potential buyers what the property looks like at twilight, which essentially replaces the exterior light direction and intensity in the sky. So, it’s a helpful editing enhancement to showcase real estate listings under the best possible natural light, even when the weather wasn’t on your side on that day.
What is sharpness in real estate photography? In essence, sharpness helps potential home buyers see detail in the image. You want to hit the right balance when it comes to photo editing, because too little sharpness keeps detail blurry, and too much will increase noise.
The focus on sharpness is essentially to bring the right level of digital noise, aka the grainy or speckled texture, and keep it as balanced as possible. But depending on the light quality or the camera settings, noise can be more or less present. Typically, the following processes increase noise presence:
Low light shooting
High ISO settings
Small sensors
Wide dynamic range scenes
Heavy HDR processing
Heavy shadow lifting
Noise is naturally a part of the image. But the more you sharpen it, the more it becomes visible. Property photo editing best practices prioritize a leveled presence of noise vs. sharpness. While there are editing processes to balance both separately, the truth is that you can’t apply noise reduction and controlled sharpening in isolation. They work together, and enhancing one will always enhance the other.
How to Apply These Trends to Your Listing Photos
Timeless real estate photo editing trends can be challenging when it comes to putting them into practice for each listing.
In reality, it’s all about planning. Each of these steps plays a part in making sure the final images look spot on.
Take Quality Photos
Good real estate photo editing standards start with usable photos. Even the best tools and techniques can’t correct poor source images. So, that means paying close attention to common disruptors:
Avoidable clutter
Wide and distorted angles
Poor lighting
Blurry shots
The editing process will be easier when you produce photos that require editing for minor enhancements. If you take the photos with quality in mind, you don’t need to rely as much on editing for meeting standards.
Apply Edits in the Right Order
Editing is most effective when you’re doing it in a logical sequence.
First, you want to sort out the exposure and lighting, then get the color balance and white balance right. Next, you can address any perspective issues, then do your cleanup tasks, such as decluttering or removing unwanted objects. Finally, you can sharpen it all up.
If you use your real estate photo editing tools in this order, it helps avoid over-processing, and you reduce the risk of oversaturation or over-processing that can undermine the whole listing
Use Tools to Address Specific Problems
Each of these real estate photo editing trends is there to solve a specific issue.
Soft HDR helps out with balancing interior light.
Color controls stop you from getting any unrealistic tones.
Perspective tools fix up any distortion from using a wide-angle lens.
Virtual staging removes distractions that staging alone can’t fix.
Sky replacement and virtual twilight help you out with exterior shots when the weather is being a pain.
The key is to use the tools with a clear idea of what you want to achieve. Tools should be used to correct and refine, not to change the scene completely.
Review Images as a Full Set
Photos should never be reviewed in isolation. A listing gallery needs to work as a single package. Have a look at how they compare side by side, to check for any consistency in brightness, color balance, and contrast. This can help spot any shifts that might not be obvious when you look at a single photo.
This final check is where many issues are caught and fixed. It’s also where you can reinforce consistency across your listing.
By treating these trends as a repeatable process rather than one-off adjustments, timeless real estate photo editing becomes more reliable and repeatable.
Why Professional Editing Still Wins
In conclusion, timeless real estate photo editing standards are designed to create a repeatable and cohesive process that produces quality listings for your real estate presence. By this point, you understand both the importance of starting with decent quality input and the way to apply the right editing trends to drive inquiries on real estate properties.
We recommend using solutions like Phixer that are specifically designed to handle the challenges and demands of real estate photography.
We’re excited to share that Phixer was recently featured in a major Redfin article, 12 Things To Do Before Selling Your House (February 3, 2026) — a go-to guide for homeowners preparing to sell their property.
In the article, Apple Suico from Phixer shares insights on how small improvements and professional photos can make a big difference in attracting buyers:
“Before listing your home, focus on decluttering and depersonalizing each room so buyers can easily envision themselves living there. Small repairs like fixing leaky faucets, repainting scuffed walls, and updating tired lighting can have a big impact on perceived value. Lastly, invest in a deep clean and professional photos; first impressions online drive buyer interest more than ever.”
Redfin’s piece covers 12 essential steps for sellers, including scheduling a pre-listing walkthrough, tackling repairs, boosting curb appeal, and capturing professional listing photos. Whether you’re selling in Boulder, CO, or El Paso, TX, these tips help homeowners prepare for a smoother sale, stronger offers, and fewer surprises at closing.
How do you take the best real estate pictures? More to the point, why do you need to put so much effort into real estate photography? Both questions are extremely valid, and you’ll find the answers in this blog post. There’s a certain knack to taking great property photos – and you will see a remarkable range of benefits when getting things right.
Expert Tips For Taking The Best Real Estate Photos
Top-quality real estate pictures don’t happen by chance; they’re the product of patience and skill. There’s an art to taking great images of real estate, and you can break it all down into three core elements:
When it comes to framing your shots, you need to organize each room and space to look as appealing as possible. Hire someone to set the scene if you don’t know what to do – and then find the right angles so small rooms seem bigger and you highlight the key features of bigger rooms.
Most importantly, make sure you edit your photos to take them to the next level. We actually have a real estate photo editing service here at Phixer where you can upload raw footage, and our editors will touch up your images to make them look even more professional.
As a result of these three steps, you will have images that look crystal clear, are framed correctly, and showcase a property’s best features. One more tip: you can never have too many photos. Avoid duplicates, but include as many images and videos as you can muster – it’ll work wonders for your listing.
How Real Estate Pictures Enhance Listings
Why go to all this effort? Based on a range of statistics, listings benefit from having high-quality, professional photography. Research demonstrates that properties with professional photography:
Sell 50% faster
See a 118% increase in online views
Sell for a 47% higher asking price
It’s all thanks to the photos and how they draw people in. Buyers or renters are more eager to inquire about properties when they see them in all their glory. The best real estate pictures show everything, so a buyer/renter feels like they’re in the property and can imagine living there. It drives up interest in your listing, which ramps up the competition – and that leads to a quicker sales process with higher sale prices.
You absolutely cannot afford to list a property without photos; it’s non-negotiable. More importantly, you need to go to every effort to create the best real estate photos possible. Start by getting the right gear so you can take high-quality photos. Follow this up with excellent staging and photo framing to show the property in a positive light. Conclude with expert photo editing to refine each image.
In today’s market, more than 90% of home buyers start their search online, according to recent NAR reports.
Therefore, it’s essential to think about effective strategies to advertise your listings. You need to be able to appeal to customers who are chronically online.
The focus of this guide is on actionable and proven tactics that brokers, agents, and sellers like you can use to boost your online presence.
Once you’ve read it, you’ll understand more about how to drive leads in a competitive digital landscape. With the proper tools in place, you can reduce selling costs and reach the very people who are most likely to buy. Understanding these challenges and then finding ways to break through them is the shortest path to success.
Below, you’ll find various individual strategies you can deploy when selling. But if you really want the greatest results, the best approach is to integrate all of them.
Once you understand your audience, develop the right marketing techniques, and craft compelling listings, you’ll make faster sales and get higher engagement from prospects. You’ll also have a better return on investment supporting your cash flow if you’re an agency.
So, what are the strategies that you need to use? Let’s take a look.
The first thing you’ll need to focus on is online visibility. Maximizing this means that your properties appear prominently on the platforms you use to sell them. This could apply to search results in Google, directories where people can post listings, or conventional platforms like Rightmove, Zillow, and Redfin.
Start with proper keyword research using Google’s Keyword Planner tool. You’ll need to look for the keywords people are using in your area, like “homes for sale in New York City” if you happen to live in New York.
Knowing the phrases prospects type into Google search makes it more likely to show up in results. This is particularly helpful if you are selling a commercial property or a luxury home that has appeared in a press release elsewhere. Google may prioritize it if you get your choice of keywords right.
The next stage is to think about on-page optimization for your listings. You’ll want to consider:
Alt text for images
Meta tags
Keywords in your descriptions
Mobile friendliness
Remember the vast majority of people listing properties for sale will not cover these bases. Instead, they’ll simply go with the default copy and setup offered by the platform. If you go beyond this, you will automatically rise above the pack, and your properties could potentially become more visible.
Following that, make sure that you claim your profiles on the major syndicating sites mentioned above. These have special algorithms that select listings based on the completeness of the data they have and the quality of the photos associated with them.
Always use a professional photographer and edit your photos using specialist tools like Phixer. Avoid the temptation to take pictures with your iPhone (unless you have a lot of experience in real estate photography).
Next, complete all the fields platforms require. These include:
Number of rooms in the property
Size of the floor space
Number of bathrooms
Number of bedrooms
Whether the property has a yard or a balcony
Whether there’s a garage attached to the property
Presence of any special utilities like solar panels or air-source heat pumps
If you run a real estate agency, optimize your Google My Business profile. Doing this gives you more visibility in search results. Make sure you use schema markup for property details. Getting this right improves the likelihood they appear in Google’s rich snippets.
Also, encourage reviews. The more of these you have, the more Google will promote you, and the more likely prospects are to use your services.
Don’t forget to track your success with the right metrics, such as impressions, click-through rates, and website traffic. These allow you to monitor what’s working and what isn’t so you know how to adjust your listings to make them more competitive.
As mentioned, maximizing your online visibility means crafting more compelling listings. But how are you supposed to do that?
For us, the most important thing to remember is that your listing is essentially your digital storefront – it’s what your audience sees the moment they encounter your property. Therefore, find ways to captivate them in seconds and convert them (just like any other business would).
Focus on high-quality visuals
Start by focusing on creating high-quality visuals with Phixer. For example, our AI tools can assist with:
Photo editing to make every image of your interiors and exteriors more exciting
Virtual staging to remove clutter and personally identifiable objects from your listings
Lawn replacement to make your exterior areas look more attractive
Virtual twilight so that audiences and prospects can see what your home looks like in the evening
Decluttering to remove unwanted objects from scenes
AI editing to speed up the editing process and reduce the amount of work you have to do
AI website builders that can create websites for your listings in a fraction of the time of conventional approaches
Once you have high-quality images, people are more likely to click on your listings and learn more about them. This is probably the best way to attract genuine leads who are looking for exciting properties to purchase.
We recommend taking a combination of professional photography, 360-degree images, and drone shots. Ideally, prospective buyers should be able to walk through the properties that you list virtually and get a tour before they actually visit.
Compelling headlines are another way to grab attention and tell leads what’s appealing about your property. For example, you could write titles like:
“Attractive waterfront property with the latest smart upgrades”
“Cozy cottage home in a rural setting for people who want peace and quiet”
“Modern urban apartment for busy professionals who need automated utilities”
Ideally, the headline should describe the property while also addressing a pain point prospective buyers might have. For example, some people need a home offering convenience because they’re working 50 to 80 hours per week. Others require somewhere that gives them peace and quiet, perhaps because they’ve lived a busy life and now they want to take time to unwind
Once you’ve written the title, it should be paired with some descriptive body text. Most buyers won’t read this, or if they do they’ll just scan it, but make sure that it includes all the essential details they need anyway.
Ideally, any description you provide should confirm the property solves the particular pain points the prospect has. Then, it can go on to provide solutions to their additional pain points.
For example, if they have dogs, they might want a mud room for when they come in from walks. These give them space to clean up the dogs before they enter the main property.
They might also want outbuildings if they plan on keeping animals. Again, these can be included in the descriptive text.
Add storytelling elements
These are narratives that describe the ideal situation that a new property purchase might create. For example, you might discuss how the outdoor patio is perfect for family gatherings during the summer or how there’s a spacious backyard which provides space for young children to play.
While it’s advisable to add statistics like square footage and market comparisons, it’s often these stories that have the greatest impact on buyers. With them, they can better imagine what it might be like to live on the property that you’re selling.
Another tactic is leveraging social media. Facebook, Instagram, TikTok, and LinkedIn allow you to reach specific demographics you might want to target more easily than ever before. Plus, more than 70% of prime property buyers in the millennial age category use social home searches. That means that they’re actively on social media looking for properties.
Build and engage with communities
To start off, you could grow your followers for your agency or brokerage. Then, you could recommend properties to them throughout the year depending on their preferences.
What’s nice about this approach is that you can be very specific in your targeting. You probably already have a lot of data on the type of people in your audience, so you know more about the properties they want.
You can also pair them with sellers who are trying to sell the same types of properties. For example, if you have a luxury audience, the market is often quite small, but you can get early access to listings that are in this category and disseminate them to your followers.
Paid and paid social advertising is another option. You can provide platforms like Facebook and Instagram with an ad budget, and then they can boost your posts and carousel ads for various properties. This approach is expensive, but it can be used if it has a high ROI.
The last approach you might want to look at is influencer and partnership collaborations. Working with popular faces online or complementary businesses, like interior design firms, can be useful, especially for cross-promotion. You can get them to look around your properties or showcase them on their websites to drum up interest in the lifestyle you’re offering.
Targeting the Right Audience
We’ve briefly mentioned how important it is to target the right audience, but it’s worth reiterating in this section. When you get this puzzle piece right, (by understanding your audience’s demographics, behaviors, and psychographics), you’re in a much better position to convert them.
Use data-driven approaches
When trying to target the right audience, use data-driven approaches. We like the idea of using analytics platforms like Google Analytics and CRM tools. These are great for identifying buyer personas and differentiating between investors and first-time buyers.
Use geo-fencing and location-based targeting
Second, use geofencing and location-based targeting when seeking your audience. While it’s possible that people from the other side of the country might want to buy a property, most people actually move locally.
That’s why, if you’re trying to save money and you know you have a local market, it can be a good idea to set boundaries on where ads can appear. For example, if you’re selling a property in New York, you may not want advertisements to appear to users searching in San Antonio, Texas, unless they’re specifically using local search terms like “New York.”
Location-based targeting also works depending on the price range of the property. Some districts simply don’t have the purchasing power to purchase properties that add to my service. There’s no point targeting them.
Use demographic filters
Finally, always use demographic filters. For example, you might want to target families that are in a specific school district, or use luxury features to attract high-end buyers via Facebook advertisements. These filters mean allowing you to target in a more niche manner, you’re not serving adverts to people who won’t benefit from them.
If you’re unsure if you’re targeting the right people, use A/B ad testing. These testing variations of ads on different audiences can help you optimize for conversions. You’ll often notice that the number of people clicking ads increases when they connect with them on a genuine emotional level.
Another strategy is to engage with prospective buyers with virtual tours. These are possible because of advances in technology in recent years. For example, Matterport and 360-degree cameras make it possible to simulate in-person walkthroughs and viewings of properties before they visit.
These approaches have a number of benefits. For example, properties with virtual tours have far higher engagement (up to 4x more), according to NAR data. Furthermore, they enable greater accessibility for remote buyers. Prospects don’t have to travel across the country, covering thousands of miles, just to visit a property that they might want to buy. This is particularly important for investors who often understand the market but don’t necessarily want to visit a property before buying it.
It’s also time-saving for agents. As a real estate agency, taking people around properties is time-consuming and expensive. However, if you can provide a virtual tour, it gives them essentially the same experience. There’s no need to shoulder this cost.
To create an effective tour, make sure that you:
Add annotations to each room
Provide adequate lighting so that cameras can capture details effectively
Choose the right types of equipment, such as 360-degree cameras
Get somebody on your team who understands on-site setup
You can now integrate 360-degree tours with most listings and platforms. Even social media sites now allow you to post this kind of content.
Harnessing Email Marketing
Finally, it’s a good idea to use email marketing when you are trying to sell a property. Right now, it is the most direct and cost-effective way to nurture leads with incredibly high returns of up to $40 per $1 spent, according to industry averages.
Building an email list is the most challenging part of the process. You have to do this voluntarily, as per Google rules. Therefore, make sure you add plenty of opt-in forms on your websites and lead magnets. Give people something in return for submitting their email addresses to you (like a market report).
The next step is to use segmentation and personalization. Make sure you divide lists by buyer stage. For example, the emails you send to prospects (i.e. people who haven’t bought yet) will be very different from past clients (i.e. people who have bought).
You also want to tailor the content to the specific interest. For example, if you can provide email recipients with personalised property recommendations, then do so. This is one of the reasons why you need to collect as much information on your prospects as you can.
If you do plan on sending marketing emails to your clients, then use tools like Mailchimp. You can use these to build email sequences that are proven to maximise engagement and possible conversions. You can also use them for analytics to tell which approaches are working best and where and what actions you need to take to refine your campaigns.
Now you know how to effectively advertise properties online
Having read this article, you should now be in a better position to advertise properties online. Combining all of the above, including boosting visibility, leveraging social media, targeting the right audience, providing virtual tours, and using email marketing creates a synergistic online advertising system. As you deploy these strategies, you’ll notice that the amount of interest in what you’re doing explodes exponentially.
We encourage you to use tools like Phixer to speed up listing creation. Our tools allow you to improve the quality of photos and videos on your listings, which is the first thing that most people see when looking for properties.
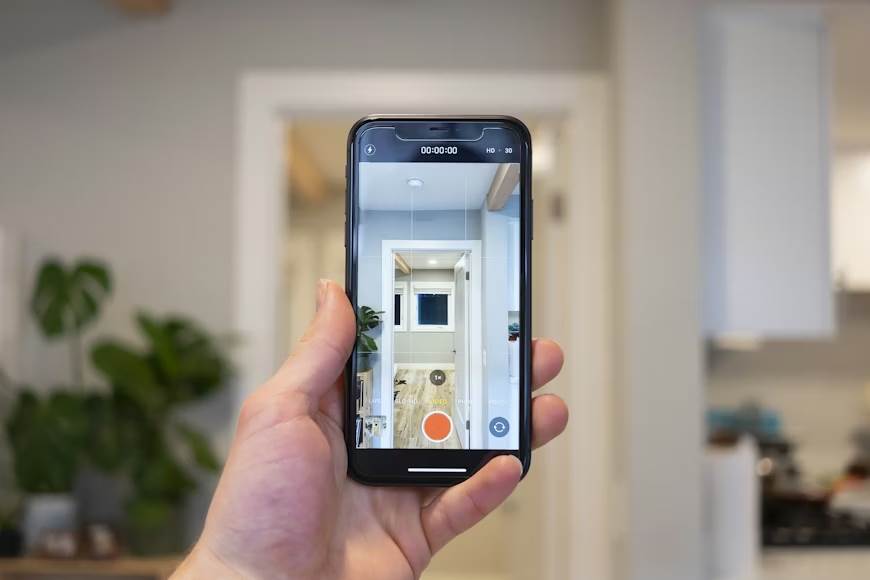
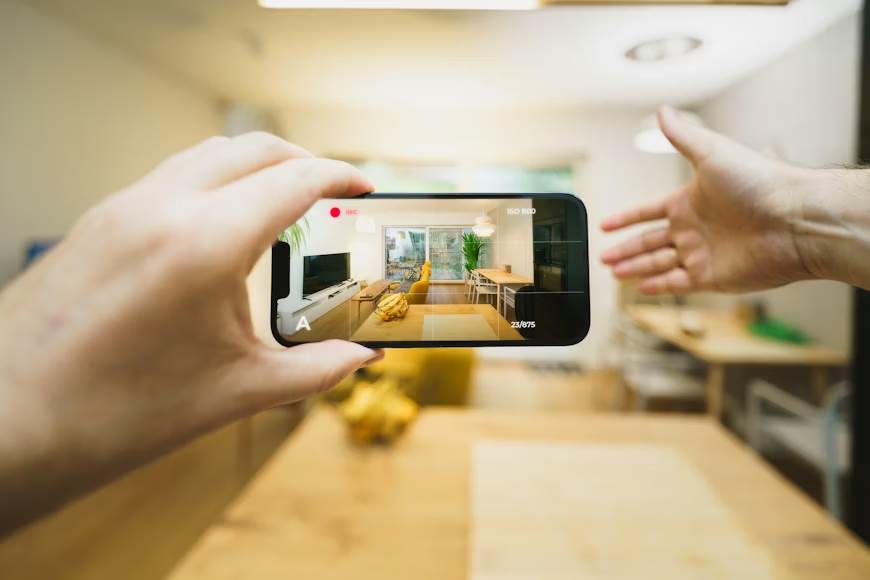
Imagine you’re a home buyer and you come across a property that on paper is perfect for you. You read the description with glee but, alas, the photos of the home you want to buy are dull, grainy and out of focus.
What’s your first reaction? Usually, it’ll be to simply skip the listing altogether and look at another one offering you better insights.
This example is the reason getting real estate photography right is so critical. You need to be professional if you want to sell.
Getting real estate photography right is partly about technique. However, it also relies on using the right equipment for stunning shots. If you make the wrong choices, you’ll never get the results you want.
Fortunately, this guide is here to help. We run through the products you need if you want to snap eye-catching real estate photos that sell. By the end, you should have a better understanding of what to get and how to use it.
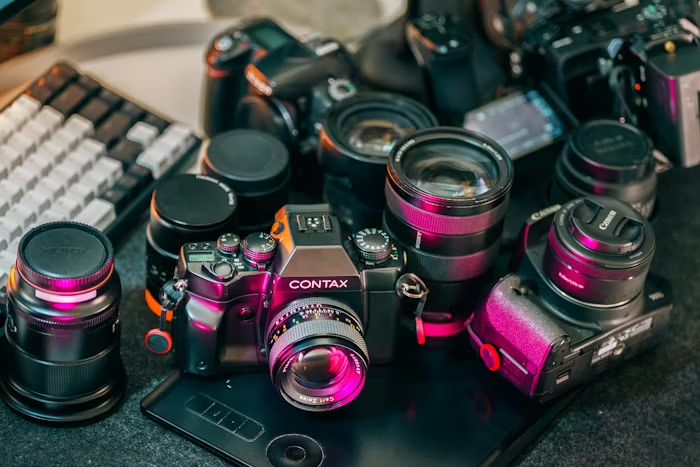
The camera you get will be the most important equipment choice you make when it comes to real estate photography gear. Nothing else will determine photo quality to the same extent.
When choosing a camera, you’ll need to consider:
The sensor size: Does the camera offer full-frame modes or crop options?
The megapixel count: Is the sensor sufficiently high fidelity? Most cameras top out at around 100MP, but even 20MP is sufficient for detail shots
Dynamic range: Does the camera have an option that enables it to capture more colors than standard options, and upload them to digital devices capable of displaying them?
Compatibility with wide-angle lenses: Is the camera compatible with lenses needed for difficult interior shots?
For real estate shots, you’re usually okay with middling megapixel counts. You don’t necessarily need the highest fidelity. However, high dynamic range is a good idea for realtors. It helps you capture high-contrast interiors and bring out more colors.
Wide-angle lens compatibility also helps. Cameras accepting more lenses are better able to deliver high-quality shots that entice buyers and capture key features (like pool outlines or rooflines).
Types Of Cameras
As you explore equipment for real estate photography, you’ll discover multiple different types of cameras. Understanding how these differ from each other is critical for learning to get the best shots.
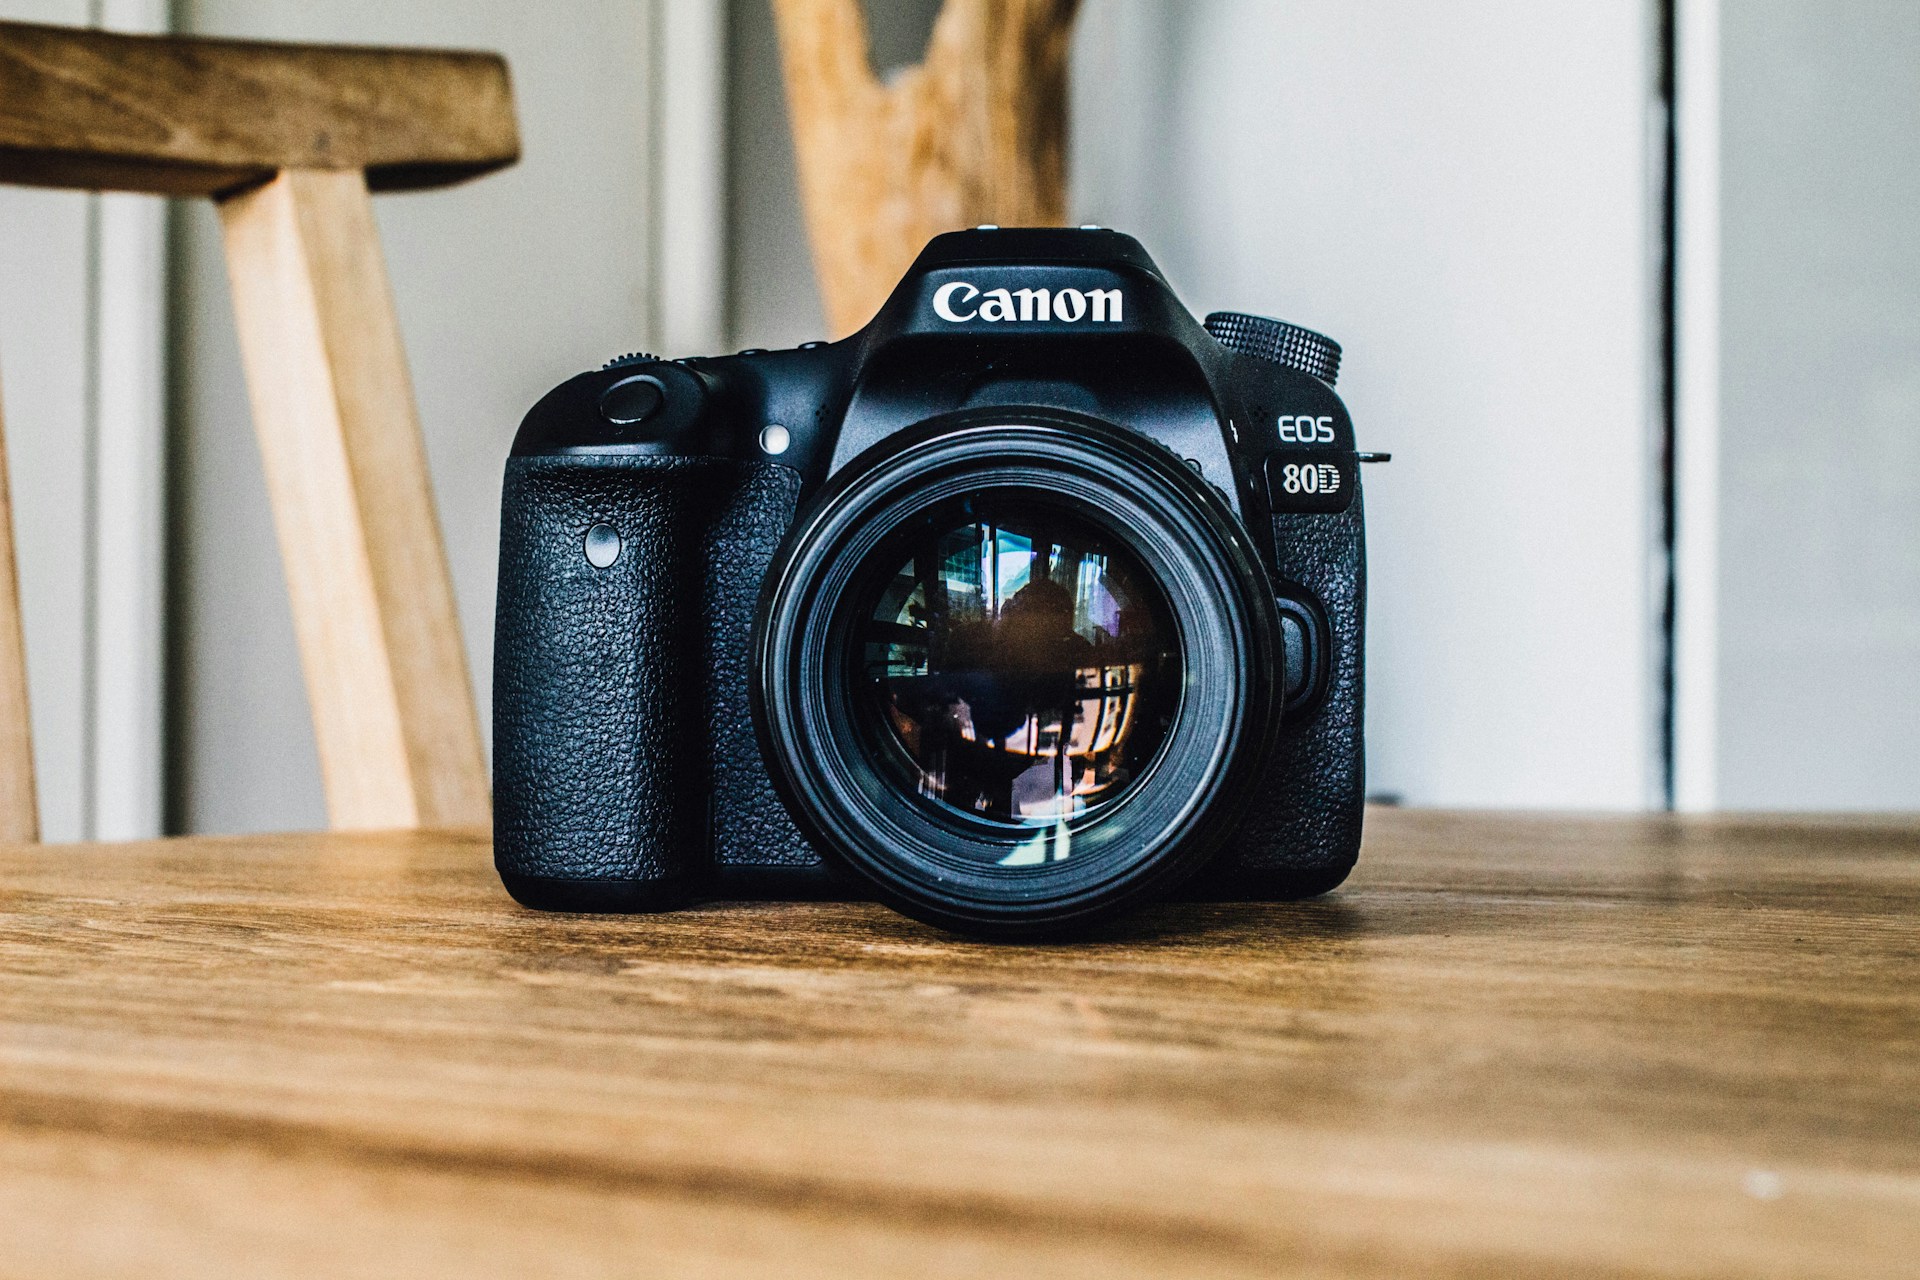
DSLR Cameras
DSLR cameras used to be the gold standard for real estate photography (and still are by many metrics). Their primary benefit is their optical viewfinder.
As a class of cameras, they’re easy to use and have a robust design. This makes them suitable for realtors and estate agents needing to photograph a large number of rooms or properties over an extended period.
DSLR’s downside is their bulk. Because they have so much traditional equipment onboard and an optical design, they need more glass and materials to construct.
Here are some examples of popular DSLR cameras you should consider if you want to go down this route:
Canon EOS 5D Mark IV: Well-known in the real estate industry because of its lower price and high performance in a lightweight package.
Nikon D850: A premium option photographers love for its cropping details and exceptional resolution.
Mirrorless Cameras
Mirrorless cameras are the other big category of real estate cameras. These are significantly lighter and less bulky than standard DSLRs and usually come with nice digital features, like auto-focus. This latter makes them better able to capture details in walls, furniture, and ceiling molding.
The downside is the risk of overheating while recording videos and the shorter battery life. Mirrorless cameras are often energy-hungry and will drain cells quickly.
Overall, though, the real estate industry — like many others — is shifting toward these cameras. Their electronic viewfinders are just more convenient and photographers can get previews of their images in real time to determine their quality.
Top options include:
Sony A7 III: Loved for its sharp images and its full-frame sensor (no cropping or distortion)
Canon EOS R6: Offers in-body stabilization for hand-held shots, reducing blur and increasing photo professionalism
Compact/Point-and-Shoot
Finally, some beginner real estate agents use compact and point-and-shoot cameras. These don’t really offer the same level of fidelity as the options discussed above. However, they still can be a good choice
We’d suggest looking into compact or point-and-shoot products if you’re a beginner. Try to find models with wide-angle lenses built-in. These help you bypass some of the limitations that are present with other compact cameras in this category.
General Camera-Buying Advice
If you are in the market for a real estate photography camera, we suggest the following:
Must have RAW shooting capability. This functionality makes images from the camera easier to move and edit.
Should have bracketing for HDR. This feature is where the camera takes multiple shots of the same scene but with different exposure levels. Then, editing software can stitch the various image layers together for a richer appearance.
Weather sealing. Equipment that can keep out of the rain and moisture is relevant to real estate photography, too. Cameras you can take outside in the rain are more useful than those that require dry conditions.
If you have a low budget, start by renting the real estate photography equipment you need. Then, later, consider buying if you get the volume of gigs you need.
Alternatively, hire a photographer. If they’re contractors, they’ll have their own equipment.
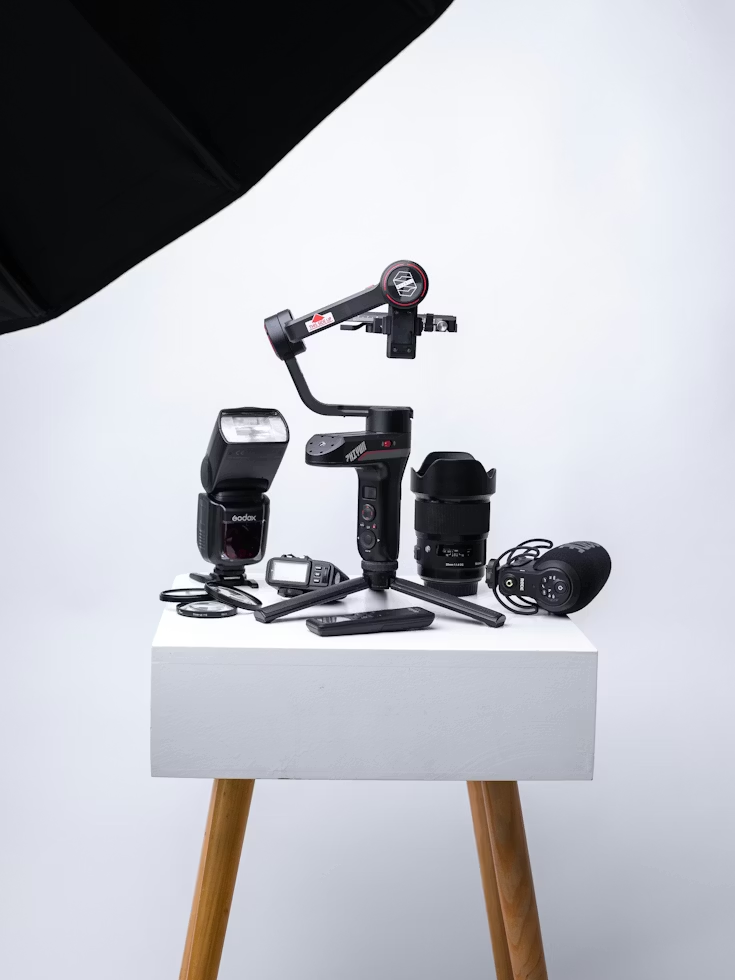
Note that while cameras are the core of the equipment you need, additional accessories enhance the potential to take great shots.
As you explore real estate photography equipment further, you’ll discover that cameras aren’t always enough. Yes — they’re useful and essential, but there’s so much more you need to consider.
Supporting gear helps with lighting control and stability. Getting it right can mean the difference between a high-resolution grainy or blurry shot, and one that looks like it should be in a real estate magazine. Additional equipment deals with common challenges, like uneven lighting and image distortions.
Lenses
No matter what camera you have, you will need an assortment of lenses to go with it. These are essential for achieving the correct focal length and aspect ratio in interiors.
Wide-angle lenses are what they suggest: lenses that let you take letterbox-style shots. These can upgrade the aesthetics of interior photography significantly, making it more compelling.
The Canon EF 16-35mm lens is popular because it offers minimal distortion. Close-range interior shots look true to life with minimal fish-eye effect.
The Sigma 14-24mm is another option that works well in low light and has an adjustable focal length. Real estate photographers can choose the 10-24mm for APS-C or 16-35mm for full-frame.
Tilt-shift lenses are another option for correcting perspective. These are helpful when you need to control depth of field in a real estate setting.
For example, you can use tilt-shift lenses for architectural correction. If vertical lines aren’t straight, tilt-shift lenses can change the angle of the lens in relation to the sensor so everything lines up.
The Canon TS-E 17mm is a top tilt-shift choice for real estate agents. It makes it easy to keep vertical lines straight and prevent them from bowing in ways that might make buyers suspicious.
Finally, you could explore macro lenses. These are ideal for close-up photography, allowing you to capture more detail.
For example, suppose a property has a hand-hammered copper sink. Macro lenses would be ideal for capturing the detail in the hammer marks.
Macro lenses also make sense for stone countertops, the texture of soft furnishings, and indoor plants. Essentially, you can use them for anything requiring a crisp, up-close image.
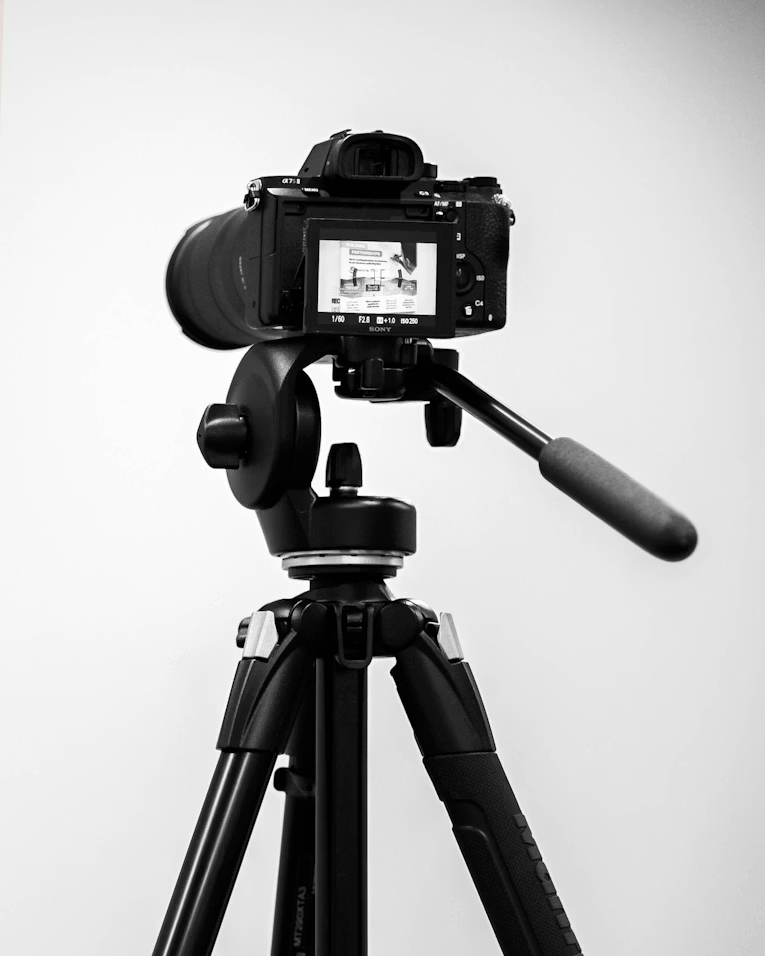
Tripods And Stabilizers
Next, you’ll want to look into tripods and stabilizers. These are critical for taking sharp, level shots.
Again, what you use for real estate depends on your requirements and how you want to take photos. It is possible for photographers to hold cameras in their hands and take shots, but it isn’t advised.
For fixed options, consider the Manfrotto MT055XPRO3. This tripod is made of aluminum (making it easier to carry) and has an adjustable camera mounting point. Each leg is also extendable, so you can raise or lower your camera relative to the rest of the room.
For video explainers or walkthroughs, we recommend a gimballed option, like the DJI Ronin-S. These devices have smart tracking, keeping the camera pointing at you, even as you move around.
Lighting Equipment
Lighting equipment can come in several forms for real estate photography. Whether you need it depends on the amount of natural and artificial light already present in the environment, and the angle it comes into the frame.
External Flashes
You don’t often see external flashes in the real estate photography world. However, they can still be a helpful addition to camera equipment when looking to fill shadows.
For example, suppose you need to photograph a storage room with a single ceiling light and no windows. A flash is essential in this situation.
Softboxes
Softboxes may be needed in a few situations, too, especially when you need consistent illumination. If a full-size softbox isn’t in your budget, you can get less expensive LED panels.
Natural Light Modifiers
Lastly, it might be worth investing in natural light modifiers you place over windows. These make incoming light seem less harsh, especially on bright, sunny days.
Miscellaneous Items
Other miscellaneous equipment you might need includes things like remote shutter releases. These are handy when trying to avoid camera shake (and editing nightmares).
We discuss other camera-specific accessories in the next section.
Overall, you are looking at spending around $800 to $1500 for the equipment listed in this section. Lenses will comprise the bulk of this cost, although professional lighting can be costly, too.
Accessories are “nice-to-haves” that complete your shots and make your images pop even more. They make your life as a real estate photographer easier, especially if you’re a startup and you haven’t done much of this before.
Camera accessories essentially make your work more efficient. When you have the right tools, you can get more done and make faster progress. With the right products, you can photograph multiple properties in a single day and still have energy left over.
But what items do you need specifically?
Filters And Protectors
Camera filters are additions to conventional transparent lenses that adjust the nature of the light entering the sensor. Some interior shots may require these in specific situations.
Neutral density filters are like sunglasses: they reduce the amount of light reaching the lens, allowing for superior shots in bright rooms. For example, you might use these if sunlight is blazing through an open window in the morning and you have no other way to soften it.
Polarizing filters are also sometimes necessary in these situations. These are useful when trying to cut down on reflectivity from non-metallic surfaces in the presence of bright lights. They help with color gradients, making things like leaves greener and the sky bluer. You can add these in the editing phase, of course, but it just cuts down on extra work later.
Lastly, some real estate photographers use UV light filters. These aren’t as common now among digital cameras, but they used to be essential in rooms with skylights photographed at midday. UV filters reduce annoying gray “haze” in film-based images, bringing out truer colors.
Protectors are more straightforward. These are simply to protect the lens’s sensitive glass from damage. If protectors get scratched, you can replace them at low cost.
Clear protectors are protectors you can leave on your lenses during shots. These cut down on tasks when shooting rooms, but they need to be in perfect condition to avoid harming image quality.
You can also get opaque, removable protectors that you remove and fit each time you use your camera. These make sense if you’re regularly boxing and unboxing cameras, or storing lenses loose.
Bags And Storage
Bags and storage are also equipment needed for real estate photography. Don’t leave the office without them!
Bags are like lens protectors, but they protect the entire camera and associated accessories. Many have reinforcements to protect against crush damage, and separate compartments for all the parts you need, like flashes, additional lenses, filters and so on
The downside, of course, is that you need a bag that fits your equipment, so choose wisely. A generic bag might not be sufficient for your requirements.
Generally, you’ll want to buy the bag with the camera, ensuring they go together. Then, if you need additional equipment, like lenses, buy them with separate, bespoke cases that fit them.
Also, check the bag is ergonomic if you or your photographers are going to be carrying it around all day. Most camera bags have handy straps that make them more comfortable to carry around.
Some camera bags also have additional versatility. For example, they might have space for things like water bottles, laptops, tripods and so on. You’ll need to decide which of these additions you need.
Editing Tools
As a real estate company, you also need editing tools for your images. These help you improve them further, making them more compelling.
Historically, editing was the most time-consuming part of the process. However, with today’s AI tools, it’s considerably more efficient.
Lawn replacement – automatically removes unwanted items from lawns, making them look green and verdant
Sky replacement – transforms dull gray skies into blue or blue with some light clouds for more appealing aesthetics
Virtual twilight– adjusts the image settings to mimic twilight, showing what the property would look like in this light level (even if you took pictures at midday)
AI room decluttering – automatically removes clutter from rooms in a single click, making properties look more staged
Object removal – eliminate specific items from frames to improve images
Phixer also offers more conventional real estate photo editing for improved real estate photography. For example, you can do things like correct colors for more natural and appealing images. You can also improve HDR, balancing things like bright window openings and dark corners.
Phixer using a drag-and-drop interface for ultimate simplicity. Photos are available in various output formats for convenience when uploading to specific platforms.
Drone Accessories
If you’re photographing commercial properties or luxury homes, then you might need drone accessories. These devices are handy for taking aerial shots and photography of hard-to-reach areas.
For example, suppose you want to capture unique home features, like crenellations or clock towers. Drones are the perfect tool for getting up high and filming or photographing these elements. Plus, they can also be useful for capturing videos of large tracts of land or gardens surrounding a property.
The best drone options are made by DJI, like the Mini 3. Just make sure you take spare batteries with you for long filming days since they can run flat fast.
Apps For Remote Control
Some camera brands also have apps that let you control things like camera shutters remotely. These are handy when you want to control shots from a phone or notebook.
Here are some examples:
Nikon SnapBridge
Sony Imaging Edge
Canon Camera Connect
BT Cam (a third-party option)
Shutter
SayCheese (a mobile app)
Airdroid (for Android only)
What’s nice about these apps is that they eliminate the need to interact with the camera directly. You simply establish a wireless connection and then click “shoot” on your device, removing the risk of wobble.
Mistakes To Avoid
When buying camera equipment for real estate photography, make sure you avoid the following mistakes:
Skipping The Lens Cleaning Kit
First, you’ll want to ensure you have a proper lens cleaning kit. Getting this wrong can make your lens look hazy.
Don’t use any non-specialist product on the lens. The wrong types of cloth or leaning agent could cause permanent (and expensive) damage, forcing you to replace the lens.
Buying A Drone Before Licensing
Depending on where you are, you may also need to get a license to fly your drone. Don’t buy one before you have the proper clearances.
Usually, you can get a license pretty quickly, especially as a real estate firm. Just ensure that you have permission from the authorities in writing and a letter from the client if applicable.
Purchasing Multiple Speedlights
Purchasing multiple speedlights you don’t need is another mistake you’ll want to avoid. Many realtors jump in and add several of these to a room, creating ugly shadows and color shifts.
To avoid this, stick to a single high-quality flash. Options like the Canon 600EX-RT or Godox V1 can work really well in the right setting. If you need to add more at a later date, you always can.
Buying Fast Primes For “Low Light”
Don’t fall into the trap of buying fast primes for so-called “low light” settings. As a realtor, you’ll usually only need f/8–f/11 for depth of field and sharpness. Anything shorter than that is almost always useless unless you know you’re going to photograph objects up close.
Using A Cheap Tripod
Finally, don’t fall into the mistake of purchasing a cheap tripod. A lot of realtors try to cut corners here, but it can make your shots less steady (and ruin them in the process).
For this reason, budget around $200 for each tripod you use. If you can use carbon-fiber instead of aluminum, that’ll improve performance further.
Wrapping Up
Reading this full guide, you should have a much better idea of the camera equipment you need as a realtor. We suggest beginning with a solid camera and then building from there. Going down this route allows you to add what you need as you develop your business without wasting money.
As always, we encourage you to experiment and try different types of gear. You can also use Phixer to quickly edit images with AI, saving you time and effort.
To close, the right equipment empowers you to create professional-looking real estate images that sell properties. After all, that’s ultimately what you want to do.
Getting residential real estate photography right is essential if you want your listings to stand out on big platforms. If images look cluttered or dim, buyers won’t spot them, and your property will remain on the market longer.
But what are the secrets of residential real estate photography? How can you get it right?
If you want to know, we suggest reading to the end of this guide. You’ll learn how to capture the perfect shot, the editing techniques to use for the best results, and marketing properties through imagery (including what works).
Capturing the Perfect Shot
As always, start by learning how to capture the perfect shot. This skill is essential in real estate photography.
As a general rule, always shoot landscapes. Portrait images don’t sell properties as well, and look awkward in most cases.
When holding your camera, bring it between waist and chest level. This height is optimal for rooms and helps to emphasize their features. Lifting the camera too high ruins proportionality.
Sticking to the “three wall rule” is another piece of sound advice. It can help to make spaces seem bigger, giving buyers the impression your property is more roomy.
Keeping vertical lines straight falls into the same category. Leaning walls look unprofessional and create bad first impressions.
Lastly, use bracketing exposures for high dynamic range (HDR) shots. Multiple +2, 0 and -2 exposure levels enable you to create more range in post-processing so you can achieve images that appear truer to life.
Essential Equipment for Real Estate Photography
If you want to embark on real estate photography, you need the right equipment. Using a smartphone isn’t usually an option.
Most real estate agents use mirrorless cameras these days. These have a sensitive sensor to accurately convert images into digital format. You can also opt for a DSLR if you want to save a bit of money and don’t mind the extra bulk.
As for lenses, we recommend a 10-20mm APS-C and a 16-35mm option, depending on your setup. The latter is full-frame and can look fantastic in the right room.
Other essential items include:
A reliable tripod you can adjust to the optimum height
A shutter release timer that can reduce camera shake
An external flash for dark rooms or night shots
A setup like this usually costs around $2,000. However, you can get budget options (non-video) which are around half as much. The biggest expense is usually the telephoto lens due to manufacturing complexity.
Okay, what about styling your property? How can you get that right?
Declutter First
The first step is to declutter. Removing items from tables and ugly cords from view makes your property look less lived-in.
Of course, if you don’t want to do this these days, you don’t have to. Phixer has AI tools that will remove eyesores for you with the click of a button.
Add Quick Staging
Next, look for quick staging hacks you can use to make rooms and exterior areas feel more welcoming and attractive. Research shows that proper staging can make your home sell for up to 10% more than if you didn’t bother.
There are all sorts of things you can do to stage your home and give it that professional look. These include:
Fluffing up all your cushions and pillows
Adding fresh flowers to your bowls
Including fruit bowls with fresh green apples in the kitchen
Hiding messy items, like trash cans and kitty litters
Setting the dining table to make the home look like it is ready to use
Go Room By Room
Our final tip is to go room by room, staging in the most appropriate way for the space. Buyers have different expectations depending on the setting, so catering to these can work in your favor.
For example, add white towels to the bathroom. Don’t leave any branded or personal products out.
In the bedroom, make the bed like they do in hotels, using layers of pillows and multiple coverings with the ends folded over. If your nightstands match, that’s even better.
In the living room, try to bring the furniture into the middle of the room. Put down a rug and make the coffee table or the fireplace the focal point. Keep playing until you get it right.
Editing Techniques for Stunning Results
Once you have the photos, the next step is to edit them. This stage is where an AI-powered tool like Phixer can really come in handy, speeding up the process and making your alterations “pop” even more.
Most photographers start with perspective and lens correction. If your photos seem a bit “off,” try playing around with this until it looks right again.
If you see the horizontals and verticals are out of whack, adjust these, too. Make sure your interiors appear formal and not wonky like a haunted house.
If your software tool has HDR merging (if you took multiple exposures) and image sharpening, use these, too. These corrections can transform elements like white balance and reduce noise in pictures, again making them look true to life.
Phixer lets you do more advanced things, like AI sky replacements. If you’re taking pictures on a gray, miserable day, then this feature is essential and only requires clicking one button.
You can also use Phixer to remove clutter and other image artefacts you don’t want, again using AI. See before and after examples on our website.
Maximizing Natural Light in Photos
Whether you use AI tools or not, maximizing natural light in real estate photos is always a good policy. The brighter they are, the better. Homes with more natural light sell faster.
We suggest you start by opening all the blinds and curtains in the home. Allow natural light to flood in from outside, being selective with sun patches. Then, turn off the interior lights. (Doing this reduces color issues).
If the incoming light is harsh, draw any sheer curtains. These will diffuse incoming light while allowing most of it to come through.
If you can shoot on overcast days, that’s even better. Clouds act as a kind of natural softbox, again diffusing light in a way that makes interior and exterior images more flattering.
Another trick is to pull back curtains and shoot straight through the home to the outside. These window shot views put homes in context for potential buyers, helping them make up their minds.
Finally, figure out how to handle rooms that don’t have windows. The best option here is to use multiple natural light boxes (e.g. if photographing a basement). You could also experiment with using a flash and then editing images afterwards to achieve the desired balance of light and dark.
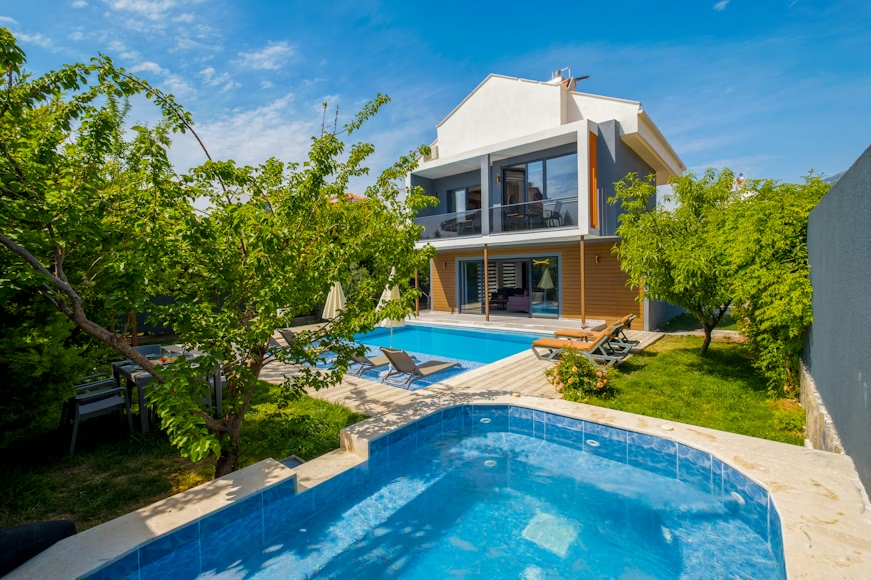
Showcasing Unique Features
Showcasing unique features is also critical when trying to master residential real estate photography. You want buyers to see the listing and experience that “wow” factor.
Interestingly, the property’s opulence doesn’t matter that much in this regard. All you need to do is focus on anything that stands out in its price category, whether that’s architectural details, crown molding, the fireplace or something else.
If you can shoot these features close up and from interesting angles, that’s even better. The form of the shot tells buyers: “this is something unusual. Pay attention.”
Close-ups work particularly well for materials like naturally-grained wood or copper. The closeness shows off the quality of the material.
Lastly, consider whether drone shots would help sell the property. These work for large lots or homes with unique locations or views over the surrounding landscape.
Residential real estate photography also needs to create an emotional connection. Buyers should feel like you’re telling them a story and that they can picture themselves living in the property.
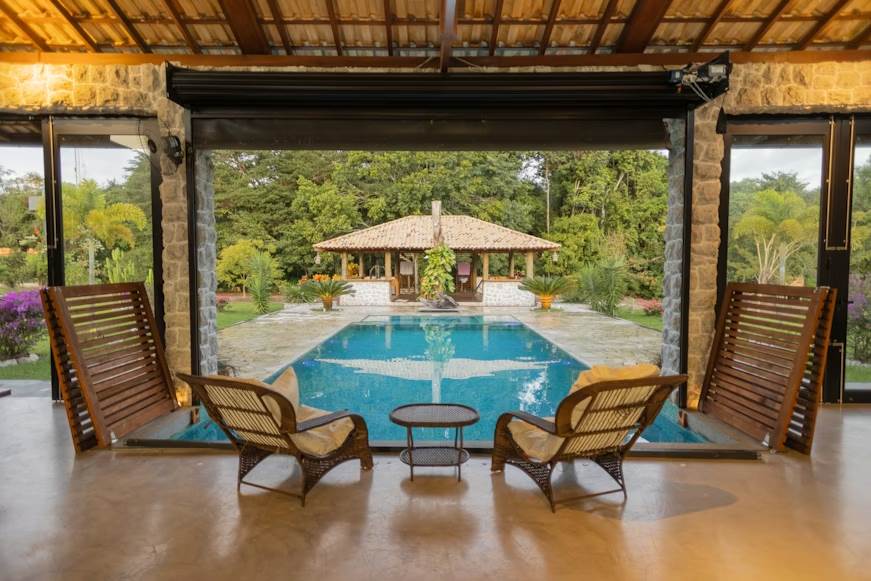
The best way to do this is to shoot curated lifestyle vignettes. For example, you could add pots and pans to hooks in the kitchen or an open book on a coffee table. These little touches show prospective buyers how they could be using the home.
Twilight exteriors are also a nice touch, especially if the property has exterior illumination lamps. Sometimes, industry professionals refer to these as “the most emotional shots” in real estate.
Lastly, you could try humanizing shots without adding any people. For example, you could leave a steaming espresso on the side when photographing the kitchen or a computer running a screensaver in the home office.
Marketing Your Property Through Imagery
In conclusion, marketing your property through imagery is essential in today’s market. Most buyers will scroll through dozens of listings before finding something they like. Adding 25 to 30 images is usually optimal, but you can include more for keen buyers.
If you want to speed up image editing with AI, use Phixer’s photo editing tools. You can declutter messy living rooms and tidy up chaotic bathrooms, all without the need to stage your property first.
In recent months, more homeowners have been convinced that now is the right time to sell. With rising buyer demand, tight inventory, and shifting market momentum, sellers are looking for every competitive edge possible to maximize their final sale price. But there’s one crucial step that often gets overlooked — and it can dramatically influence how fast a property sells and how much it sells for:
Professional real estate photo editing.
As interest in home-selling trends grows — highlighted in the recent Good Men Project article discussing why homeowners think it’s the perfect moment to sell — one truth remains consistent: beautiful, high-quality visuals are non-negotiable in today’s real estate market.
In this follow-up, we explore why expertly edited photos are more important than ever and how services like Phixer.net are helping agents and homeowners sell faster, smarter, and more profitably.
1. In a Hot Market, First Impressions Matter Even More
When buyers know homes are selling fast, they respond even faster — often within minutes of a listing going live.
But the listing they click first is always the one with the strongest images.
With competition heating up, it’s not enough to post unedited or smartphone photos. Edited, polished imagery sets the tone for the entire viewing experience.
2. Today’s Buyers Expect Magazine-Level Quality
Online property browsing has changed the real estate landscape.
Buyers now scroll through platforms like Zillow and Redfin with the same visual standards they apply to Instagram, Airbnb, and luxury travel sites.
They expect:
Balanced lighting
Vibrant but natural colors
Clutter-free rooms
Enhanced curb appeal
Clear, polished details
Professional editing bridges the gap between a decent photo and a listing that stops someone mid-scroll.
This adds perceived value — often increasing buyer interest by 200–300%.
5. Editing Helps Correct Common Seller Photography Problems
Even good cameras can’t fix:
Harsh shadows
Bad angles
Poor lighting
Distracting objects
Crooked walls
Window glare
Dull colors
Overexposed skies
Phixer’s professional editors handle all of this, ensuring every image meets the industry’s highest visual standards.
6. Why Agents Trust Phixer During the Busy Selling Season
When activity spikes — like it is now — real estate agents need fast, reliable, and high-quality support.
Phixer provides:
24-hour turnaround
Real estate–focused editing experts
Virtual staging, object removal, twilight edits, and retouching
Scalable services for agents, brokerages, and photographers
This means agents can list properties quickly without sacrificing quality.
7. Selling in 2025? Polished Photos Are No Longer Optional
But timing alone doesn’t maximize profit.
Presentation does.
In a digital-first market where buyers make decisions based on photos, professionally edited images are a powerful, proven tool for generating more interest, faster offers, and higher final sale prices.
Whether you’re an agent preparing for a busy selling season or a homeowner wanting to capitalize on market momentum, now is the time to elevate your visuals.
Ready to Make Your Listing Stand Out?
Phixer.net helps real estate professionals and home sellers transform ordinary property photos into high-impact, buyer-attracting images.
Real estate photography is more time-consuming than conventional portraits or product photos. You have to literally prepare the entire property if you do it the old-fashioned way, from ensuring proper landscaping to removing clutter from living rooms.
However, AI is riding to the rescue. With these modern tools, real estate photo editing is so much more straightforward than it was in the past. You can get the results you want with a single click plus benefits in other ways, like saving time and even increasing sales via your platform.
Streamlining Property Marketing
For example, one of the benefits of AI property listing editing is how it speeds up traditional staging. Instead of going to a property, making everything perfect, and then taking pictures, you can literally skip enormous chunks of the process with AI.
Take Phixer. It actually lets you declutter instantly. It removes toys from the floor, visible cords, and other items, leaving interiors looking clean and polished.
This capability means you can massively speed up your workflow. All you need to do is shoot the snaps you want, send them to the AI tool, fix them in a few seconds, and then post them. You don’t have to wait for homeowners to tidy their properties or tell you the ideal time for the photographer to come over.
Enhancing Visual Appeal
As mentioned, tools like Phixer give you numerous ways to enhance the visual appeal of your rooms and make buyers keen to part with their cash. For example, artificial intelligence can make it seem like daytime (even if it is night), replace the sky and enhance the weather, remove trash cans and other unsightly street furniture, and add HDR (high-dynamic range) to make images look even more crisp and professional.
The time-saving benefits of AI real estate photo editing software is also significant. Many AI tools have one-click features that let you make adjustments on the fly.
Using a conventional approach, these edits might take up to eight hours per set of photos for a home. But with Phixer’s built-in tools, you’re talking about a few minutes instead. Batching property editing was never so fun!
Plus, even if you don’t want to do the editing yourself, AI assistance still helps because you can hire fewer freelance editors, and they don’t require as much training to meet your editorial and advertising standards. They can simply use tools like these to get you results quickly.
Most photographers and editors using Phixer, for instance, report that they spend up to 90% less time editing photos. It’s just so much simpler once AI is on the scene.
Boosting Sales with AI
But what about your sales? Does AI editing software help with that, too?
If you’ve ever been on a popular property platform, you’ll know the answer is almost certainly “yes.” Prospective buyers are far more likely to click on properties with enhanced, crisp, and clean photos than those that are messy and cluttered. For example, Zillow and Redfin ads with professional editing get around 61% more views than those that don’t.
If you virtually stage a property, you will often find that it sells faster, too. Shorter transaction times makes life better for agents, sellers, buyers, and numerous other stakeholders who get paid by the sale.
Even the perceived value of staged homes can be higher. Some data suggests that buyers are willing to spend between 1-10% more if a property has reasonably good staging and looks professional. It’s easier for them to imagine it as their house (not someone else’s that they might be moving into).
But why does all this happen? Most commentators think it’s the psychological impact of highly-edited images. People wanting to buy property fall in love with the lifestyle it offers rather than the building itself. They want to experience what it’s like to live somewhere that looks clean, modern and professional, and that makes them want to take action.
Ultimately, you need the right tools, like Phixer. Once you have these, you can do anything you want, including all the tasks that crop up at every real estate agent’s office, like removing background clutter from bedroom and living room images.
What’s nice about all-in-one enhancement suites like ours is that you aren’t switching between programs. You can get everything you need to get done by using a single piece of software.
Of course, there are free options but these tend to be more limited and don’t offer the scope that many agents would like to see. They also tend to lack the variety of paid alternatives, which is another drawback.
Achieving Professional Results
You don’t need to go on an expensive professional Adobe Photoshop subscription and spend hours editing individual photos to make them look just right anymore. These days, AI real estate image editing is making everything far more democratic.
We suggest starting with an AI tool, like Phixer that offers all the functionality you need to create the best possible images. Then, all you need to do is shoot the photos in RAW and upload them to the platform running the software. Once you’ve done that, the AI will essentially do the vast majority of the work for you, leaving you with only a few minor tweaks to make.
Wrapping Up
If you’re not using AI tools yet, our question to you is: why not? These are inexpensive and save you a lot of time so you can essentially get more done with your day.
Try Phixer today for free to see how it could fit into your workflow and enable you to create stunning real estate images that generate more sales.