Real estate photography is a significant marketing tool that has the power either to attract potential buyers or drive them away. This strong influence to make or break a deal, epitomized in images, brands real estate photographers as important to realtors, making this business a profitable one.
If you are a newbie who wants to earn big bucks in the world of real estate photography, yet you have zero knowledge and skills in the profession, you might feel a bit discouraged. But, worry no more because here are 12 tutorial guides to kick off your journey towards becoming an expert real estate photographer.
1) Introduction to Real Estate Photography
Before delving into the photography side of the job, you need to learn first the best practices to be done once you arrive at a property.
Firstly, although there are formulas and rules of real estate photography that you will be thinking about every shoot, you have to keep in mind that every agent and broker has different preferences and goals, based on their taste and the distinct features of the listing. Immediately after you’ve met the agent and done brief introductions, ask them to give you a tour of the property so they can share any specific shot ideas, angles and elements that they want to highlight. Doing this will give you a good sense of your client’s marketing goal as well as the layout of the house to aid you in mentally preparing for the upcoming shoot. You may also use this situation to raise your concerns if ever your client has a poor shot idea, which can be politely executed by taking their desired shot and showing them it’s a bad idea. Nevertheless, your ultimate goal is to give the agent what they want, so be flexible and experiment with bizarre ideas if needed.
Then, start prepping the house for the shoot by turning on all light fixtures and lamps, pulling up blinds, and hiding items that will show poorly in photos and negatively affect the marketability of the listing. Remember, you should not spend more than 15 minutes prepping the property since it is not exactly your responsibilities. If after the said duration, the property still seems unprepared for shooting, ask the agent whether you should reschedule or if they are comfortable with shooting the house in its present condition.
A general rule on window blinds is to pull them up in every shoot but there are some exceptions to this rule, so leave the blinds down if the view outside is unpleasant, if the agents insists on leaving them down for whatever reason, and if the blinds are broken, unstable or won’t pull up entirely. Excessively heavy blinds are usually twisted open so light can come through the windows. Other practices that are best to remember are removing security signs from the front yard when taking exterior shots, removing hoses and garbage cans out of the view, and keeping the garage doors closed.
2) Camera Settings
After you’ve prepped the house, start setting up your camera equipment and make sure your camera settings are dialed in. In no particular order, set your file of numbering settings to continuous to ensure that your photos are organized sequentially when you transfer them to your computer, so it would be an easy task to send them to
your real estate image editing company. Set the photo quality to small raw files ideally at about 5 megapixels.
Go to live view/movie function settings and make sure you are in stills only or exposure simulation live view. Furthermore, you should set your lens to manual focus and dial in manual exposure mode to control both shutter speed and lens aperture or F-stop that should be set between 7 and 10. Before every exposure set, it is wise to set your focal point half the depth of the room, which you can accomplish by using your live view zoom feature for precision focusing. Lastly, set you ISO as low as possible, usually at 160 or 100 for exterior shots.
3) Basics of HDR and Flash
HDR or high dynamic range photography is a popular photographic technique that allows real estate photo editors to fuse different exposure photos of the same scene captured at various shutter speed, and then do a composite photo that consists of the best light information of each exposure, creating a balanced tonal spectrum. This means that for each image you take, you will have to shoot between 4 to 7 separate exposures, or more if necessary.
You will manually bracket these exposures from darkest to mid to brightest, by changing the shutter speed in your camera. Do not change the ISO of the F-stop mid bracket. To ensure that each exposure is crisp and align, you can use a shutter release cable and make sure your tripod is stable and completely still throughout the exposure set.
Moreover, you have to take a good flash out of the room after you complete your exposure set so get familiar with your flash. As you capture more photos and get more familiar with your on camera flash, you will develop a better sense of what ISO setting you’ll need according to the lighting conditions of the space that you’re shooting. Be gentle while switching the flash so as not to shake the camera out of position. Ultimately, you want the flash shot to line up perfectly with HDR bracket of exposures.
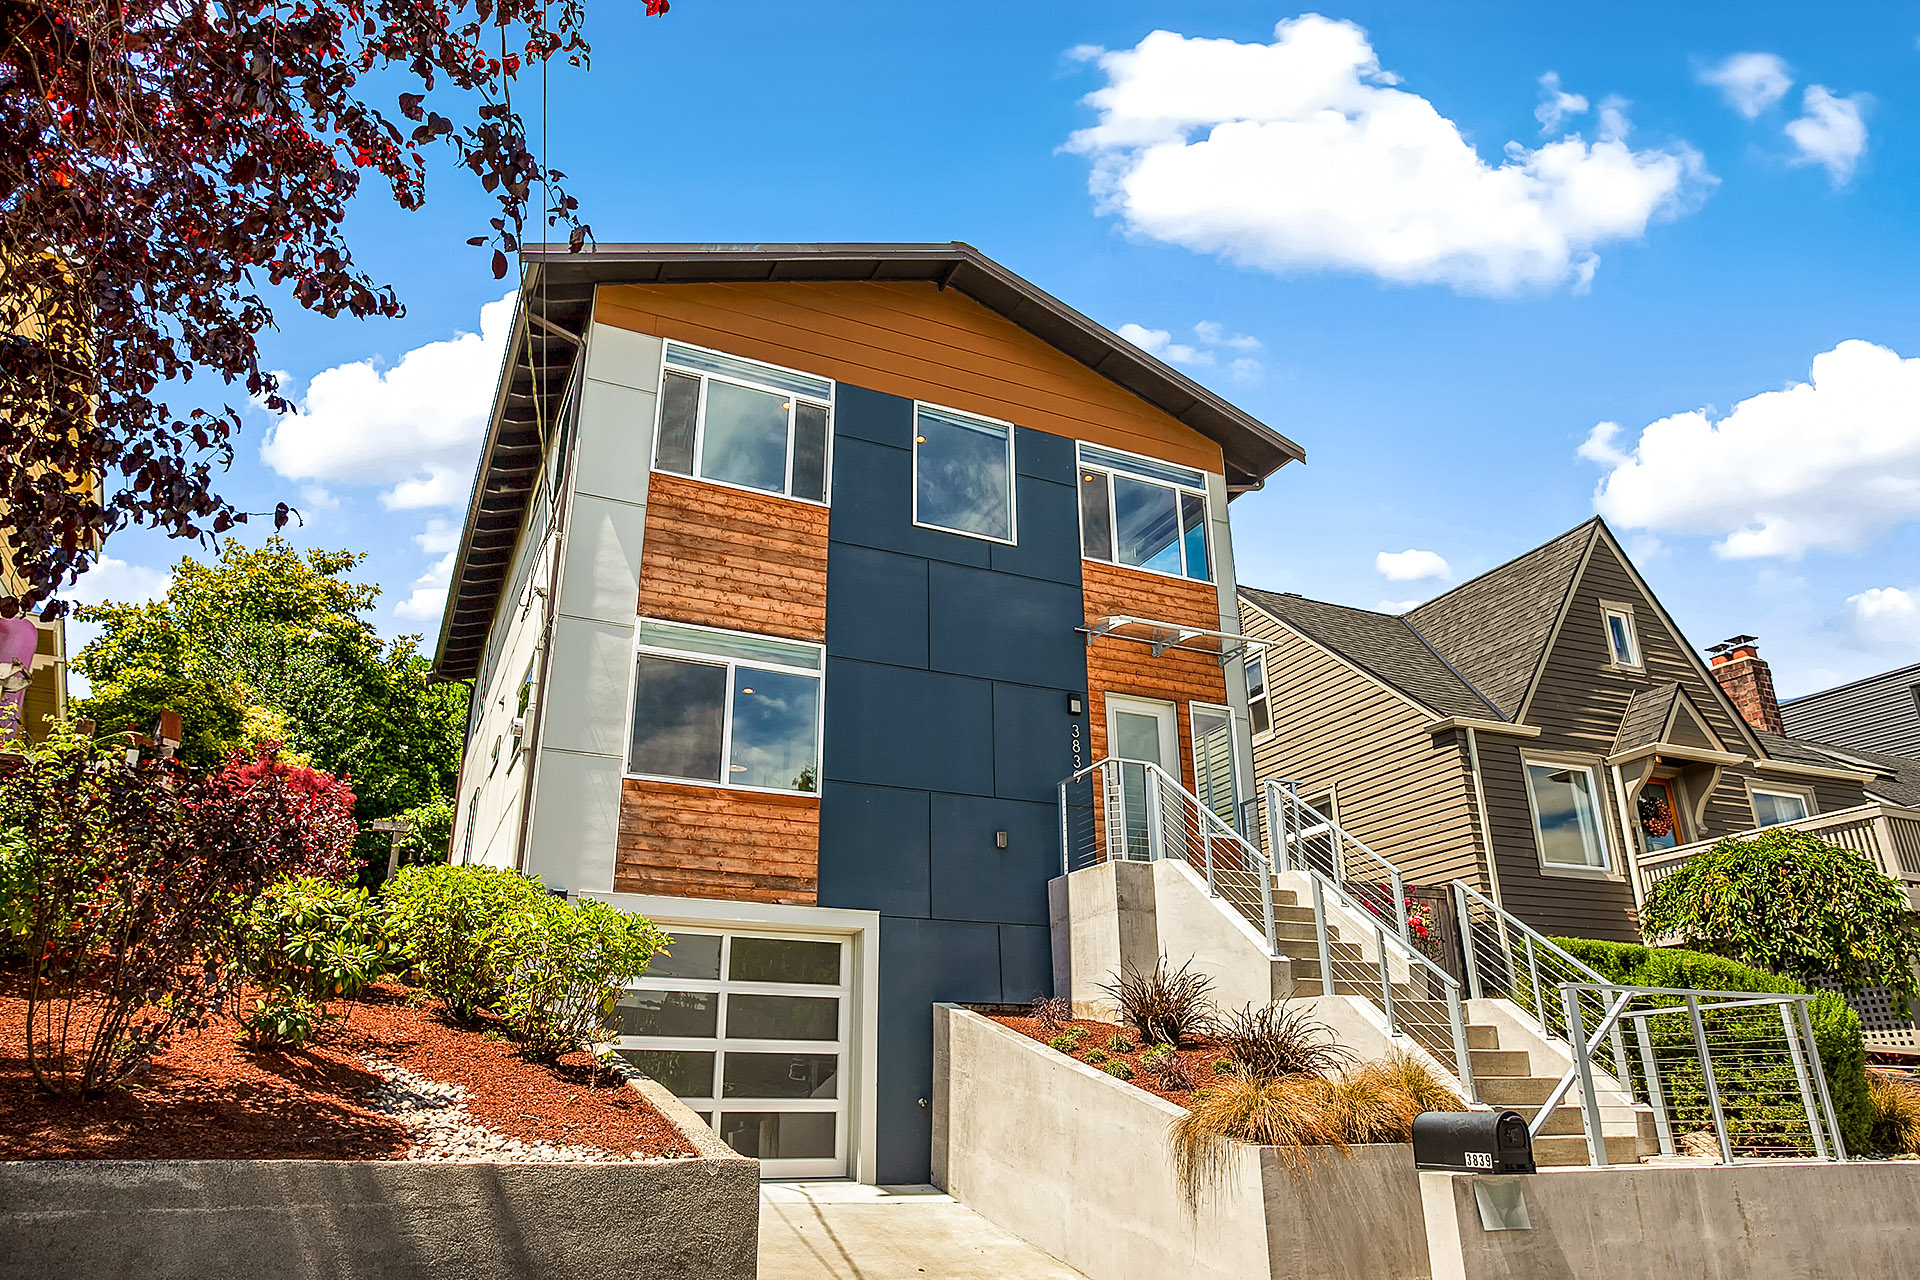
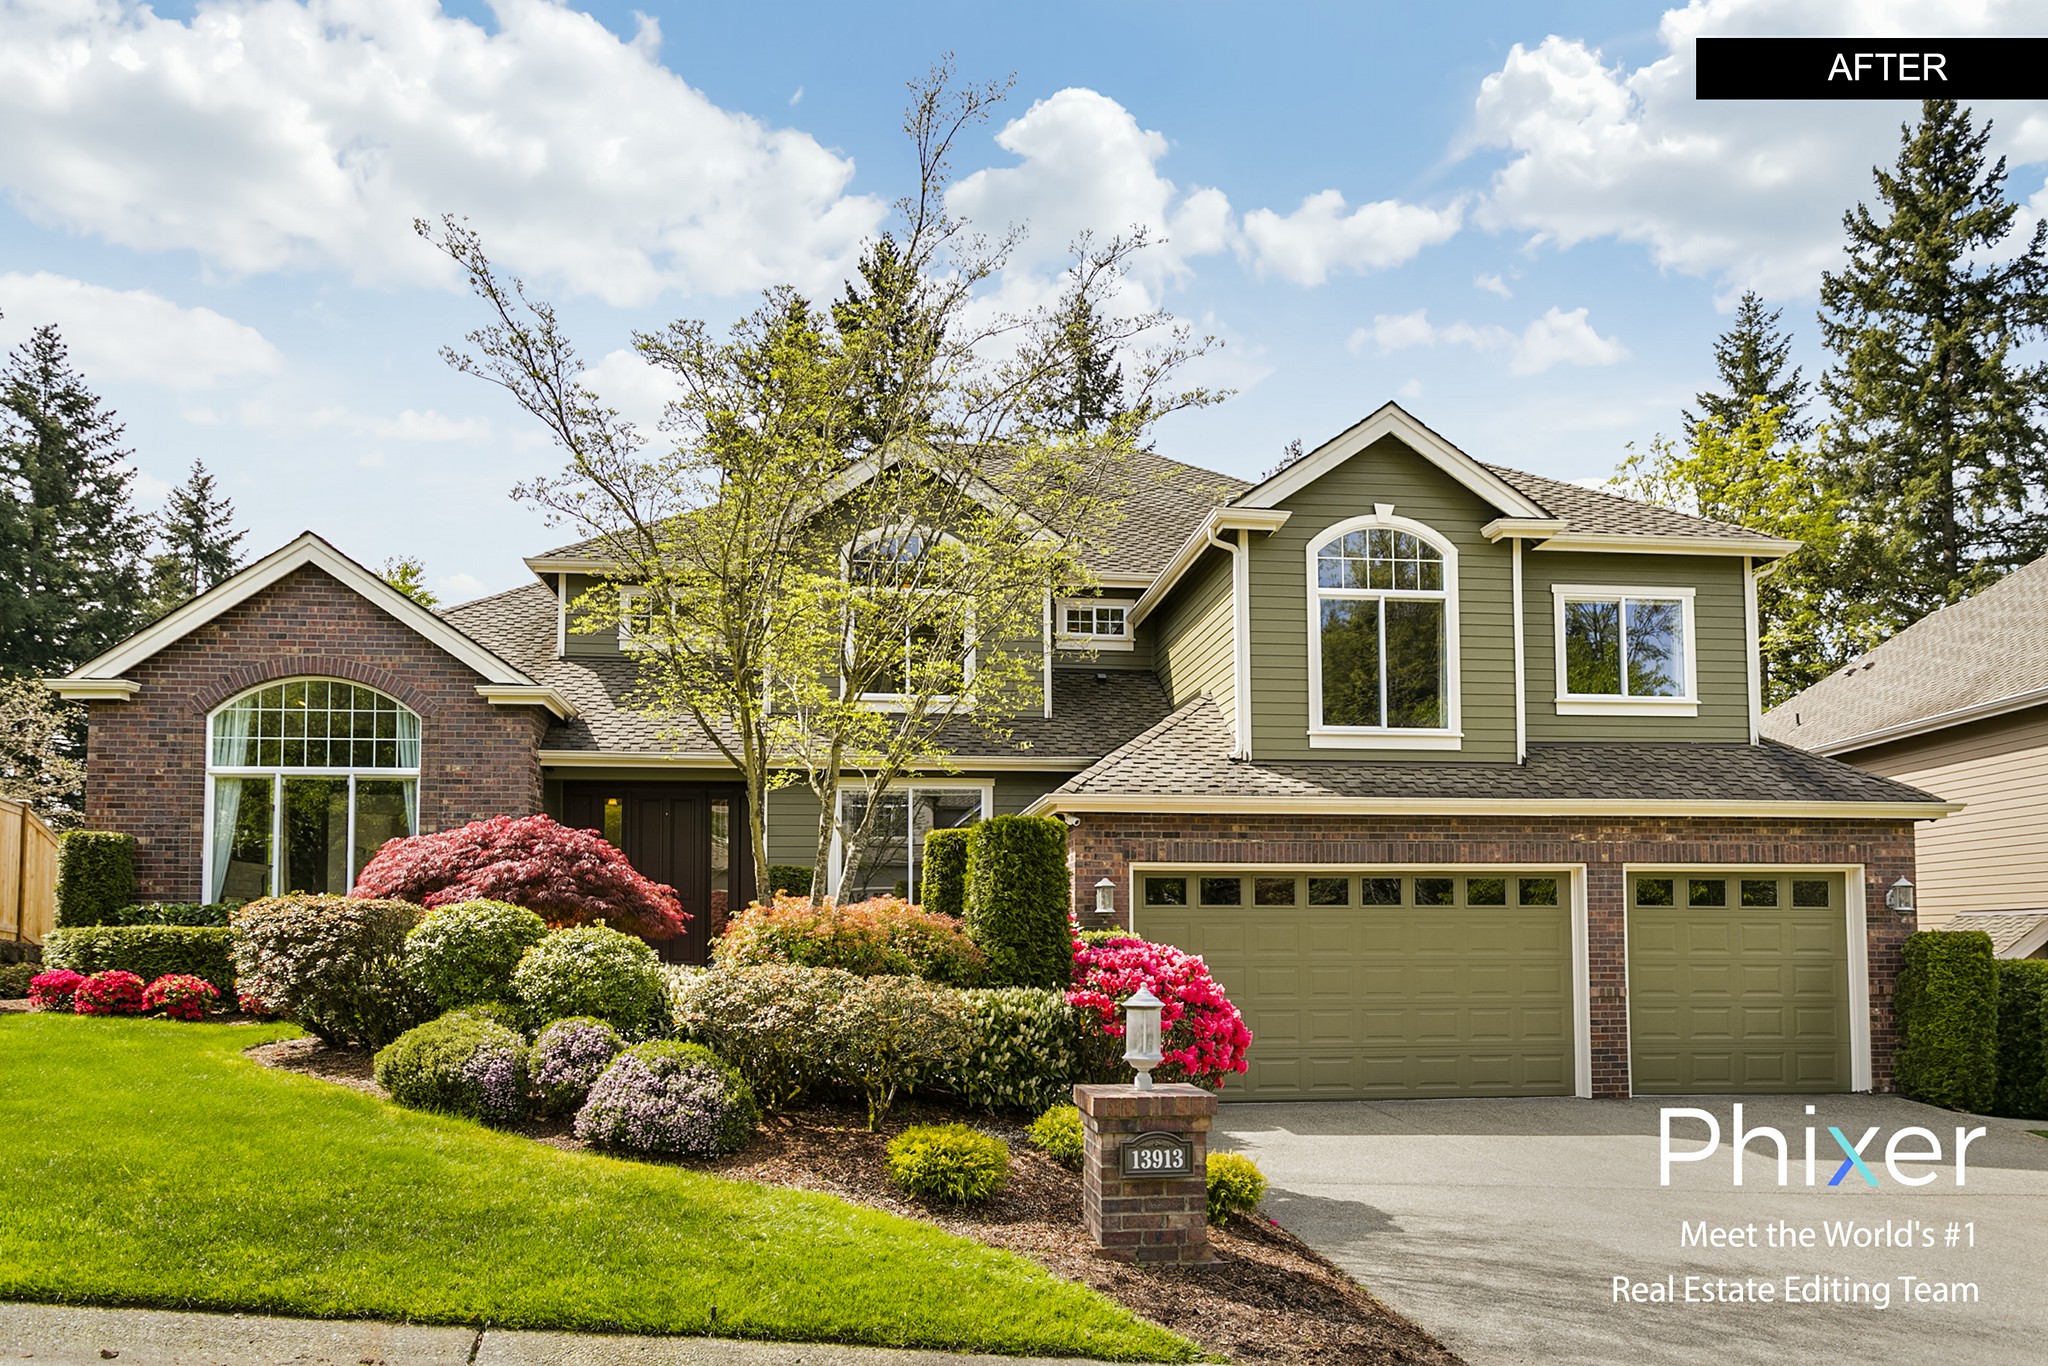
4) Front Exteriors Photography
After going over some basic techniques, principles and compositional rules, let’s talk about specific types of shots you’ll take nearly every shoot you do, and shots you’ll come across often in real estate photography. The Multiple Listing Service requires an exterior shot to be the cover photo of every listing, so you would have to make sure that you get at least one outstanding shot of the front exterior.
The best way to do this is to back up across the street, if possible, and zoom in to frame the house closely since the more of the composition the house takes, the larger it will appear. Remember not to cut off the edges of the structure unless you’re shooting a vignette detail of the front door or another distinctive architectural feature of the front porch.
In shooting a two-point perspective shot, it’s recommended that you shoot from opposite the garage to have grass and greenery in the photo’s lower foreground instead of the pavement. Lastly, do not shoot directly into the sun, but if it’s unavoidable, place your hand over the lens to block the glare, and prevent lens flare.
5) Backyards Photography
Backyards vary a bit in layout, landscape design and space so it is best for you to gather shots of different angles to exhibit the space from varying viewpoints. One common and effective angle you can take is from the house deck or patio area out into the yard from a two-point perspective. You can also shoot from the corner so you can capture a comprehensive sense of the space and fit as much as possible in the frame.
Another effective shot is a view from the back of the yard looking towards the house, usually a two-point perspective shot. When there is nice patio furniture in the yard, you can take a vignette shot with the furniture in the foreground and the yard behind to prompt prospective buyers to envision spending time in the yard. While you can decide what shots to take, it is prudent and safe to take multiple variations so your client will have a set that they can choose from.
6) Entryways and Staircases Photography
It is typically only worth capturing the entryway if there is a decorative front door, French door or a dramatic entryway space. You can approach this section of the house by taking a one-point perspective shot with the French door swung open that will lead your view into the entryway spaces.
Just like entryways, you only have to take photos of staircases if they are a distinctive selling feature of the property for example, big rounded staircase often photograph very well. In doing so, you would have to prop your camera up higher than usual since you are basically shooting two different levels at once with no ceiling obtruding on the upper part of the composition.
7) Living Rooms Photography
Living rooms can also vary dramatically in scale and layout but in shooting this part of the property, there are few general considerations. Typically, living rooms display best in two-point perspective shots but if the room is extremely organized and symmetrical, a one-point perspective shot can be employed. Since this is usually a main selling feature and one of the larger interior spaces of the house, it is ideal for you to shoot between two or three shot of this section. In addition to this, you should take at least one shoot of the living room facing towards the windows because this type of shot are primarily more inviting and colorful, making your photo stand out.
If the living room has a fireplace, you have to get one shot facing towards it given that fireplaces are also a strong selling point for prospective buyers. Considering that couches can often be obstructive or hard to negotiate with a camera, you can solve this by either shoot over the arms of the couch so the viewer sees the space from a more intimate inclusive viewpoint (subjective approach) or shoot from the corner showing off the whole room with the back of the couch in frame (objective approach). However, it is best for you to take both to give more options to the agent.
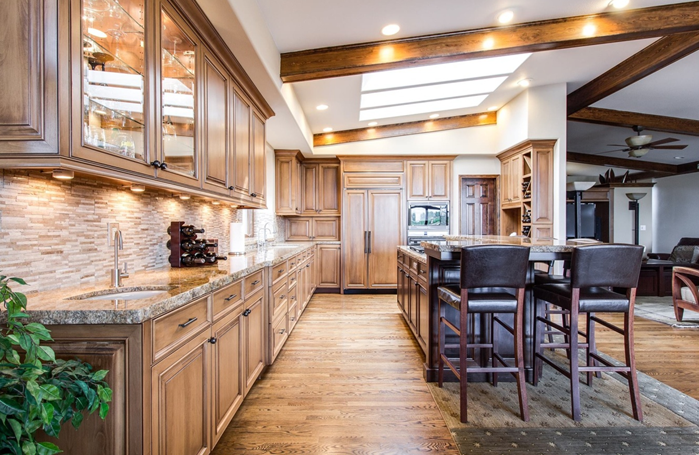
8) Kitchens Photography
You can take the trademark real estate kitchen shot from outside of the kitchen and with the countertop island looking towards the cabinets and windows, which is typically a two-point perspective shot. But, kitchens are where one-point perspective can prove to be very effective and aesthetic. Examples of this are the shot of the stools lining the countertop island horizontally with the wall side countertops and cabinets in the background, and the shot taken down the corridor between the island and the countertop.
You can also shoot from inside the kitchen looking out into the space beyond so as to bridge between two spaces, putting emphasis on the layout of different sections of the house and their relation to each other. Always remember to take at least two or two different angles of the kitchen so that your client has options.
9) Dining Rooms Photography
Before shooting this area, you have to double-check to ensure that all the chairs are tucked in and evenly spaced so that the display looks orderly and neat, and to declutter the table and surrounding area. You can take photographs of the dining rooms best from a two-point perspective backed up as far as possible and shooting towards the windows. In doing so, you have to make sure to prop the camera up high enough to get a view over the top plane of the table.
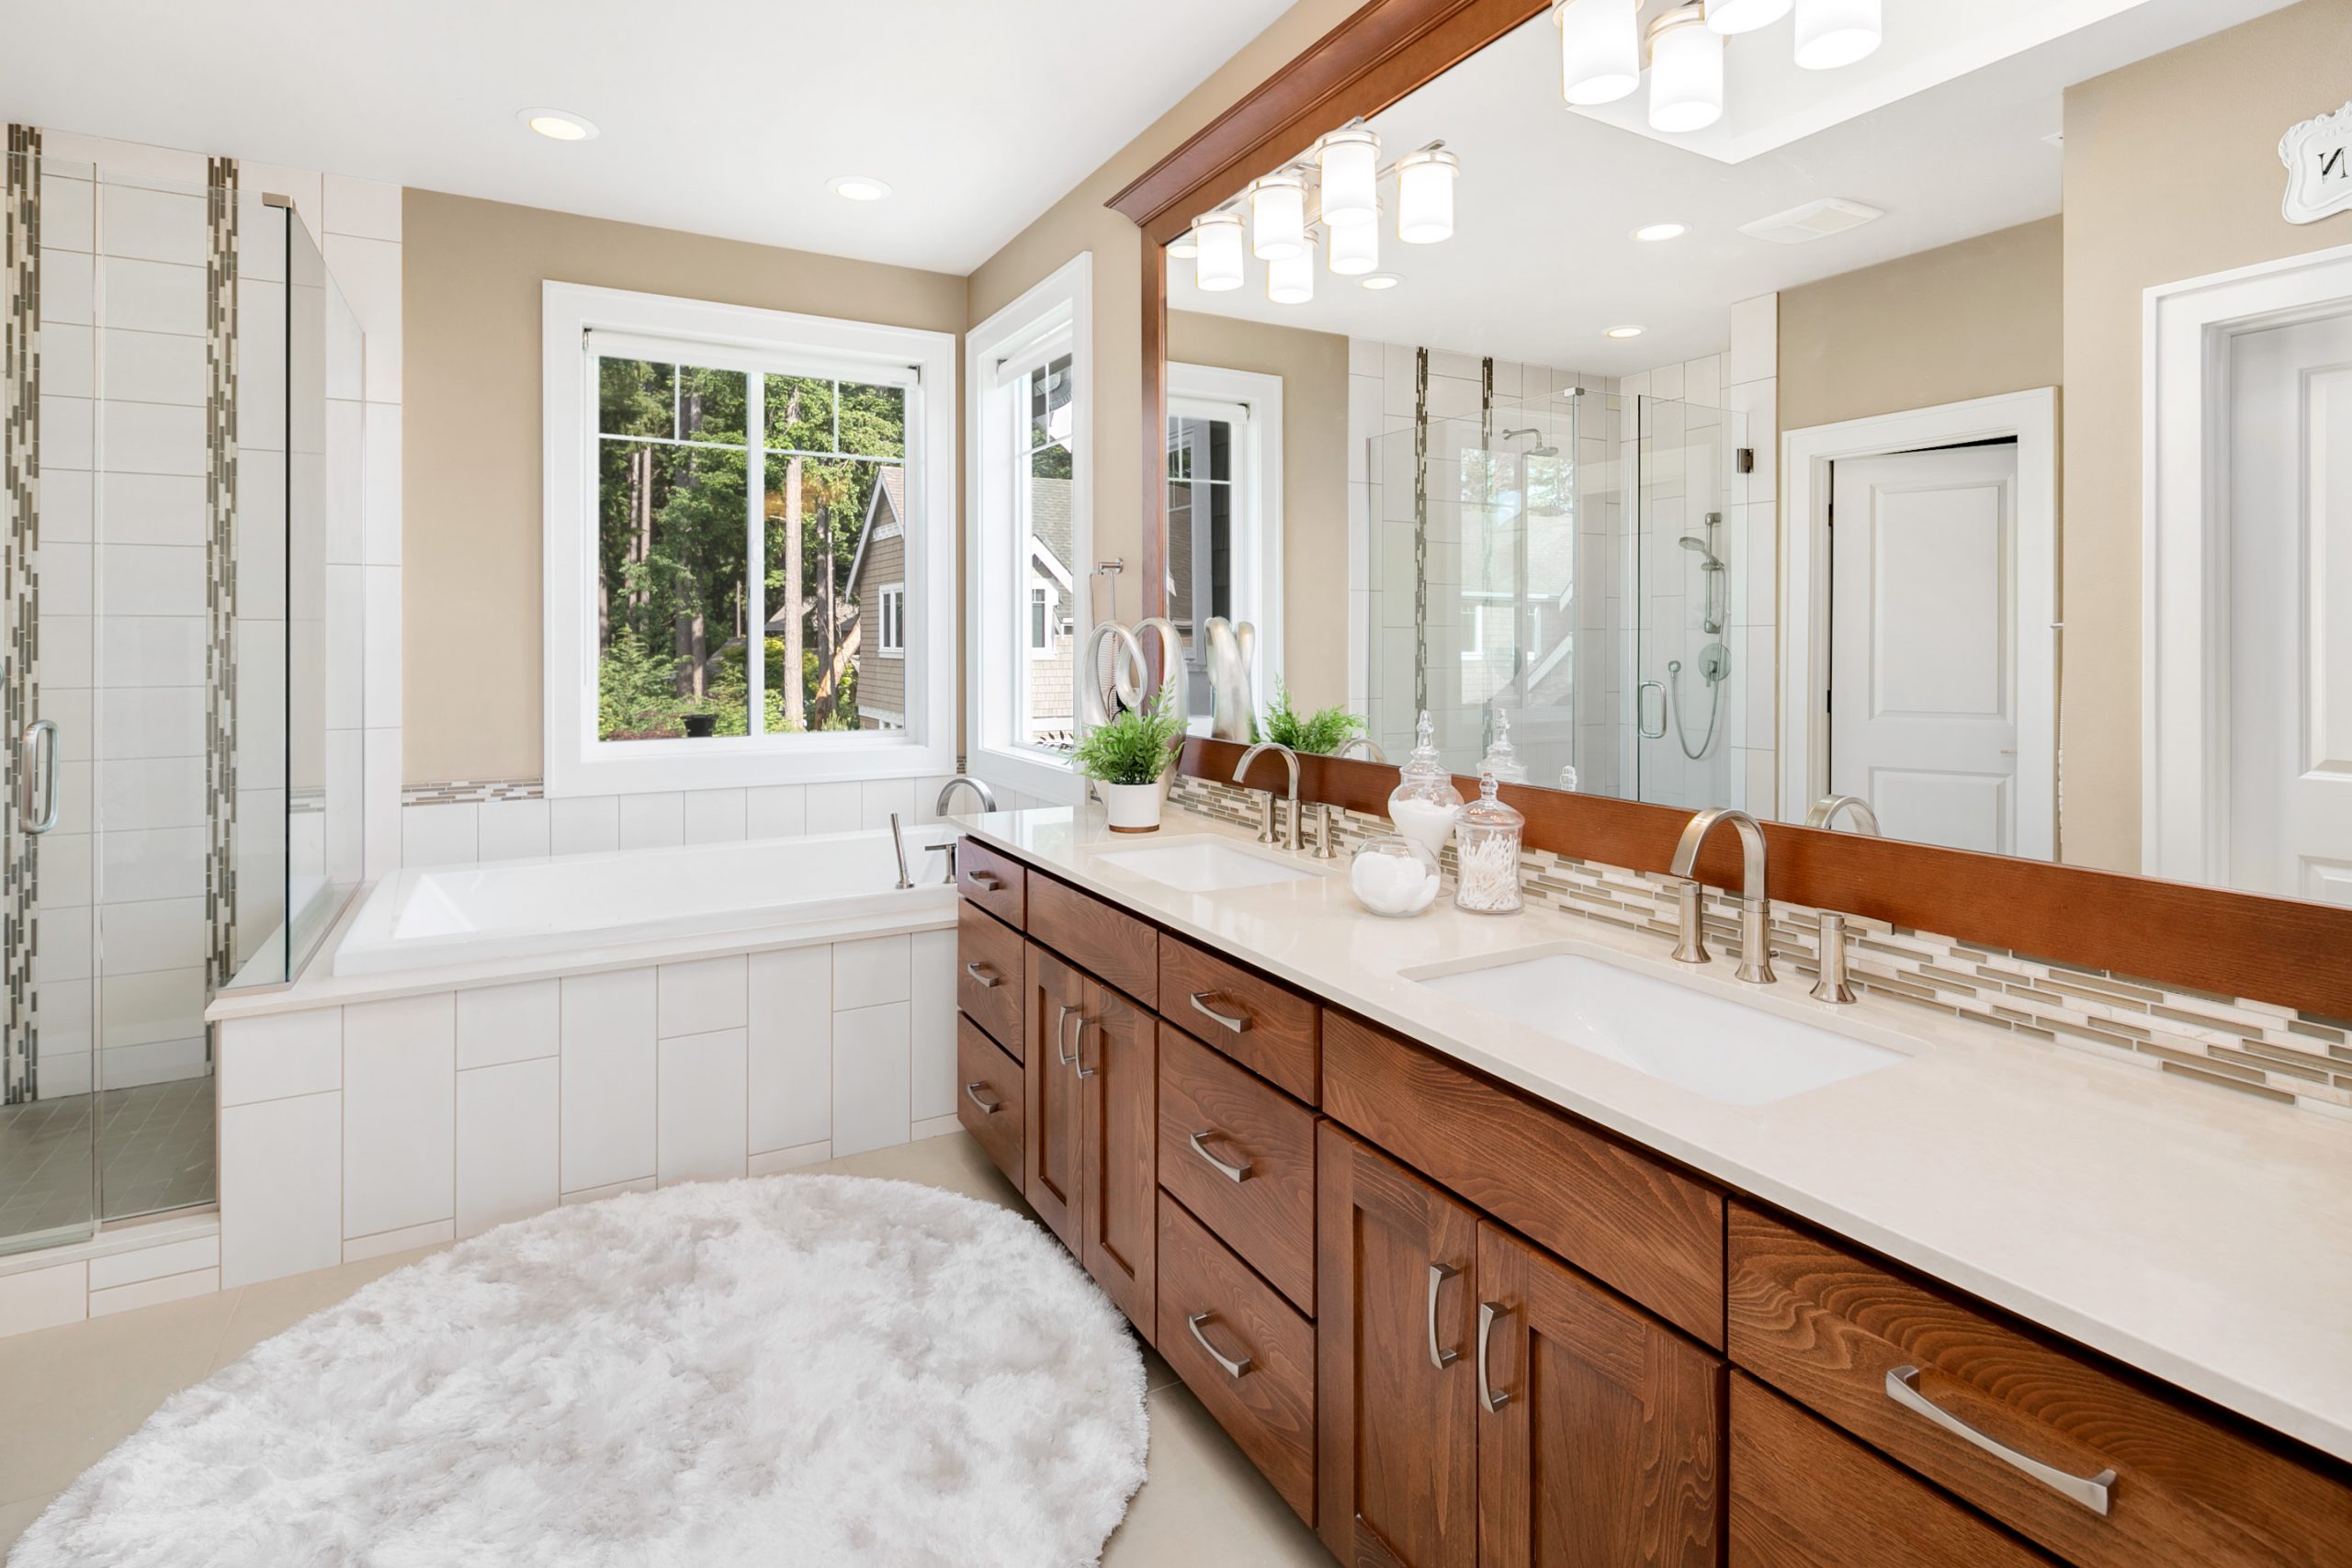
10) Bathrooms Photography
In shooting bathrooms, you have to focus more on the sink and mirror than the toilet. But, if the toilet fits in the frame, make sure the lid is closed. To get a good shot of this area, you will have to place your camera at the fulcrum of the door to get as much of the space in the frame as possible. Try to avoid capturing the camera’s reflection in the mirror. For half baths, where you need to focus on sinks, counters, and baths, you would have to prop the camera high enough to see the sink concavity, as well as the previously mentioned techniques.
10) Bedrooms Photography
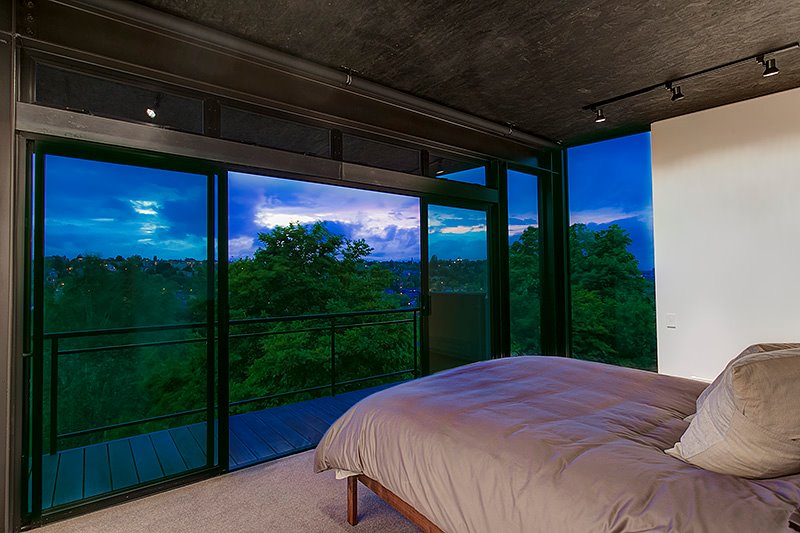
Since bedrooms vary less than other rooms, most bedrooms display best from a two-point perspective looking towards the bed and windows. You can do this by backing the camera up, if necessary, into the doorway and zoom in to frame the space excluding the third wall. Another approach in photographing bedrooms is to shoot from the back corner of the bed looking out into the room, which only works when there is enough space to back away from the bed so that it isn’t taking up much of the composition. This shot provides a view similar to what you might experience waking up in the room and is a great one if there are windows with exceptional view of the exterior landscape opposite the bed.
11) Porches, Views, and Panoramas Photography
Porch photos are primarily two-point perspective shots. You can shoot this section by backing up the camera through the sliding doors to capture more space while also taking into consideration the sun placement. When touring a property with a view, you have to take note of which vantage point will best highlight the view.
For view shots, you will need to switch to your zoom lens in order to focus on the most remarkable section of the view. You might find that if a view is so expansive that one photograph doesn’t do it justice, the agent will order a panoramic photo. This is taken just like any other view shot, expect it is repeated across the horizon line 3 to 5 times. In executing the panoramic photographic process, you must make sure that there is at least one third of each subsequent composition overlapping with that of the previous one since the real estate photo editing company will be stitching together your separate HDR photographs to create a successful panoramic shot.
12) Agent Review Process and Conclusion
After succeeding to capture all the angles of a particular listing, the last thing you need to accomplish on site is to do a review of your photos with the agent. This is crucial in avoiding unhappy clients and a revisit to the property. Once you’re done with the review, count the photos for the agent so they know how many they will be paying for. This is your opportunity to sell the angles you decided to take, so explain and articulate why you like particular photos.
Having read the 12 essential guides, you already have all the general knowledge necessary to begin shooting beautiful real estate photographs. However, keeping these all in mind is not enough to start your career as a real estate photographer— you have to internalize these principles and techniques through constant practice. If you need to build up your confidence first before taking any actual shoots, try photographing your own living spaces or those of your family and friends to gain experience. Just keep in mind that the most important thing is to start applying these lessons as soon as possible and to continue honing your photography skills because you never know when a deal will be struck to jump-start your career in this industry.

Top Realtors Talks About using Smartphone for Real Estate Photos
Real Estate Agent:
Wanda Kubat-Nerdin – Wanda Can!
So Utah Residential, Referral & Relocation REALTOR
St. George, UT — Red Rock Real Estate
Independent Brokerage
http://www.buynsellutah.com
St. George Utah Area REALTOR Insights – Wanda Can!
Question: Do you hire a professional real estate photography to take your photos?
Answer: Hiring a professional photographer is the best decision an agent can make. I have seen way too many amateur attempts and that is a disservice to sellers, in my opinion.
Services for Real Estate Pros
Bob “RealMan” Timm
Owner of Ward Co. Notary Services, retired Realtor
Minot, ND — Ward County Notary Services
Ward County / Minot Notary Services
Question: Do you hire a professional real estate photography to take your photos?
Answer: My advice is just DON’T!!! Hire a professional photographer. I don’t care what phone you have, how expensive it is, it’s not a substitute for a professional.
Services for Real Estate Pros
Ron and Alexandra Seigel
Luxury Real Estate Branding, Marketing & Strategy
Carpinteria, CA — Napa Consultants
http://www.napaconsultants.com
Question: Do you hire a professional real estate photography to take your photos?
Answer: I love my phone with the latest and greatest features….And I have taken some nice photos and we have made a few videos with it.
I am not a professional photographer or videographer, so we are not recommending that agents take their own. There is so much more to point and shoot. Cheap and DIY are two words I would not recommend in marketing real estate, even if the property is a double wide….A
Real Estate Agent
Rae Dolan
Real estate agent serving the Katy area
Katy, TX — Roots & Wings Realty Group / Champions Real Estate Group
Roots & Wings Realty Group | Katy Realtors
Question: Do you hire a professional real estate photography to take your photos?
Answer: My two cents is to hire a professional photographer.
Real Estate Broker/Owner
Peter Mohylsky, Beach Expert
TOP LISTING AGENT ALONG THE BEACH
Santa Rosa Beach, FL — PrimeSouth Properties
Mobile: 850-517-7098
Office: peter@bucketlistbroker.com
Question: Do you hire a professional real estate photography to take your photos?
Answer: I have not read any other answers prior to answering your questions but I am sure that the majority of the experienced, successful agents use a pro to get pictures taken. Phone photo’s can be of good quality but really, is that the best you are offering to your client?I am an amateur photographer and do own a “expensive camera” I do use photo shop. Adobe light room. but it is for marketing purposes.Your clients deserve a pro.
Real Estate Agent
Thomas J. Nelson, Realtor e-Pro, CRS, RCS-D, Vets
& Host of Postcards From Success Podcast
La Jolla, CA — Big Block Realty 858.232.8722
http://www.ThomasJNelsonRealtor.com
Phone #: 858-232-8722
Email Address (optional): TJN@ThomasJNelsonRealtor.com
FB: https://www.facebook.com/ThomasJNelsonRealtor
As professional REALTORS, I firmly believe we hire should hire professional photographers to help our clients have the best opportunity to get their property sold. iPhone and android phone photos are obvious and they’re often poor quality, poor lighting, not always the best angles and often times shot incorrectly and vertical instead of horizontal. They make the home look less than desirable as there’s an amazing difference between professional and amateur photos. Unless you yourself are a professional photographer with professional equipment; it’s a disservice to your client and a violation of your fiduciary duty to cut corners.
1. What smartphone are you using to take real estate photos?
– I do not, I use a professional photographer for all published photos well I’ll use my Apple iPhone for photos during a walk-through just for my own personal reminders.
2. Do you have a professional camera? What is it and when is the best time to use it?
– No
3. How important is it for you to beautify the photos for real estate?
– Occasionally I’ll use virtual staging for empty properties and I always want the lighting adjusted but, we do not tamper with the photos as to modify them from truth and we do disclose virtual staging when we advertise.
4. Do you upload your photos without editing them on your website and to other listing channels?
– All my photos are professionally edited before uploading that’s part of the service I paid for with my professional photographer.
5. Do you know how to edit your photos or do you hire an editor to do it?
– I’ve been a photographer all my life and I do know how to edit my photos however I do not get paid to do so, so I spend my time where it earns money and I hire professionals to edit my photos as part of the service of them taking the photos.
6. Do you hire a professional real estate photography to take your photos?
– YES
7. Can you share your editing software or apps which you use in editing your real estate photos?
– Since I use a professional photographer the only photo editing tools I use are the ones that come standard with any windows PC
Real Estate Agent
John Juarez
ePRO, SRES, GRI, PMN
Fremont, CA — The Medford Real Estate Team
Keller Williams Realty Inc.
http://www.JohnJuarez.com
Question: Do you hire a professional real estate photography to take your photos?
Answer: We use a professional to take quality, magazine quality photos.We eschew cell phone mls photos.
Real Estate Agent
Bob Crane
Forestland Experts! 715-204-9671
Stevens Point, WI — Woodland Management Service / Woodland Real Estate, Keller Williams Fox Cities
Keller Williams Realty Inc.
http://woodlandmanagementservice.yolasite.com/
Question: Do you hire a professional real estate photography to take your photos?
Answer: I see a lot of good photos and bad, having a RE license or not does not seem to be the determining factor.
Buying an expensive camera and going into the picture business, does not guarantee good photos either.
Generally it is a matter of following a few simple rules when shooting the pics, taking plenty of photos, then separating the good ones from the bad.
If enough photos are taken you will have 50 great photos worthy of publication.
Real Estate Agent
Roy Kelley
Gaithersburg, MD — Realty Group Referrals
LinkedIn
Question: Do you know how to edit your photos or do you hire an editor to do it?
Answer: This is a good blog topic for you. Every photograph should be edited. I use iPiccy.com. It is free.
Real Estate Agent
Debe Maxwell, CRS
The right Charlotte REALTOR!
Charlotte, NC — www.iCharlotteHomes.com | The Maxwell House Group | RE/MAX Executive | (704) 491-3310
RE/MAX International Inc.
Charlotte’s Most Popular Home Search Site
Question: Do you hire a professional real estate photography to take your photos?
Answer: I run across agents doing their own virtual tours and always wonder why sellers are okay with that…and they’re not professionals or semi-professionals either – they’re just you and me – agents.
My photographers are professionals and their shots and videography take less than ½ the time to take than they do editing. They are at the house for 2.0 hours (at a minimum – without drones) so, if they spend 4.5 – 5 hours editing, I think of the 7 hours they spent doing my shots & editing…and how much prospecting I can do in that 7 hours!! LOTS! I’m not stopping prospecting to do something that I can easily pay a professional to do. Same with measuring.
Real Estate Broker/Owner
Olga Simoncelli
CONSULTANT, Real Estate Services & Risk Management
New Fairfield, CT — Veritas Prime, LLC dba Veritas Prime Real Estate
Real Estate Services, Consulting, Risk Management
Quote: Good luck with your project! Many smart phones have resolutions superior to some cameras. Also, many professional photographers are over-rated.
Real Estate Broker/Owner
Scott Godzyk
One of the Manchester NH’s area Leading Agents
Manchester, NH — Godzyk Real Estate Services
Realtor.com
1. What smartphone are you using to take real estate photos?
– Iphone xs max
2. Do you have a professional camera? What is it and when is the best time to use it?
– Yes, mostly indoors, wide shots, close ups and when fine detail is needed
3. How important is it for you to beautify the photos for real estate?
– Every time. It is a must to make sure my photos are bright, vivid and eye catching
4. Do you upload your photos without editing them on your website and to other listing channels?
-I usually edit all photos. some it is just cropping. Some need brightening.
5. Do you know how to edit your photos or do you hire an editor to do it?
– I edit myself
6. Do you hire a professional real estate photography to take your photos?
– I am a professional. 34 years experience taking photos that garner viewers eyes
7. Can you share your editing software or apps which you use in editing your real estate photos?
– Most every day editing is done right on the iphone that takes pictures as good as some of the best cameras.
Real Estate Agent
Doug Dawes
Your Personal Realtor®
Georgetown, MA — Keller Williams Realty – Topsfield, MA
Keller Williams Realty Inc.
FB | LinkedIn
1. What smartphone are you using to take real estate photos?
– Pixel 3XL BUT I use a photographer
2. Do you have a professional camera? What is it and when is the best time to use it?
– No but the photographer does
3. How important is it for you to beautify the photos for real estate?
– Beautify? The photographer does his magic
4. Do you upload your photos without editing them on your website and to other listing channels?
-Before the photographer, I use I did.
5. Do you know how to edit your photos or do you hire an editor to do it?
– Not anymore
6. Do you hire a professional real estate photography to take your photos?
– Yes, I do
7. Can you share your editing software or apps which you use in editing your real estate photos?
– I don’t have any
Real Estate Agent
Jeff Pearl
Full Service Full Time Realtor
Lovettsville, VA — RE/MAX Distinctive / LIC in VA
RE/MAX International Inc.
Quote: I don’t use a smart phone for photography at this time, but the cell camera technology has improved so much, I wouldn’t totally ignore taking photos with a smart phone. There are numerous photo editing apps available now.
Real Estate Broker/Owner
Joan Cox
Denver Real Estate – Selling One Home at a Time
Denver, CO — House to Home, Inc. – Denver Real Estate – 720-231-6373
Denver Real Estate – Search for Homes
Quote: A listing sells with the photos — I would never have a listing without a professional photographer.
Home Builder
Jerrill Ewing
Builder
Eatonton, GA — N & J Lake Properties, LLC
Quote: phone photos means you need a new agent
Real Estate Broker/Owner
Ryan Huggins – Thousand Oaks, CA
Residential Real Estate and Investment Properties
Thousand Oaks, CA — https://HugginsHomes.com
Independent Brokerage
Phone #: 805.905.4000
Email: Ryan@HugginsHomes.com
My website | LinkedIn
Yes, I use my phone to take pictures. It’s camera is on par with man of the super expensive standalone cameras and I know a thing or two about composing shots.
1. What smartphone are you using to take real estate photos?
– Google Nexus 6P
2. Do you have a professional camera? What is it and when is the best time to use it?
– No. Looked into the DSLRs that Costco has. Have a mid-range point & shoot with manual settings. Have used the Point & Shoot in conjunction w/my camera phone and have preferred the camera phone’s photos.
3. How important is it for you to beautify the photos for real estate?
– Not sure what you mean by “beautify”. Where needed I’ll do some minor editing (removing people from mirrors, touching up grass, adding a sunny sky, using HDR tune-ups).
4. Do you upload your photos without editing them on your website and to other listing channels?
– No, all photos are reviewed (I usually take multiples of a room) and the best ones are kept. Of those, not every room needs to be in the MLS or website.
5. Do you know how to edit your photos or do you hire an editor to do it?
– Yes, I know how to edit my photos. Youtube has many great instructional videos on this.
6. Do you hire a professional real estate photography to take your photos?
– No. I’m from the old days before there were professional photographers and when you had to wait three days to get your photos developed at the drug store or drive-through photomart. We learned then how to take good pictures.
7. Can you share your editing software or apps which you use in editing your real estate photos?
– On the phone I’ll use Snapseed. For anything more involved I use GIMP, which is a free and open source Photoshop clone.
Real Estate Agent
Tony Lewis
Summit Real Estate Santa Clarita & OC Laguna Nigel
Valencia, CA — RE/MAX of Valencia (Hall of Fame) 30 year Valencia Resident
RE/MAX International Inc.
http://www.TonyLewis.com
Quote: Use a professional Photographer and Videographer. Let the public know that you are a professional.
Real Estate Agent
Annette Lawrence , Palm Harbor, FL 727-420-4041
Making FLORIDA Real Estate EZ
Palm Harbor, FL — ReMax Realtec Group
RE/MAX International Inc.
http://www.AnnetteLawrence.com
1. What smartphone are you using to take real estate photos?
– iPhone 9. Hey, it was the ‘new thing’ when I got it. Cell is used ONLY for temporary web posting. Be aware web optimized images do not have the same requirement as print. A cell is more than capable however the one holding it may not have the ability.
2. Do you have a professional camera? What is it and when is the best time to use it?
– Canon 80D. Needed when an agent does real marketing in print. Preferably leveraging CR2 formats. If all they do is stick a sign and put in mls, the cell is all they need.
3. How important is it for you to beautify the photos for real estate?
– Knowing the capability of the tech and one own skill levels, post editing is the secret sauce. 90% of the corrects needed by a conscientious agent requires only minor adjustment. However, egos require a bigger investment.
4. Do you upload your photos without editing them on your website and to other listing channels?
– Upload without editing? That’s like publishing with clicking ‘spell check.’
5. Do you know how to edit your photos or do you hire an editor to do it?
– Naaa….I just like to talk about it.
6. Do you hire a professional real estate photography to take your photos?
– When the tech I own won’t to the job I hire those with the big guns.
7. Can you share your editing software or apps which you use in editing your real estate photos?
– For web stuff I use the native edit stuff free with Microsoft. For the good stuff I use Gimp, Gravit, RawTherapy and Inkscape. Video is Wondershare…. Hmm, NA.