The problem facing a real estate photographer is always the absence of time. Producing high-quality photos is the ultimate goal of every photographer. When quality is non-existent, color correction, and adjusting tones and shadows are done in clearly and full of expression. Photo-editors may use patch tools to clean up any imperfections, their burn and dodge tool to create beautiful eyes, hue and saturation for whitening several areas of the photo, and many more. Color correcting is also important to differentiate a dull photo from a photo that sells.
Because Adobe has an unrivaled reputation in terms of photo editing, its products are undoubtedly the most preferred options among professional photograph editors. Adobe Photoshop makes synchronization of photos between devices possible without transferring the photos manually from one device to another. Being a user-friendly software, Adobe offers the Lightroom CC and Photoshop to edit an create photo effects in an almost similar manner.
Photo editing is essential in the business. It is very hard to get the perfect shot of a property, an event, or even a simple occasion. These days, photo retouching is an integral part of digital photography. Retouching services is very essential to bring out the natural beauty of the photo.
The following are guidelines and tips from different YouTube links.
1. Milky Way Photography – Make your Photos Look Awesome in 5 Minutes
This tutorial is effective in turning dark and average into a colorful picture using the classic Photoshop CC. It teaches how to bring out the true colors of the stars by bringing down the temperature as well as the highlights, and bringing up the contrast and white.
YouTuber: YuriFineart
2. Master the Pen Tool in 8 Minutes (Photoshop)
This video will teach viewers how to use the pen tool and to help you cut out anything in Photoshop. The pen tool is said to be the most accurate way to create cutouts and paths are always editable. You can create simple points and curves from beginning to end and you can cover long distances using long curves.
YouTuber: PHLEARN
3. Learn the Tone Curve in 5 Minutes: Lightroom Tutorial
This video will teach you how to use the Tone Curve tool. It will show how functional and important the S-Curve is. Starting with the shadow, as the video suggests, is one of the most essential thing when starting editing using Lightroom.
YouTuber: Nu Two Times
4. How to Own Tone Curves to Edit and Color Grade Photos Like a Pro
This video will show you how to master editing photos using curves in Photoshop and Lightroom to move beyond simple contrast adjustments and create your own basic photography editing flair without using presets. It requires a knowledge of using RGB Curves.
YouTuber: Chelsea Nicole Photography
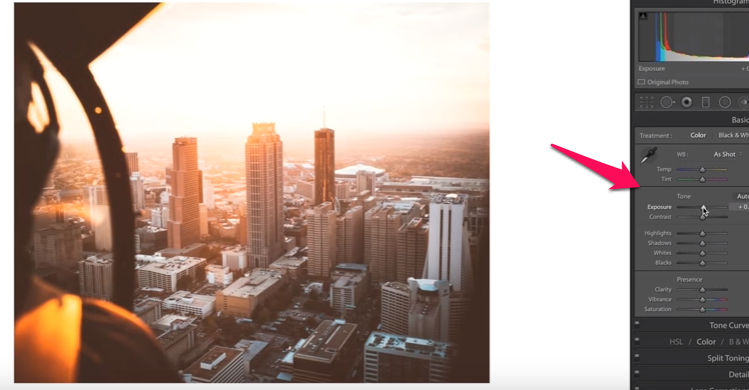
5. Cityscape Night Photography – From Raw File to Final Photo in 5 Minutes Lightroom Tutorial
This video gives you an idea on how to create cool and astounding city picture by bringing out the white while manipulating the shadow. One trick that will best create a cool view of skyscrapers is to lower the highlight control button. Depending on how you will look at the photos, it is still appropriate to find the best adjustment tool possible for the Cityscape look more attractive.
YouTuber: YuriFineart
6. I Wish I Knew this When I started Editing In Lightroom
This video is all about a series of tips and tricks using Lightroom. It teaches the viewer how to shoot panorama in Landscape Mode, how to use Perspective and Boundary Wrap Option, how to use White Balance, and many more. On the equipment that you will be using, it also talks about how to calibrate your camera to produce better colors.
YouTuber: Serge Ramelli Photography
7. How to Use the HSL/Color Panel in Lightroom
This video shows how to break down the Color Panel. It explains the three most important elements in the Color Panel, which is the HSL or the Color – Saturation – Luminance. An in-depth discussion about how the three mentioned elements create an impact to photos. It also mentions that HSL and Color Panel are both exact same thing. What differs is how they are used.
YouTuber: Lucy Martin
8. How to Use Transform Tool in Lightroom
This video tutorial show how to use the Transform Tool to shift the perspectives of the photos you are going to edit using Lightroom to get crisp and clean lines. Because lines are the main characters of Transform Tool, this is good for architects and draftsman, who are people specializing on hard lines to design buildings and skyscrapers.T he tutorial shows how to use the different clickable options and assortment of sliders under the Transform Tool.
YouTuber: Lucy Martin