Staging is a method of curating and orchestrating visuals used in different industries to suit specific purposes. Real estate editors have developed virtual staging to digitally improve and customize a space into art that potential homebuyers would love. As the industry evolves and embraces more innovative marketing approaches, virtual staging has become a powerhouse that most real estate practitioners have practiced over the past years.
We’ll cover the following topics in this blog post:
- What is virtual staging?
- Why do you need virtual staging?
- Virtual staging pros and cons
- Why is virtual staging a real estate marketing must-have?
- Rules for virtual staging
- Dressing up the emptiness with virtual staging
- How to prepare for virtual staging
- Virtual staging apps and software for real estate agents
- How to start your own virtual staging business
- How Phixer compares to other virtual staging companies
- Bottomline
What is Virtual Staging?
The visual appeal brings in real estate buyers, so staging has been customary for companies looking to promote their properties in development through home staging or creating staged real estate rooms, homes, and properties.
Let’s talk about the definition of virtual staging and how it differs from other real estate staging methods available in the market.

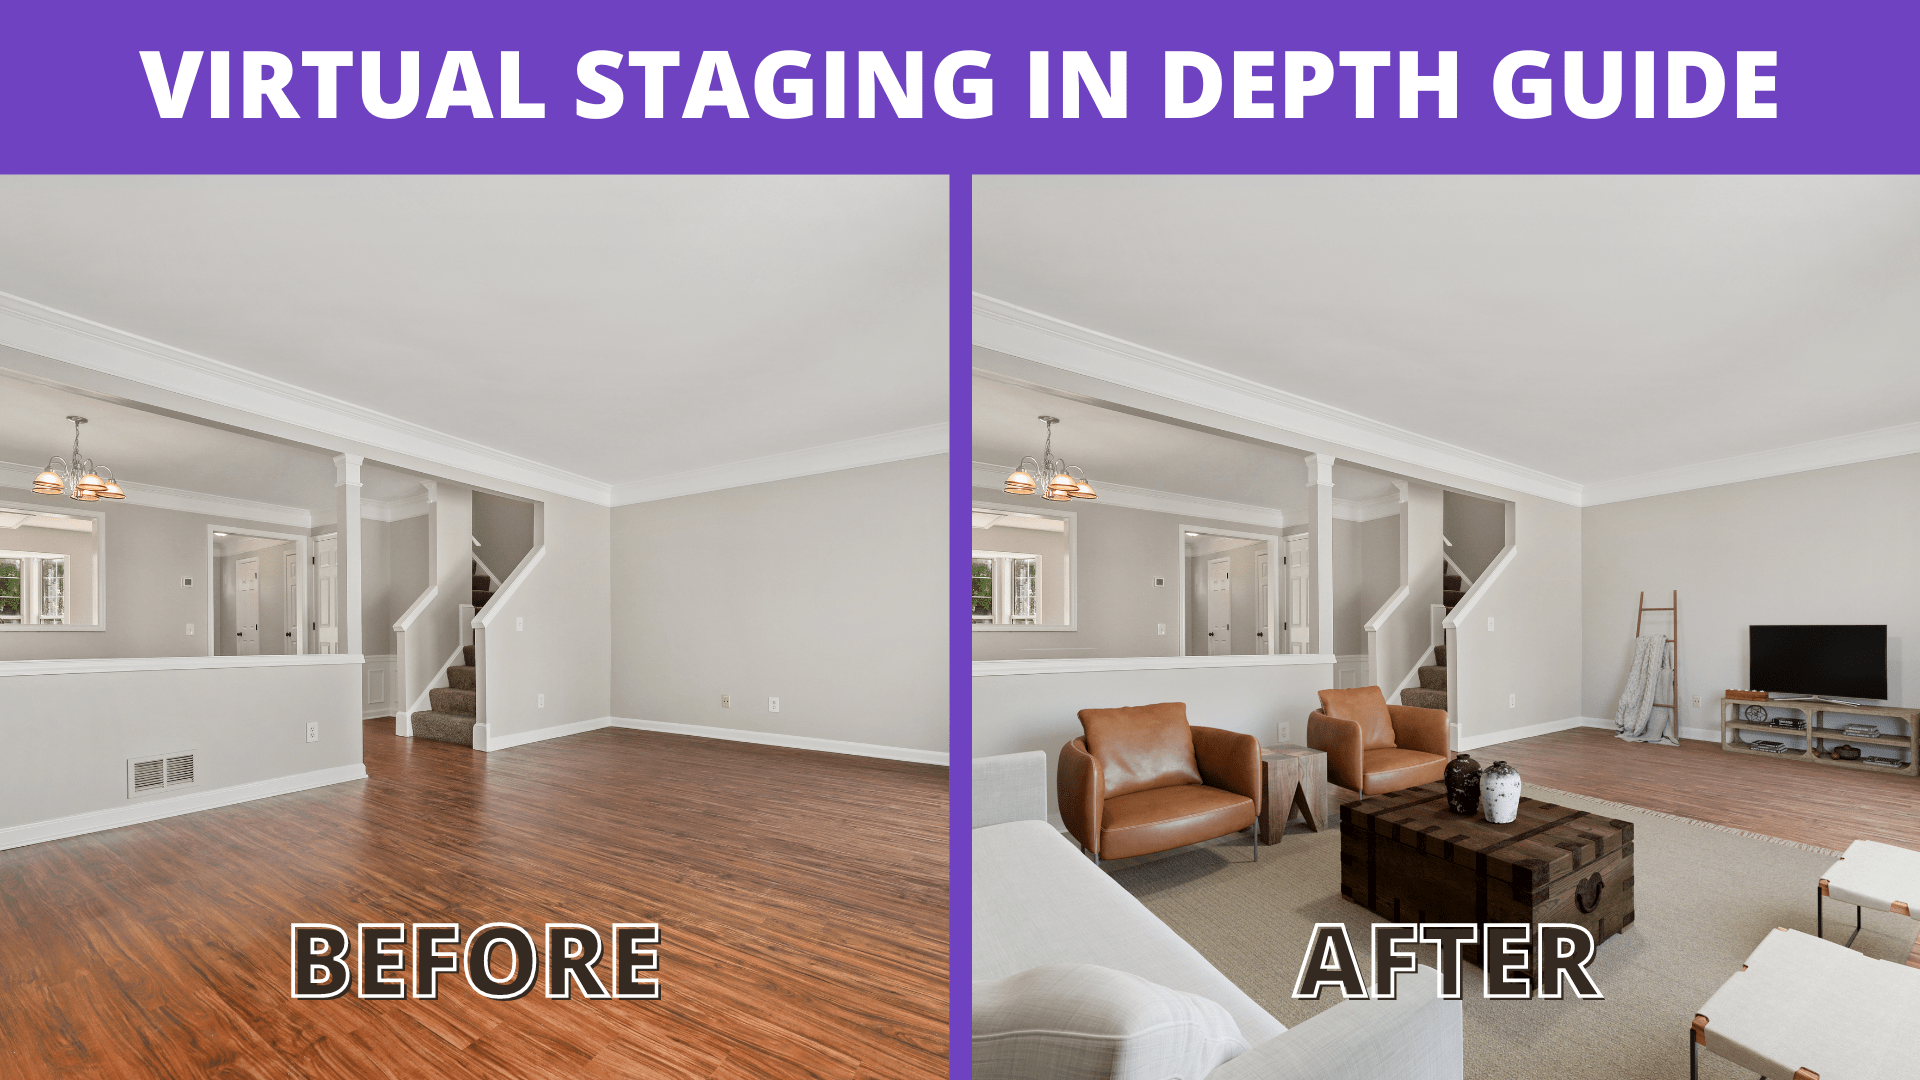
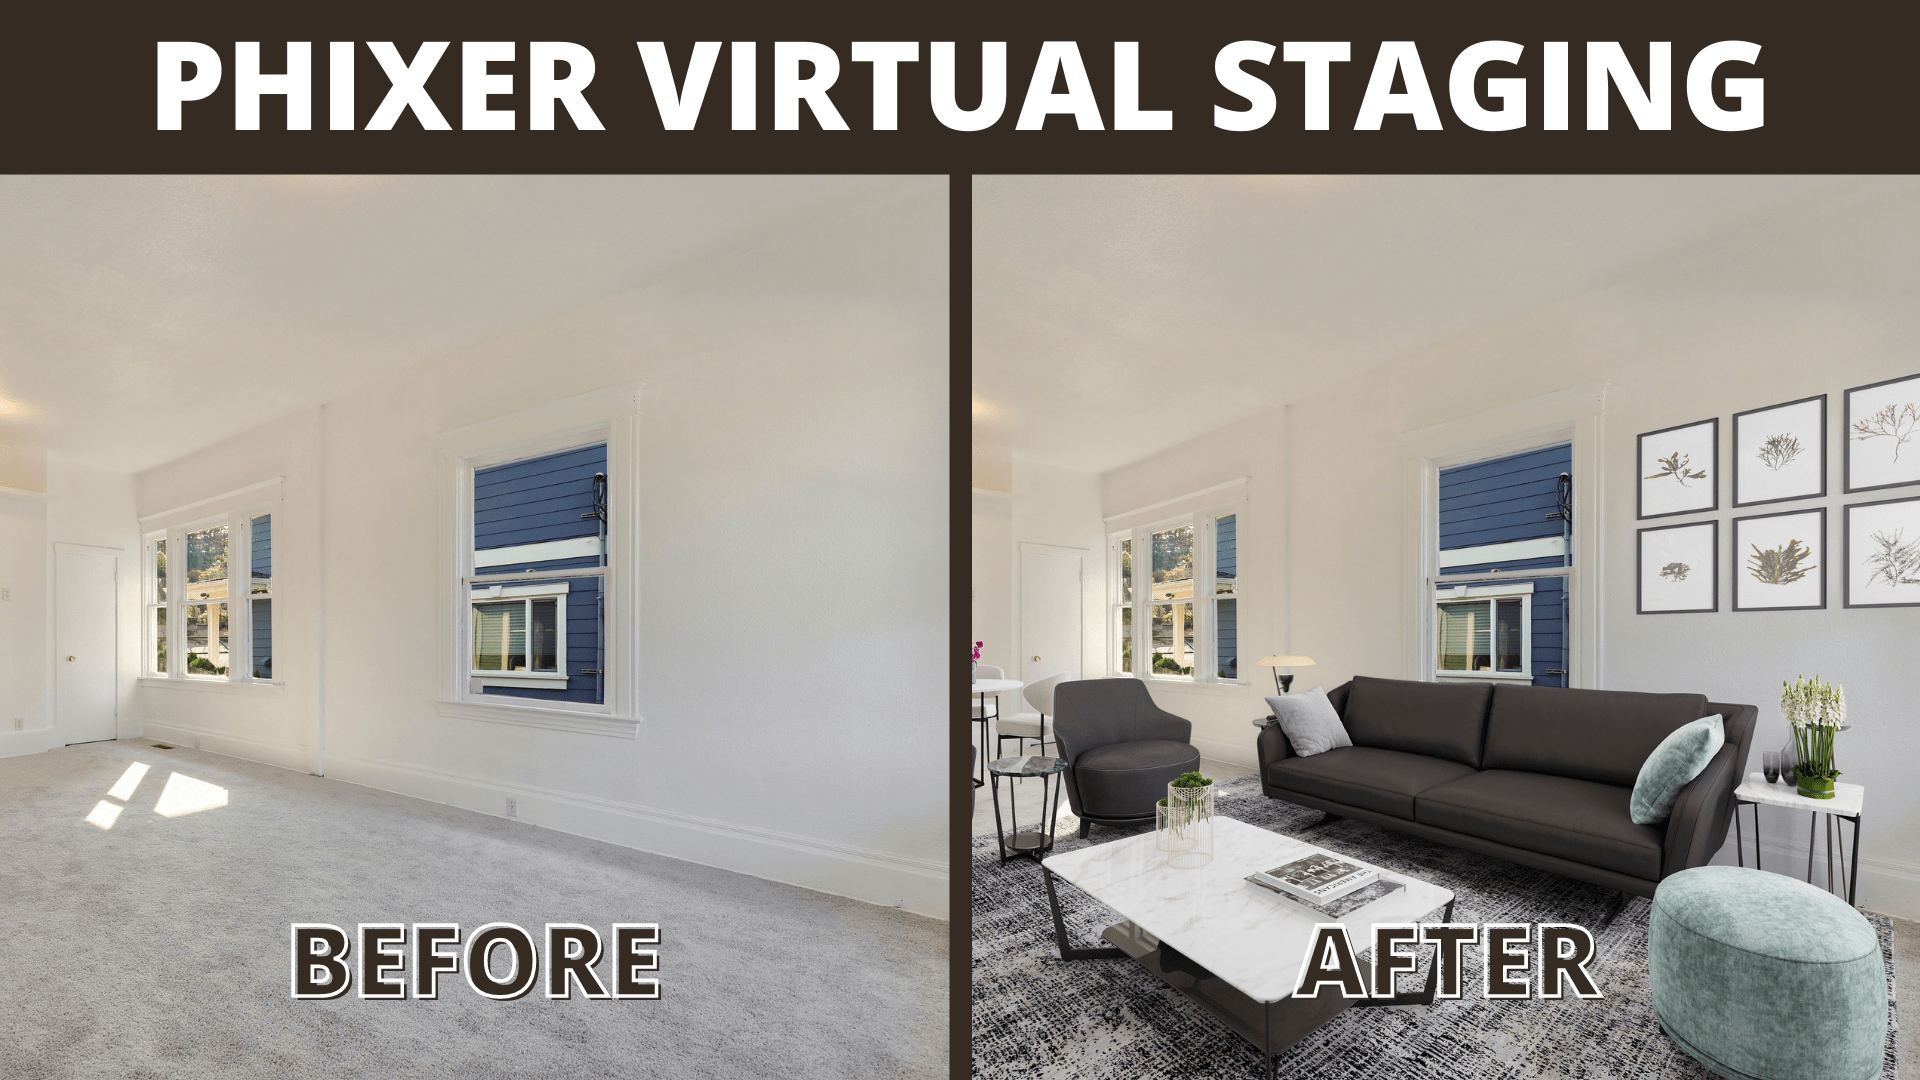
Virtual staging is a digital alteration or renovation of a room, home, or property to improve its appearance. It’s the digital equivalent of a showroom or home staging minus the expensive budget since you can get one for as low as $10. You can do virtual staging through an app or hire real estate photography post-production professionals like Phixer.
Virtual staging is currently one of the most used real estate photography post-production techniques due to its realistic approach to design. Read more about it in our virtual staging introductory post.
Aside from the definition, part of understanding virtual staging is knowing the relevant operational words in the industry. You need to understand their jargon, terms, and language before you hire a virtual staging company for effective communication.
These are some of the words you need to familiarize while dealing with virtual staging in the real estate industry:
- Computer-Aided Design (CAD) – creating and rendering designs using graphic software through a computer.
- Furniture replacement or virtual furniture – digitally altering, removing, or replacing the furniture pieces in the image.
- Furniture set – the theme or motif of furniture designs for specific areas.
- High-definition (HD) or high-resolution (hi-res) – the quality of images wherein the graphics are more detailed, starting from 720p or 1280×720. The higher the resolution, the better the quality.
- Rendering – translating computer-generated vectors and figures into a final image.
- Revisions – changes or corrections.
- Staging artist – an individual proficient in using 2D or 3D software to stage photos.
- Staging catalog – a collection of decors, furniture, or appliances for virtual staging.
- Three-dimensional (3D) – creating graphics with width, length, depth, and volume to seem realistic.
- Turnaround time – the timeframe for the overall project process from start to finish.
- Two-dimensional (2D) – images or illustrations that are flat with only length and width like a floor plan.
- Uploading or importing – sending raw photos to the virtual staging company for post-production.
- Virtual home staging or digital staging – altering graphics for rooms and homes to suit specific demographic.
- Virtual staging app – a program accessible through a device that offers virtual staging services.
- Virtual staging company – a firm that offers virtual staging services.
You can explore the common terminologies used in virtual staging.
Now that you know what virtual staging means and have familiarized yourself with the terminologies, it’s time to explore its significance, especially in the real estate industry. Market demand is a business owner’s first consideration, and with the many virtual staging companies available, you can establish that there’s rising demand.
There are several reasons you should do virtual staging for your real estate, as outlined in the next section.
Why Do You Need Virtual Staging?
Staging for real estate marketing primarily aims to attract potential buyers to your home or property. Outside of sales, there are different reasons why you should take advantage of the latest virtual staging techniques and technologies available online.
Here are six significant reasons why you need to virtually stage your home before selling:
- High selling rate. Virtual staging saves you time by selling your home faster. According to the National Association of Realtors, staged properties spend 31% less time on the market, and selling fast translates to saved advertising and marketing costs.
- Refurbished look. Virtual home staging also acts as a pre-renovation image or style guide. Some home sellers want to improve their home or property price, so they do actual refurbishing before selling.
- Attractiveness. Digital staging entices buyers from out of town by showing an alternative picture to the ones they’re used to.
- Customization. Virtual staging can appeal to multiple demographics by customizing how rooms look and adding rooms specific to their needs. Doing this style the traditional way would be expensive.
- Better impression. Virtual home staging improves the appearance of the house if the current state is in disarray. Most of the photos you put on the internet stay there, so it’s better to have staged pictures than ones unsuitable for selling.
- Privacy. You can tell a lot about some through his dwelling. Most homes have history, and the decorations have sentimental meaning and value. Altering or removing those personal items through virtual staging makes the listing more impersonal and suited for the next home buyer.
Home sellers love virtual staging because it allows them to choose the perfect look that matches their property. A general would not overdo the edits because the listing would look dubious and suspicious. This post talks about virtual staging to sell a home in more detail.
Even real estate photography professionals approve of using virtual staging as a post-production method. Their considerations involve saving time, money, and effort using innovative and creative technology.
These are the common reasons why accomplished real estate photographers choose virtual staging:
- Customizable. Shooting homes often come with unexpected circumstances like bad weather or unsuitable lighting conditions. Instead of reshooting, retaking, or returning another day, a photographer can take the photos and hand them to virtual staging companies for post-production magic.
- Lesser costs. Efficient time and effort utilization is money saved. Some real estate projects operate on specific timeframes, so making mistakes could be costly. Fortunately, virtual staging can fix those mistakes at a lower cost than reshooting.
- Modifications and upgrades. Photographers use virtual staging to upgrade the look and feel of the room and elevate its online presence.
- Better scaling and dimensions. There may be lens or camera issues while shooting, causing some corners to look warped or strange. Virtual staging can modify the dimensions and scale to suit your needs.
Real estate photographers understand the impact of visual appeal on how well the properties perform in a listing, so they rely on cutting-edge and realistic virtual staging technology to help them with their job. You can read the more detailed post on why professional real estate photographers prefer virtual staging.
Photographers are not the only ones who appreciate the value of virtual staging since realtors and homebuyers enjoy the effects of excellent digital home staging or virtual renovations. Similar to virtual staging’s intended function, virtual refurbishing shows a space’s potential.
These are some of the reasons why realtors and homebuyers love digital renovations:
Everyone in the real estate industry can benefit from the visual appeal brought about by virtual staging, whether it’s a seller, buyer, photographer, or agent. Learn more about how homebuyers and realtors benefit from virtual staging.
Virtual Staging Pros and Cons
You’ve already learned about the definition and terminologies and the different reasons sellers, buyers, realtors, and photographers like virtual staging. It’s essential to explore the reasonings from both sides to get a clear picture of its advantages and disadvantages.
Like most technological advancements, virtual staging has its corresponding pros and cons, and it is an innovation that shows promise and potential for greatness. However, some buyers may be disappointed by overly realistic virtual staging images on rundown properties. After discussing why it is such a thing nowadays, let’s examine its marketing benefits.
These are the pros of virtual staging in the real estate marketing industry:
- Home and property preview. Your rooms and property will look ready for occupancy even if you still have your items and objects in the home.
- Cost-effective staging method. You don’t need to renovate the space to accommodate your desired design.
- Saves cleanup time. You don’t have to clean extensively before a real estate photo shoot.
- Quick turnaround. Most virtual stage companies offer turnaround times as low as 8 hours.
- Extensive style selection. Virtual stagers often have a comprehensive catalog of furniture and objects that aren’t readily accessible.
You can learn more in this post that discusses the real estate marketing benefits of doing virtual staging. Aside from the real estate marketing industry, virtual staging has its corresponding advantages and disadvantages compared to home staging.
These are some of the home staging pros and cons:
Pros:
- In-person setup. An open house could also double as a networking event, which you can’t achieve in digital photos or videos.
- Actual live items. Clients can see and touch objects for real, so they can walk and explore without seeing images first.
Cons:
- Offers a low value for money tradeoff. A model home costs substantially more than the few dollars needed for a virtual staging photo.
- Time-consuming. Physically staging a room or home takes much time to complete, and virtual staging is considerably faster.
Now, let’s look at the other side of the coin. How is virtual staging beneficial or detrimental in comparison to home staging? Is virtual staging a suitable alternative to home staging? What differences in approach and style could affect how a potential buyer could view the property for sale?
These are the virtual staging pros and cons compared to home staging:
Pros:
- Cost-effective. The first and most apparent benefit is the low virtual staging cost. You won’t need to prepare funds or locations in advance outside of the intended photo shoot.
- Marketplace advantage. Virtually staged images will have better traction than a physically-made staging effort.
- Attractive and detailed images. You can enhance and improve photos to your liking.
- Catalogs. Most virtual staging companies have a wide range of interior design items like furniture or accessories.
- Quicker turnaround time. An excellent graphics team can whip up an entire listing worth of staged images in lesser time than it takes to redecorate a single room.
Cons:
- Needs graphic expertise. The downside to virtual staging is that you can’t easily do it yourself without proper tools or guidance. Relying on amateurs could make the image look fake, so technically, home staging is easier for newbies.
- Multiple revisions. Sometimes, you don’t get what you want the first time and consume more time with modifications. This is a common issue with all graphic-related work, not just virtual staging.
Read more about the pros and cons of virtual staging compared to home staging to determine if you should opt for digital modifications or redecorate your home before the photo shoot.
Why is Virtual Staging a Real Estate Marketing Must-have?
Virtual staging has been a real estate photography staple for years, and it’s one of the many technologies that make home and property photos look more beautiful. However, there are critical marketing advantages for home sellers and realtors alike that make virtual staging valuable even after several years.
These are the reasons why virtual staging is a necessary real estate marketing tool:
- Your home and property listings will sell faster.
- Your clients will know the best features before an on-site visit.
- Attractively staged homes are trustworthy for clients.
- Improved photos can compete with similar property listings.
- Staged pictures fetch more than the asking price.
- Improved conversion rate.
- Higher return on investment.
You can read more about the facts and figures in this post about virtual staging’s real estate marketing effectiveness.
Rules for Virtual Staging
Virtual staging is an art, but you shouldn’t just make your edits without a solid plan beforehand. You should follow guidelines to make it an effective real estate marketing tool and stand out in a listing with thousands of beautiful home and property photos competing for buyer attention.
These are the virtual staging rules you should observe:
- Understand your client or potential client’s preferences. The first step is planning the buyer’s needs or wants from a listing so that you can take the design direction in the right place. You wouldn’t want to waste virtual staging effort on an image that’s not custom-fitted to the potential buyer’s expectations.
- Choose designs that are realistic and reasonable. Virtual staging is treading the thin line between realism and creativity. Most people may have trust issues if the photo looks too computer-generated. Remember that you’re enhancing the existing image with staging, not competing.
- Have a house theme and match the furnishings or decor. Motifs will improve the creative direction and ensure that each photo looks like a part of a whole rather than a random photo taken from a website.
- Don’t overdo the interior renovation. Virtual staging should not be excessive since it’s supposed to help the real estate photograph and not work against it. If your listing image is too beautiful compared to the actual property, your client will have a harsh expectation vs. reality experience, which could work against your trustworthiness.
- Minimize the personal touches. The important part of virtual staging is creating photos of a house where most people can imagine themselves. Therefore, adding personal touches could make a client feel like he’s intruding in someone’s personal space.
The five virtual staging rules post will discuss these rules in better detail and allow you to create listing photos with high sales conversion.
How to Dress Up Emptiness with Virtual Staging
Sometimes, virtual staging is not about renovating or remodeling an area but more about adding accessories and features to the room. Dressing up the emptiness refers to making open spaces more alive and welcoming for new homeowners or potential buyers.
Here are some of the ways you can improve the empty spaces with virtual staging:
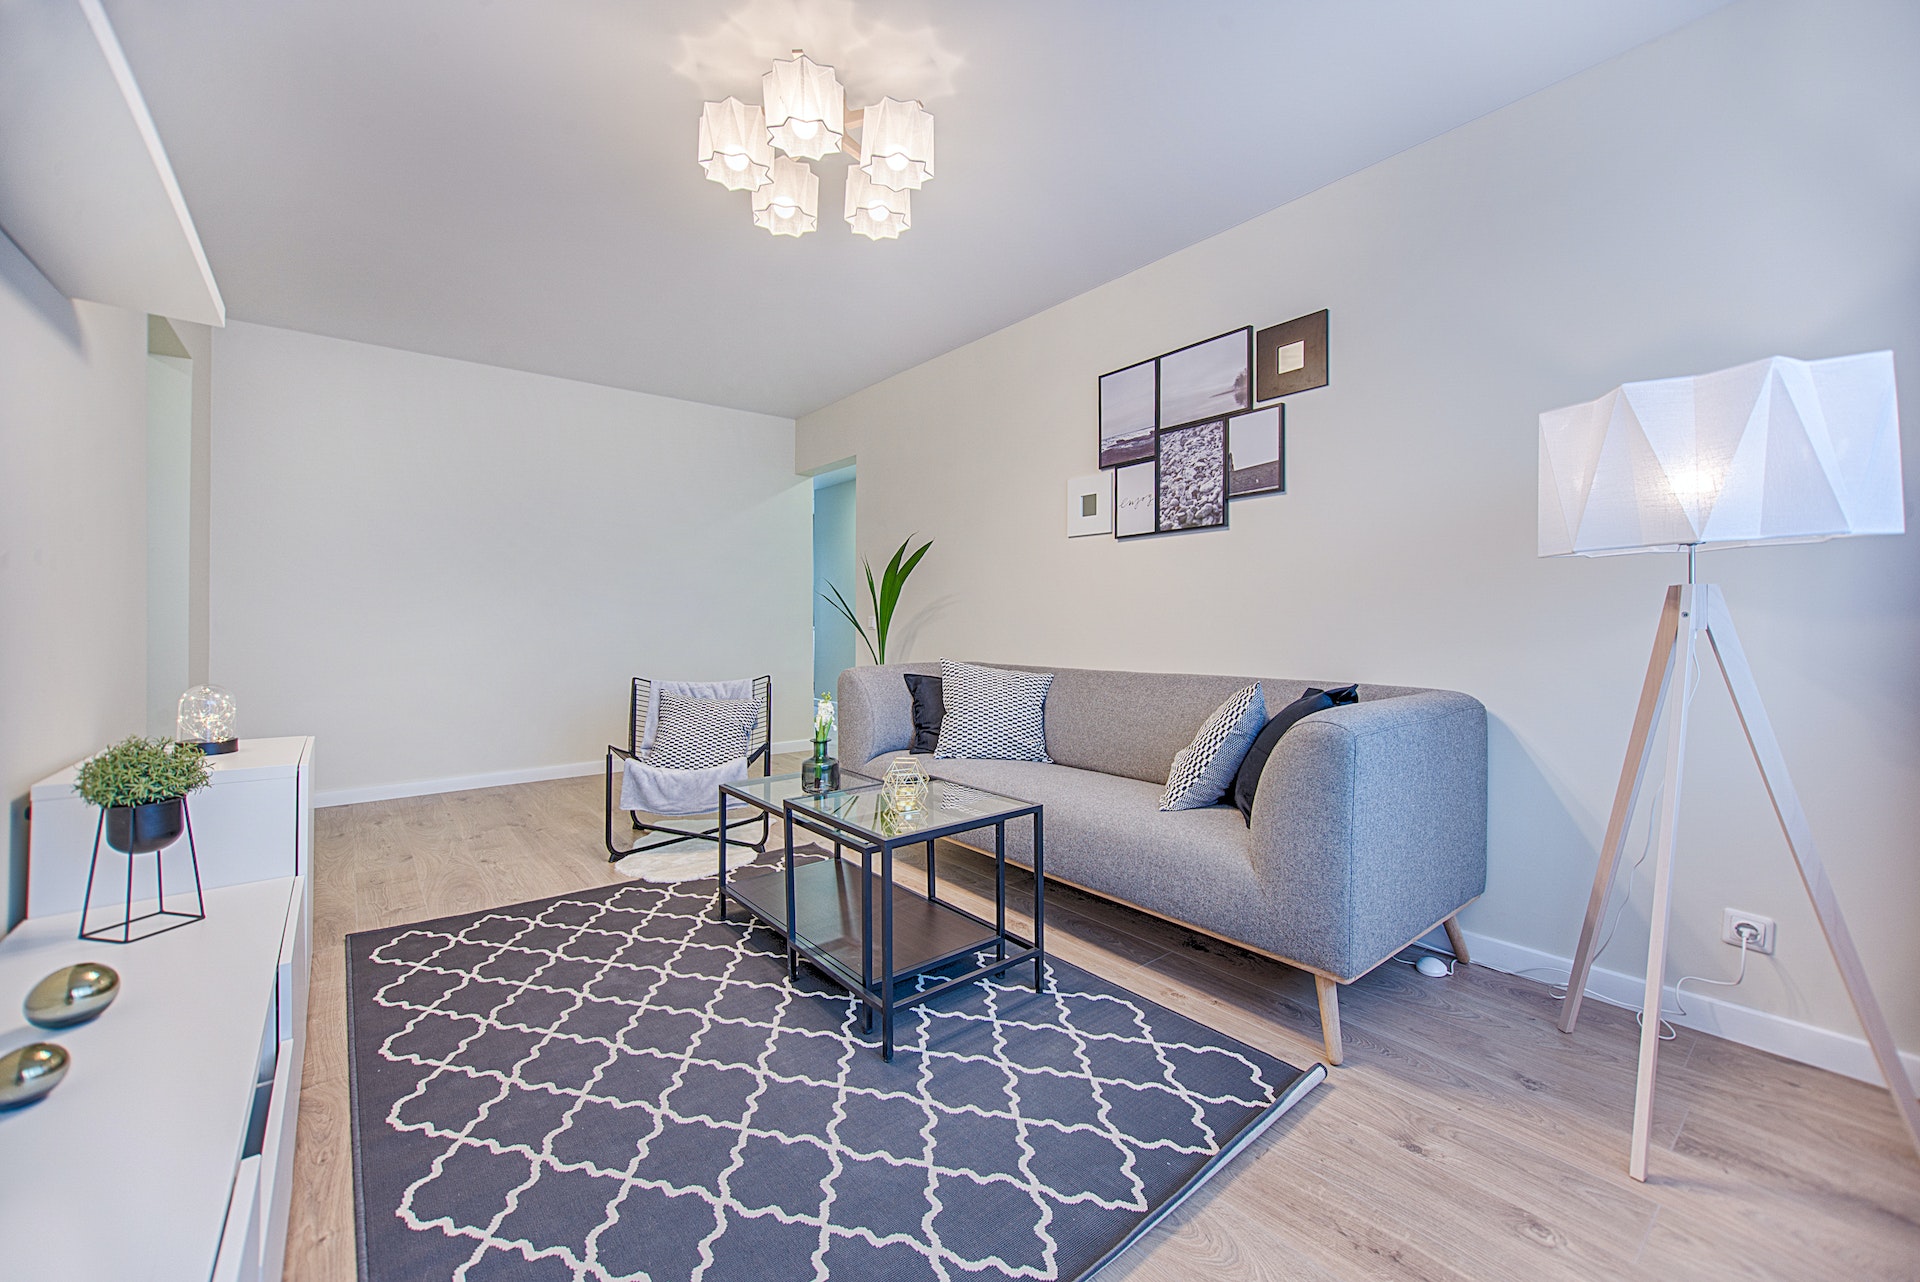
- Add unique furniture and decorations.
- Have a focal point or centerpiece.
- Use a neutral background that would go well with anything.
- Create a balance of colors and textures.
You can read more about the many ways virtual staging can dress up the emptiness in this blog post and gain virtual staging creative interior design ideas.
How to Prepare for Virtual Staging
Maybe you’ve decided you’re ready for virtual staging. This part will discuss preparing your real estate photo shoot for the virtual stage post-production treatment. Virtual staging is an excellent way to hide imperfections, but you can save time and effort if you get the necessary preparation done pre-shoot.
Here are some ways to get ready for virtual staging real estate photography shot:
- Note your home, property, and neighborhood’s sellable features beforehand.
- Draft a buyer profile based on the area’s unique selling points.
- Look for possible inspirations online.
- Get the right photography equipment or hire a competent photographer.
- Find a virtual staging app or hire a company to do it for you.
Aside from preparing for the shoot, you need to check the state of the rooms you’re planning to redecorate digitally. The National Association of Realtors (NAR) has suggested rooms you need to stage for listings according to their data on buyer statistics:
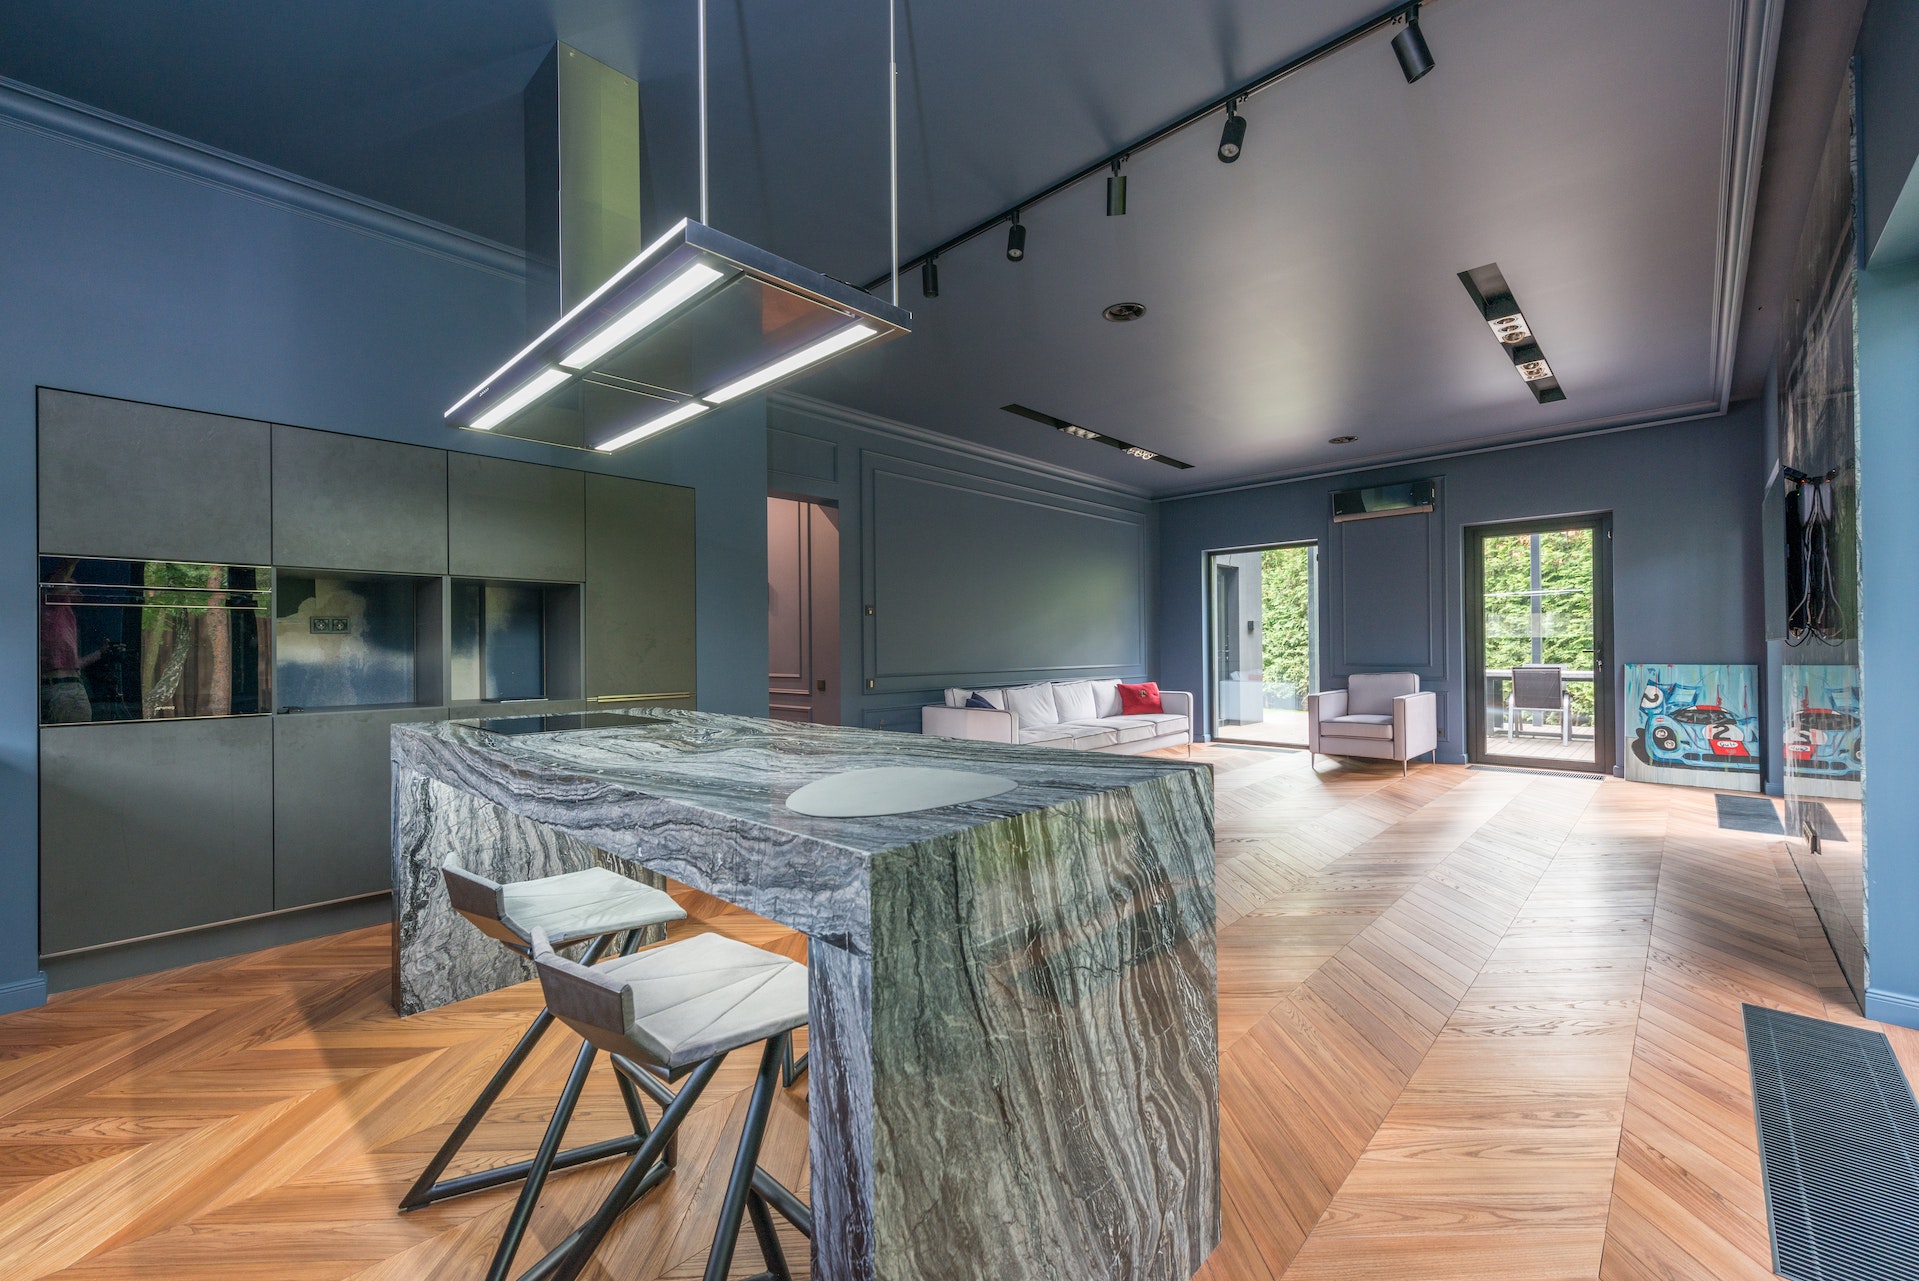
- Receiving area or living room
- Master or main bedroom
- Pantry or kitchen
- Dining room
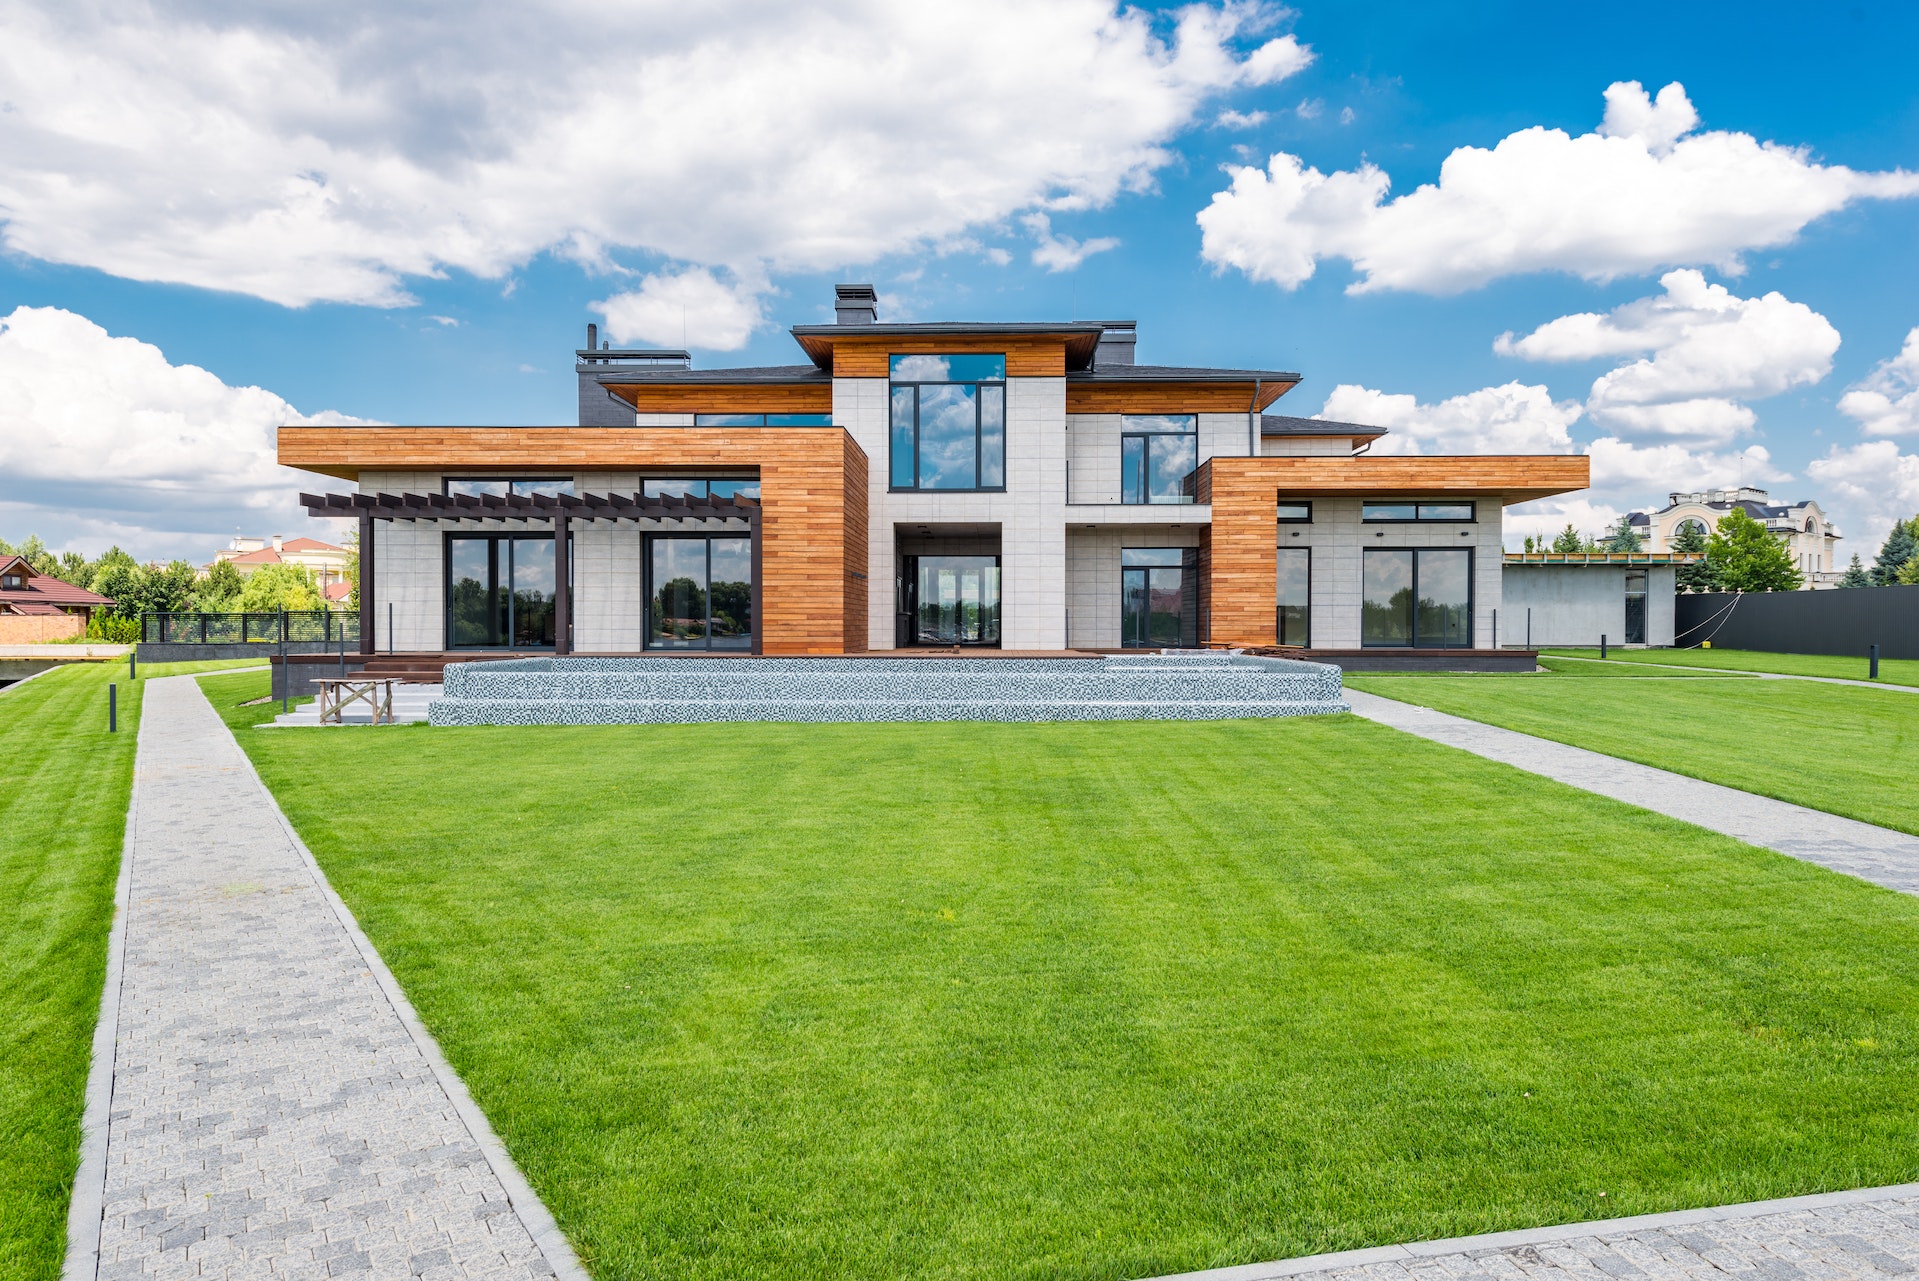
- Yard or garden
- Comfort room, washrooms or bathrooms
You don’t have to stage all the rooms, just the crucial ones needing more value or improvement. The buyer market’s needs and expectations will continuously evolve, and digital staging allows your home to show buyers why they should consider yours.
Read more about how you can stage your rooms for the best virtual staging results.
Virtual Staging Apps and Software for Real Estate Agents
Real estate agents may want to try their hand at virtual staging, and an app is a great way to practice or do the graphics themselves. They would only need a compatible device and the imagination to envision the home or property’s potential.
These are eight innovative apps that agents can use for virtual staging:
- Phixer (available for iOS) – the app of a leading real estate photography post-production agency offering more than virtual staging services with a turnaround time of 8 to 24 hours.
- Homestyler (available for Android and iOS) – the app is a joint investment and establishment product of Easyhome New Retail Group and Alibaba Group.
- Housecraft (available for iOS) – the app uses the power of Augmented Reality (AR) to customize your home.
- iStaging (available for Android and iOS) – an app where you can capture virtual reality (VR) videos, edit them, and share them with friends.
- RoOomy (available for iOS) – an app where you can do 3D VR and AR images.
- Room Planner (available for Android and iOS) – an app that lets you create 2D or 3D visuals with subscription plans.
- Planner 5D (available for Android, iOS, Windows, and Mac) – an app that allows you to layout, create, furnish, edit, render and share designs.
- MagicPlan (available for Android and iOS) – the easy beginner-friendly app enables you to render floor plans, estimates, and field reports.
Some apps may not be manageable for those without prior experience, so real estate agents may need other options. If the applications are too difficult to handle, they can opt to avail of virtual staging services from companies or firms.
If they aren’t satisfied with their graphics expertise, they can have experts do their virtual staging through these software, companies, and websites:
- PadStyler – software that conducts virtual staging services with a massive 3D library of interior design items.
- Spotless Agency – a company that offers a wide range of real estate photography, post-production, and graphic services.
- Sweet Home 3D – an old-school and retro open source 2D and 3D software initially released in 2006.
- Real Tour Vision (RTV) – a company that designs 2D and 3D virtual tours and other real estate photo and video services.
- BoxBrownie – a company that offers various real estate photography post-production services with a 24-hour turnaround time.
- Armstrong Flooring Design Visualizer – an AR application that allows users to check out different flooring colors and textures to match their current interior design or hypothetical ones.
- IKEA Home Planner Tools – an AR application that lets customers see how IKEA products look in their houses.
- Tantify – the company offers beautiful virtual staging designs.
- Virtual Staging Solutions – a company that digitally builds, furnishes, renovates, and remodels homes.
Real estate agents have limitless options and possibilities for virtual staging. The apps, websites, and companies listed above will help them find practical help for their needs without breaking the bank. Find out more in this comprehensive article on the 15 Best Virtual Staging Apps and Software for Real Estate Agents in 2022 and this list of Virtual Staging Companies for Real Estate Sales.
How to Start Your Own Virtual Staging Business
Buyers in the real estate industry will always want high-quality photographs, so making a virtual staging business is a great way to fulfill that demand. However, it won’t be an easy journey without the necessary help on how to start. Follow this guide if you’re planning on making one yourself soon.
These are the steps to starting a virtual staging business:
- Product validation – the first step in creating a business is testing the demand. You should verify if people need your company, product, or service in the first place.
- Business plan – after testing your product validation, you need to develop a business plan that includes a summary, company profile, business objectives, product/service details, sales and marketing plan, and financial projections with an appendix containing necessary illustrations, research and statistics.
- Build a team – your team will make or break your business journey. It would help if you recruited the right talent to help your company start and then expand. Find reliable and determined people with the right background and experience.
- Use apps or software – automation is a great way to cut costs on recurring daily operational activities. You have to be strategic about automating processes that optimize your existing resources.
- Develop partnerships – finding like-minded partners is a great way to make your business stable enough for scalability. Partners may come from individuals or companies that can benefit from each other’s products and services.
- Make a sales funnel – the sales funnel is the buyer’s journey from attention to purchase following the AIDA (attention, interest, desire, and action) principle. Create a sales funnel that generates leads or potential customers, develops an attraction to your product, service, or company, develops a purchase need, and encourages purchase or conversion.
- Review current offers – study your offers with your monthly goals to see if it’s according to the financial figures in your business plan. The pricing and target customer sales should be attainable, sustainable, and realistic.
- Add-ons – create complementary products and services so you won’t rely on virtual staging alone.
- Marketing investments – you should prepare to shell out funds for marketing activities. The rule of thumb is that 2 to 5% of your expected revenue should go into marketing efforts.
- Maintain great networks – your personal and professional network will help your business thrive since they can be your potential clients and partners or recommend you to people who might be interested.
This post can tell you more about how to start a real estate virtual staging business in better detail.
How Phixer Virtual Staging Compares to the Rest
Real estate virtual staging companies often have their unique way of doing things, and most of these businesses offer more than one service. Read more about how Phixer fares against its virtual staging competitors in the real estate industry.
These are the comparisons between Phixer and BoxBrownie:
- Locations – Phixer is an American company, while BoxBrownie is an Australian company.
- Value for money and pricing – both companies have their respective pricing and discounts.
- Industry experience – Phixer has over 13 years of experience with over 800 global staff members, processing 50,000 real estate videos and images daily. BoxBrownie has around seven years of experience, offering its extensive services to approximately 102 countries worldwide.
- Turnaround time – both businesses offer 24-hour turnaround times.
- Customer service – both companies offer 24/7 customer service.
- Technology – Phixer’s website is simple, while BoxBrownie’s has everything outlined. However, Phixer has a mobile app, where you can edit photos yourself.
You can check out this Phixer vs BoxBrownie review for more details about both companies.
Bottomline
Virtual staging is a modern take on an old showroom concept, and it’s one of the many innovations professionals use in the cutthroat real estate marketing industry. Most experts consider virtual staging a must-have for a successful real estate listing, and some apps or software achieve realistic staging effects.
As more companies present better 2D and 3D virtual staging designs, you can choose from various services to dress up the emptiness and promote real estate listings. You will always need professional virtual staging services, whether you’re a beginner listing your first property or a tenured real estate agent hoping to up your game.