Category: Photo Editing

  • Background Enhancement Photoshop Tutorial

    Background Enhancement Photoshop Tutorial

    Adobe Photoshop is an excellent digital image editing software that lets you create a magnificent image into another level. Web designers, graphic artists, layout artists, photographers, real estate artists and other professionals in the field of arts and design prefer this user-friendly software in their crafts.

    Learning to identify the problem in an image is a primary requirement in enhancing a photograph. Knowing what to edit, refine, recolor, add, or remove gives you the edge in achieving a better product compared to the image that was captured fresh from the camera. After identifying what’s faulty in an image, work on a copy of the image.

    Start editing with adjustment layers and think the best to integrate on it. Changing or enhancing a photograph’s background is just another technique you can explore in Photoshop to improve its quality.

    [lwptoc]

    Here are the steps you must follow in modifying or enhancing the background of an image using the software.

    1. Add a Blank Layer

    After opening the image in Photoshop, there is a single layer which is the Background. Add another blank layer above it by simply clicking on the New Layer icon at the bottom of the Layer options.

    Add a Blank Layer

    2. Set Background and Foreground Colors

    Your foreground color must be set to black and your background must be set to white. In order to do this, press the letter D on your keyboard. You can see that it has been changed accordingly if you look at the bottom of the Tool options. The square strip in the top left shows the present Foreground color while the square strip in the bottom right shows the present Background color.

    Background and Foreground Colors

    3. Grab the Gradient Tool

    Select the Gradient tool in the Tool options or quickly grab it by pressing the letter G on the keyboard.

    Grab the Gradient Tool photoshop

    4. Assign the Foreground to Transparent Gradient

    Right-click for (Windows) and Control-click for (Mac) anywhere inside the document window and select the Foreground to Transparent gradient from the Gradient selector that will appear. This is in the top row of gradients, second from the left. Click it to apply.

    5. Stretch a Gradient Inside the Image

    Create a neutral density filter by stretching a black-to-transparent gradient in the image. In doing this, Layer 1 must be selected then click somewhere in the background of the image and drag straight down the area where you intend to. While doing this, press the Shift key to assure that it goes straight to where you point it to. Move the gradient across the area of your choice.


    6. Modify the Blend Mode of Layer 1 to Overlay

    Proceed to the Blend Mode option in the top left corner of the Layer options. Layer 1 must be selected and click the Overlay option. This enhances the contrast by blending the black area into the image. You can see that your photograph background improves. But be careful not to include the foreground or subject in this process. You can use a layer mask.

    layer overlay

    7. Add a Layer Mask to Layer 1

    Be sure you select Layer 1 before clicking the Layer Mask option at the bottom of the Layer options. It will be added to the gradient layer in the document.

    8. Pick the Brush Tool

    Paint black on the Layer Mask over the zone you want to protect to hide the effects of the gradient of the photo. Press B on your keyboard to grab the Brush Tool quickly.

    brush tool in photoshop

    9. Set Foreground Color to Black

    Swap the background and foreground by pressing the letter X on the keyboard. You will notice the square strips of background and foreground colors switched.

    10. Paint over the Zones to Protect from the Gradients

    After switching the background and foreground colors, paint over the zones you want to protect using the Brush tool. If you want to change the size of your brush and make it smaller, press the left bracket key on the keyboard. On the other hand, press the right bracket key if you want to make it larger. The edges of the brush could either soft or hard. To make it soft, press down the Shift and left bracket key. Hold down Shift and right bracket key to make the edge harder. If you accidentally painted a portion of the photo which is unnecessary, simply press X on the keyboard to change the strips from background to foreground and vice versa.

    11. Adjust Brightness and Contrast

    After painting over the zones and enhancing the background, you might want to improve the brightness and contrast of the final product. You can do this by proceeding to the menu bar. Select Image then Adjustments and select Brightness/Contrast. Select the layer where you will adjust. Alter the buttons to the point that you desire. After the tunings, click OK.

  • What is Real Estate Photo Retouching Job?

    What is Real Estate Photo Retouching Job?

    Real estate photography has always been an in-demand business. People sell houses which means a photographer is needed in order for them to be able to show their house in its best light. Real estate photography is not just a simple matter of taking photos of the house interiors and exteriors. There is a certain process of this kind of photography. It captures the essence of the house—its personality, character, emotions a house gives, as well as its major selling points. In order to do this, retouching job in photography is always a necessity.

    Selling a property has never been easy without simple yet handy cameras that are capable of producing great quality images in the real estate industry. Having a good camera is a step closer to selling your property. Enhancing the image quality through a simple yet amazing photo editing app is another story which can take your business to a whole new and better level. It is because, the more beautiful, more vibrant, and more realistic your pictures are, the greater is the chance for your property to get sold quickly.

    Developing Skills in Photo Retouching

    Being a real estate photographer entails lots of days of photo shoot not only as part of marketing purpose but also to perfecting the small details of some common mistakes. A photographer does not only consider the right time of day to create good shots. Other factors like right lighting and good angle are also important in developing good quality real estate photos.

    The world of photography amazes each viewer of its distinct and indispensable beauty. On the other hand, distinguishing an original shot from an edited one is a tough thing to take into account. Nevertheless, an enhancing application or software gives handful of help in achieving quality pictures for any purpose it could serve.

    Photo editing software like Adobe Photoshop and Lightroom permit users to adjust the details in a picture, some of which are photo resizing, cropping, recoloring, and other alternatives when it comes to digital editing. These become possible because of the different features that it has like brush manipulation, pen tool, luminance and color controls, group layering, variable fonts, quick share access and more.
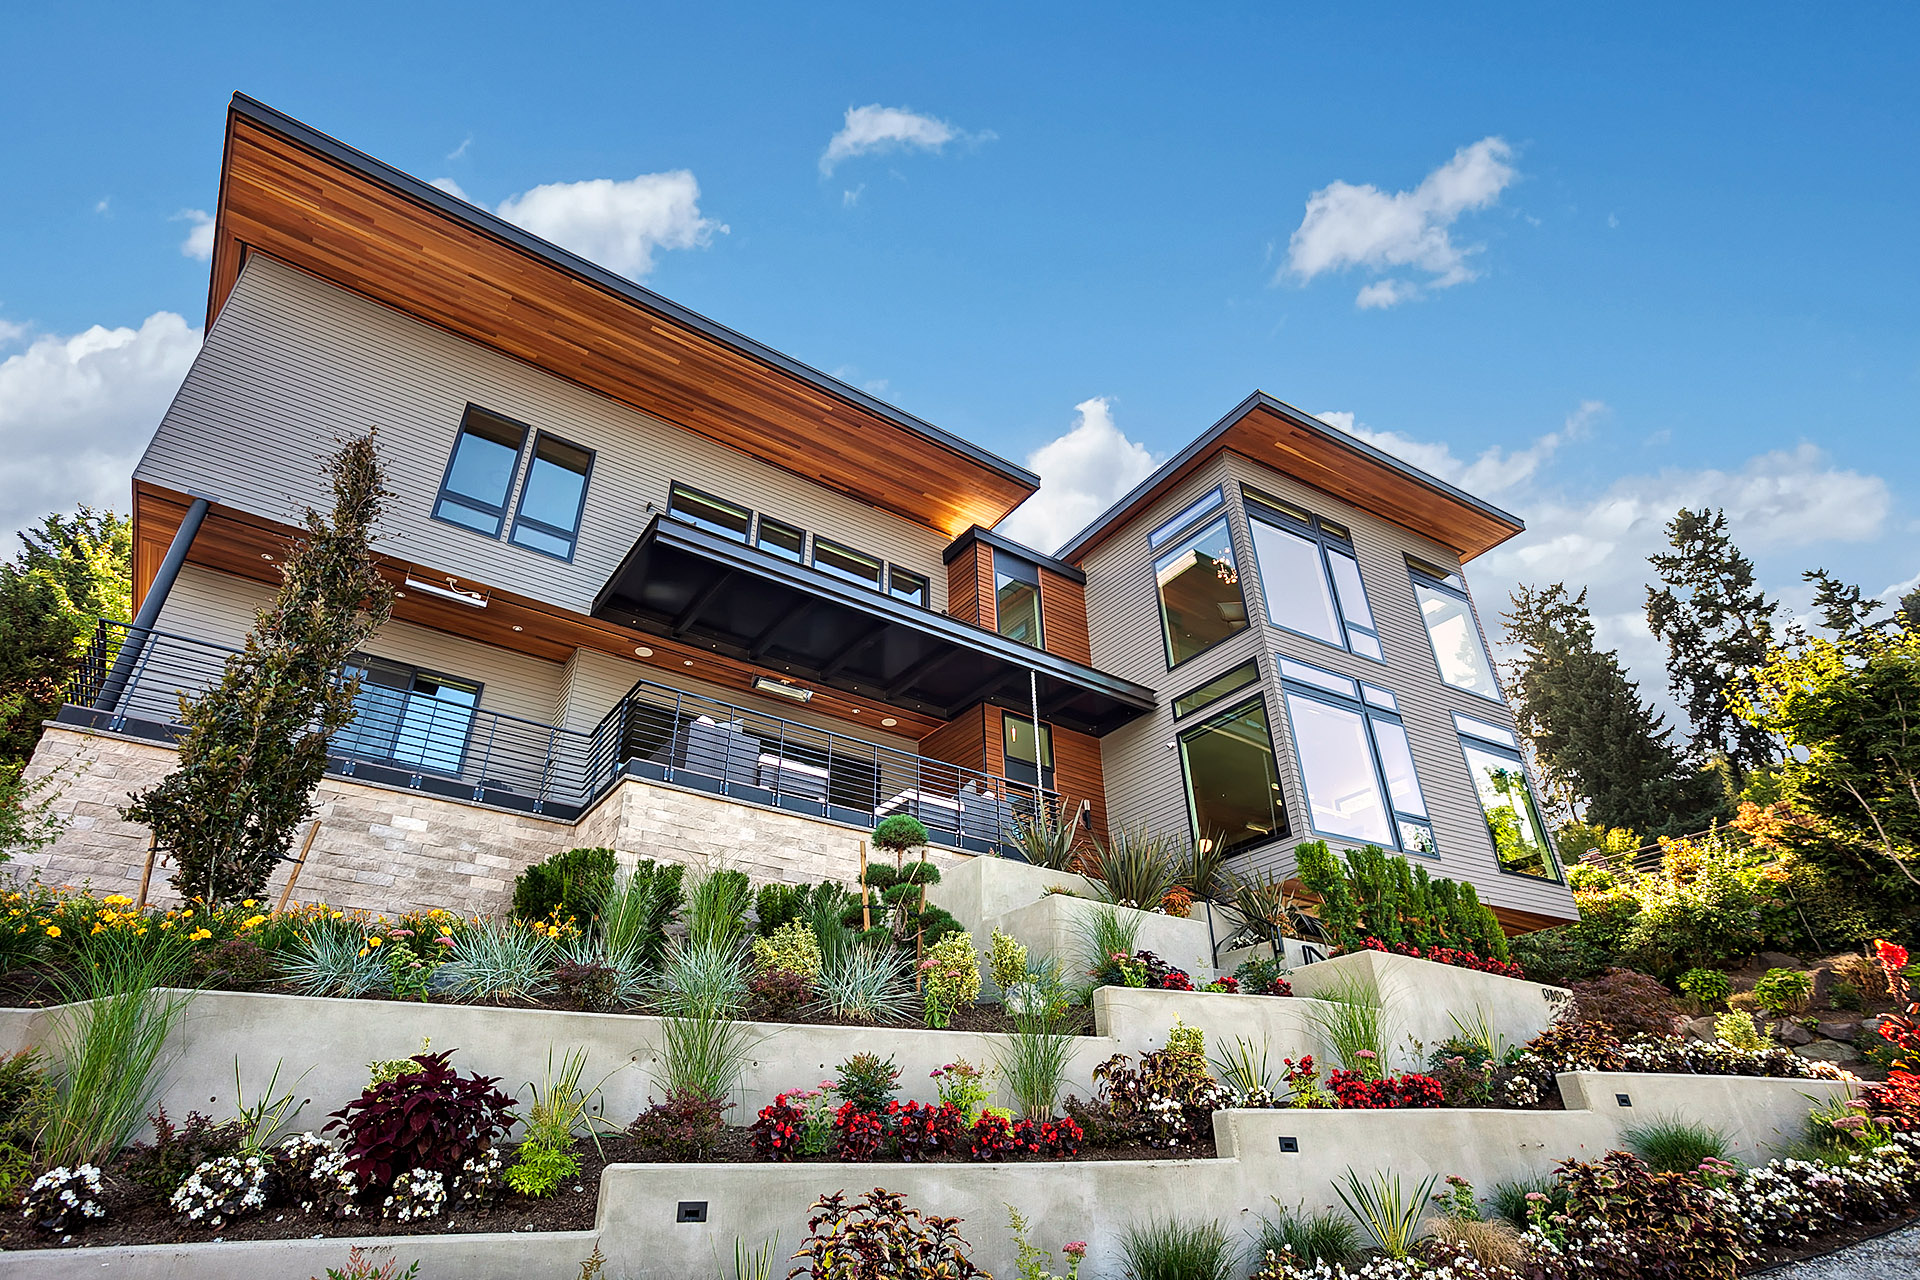
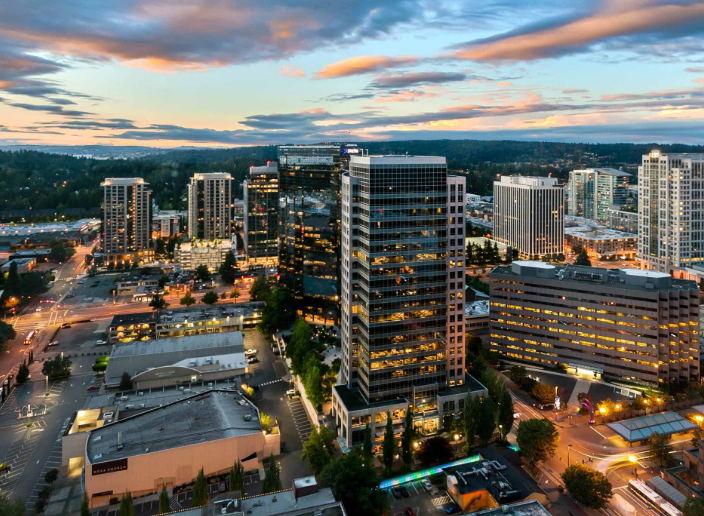
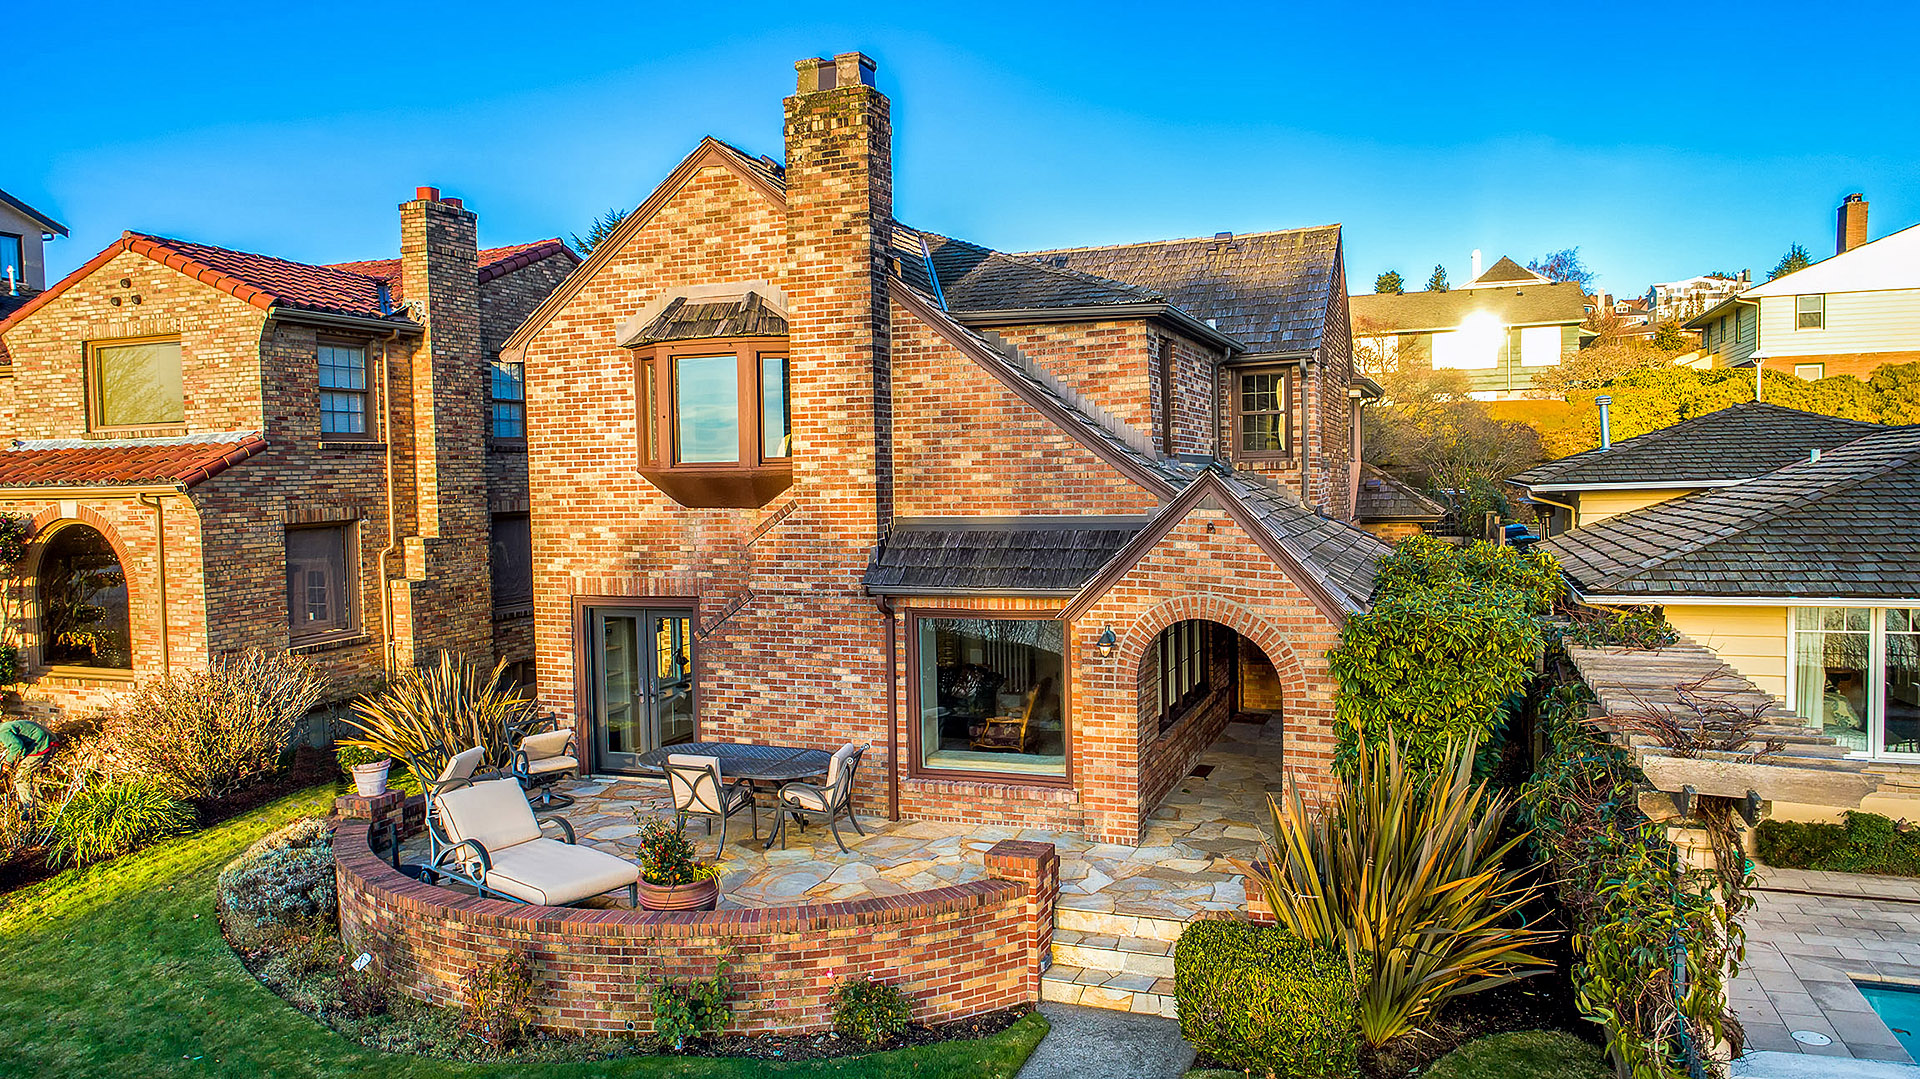
 The software can be used to obtain high-quality resolution of the image which is perfect as a marketing tool in selling properties.

    Hiring a real estate photo editing professional really saves you time. With these people, retouching job can be far easier. Tasks such as color correction, adding effects, window stain removal, sky replacement, and even deleting unnecessary objects can make your ordinary real estate photos become high-quality images. And to become a real estate retouching editor, there are job requirements that you needed to possess.

    1. Higher education in photography

    There are courses, whether a vocational crash course or four of five-year degree course that are helpful in developing your skills in digital and graphic designs like fine arts, interior designing, and other similar courses.

    2. Knowledgeable in Adobe Photoshop

    The most popular tool used in photo editing is Adobe Photoshop Creative Cloud (CC). This is considered by many as the most advanced digital imaging software. The very basic step to use this is to download Photoshop CC. Adding effects to real estate pictures can be limitless unless your retouching skills are exceptional. You can resize the photo using Adjustments, familiarize with ‘Curves’, and practice the Hue and Saturation buttons.

    3. Develop skills in visualizing real estate images through editing.

    Photo editing can also help service and advertising firms for real estate companies and brokerage systems. It can increase the aesthetic beauty of properties by the enhancement and enrichment of images. Images are edited by making the color more vibrant and to make the photos look more entertaining to stare at. These modified images may turn out to be used for listing services for other websites.

  • Object Removal using Photoshop: A Tutorial for Beginners

    Object Removal using Photoshop: A Tutorial for Beginners

    In real estate photography, how to get started is always the consideration. Every business starts from scratch and only the interest in the business will be the main idea if a photographer yearns to learn more. The only thing that results in making someone retreat to continue the photography business is the lack of the essential skills needed for lots of things.

    Aside from the basics of image shooting, one skill that stands the most is photo editing. Professional photographers make use of photo editing software to do this. One of the most sought after editing applications is Photoshop. Because anybody can use Photoshop’s various features even without the Internet, editing of different images can be done easily. This goes to show that you can take any editing works for as long as you possess the skills for the job.

    object removal - real estate editing

    Being a real estate photographer uses lots of photo shooting days as part of marketing purpose. Other than this, it is also used to perfecting some of the minute details. In this way, some common mistakes are avoided. A photographer does not only consider the right time of day to create good shots. Other factors like right lighting and good angle are also important in developing good quality real estate photos. It makes the user reconnected to the computer anytime without connecting the hard drive.

    There are many factors to consider why photo editing is important. The creation of stunning real estate photos is what buyers really wanted to see in the listing. There are many elements in the photos that are important, while there things that are needed to be removed. There are many experts that can be outsourced who are well-versed in the different features of Photoshop.

    [lwptoc]

    Remove Objects through Photoshop


    Video credit: Photoshop Tutorials by Webflippy
    Removing unwanted items from a photo is an easy task to do using Photoshop. The most common Photoshop tools that are used for the removal of unnecessary elements in a photo are Content Aware Fill, Spot Healing Brush Tool, and Clone-Stamp Tool. These are very important tools to create an image just as you want it to be displayed in your real estate listing.

    • Content Aware Fill

    content-aware-fill.
    Photo credit to https://creativepro.com/

    This tool works best for the removal of big objects. It is also useful in the removal of difficult sections from a photo. This feature of the Photoshop identifies details of the area of your choice. The detached objects can be immediately replaced with the details that best blends with the picture.

    But before using the Content Aware Fill, you need to make a selection first. You need to pick the Lasso tool and use it around the area or object you wanted to delete. This is the time that you have to go to Edit menu and click Fill. Select the Content-Aware by using the drop-down menu and click OK afterwards.

    • Spot Healing Brush Tool

    healing brush tool

    Combining with the Content Aware Fill, Spot Healing Brush Tool can clean up extra elements not needed in the picture. One of the main functions of this tool is to smoothen the jagged spots. You can do this by selecting the Healing Brush, click and hold over on the area of concern. Use Spot Healing Brush to also erase undesired sections of the photo.

    For real estate photos, this tool can remove thousands of unwanted objects like lamp posts, closed circuit television cameras, architectural flaws like broken walls, unfixed electrical convenience outlets, or any objects and imperfections that are uncomfortable to the eyes. You can also use Spot Healing Brush Tool to remove acne and other skin blemishes for personal pictures.

    • Clone Stamp Tool

    Clone Stamp Tool

    Photo retouching can be done easily with the availability of software like Photoshop. Using the Clone Stamp Tool, retouching of photos will allow you to imitate or copy a section of the photo to another area of another photo. This feature is a basic Photoshop tool since the beginning to remove unwanted details of a photo.

    Since a photo is made up of tiny pixels, Clone Stamp Tool exchanges pixels with pixels. This makes editing looks indistinguishable. To use this tool, you need to set a sampling point on the section you wanted to clone. This is done with the use of paint. To paint the existing sampling point, choose the Aligned selection. You can anytime deselect the Aligned option whenever you wanted to stop.

    To completely alter the image, you have to select the Clone Stamp Tool, select the brush tip, and set the brush options for blending mode. Only then that you can distinguish the area you want to align with the sampled pixels. To set the sampling point, position the pointer to any part of the image and click Alt.

    Although optional, you can scale or rotate the source that you are imitating. You can even reverse the source’s direction, or even show an overlay of the source. These are all done with the use of Clone Stamp Tool.

  • The Arsenal of a Real Estate Photo Retoucher: Newbie Guide

    The Arsenal of a Real Estate Photo Retoucher: Newbie Guide

    A single photograph tells thousands of stories. This makes photography special. Digital photography connects us to the digital world where millions can appreciate, admire, and relate to the story behind each photograph. To point and shoot wonderful, dramatic, and dynamic photographs using a camera gives much relief to the soul of the photographer and amazement to the eyes of the viewers.

    But using a camera can be very complicated for beginners especially that there are a lot of features to consider like: exposure, aperture, shutter speed, ISO, white balance, focal length, distance, filters, eye-lines, visual weight, and so on. Good photography can never be achieved over night. It is not that when you begin you actually get what is right. It requires much time to master this field. It is a craft that communicates emotions to the audience and an art that attracts attention from them.

    Photographers would not be worried so much about the quality of their shots because of the presence of photo enhancers or retouchers like Lightroom, Photoshop, and Snapseed. These applications or software provide users to easily access, edit, organize, and share photographs anytime and anywhere. It also elevates the quality of their photos.

    But what more interesting than these applications is a photo retoucher that can manipulate and design artistically the scene that is buyer-friendly and one who does not rely merely on such software. One who does not consider his or her own interest but of the professional quality work that fits for this career.

    Retouching Guide

    The quality of the photograph could attract or distract buyers so the arrangement level of the scene serves as the market for the industry.

    real estate retouchers - phixer

    Editing can be very critical depending on the picture to be edited so it requires skills in arts and design. To avoid relying on the easy-to-tap applications and making your product a mere abstract, here are the following factors to consider:

    • Exposure. The artistry of the retouch editor relies on whether what kind of exposures is appropriate to a given picture. The set of exposures must bring the photograph to life. This will be achieved through proper lighting and correct detailing, thereby removing some unnecessary spots on the picture.

    • Object Removal. Interior decoration is a skill that requires high level of designing. Objects that could be distracting to the eyes and the overall appearance of the scene must be removed so that little details could complement to the entire proportion and harmony of the sight.

    • Color. Dynamic and lively colors attract the impression of the people. Make it sure that the project would not be dull. It consists of hue, value, and saturation. The color in a camera appears on screen as what actually it is in reality.

    • Cleanliness. The neatness and orderliness of the scene must be taken into consideration. This would give the picture a great quality and some spare time will be saved in the editing process.

    • Background Enhancement. The part behind the main object of the scene or the background is crucial in the photographic attainment. However, it must be minimized so that the main subject or the center of attraction will not be overpowered by the background. Minimal yet important details of the scene must be included in the entire quality of the picture.

    • Contrast. Edge and main subject contrast must be enhanced to create a vivid picture. Tonal contrast and color contrast are two different but important factors in the quality of the picture. The former underscores light and dark tones while the latter emphasizes on how colors interact and blend.

    • Angle. Whether the scene is for commercial art or for personal purposes, capturing the proper angles is a key in achieving a captivating picture. Adjusting your perspective to any object can redirect and formulate another object, thereby creating another form.

    • Lines and Shapes. Shape and form are vital in the quality of the picture. Understanding the harmony of these factors lead to a simply sophisticated photograph one can ever imagine. Shape in a picture doesn’t have depth because it is two-dimensional but it creates a form. Line, on the other hand, can guide the eyes in appreciating the photograph.

    • Pattern. When shapes, lines, and objects are recurring, they create a pattern. Patterns can give drama to the photograph because they could establish rhythm, clarity, and emotions.

  • 5 Real Estate Photo Retouching Tools for Newbies

    5 Real Estate Photo Retouching Tools for Newbies

    Whenever you want to transform a real estate photo to its amazing state and you are only a beginner, you need not to worry. There are lots of photo editing programs that will surely fit your styles and capability. You may opt for free editing tools that can be found on the Internet. There are also premium or advanced editing tools that will require you to either sign up or buy the product.

    Basic edits include cropping, rotating, resizing, changing of colors and background, removal of unnecessary objects, and many more. As a beginner, you might also be aware if your photos are slightly off. This is the reason why you will consider straightening of the image, proper exposure, as well as clarity.

    Photos and images are integral parts of any business. This is the main reason why photo editing is essential to the digital marketing techniques that can be employed by both the real estate agent and the photographer. The real estate game nowadays employs photos as one of the potent weapons of sellers. Professional photography, which also includes editing and fine tuning of images, is very important to property listings.

    It is very important to get assistance from professional photographers rather that executing the business by your own. You cannot shoot photos all day and edit them by night. Professional photos can give you great impression from potential buyers because buyers usually respond to photos. Buyers always seek the web for consultation and information. The seller who can provide the most dynamic, detailed, and crisp photos will clearly gain the advantage.
    With properly edited photos shown on the listing, properties backed up by professional images will sell faster than those that are not accompanied by professional level photography. Time is also on the side of those catering well-edited photos because aside from saving time, you can even close deals with a client or create new listing, instead of doing the laborious editing works.

    Photo Retouching Tools for Newbies

    Luckily for every photo editing newbie, there is a wealthy collection of photo editing and retouching tools that are available today. Photo editors can Google these different retouching tools and they can decide whether they will opt for the free software or the free trial ones.

    Below is the list of five (5) most real estate photo retouching tools for beginners this 2019.

    • Adobe Photoshop

    This is the most popular and sought-after photo editing software by most photographers, designers, and editors. Adobe Photoshop remains to be the most well-known photo editing tool which allows users to develop, edit, and create new photos. It can be used to designing websites, mobile apps, simulating painting techniques, and of course, creating crispy and glossy real estate photos to attract customers. Adobe Photoshop has a 360-degree panorama workflow, variations of tools, and has a custom path color and width. What most people like about this editing and retouching software is its highly improved brush management system and can easily imports and develop libraries.

    • Pixlr Editor

    This is a wide array HTML5 photo retouching and editing software. Pixlr Editor’s best feature so far is that it can support a variety of formats and it contains a large number of editing tools which include overlay, pre-built filters, and assortment of effects. It has also a one-click management for a variety of tasks and it has this special vector editor. It’s easiness to use will really favor beginners. They can easily add image quickly while at the same time edit it by using some of the software’s stylish features.

    • Serif’s Affinity Photo

    For beginners, this is a very powerful editing option but is really suited for Mac users. Its robust features can give the user how to create an end product. Because of its channel controls, editors can easily add shadows, glows, and even outline the whole photo. In general, flexibility is what Affinity can really offer. This can be a great alternative to Photoshop because of its efficiency.

    • Pablo Editor

    Aside from being one of the best real estate photo retouching tools around, it has a robust collection of 600,000 images that editors can choose from. These images can be used to edit some real estate photos. Basically, Pablo is a free image editing tool that can be a good alternative to boost business projects. The software is focused on image editing for social media. Speed is Pablo’s defining characteristic.

    • Ribbet

    Ribbet is a free image editor just like Pablo. But this software is solely focused on layering and watermarking which is ideal for collage creation. In the real estate business, collage is considered an attraction to customers since they can easily look at the whole property on only one page. Ribbet also has a number of auto-fixing tools and generally a user-friendly software.

  • Basic Image Enhancement for Your Real Estate Photos

    Basic Image Enhancement for Your Real Estate Photos

    Photography has never been more important to venture real estate than it is these days. The markets are always in demand. Hence, this also creates demand to photography. For professional photographers, real estate business entails patience because there are lots of competitions in this business.

    Although real estate properties, most especially houses, go on and off the market on a daily basis. And every agent must have the perfect strategy to get the attention of every homeowner. Because of this, real estate agents resort to photography. This task is a little tricky. This is why doing photography for real estate is one best option to make selling fast.

    Being a real estate photographer entails lots of days for photo shoot not only as part of marketing purpose but also to perfecting the small details of some common mistakes. A photographer does not only consider the right time of day to create good shots. Other factors like correct lighting and good angle are also important in developing good quality real estate photos.

    [lwptoc]


    Since most buyers are already using online for their home search, uploading of stunning photos is a factor that will make your listing get noticed. There are times when photos were taken on a cloudy day and this kind of photo needs enhancement. In order to make listing photos stand out and gain that elusive attention.

    Digitization has made everything possible at the tip of the fingers. Picture editing and enhancement is one of the most common tasks to be done when it comes to improvement of pictures. Image restoration of old photos and videos ultimately needs a particular set of skill. With proper knowledge on photo editing, it can be guaranteed that profits can grow exponentially when used in a correct and professional manner.

    Photo editing is valuable to portraits for personal representation of pictures. It can be utilized for special occasions like birthdays, anniversaries, weddings and other eventful ceremonies. It is also suitable for commercial projects and businesses, like real estate, in particular. Photo editing can also help service and advertising firms for real estate companies and brokerage systems. It can increase the aesthetic beauty of properties by the enhancement and enrichment of images.

    Mastering Real Estate Image Enhancement

    Giving your clients a number of high-quality images will not only give you the edge. Captivating photos are what homebuyers are always looking for. They can simply attract buyers. This is the very reason why photo editing is an important inclusion in real estate photography. It allows you to improve colors, crop objects, upgrade lighting, change settings, adjust dimensions, and more. Below are some of the basic techniques to master real estate image enhancement.

    • Correct the color

    In shooting photos, always consider the weather conditions, interior and exterior lightings, window tints, camera model and camera settings, and many more. These factors clearly affect the color of the photo. Color correction is very essential to significantly change the color of the photos to new and invigorating ones.

    • Cropping

    Even professional photographers usually fail to shoot the best image they imagine. By means of cropping out the unnecessary parts of the image, it means improving the framing of the photo as well as changing its aspect ratio. Bear in mind though that it is not proper to include permanent fixtures to be cropped out. These may include electrical posts, piping systems, water tanks, etc.

    • Check vertical alignment

    It is also an essential element in basic image enhancement to address the vertical alignment of the property. Make it a point that the image undergoes vertical correction because this is one of the most common editing processes for real estate photos.

    • Replace the sky above

    Sky replacement is a common thing in real estate photo enhancement. When skies look dreary, it is without question that they must be replaced with clear, sunny skies. By doing this, it will completely change the outlook for the property.

    • Removal of unnecessary things

    Items like cars, bins, electrical equipment, gardening tools, and the like must be removed during the editing procedure. And in doing so, it will make the surrounding area clean. This will also pave the way for customers to see the whole property without any distractions.

  • Master Guide: How Real Estate Photo Editing Helps Sell Homes the Quickest Way

    Master Guide: How Real Estate Photo Editing Helps Sell Homes the Quickest Way

    In ensuring that the images of the property on catalogues and websites can attract potential customers, the use of real estate photo retouching tools are very important. Even if it is for a fact that real estate business mainly focuses on skills on marketing and selling, maximizing the use of the different techniques in enhancing real estate photos is another interesting strategy to increase sales.

    There are customized services that can offer high quality real estate retouching jobs in order for your business to have the edge in the market. In utilizing the assistance of these services, it does not only aim to deliver high quality services to customers. Because these photos can capture the attention of buyers, it also helps increase sales.

    Real estate retouching process are techniques using different software applications. Adobe’s Photoshop and Lightroom are two of the most common software applications used to enhance and recreate captivating photos for the business. These are two powerful applications for photo restoration, retouch, photo masking, and more.

    To recreate photos means many things. Recreating photos can be the removal of undesired objects, color enhancement, tidying up the area, balancing of light sources, just to name a few. For a real estate photographer, he will only shoot the property the best possible way and leave all the retouching works to the editors.

    Likewise, for real estate agents and brokers, edited real estate photos can attract more buyers because they will be presenting attractive property images. Buyers would like to see spacious areas. This is the reason why there was a removal of unwanted things during the editing process. In this way, it pushes up the selling process because the photos will be presented with those unwanted things eradicated.

    Statistics would reveal that high quality photos of homes sell 32 percent faster. Furthermore, homes with more photos also sell faster. Eighty-nine percent of homebuyers who used the internet are likely to be looking for photos. These photos, according to study, are the most useful and powerful feature of most of real estate websites. Many sales agents believe that a single photo can sell a thousand homes because, ultimately, photos attract buyers.

    It is always a good option for photographers and editors to make the photos attractive so that listings are always fresh. This can be a reason for them to avoid reshooting and make their business stay at the top of the game.

    How to Take Crucial Shots to Sell Homes the Quickest Way

    For a photographer, he has these innate tricks on how to make shots correctly. In reality, he has no control over what he wanted to include in his photos and what he does not want. There are things that he needed to highlight but he does not know how. This is where the tricky works of a real estate photo editor come in.

    Below are some of the techniques on how to capture shots for your listing needs that will help sell homes the quickest way.

    1. Make the curb appealing

    This is the foremost consideration to gain an excellent impression. One of the most common ways to do this is by simply removing the vehicles in the driveway. The street leading to the house must always be clear of anything including trash bins and other unnecessary things that will cause buyers’ withdrawal from the transaction.

    2. Create a room with a view

    To ensure buyer’s interests, focus the attention in making the rooms with views. Make sure that the windows can capture the views outside. In addition to this, always create spaces of the exterior landscapes.

    3. Shoot the biggest bathroom

    This is the tone-setter of any house, a great hiding place, and perhaps the most important room of any house but is sometimes, taken for granted. When you want to shoot the biggest bathroom, take the shot right from the doorway. One way to make the bathroom big is using lots of white – from tiles to paint to any other elements inside your bathroom.

    4. Showcase the master bedroom

    When taking images of the master bedroom, pull up the blinds. For curtains, make sure that it is styled in a pleated way to show views from the outside. Also, ensure that covers are free from creases and folds, and pillows are in their proper places.

    5. Make the ambience of the living and dining rooms perfect

    Before taking shots at the dining area, ensure that the chairs and tables are spaced evenly to create a better atmosphere. The living room is another area that is a separate zone from the dining area. Accent type of lighting is a good alternative when shooting a living room. As for the furniture, it is important to straighten out sofas and must face away from the dining area.

    6. Kitchen

    Just like the dining area, the kitchen needs to be free from any unsightly objects. Ensure that chairs and stools are arranged properly.

    7. Backyard and entertainment room

    When shooting the pool or the patio, always position at the rear-view to obtain two different angles in a single frame. This technique is a common practice among real estate photographers.

  • Under 10-Minute Photo Editing YouTube Tutorial

    Under 10-Minute Photo Editing YouTube Tutorial

    The problem facing a real estate photographer is always the absence of time. Producing high-quality photos is the ultimate goal of every photographer. When quality is non-existent, color correction, and adjusting tones and shadows are done in clearly and full of expression. Photo-editors may use patch tools to clean up any imperfections, their burn and dodge tool to create beautiful eyes, hue and saturation for whitening several areas of the photo, and many more. Color correcting is also important to differentiate a dull photo from a photo that sells.

    Because Adobe has an unrivaled reputation in terms of photo editing, its products are undoubtedly the most preferred options among professional photograph editors. Adobe Photoshop makes synchronization of photos between devices possible without transferring the photos manually from one device to another. Being a user-friendly software, Adobe offers the Lightroom CC and Photoshop to edit an create photo effects in an almost similar manner.

    Photo editing is essential in the business. It is very hard to get the perfect shot of a property, an event, or even a simple occasion. These days, photo retouching is an integral part of digital photography. Retouching services is very essential to bring out the natural beauty of the photo.

    The following are guidelines and tips from different YouTube links.

    1. Milky Way Photography – Make your Photos Look Awesome in 5 Minutes

    This tutorial is effective in turning dark and average into a colorful picture using the classic Photoshop CC. It teaches how to bring out the true colors of the stars by bringing down the temperature as well as the highlights, and bringing up the contrast and white.

    YouTuber: YuriFineart

    2. Master the Pen Tool in 8 Minutes (Photoshop)

    This video will teach viewers how to use the pen tool and to help you cut out anything in Photoshop. The pen tool is said to be the most accurate way to create cutouts and paths are always editable. You can create simple points and curves from beginning to end and you can cover long distances using long curves.

    YouTuber: PHLEARN

    3. Learn the Tone Curve in 5 Minutes: Lightroom Tutorial

    This video will teach you how to use the Tone Curve tool. It will show how functional and important the S-Curve is. Starting with the shadow, as the video suggests, is one of the most essential thing when starting editing using Lightroom.

    YouTuber: Nu Two Times

    4. How to Own Tone Curves to Edit and Color Grade Photos Like a Pro

    This video will show you how to master editing photos using curves in Photoshop and Lightroom to move beyond simple contrast adjustments and create your own basic photography editing flair without using presets. It requires a knowledge of using RGB Curves.

    YouTuber: Chelsea Nicole Photography

    5. Cityscape Night Photography – From Raw File to Final Photo in 5 Minutes Lightroom Tutorial

    This video gives you an idea on how to create cool and astounding city picture by bringing out the white while manipulating the shadow. One trick that will best create a cool view of skyscrapers is to lower the highlight control button. Depending on how you will look at the photos, it is still appropriate to find the best adjustment tool possible for the Cityscape look more attractive.

    YouTuber: YuriFineart

    6. I Wish I Knew this When I started Editing In Lightroom

    This video is all about a series of tips and tricks using Lightroom. It teaches the viewer how to shoot panorama in Landscape Mode, how to use Perspective and Boundary Wrap Option, how to use White Balance, and many more. On the equipment that you will be using, it also talks about how to calibrate your camera to produce better colors.

    YouTuber: Serge Ramelli Photography

    7. How to Use the HSL/Color Panel in Lightroom

    This video shows how to break down the Color Panel. It explains the three most important elements in the Color Panel, which is the HSL or the Color – Saturation – Luminance. An in-depth discussion about how the three mentioned elements create an impact to photos. It also mentions that HSL and Color Panel are both exact same thing. What differs is how they are used.

    YouTuber: Lucy Martin

    8. How to Use Transform Tool in Lightroom

    This video tutorial show how to use the Transform Tool to shift the perspectives of the photos you are going to edit using Lightroom to get crisp and clean lines. Because lines are the main characters of Transform Tool, this is good for architects and draftsman, who are people specializing on hard lines to design buildings and skyscrapers.T he tutorial shows how to use the different clickable options and assortment of sliders under the Transform Tool.

    YouTuber: Lucy Martin

  • Real Estate Photo Editors: Making your Photos Perfect

    Real Estate Photo Editors: Making your Photos Perfect

    It is familiar to everyone that a picture can paint a thousand words. In this way, it is imperative to create great photos to make the property look attractive. In the advancement of technology, everything can be made amazing and spectacular in the snap of a finger. This means that we technology can literally make unlimited and astounding photos that are enticing to buyers.

    Potential buyers wanted a vibrant photograph to refer to whenever they want to own a new property. They wanted a clear, crisp and cool images by referring to high-quality photos of the property they are interested in buying. Real estate photographs and videos are vital parts in the marketing and sales viewpoint.

    For these photos to be processed to its best quality, they needed to be improved. Enhancement of photos requires the services of the different photo-editing applications, tools, and techniques because this job is very critical in a real estate photography business. Furthermore, in the advent of the social media like Instagram, Tumblr and Flickr, photos and videos alike are greatly shared for business promotion.

    Photo-editing jobs today are commonly outsourced. There are many advantages of outsourcing someone to professionally edit and process a real estate photo. There are perhaps thousands of real estate photo editing companies that we can see online and they have the best equipment and the most skilled people to do the job.

    Reasons behind the Need of Professional Real Estate Photo Editors

    The creation of high-quality, saleable, stunning, and professionally-made photos is the primary goal for a real estate photographer. Below are the reasons why photo-editing is in demand these days.

    1. It saves you time

    real-estate photo-editing company
    photo via Capterra Blog

    Hiring a professional real-estate photo-editing company saves you the much-needed time for your other works. Exhausting most of your time editing photos to make them look good is not that advisable for a photographer because there are experts in this field that have a faster turnaround time to edit photos.

    Even if your photos would show that they only needed basic enhancement, tasks such as window masking, sky replacement, or object cropping not only double but triple your time doing these special tasks.

    2. Process the way you want

    One of the better reasons why there is always a need for professional photo editors is that they can enhance your photos the way you want. Photo editors are trained to specifically cater the needs of their clients. They have the capability to easily edit the photos and deliver them exactly the way you want. All they needed is thorough explanation and giving them the checklist of the parts of the photos you want to be edited.

    3. Photo editors are experts in their own field

    Since photo editors are experts in the use of photo-editing software, they know all the tricks and techniques behind making your photo look spectacular. These people are skilled in a way that they know the ins and out of the different editing software such as Photoshop and Adobe Lightroom. They are familiar of all the features and functionalities of these tools. The know-how of these photo editors will be their advantage to create an improved photo and deliver it in the most efficient way.

    4. Creation of profit

    With the help of the skilled and professional photo editors, your business can create more sales. Instead of spending much time in trying to improve your photos by your own, you can exert much of your time and effort in actual shooting real estate photos. The benefits of hiring an expert can expand your time closing out better deals and transactions. As photographer, you can also work on other business matters.

    5. High-quality image

    Because of the experience of professional and skilled photo editors, they can produce very high quality images because of the latest technology they possess. These people work all day long improving their skills in using different editing tools. The only thing their minds are set into is how to produce tons of quality images the best and quickest way possible.

    6. Gets you ahead of the competition

    Outsourcing your photo-editing experts from around the world will let you choose the best and highly-skilled person to do the job. In this way, you can have the edge that will help you get ahead of the over-saturated real estate photography business. While others are spending much in producing processed photos, it will be your advantage when you outsource editing jobs at a reasonable price. In this way, upon selecting the right person who will work for you for over a long period and minimize time looking for someone to entrust your photo-editing jobs, the distinct advantage of getting ahead of your competitors is enjoyed.

    7. Photography Website

    Digitization is the culprit why a website for real estate photography is important. This is not part of the gear you are bringing to the site. It is also not the equipment you are using during photo shoot but it is self-explanatory why one needs to have his own website. Having the right tools and equipment is essential it is also viable to have an online space in the Internet.

    Having an attractive website is what entices clients to visit it. Make it a point that the template you are using for your website will offer a correct and complete package for every individual visiting your website.