Category: Real Estate Photo Editing

  • How to Boost Property Sales With Edited Real Estate Photographs

    How to Boost Property Sales With Edited Real Estate Photographs

    Visual appeal never goes out of style, especially in the real estate industry. Photos can highlight the best amenities of your home and will allow you to negotiate with buyers so you can score better deals. However, merely posting any random picture of your home won’t cut it.

    “How can I increase property sales?” is one of the most frequently asked questions by real estate agents. The simple answer lies in producing high-quality real estate photos. Aside from investing in companies that provide high-definition editing services, like Phixer, you can also boost your property sales when you learn how to edit real estate photos.

    Edited real estate photos can be your key to boost property sales and gain the most profits from your home when done correctly.

    [lwptoc]


    TL;DR: Here are some of the ways to edit real estate photos to boost property sales to help you get started:

    Adjust Light

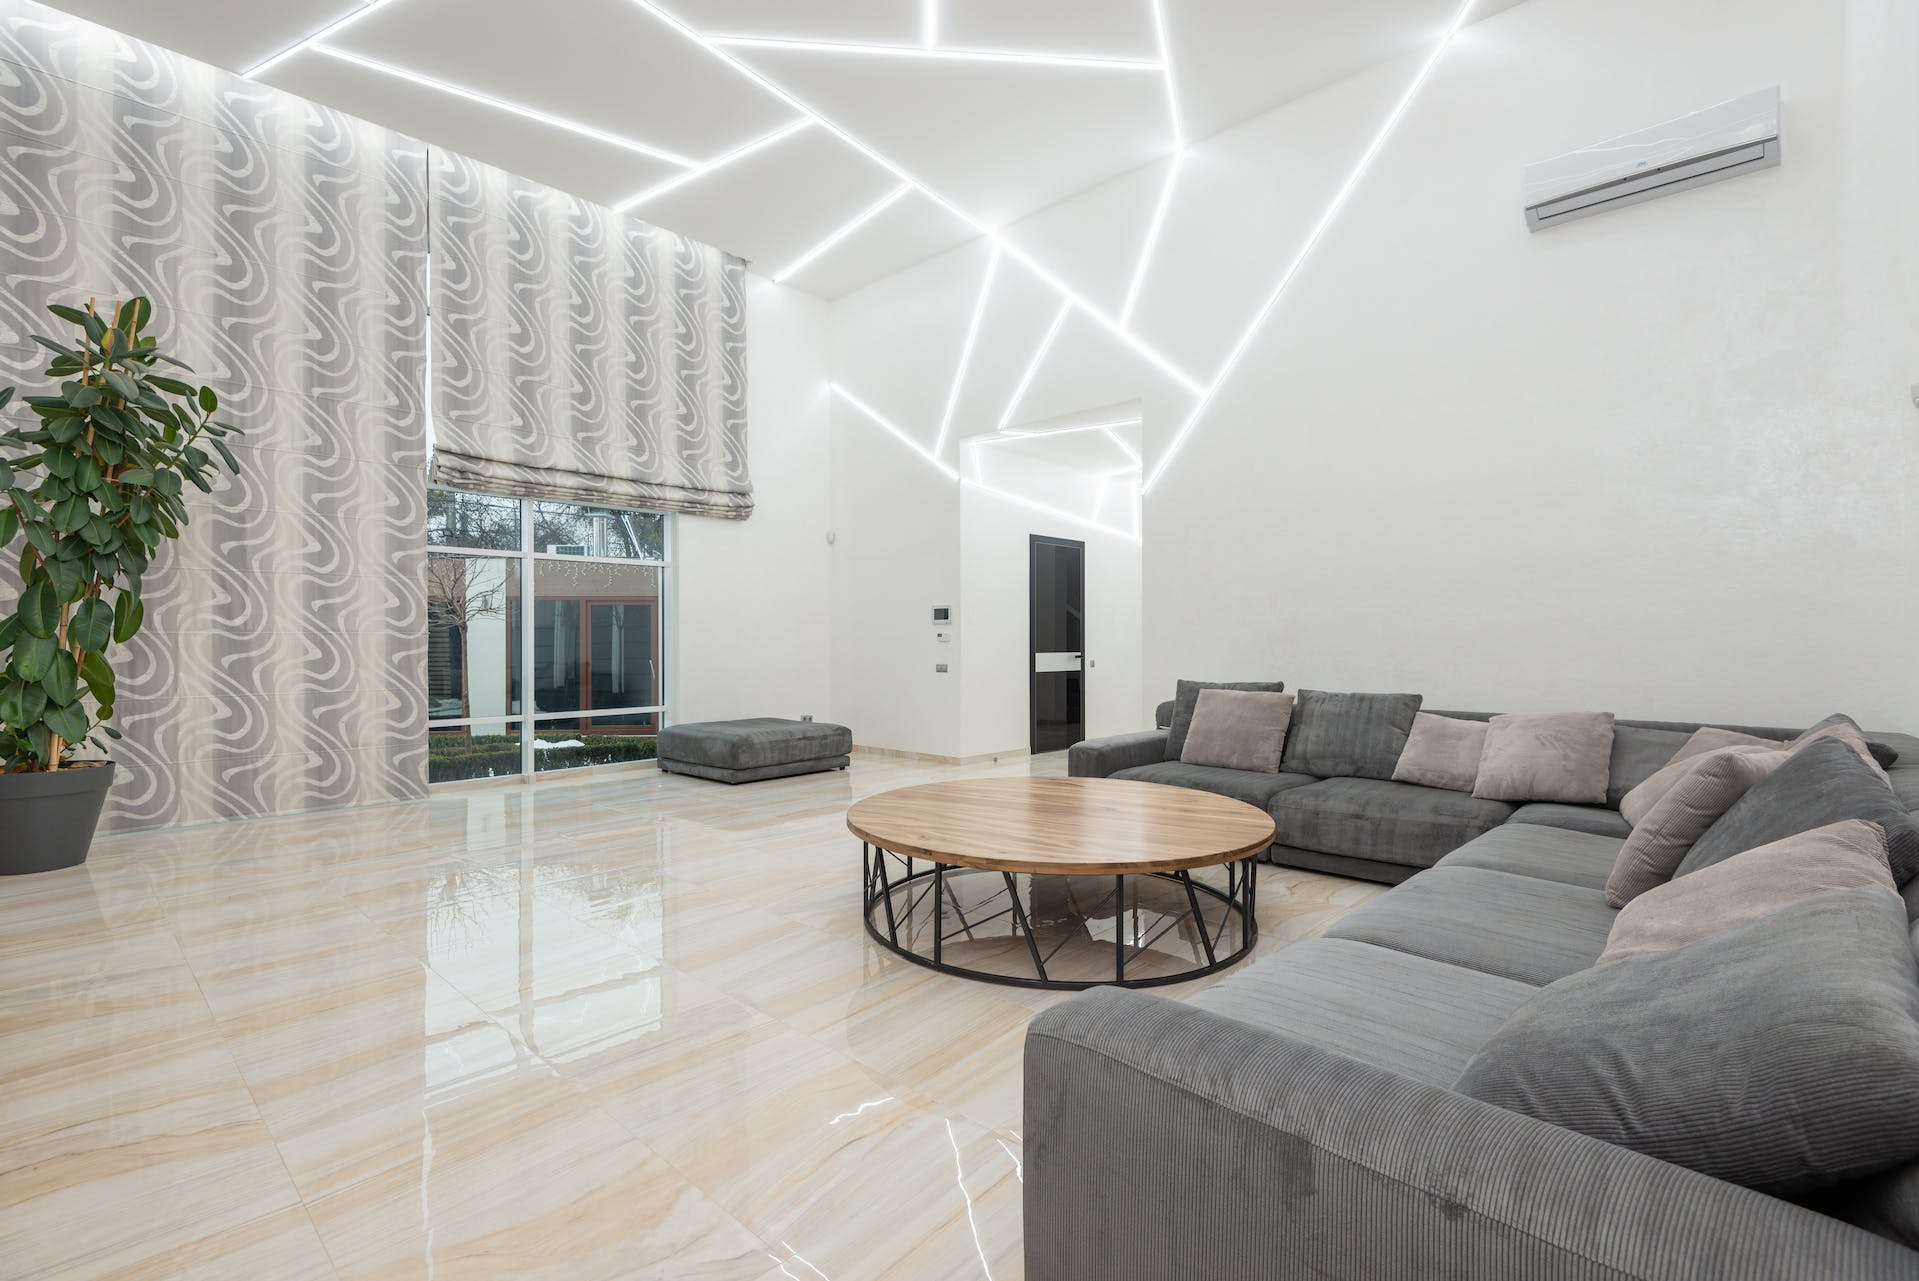
    The clarity and lighting can immensely affect your ability to show off your home. Even if your living room has state-of-the-art technology, you can’t expect your photos to boost your sales if the image is too dark. If you want to know how you can attract real estate sales, start by adjusting the lighting in your photos.

    Aside from lighting up the entire room when taking photos, use editing software to lighten up specific dark areas. Editing software, like Lightroom and Photoshop, can come in handy, especially when you’re shooting without any natural light. Only use vibrantly-lit photos as a marketing strategy for advertising the property, as these will attract viewers to look deeper into the objects in the image.

    Contrast Color Hues

    Another answer to the question of “how can I increase property sales?” is to contrast color hues in your photos. Colors help you communicate with potential buyers and encourage them to draw more attention to the subject of your image. Potential buyers often look for neutral colors when checking real estate photos, especially when looking at the interiors. To contrast color hues successfully, aim to create a cozy feel by using warm tones when editing your photos.

    Sharpen Details

    You can also boost property sales by sharpening specific details on your real estate photos. More often than not, you’ll have particular amenities in your room that you want to use as a marketing strategy for advertising the property.

    You can sharpen details on your real estate photographs by using the sharpen filter of Photoshop or blurring other information around the focal point. You’ll have several options to choose from, but make sure not to go overboard to avoid making your photos look hazy and uninviting.

    Remove Clutter

    First impressions do last, and seeing clutter in your photo is enough to turn off any homebuyer. Clutter can make your home look small and cramped in photos, and these don’t appeal to any homebuyer. Using clutter-free images should always be part of your real estate marketing plan for sellers!

    If you want to remove clutter from your real estate photographs, use the Clone Stamp tool from Photoshop that enables you to paint one part of an image to conceal unwanted objects or details in the photos.

    Sky Replacement

    Since the exteriors of a home significantly affect its curb appeal, it’s also essential to make sure photos taken from the outside look good. You’ll have difficulty convincing homebuyers to invest in your property if your exteriors look dull and old.

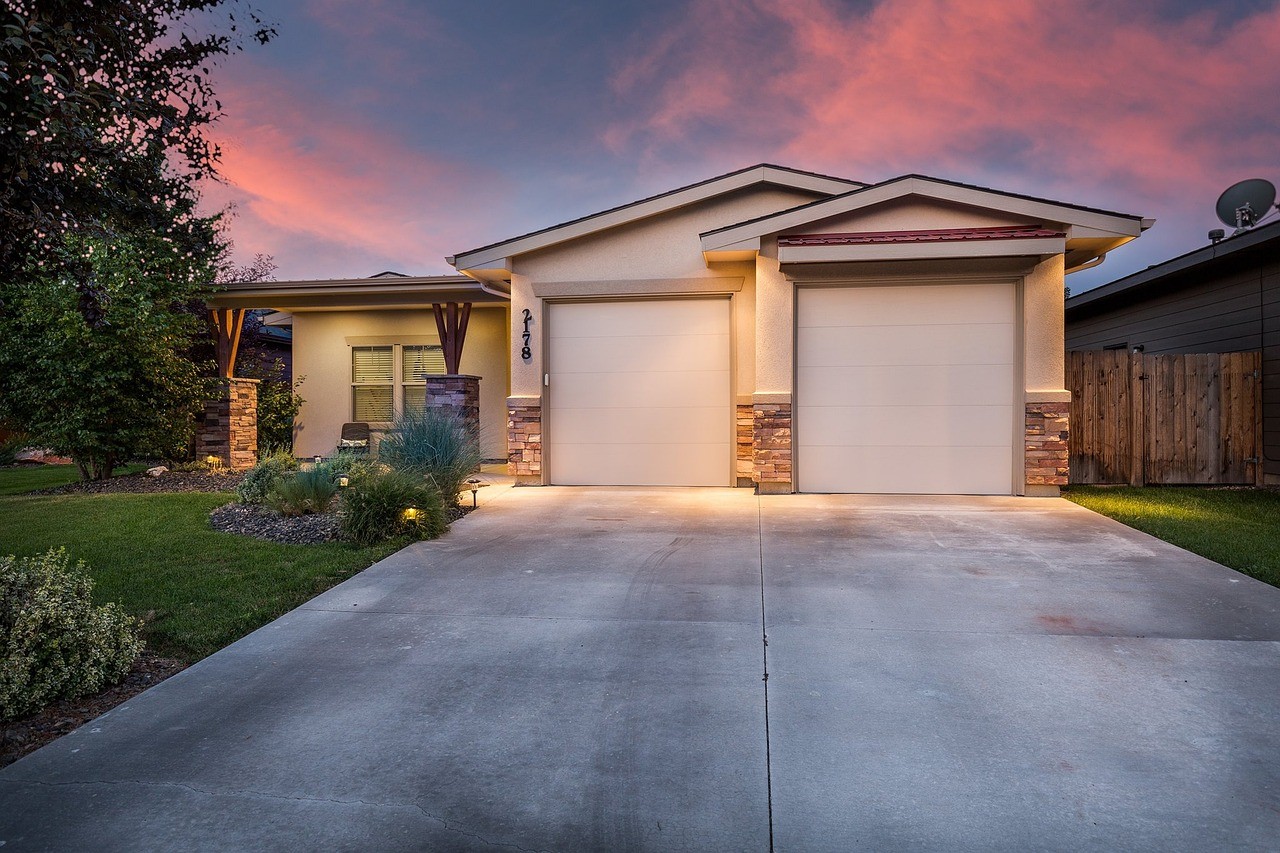
    Making use of sky replacement editing techniques is an excellent way on how you can attract real estate sales. With this feature, you can make the sky come alive in your photos as if you took them during bright and sunny days.

    Photo Manipulation

    Does your grass have varying shades of green? Are you worried that potential homebuyers will notice your dull-looking den in photos? Regardless of how your home looks, photo manipulation is a great tool to enhance the colors or add details to your photos. With this feature, you can use one shade of green to your grass, so your lawn looks more polished or adds some nice flames in your den.

  • Best Reasons Why Photographers Should Outsource Their Real Estate Photo Editing

    Best Reasons Why Photographers Should Outsource Their Real Estate Photo Editing

    Photography is a multifaceted discipline, and several industries have their own sets of standards and practices. Therefore, if you’re a photographer trying out real estate for the first time, you might want to consider outsourcing the post-processing to professional real estate editing companies like Phixer.

    You might be wondering what outsourcing is and why you should outsource your listing images to a real estate photo editor. Here is the definition of outsourcing and several reasons why you should outsource your real estate post-production:

    What is Outsourcing?

    Outsourcing is the practice of hiring or contracting an external party to administer business services, processes, or produce goods. Most companies outsource their staffing, customer support, manufacturing, retail, and other business functions. This practice is necessary for businesses, especially those with various project-based or ad hoc service requirements.

    Why Should Photographers Outsource Real Estate Editing?

    People often have the misconception that outsourcing automatically means offshoring. That’s not necessarily the case, especially when specialist companies are concerned. Outsourcing involves a broad scope of remote workers dedicated to assisting your business needs.

    Here are some advantages of outsourcing real estate photo editing:

    1. Mastery and Quality Control

    The most apparent reason you should outsource to a real estate photo editor is the industry-grade editing style. Professionals who specialize in a specific industry have more knowledge than generalists. For example, a real estate photographer would know more about property photos than a wedding or events photographer.

    There are editing services that are distinct to real estate, primarily due to the nature of the business. You can benefit from their years of experience as information and processes constantly evolve within the real estate industry. Some of the real estate-specific editing services include:

    • Virtual staging
    • Commercial real estate videos
    • Decluttering or unwanted objects removal
    • Twilight or dusk edits
    • Indoor/outdoor properties

    While most real estate photographers can handle some of the necessary edits, a busy photographer may miss a few features. The reputation of the company or freelancer is essential in a specific sector; therefore, you can guarantee that each output has gone through extensive quality control.

    2. Equipment

    Like photographers, post-production teams also have special tools and software to process photos for real estate listings. Some of the equipment may be too expensive, especially for occasional use. As an alternative, you can hire a person or company that already has access.

    3. Speed

    A photographer is often busy between shoots, post-production, and project coordination. Outsourcing your real estate photo editing allows you to save time on one process and concentrate on other areas of your business.

    Most companies offer a 24-hour guarantee, which automatically cuts your turnaround time by at least a day. Phixer allows you to upload and outsource images with a faster turnaround time.

    4. Holistic Profits

    Profit is arguably the most critical reason for outsourcing your editing needs. The great thing about outsourcing is that you can profit in both financial and time aspects. When we measure the resources needed for business, we often disregard time, which is more important than money.

    You get things done quicker when you commission your editing tasks to third-party companies, and this speed will enable you to accommodate more clients and clear your calendar faster. Aside from that, you can add profit on top of your photography talent fees.

    Final Thoughts

    Niche professions like real estate editing are easy to execute with enough time and experience. More often than not, it’s better to outsource your post-processes to experts, especially if you’re new to the industry or have limited resources like time and energy.

  • How to Make Images Look More Twilight for Real Estate?

    How to Make Images Look More Twilight for Real Estate?

    When it comes to real estate sales and marketing, the quality of your photographs plays a significant role. If you’re looking to elevate your property images and make them stand out, utilizing techniques like virtual staging, object removal, and digital twilight effects can be a game-changer. In this article, we will explore how to enhance the twilight atmosphere in your real estate photos and create a captivating twilight aesthetic that captures the attention of potential buyers.

    Twilight photo editing is the key to achieving stunning twilight imagery. By following a few expert tips and techniques, you can enhance the dusk or sunset vibe in your images and create a mesmerizing twilight look. Let’s dive into the details:

    Plan Ahead for the Perfect Shot

    Planning is crucial for capturing breathtaking twilight photos. Check the weather forecasts and choose a day with clear or partially cloudy skies, as this can enhance the twilight effect. Avoid shooting on days with rain or storms, as they can interfere with the desired lighting conditions. By selecting the right day, you set the stage for creating stunning twilight visuals.

    Embrace the Golden Hour

    The golden hour, which occurs shortly after sunrise or before sunset, is the ideal time to capture twilight images. During this magical time, the natural lighting is softer, warmer, and bathes everything in a golden hue. Take advantage of this period to shoot your photos and capture the enchanting lighting contrasts that define twilight.

    Master Your Camera Settings

    To achieve the perfect twilight look, it’s important to adjust your camera settings accordingly. Use a low ISO to minimize noise and ensure clean, sharp images. Opt for a wider aperture (lower f-stop value) to create a shallow depth of field, which adds a dreamy and romantic quality to your photos. Additionally, consider shooting in RAW format to have greater flexibility during the post-processing stage.

    Enhance Colors and Contrast

    During post-processing, you can enhance the colors and contrast to make your images look more twilight. Adjust the white balance to create a warm tone that reflects the natural lighting of twilight. Increase the saturation and vibrancy of the colors to bring out the richness of the sky and surrounding elements. By adding contrast, you can create a captivating and dramatic effect that highlights the different lighting intensities present during twilight.

    Graduated Filters for Dramatic Skies

    To intensify the twilight atmosphere in your photos, experiment with graduated filters. These filters darken specific areas of the image, such as the sky, while maintaining the correct exposure in other areas. By applying a graduated filter to the sky portion of your twilight images, you can enhance the colors, add depth, and create a visually stunning scene.

    Utilize Post-Processing Software

    Post-processing software, such as Adobe Photoshop or Lightroom, can be powerful tools for achieving a twilight look in your real estate photos. Experiment with adjustments like levels, curves, and selective color editing to fine-tune the atmosphere and overall aesthetics. These tools allow you to have complete control over the final result, enabling you to bring out the desired twilight vibe and create captivating visuals.

    Pay Attention to Composition

    Composition is key in creating a captivating twilight aesthetic in your pictures. Look for interesting elements within the frame, such as silhouettes of trees or buildings against the colorful sky. Utilize leading lines or framing techniques to guide the viewer’s attention and create a visually engaging composition. By carefully composing your shots, you can enhance the overall ambiance and create captivating visuals that draw viewers in.

    By following these expert tips and techniques, you can elevate the twilight atmosphere in your real estate photos and create captivating visuals that leave a lasting impression on potential buyers. Whether you’re shooting residential properties or commercial spaces, mastering the art of twilight photography can make a significant difference in the appeal and marketability of your listings.

    In conclusion, by understanding the techniques and nuances of twilight photo editing, you can transform your real estate images into captivating visuals that highlight the unique charm of dusk and sunset. With careful planning, shooting during the golden hour, adjusting camera settings, enhancing colors and contrast, utilizing graduated filters, leveraging post-processing software, and paying attention to composition, you can achieve a mesmerizing twilight aesthetic in your real estate photos. These expert tips will help you create stunning visuals that captivate viewers, increase interest in your listings, and contribute to the overall success of your real estate sales and marketing efforts.

  • How Expert Virtual Staging can Save You Time and Money

    How Expert Virtual Staging can Save You Time and Money

    Home staging is the art of improving the property and areas’ appearance to appeal to possible buyers. It’s one of the best photo editing for real estate techniques to highlight the property’s potential. Virtual staging, especially when done by professionals, delivers the best results.

    The process of real estate photo editing is an integral part of real estate marketing, so you should know the benefits beforehand. Remarkably, there are advantages, and this post will highlight those about time and money.

    Why People Do Virtual Staging

    The first question is why people use virtual staging in the first place. There are several reasons why property and home sellers use virtual staging before selling them online, mainly about saving time and money resources.

    Here are some of the reasons why people rely on professional virtual staging:

    • Privacy – most of the photos on listings stay there for an undefined period, which means it’s a security risk when you don’t stage the picture appropriately. People will see private information or house layout before the site visit.
    • Aesthetics – virtually staged photos look better than their unstaged counterparts. You can add furniture or decorations to any room without spending more money.
    • Targeting demographics – part of real estate marketing is knowing your target audience and profiling which people are more inclined to purchase your house or property.

    Expert virtual staging through a professional real estate editor can save you time by:

    How Virtual Staging Can Save Time

    Letting the clients experience the home before a site visit

    Clients are inclined to invest in potential rather than absence thereof. One of the essential benefits is giving clients a sneak preview before visiting. Eight out of ten agents claimed that virtual staging made the purchasers visualize the listing as a potential homestead.

    Professionally-done virtual staging as part of photo editing for real estate will result in a better experience for the client since they’ve already seen what they want and know how to achieve them.

    Listings sell faster

    The ultimate goal of photo editing for real estate is sales, and virtual staging is known for improving selling rates. Faster turnaround saves you time because you don’t have to wait longer, and it’s a good key performance indicator of a successful campaign.

    You should hire a real estate editor with an eye for the market, especially one as competitive as real estate. You will find that real estate listings sell faster when the virtual staging team knows what it’s doing than those without real estate marketing backgrounds.

    Flexible in your offers

    One property has the potential to target multiple demographics, and efficient real estate photo editing allows you to stage them in various ways. The flexibility will enable you to save time by digitally composing the property differently for each demographic instead of having dedicated shots or staging done.

    The versatility is a time-saving feature, allowing you to target different listings and present the same property in multiple ways. Your property is more likely to be sold when you talk to several demographics simultaneously.

    Credibility and reliability

    Potential clients are more likely to work with you when you have high integrity and credibility. One key benefit of virtual staging is promoting your property’s credibility and reliability metrics. Most customers will likely dismiss an agent’s reputation if the property photos are unkempt and not up to standards.

    Professionally-done virtual staging can save you money by:

    How Virtual Staging Can Save Money

    Cuts losses brought by prolonged unsold listings

    Properties that are unsold for a long time will eventually lose their value when clients finally come to visit due to limited upkeep and maintenance. The property owner will need to shoulder costs to keep it in tip-top shape, and agents will only have their commission later.

    A real estate agent’s goal is to limit the cost of keeping a property listing on the market to demand excellent compensation from the homeowner, and that’s where photo editing for real estate comes into play.

    Improves selling price

    Aside from ensuring the property is sold fast, virtual staging benefits the seller by improving the selling price. According to data, one out of five agents reported an increase in the staged home selling price by up to 5%, which means that a $400,000 property could potentially get up to $20,000 just because of practical real estate photo editing and virtual staging.

    An improved selling price means you will get a higher return on investment (ROI) if you sell the property as part of your asset portfolio. ROI directly translates to profit and allows you to invest in more properties.

    Spending less money on promotions

    Outstanding real estate photos are attractive, but virtually staged ones will attract the people who are most inclined to purchase the property. You won’t have to spend on promotions and marketing gimmicks when your photos will speak for themselves.

    Virtually staging your photos is an excellent investment, especially for slow-moving properties and listings. By spending less on promotions, you can focus on beautifying the property and taking care of the potential client.

    A fraction of an actual staging’s cost

    Staging is considered an essential part of real estate promotions. One of the key benefits of virtual staging, instead of traditional home staging, is the cost of completing one photo compared to staging the room with new furniture or remodeling.

    The digital enhancements cost less than new fixtures, wall paint, and decluttering expenses, which is a good deal if you don’t plan on selling the house to include the new furniture.

    Final Thoughts

    If you find yourself with slow-moving properties, consider getting it staged virtually. Every real estate editor wants to create the best possible listing images for quick turnovers. Agents, sellers, and event buyers will benefit from professionally-made staged photos.

    Phixer’s real estate photo editing service allows you to improve the image quality and promote the property. You can even utilize virtual staging for photos that professionals didn’t take, improving the chances of sales.

  • How to Make Real Estate Images Have A Stronger Twilight Effect

    How to Make Real Estate Images Have A Stronger Twilight Effect

    Real estate sales and marketing efforts significantly rely on the quality of your photographs. Utilizing a proven and tested technique–virtual staging, object removal, digital twilight effects–to elevate your property images can be a game-changer when it comes to selling homes.

    According to the National Association of Realtors, virtual twilight can sell old listings or improve listing performance. If you have a difficult time getting traction on your listing, you may want to add a virtual twilight image..

    Check out a few pointers on how to maximize twilight imagery in your listings below.

    1. Plan ahead

    Preparing for the photography session is the first step in capturing a stunning twilight image. Real estate photo editing companies can create virtual twilight from standard or ordinary pictures, but the way you shoot your photos may impact the final result.

    Here are some of the considerations for the perfect twilight photo:

    • Bring your DSLR camera/s, lenses, filters, lights, tripods, and other equipment. You won’t know which ones you need until you get to the site.
    • You should plan your day, checking the weather forecasts for the possibility of rain or storms. It would help if you shot during sunny or cloudy weather with minimal interference.
    • Check the property lighting in advance. Some houses may not have matching lights or complementary to the twilight effect you want. To be safe, test your filters with the existing lighting.

    2. Turn on the interior and exterior lights

    The best virtual twilight photos will come when you utilize all interior and exterior lights. The key to that special twilight effect is contrasting the dimming surroundings with bright interior lights to create a unique glow and ambience.

    The various lighting produces different colors and shades in your photo. If you’re not able to capture images with lights on, utilize Phixer’s virtual twilight product. Phixers editors will digitally alter the lights in the image, so they appear to be on.

    3. Use a tripod

    Professional real estate photographers will always use a tripod, this allows for multiple shots, ambient and flambient, to be steadily captured. You may need to combine two or more layers depending on your goals for the final product. With a tripod, achieving that beautiful result–and a beautiful twilight–is much more attainable.

    4. Utilize a flash shot

    Implementing a flash shot means that you can edit the photos more realistically. Flash shots bring in intense light and help show the true colors of the home. This is helpful with virtual twilights if there is insufficient lighting.

    5. Wait patiently and shoot

    The golden hour is the perfect time to shoot images for twilights. As the sun starts to set, you will see the different lighting contrasts in the photo. Decide how to frame the picture, and don’t move the camera until you get the perfect shot.

    Shooting twilight real estate photography differs from standard daylight shots because it’s very time-specific, unlike traditional real estate photography, where you move around the property and take many photos. You have a very short window of time to get the perfect shot.

    6. Color Correction

    You can also make images look more twilight in post-production with color correction or color balancing. Some parts of the property lighting may look different from others, and you can fix them in Photoshop or Lightroom.

    Bottomline

    It is not always possible to capture the perfect in-person twilight shot, which is why many photographers are opting for a virtual twilight instead. Virtual twilight has been developed to enhance property appeal and interest, without having to wait until sunset to capture the shot. Whether you offer your client a virtual twilight or in-person twilight, the final result will always impress the viewer!

  • Effectively Using iPhone 14 to Take Professional Real Estate Photos

    Effectively Using iPhone 14 to Take Professional Real Estate Photos

    Digital technology has significantly improved how we do things, from photography to real estate video editing. Before smartphones, taking great images took a lot of time and effort to share pictures online. Nowadays, bringing hefty cameras and lenses is a burden due to their size and weight. 

    The newest iPhone 14 captures high-quality photos and does your real estate editing so that you won’t need cameras or laptops! For best results, you can have professionally-done photo editing to complement the work you’ve done so far.

    [lwptoc]


    These are pointers on how to produce great real estate images with your iPhone 14:

    1. Make use of natural light

    We’re all aware that we need light to shoot images. If you want to snap photographs outside during the day, you may feel that light is the least of your problems. While this is somewhat correct, natural outdoor lighting impacts the photograph’s overall aesthetic, especially in real estate photo editing

    Natural light has various properties; it may exude warm or chilly tones or mild or harsh. While you can edit the tones and lighting in Photoshop, your photography can benefit from excellent use of natural light, especially for outdoor shots.

    External circumstances like the weather and the time of day determine the light quality. With the iPhone 14, taking photos with natural light is recommended, and it avoids being over-exposed (just like when using flash). The iPhone 14 gives the feeling of having its own real estate photo editing service. 

    2. Maintain your grip

    Having steady hands is crucial when taking photos because it helps prevent blurry images and allows you to have the best quality ready for real estate photo editing. iPhone 14 has camera stabilization called Optical Image Stabilization (OIS).

    If you are not using a tripod, you can tuck your elbows in for balance and use two hands to capture photos. You may also adjust your shutter speed to your desire for finer images, especially when you’re preparing for real estate editing.

    3. Look for diverse viewpoints

    Taking photos from the same angle may look dull. Capturing pictures from different angles will significantly help you when using real estate video editing. Your potential customers will be more excited to view the property as it captivates them.

    The most basic angles you can try are: 

    • Standing Level
    • Wide-angle property shot
    • High Angle

    Don’t worry if you cannot perfect it on your first try. Practice your angle shots, and you can get the hang of it over time.

    4. Take note of your image composition

    Every space is unique, and there is no set formula for filming on location. The most straightforward technique to get the finest composition for your photograph is to stroll around and determine which perspective points are appropriate for the particular room before real estate editing

    Typically, the most fantastic spot to put up your tripod is from the corners or from an angle that best conveys the space. A professional would snap shots from more than one vantage point so that the chances are in their favor when they look at their images in post-processing.

    5. Use the zoom function

    The current iPhone 14 Pro camera zoom is the best it has ever been. For the first time, Apple offers 2x and 3x optical zoom. To zoom in and out, pinch the screen. After determining the best perspective and focusing on the property, you can zoom in to make the property’s details more evident and distinct, even without a real estate photo editing service.

    6. Check out the Live Photo option

    With Apple’s live photographs, you can easily capture the perfect shot for your real estate photo editing service. They put your images to life by converting them into gif-like 1.5-second films that capture the moments before and after you take a shot.

    Instead of a single static image, it records real-life movement and background sound, allowing you to select the perfect moment in time for your finest photograph and best viewpoint of the property.

    7. Return to the same area at various times of day

    Because of the iPhone 14’s excellent low-light capabilities, you can capture shots outside midday and not compromise the quality of real estate photo editing. Sunrises and sunsets are often darker, but they may reward you with gorgeous sky colors and fantastic lighting contrast.

    If you have additional time, it’s worth doing a twilight shot at least once for the property, and this will set your photographs apart from those of other real estate brokers.

    8. Crop your images for better results

    You may take an image and then discover anything in it that you wish to trim out. A simple real estate photo editing will do the trick. To utilize the Crop function, open the image from the camera roll and click Edit. The crop tool is located at the bottom. Click on it, and then move the image’s sides or corners to anywhere you like. Suppose your horizon is skewed; spin and straighten it with two fingers. Alternatively, you may use the dial just below the image.

    9. Create videos

    These days, potential buyers want to see the property, so most sellers create videos like a house tour. Real estate agencies who use video listings on their websites receive 400% more leads than those who do not. According to a recent poll (National Association of Realtors), 73% of sellers prefer to list with an agency that employs video listings. real estate videos may only deliver a wealth of information.

    Customers may view room size, location, floor layout, and other property aspects without extensive research. It also makes sense to develop a teaser video to captivate and show them its benefits. Luckily, the iPhone 14 can capture superior videos and prime settings for your real estate video editing.  

    Bottomline

    The iPhone 14 provides options on how you want your memorable photos to be. It offers a variety of set-ups for your real estate photography essentials. It is user-friendly, and this guide will help you get more property leads.

  • 10 Useful Tips on Starting a Real Estate Virtual Staging Business

    10 Useful Tips on Starting a Real Estate Virtual Staging Business

    Information technology makes everyday transactions faster and better. Several industries are steadily migrating into the digital space, and real estate is no exception, as more people are relying on the Internet to bring solutions to their problems. Recent statistics say that most buyers find their next home online.

    Therefore, with the ever-increasing real estate market demand in the digital space, it’s a great time to start a virtual staging business and help home sellers attract potential buyers. This post will talk about helpful tips entrepreneurs can do to get started.

    [lwptoc]

    Real Estate Virtual Staging

    You may ask yourself, how do I start a virtual staging business? The simple answer lies in knowing what you want and finding ways to achieve them. The real estate industry has an increasing need for graphics, creatives, and marketing businesses.

    There’s no denying that the digital space has opportunities and potential clients. A 2021 study by the National Association of Realtors found that for real estate, in particular, 41% of home buyers decided to look at properties online, and 95% of home buyers used online tools to search.

    Here are some of the essential tips on establishing a real estate virtual staging company:

    1. Check for demand

    Your business will aim to supply a demand, so you need to know who will be giving your profit. Before you start a staging business, you need to survey if there’s a market for the service or products you plan to offer. You can ask people in the real estate industry and those looking to buy or sell properties in the future.

    There are many ways to look for demand. For example, you can do an informal survey asking how they edit real estate photos and give hypothetical offers of $50 virtual staging or a $75 total package. Your respondents will provide you with an idea of their needs and budget.

    2. Plan ahead

    After establishing product or service demand, the next step is to set up a business plan with objectives, strengths, weaknesses, opportunities, and threats (SWOT) research. Your company’s long-term and short-term goals will serve as a map that guides your entire journey as a virtual staging business.

    Here are the steps on how to write a business plan:

    • Construct an executive summary. You write this last, but this goes on the first page.
    • Create a company profile describing your establishment.
    • Write down your long-term business goals.
    • Talk about your products and services in as much detail as possible, including pricing and packaging.
    • Outline a sales and marketing plan.
    • Make a business financial estimation to generate projections.
    • Add attachments, research, and case studies in the appendix section.

    Your objectives should be specific, measurable, attainable, realistic, and timebound (SMART). For example, you want to earn a net profit of $500 in revenue within the first month of operation by offering 50 virtual staging photos at $18.

    The SWOT analysis offers insight into your advantages, disadvantages, competitors, and openings. You can strategize your services, pricing, and operational frequency on this information.

    3. Find the right talent

    You may wonder, how do I start a virtual staging business after the planning stage? The next step is finding suitable people to help with business operations, client management, and creative execution. You won’t get started or scale successfully without the right people on your team.

    You can get a recruiter or agency to help you get the right help. In the meantime, you can outsource your needs to a company that offers the same services.

    4. Use virtual staging software or apps

    If you don’t have an entire artist team or can’t afford to hire an internal team, you can start by familiarizing yourself with virtual staging apps. These applications will show you the different standards from other staging companies. Aside from that, they could help you with your actual output.

    Virtual staging applications and programs allow you to edit real estate photos quickly without the help of graphic designers. Because these are often automated or pre-made, they may not look realistic, so hiring professionals is still better for long-term success.

    5. Cultivate partnerships

    There’s a saying that no man can survive alone, which also applies to businesses. Companies can’t make all sales, marketing, and executive functions without the necessary expenses. Partnerships allow your business to operate on x-deal or service exchange instead of cash payment to prioritize your capital on other efforts.

    For example, suppose you’re starting and have a great lead generation system. In that case, you could outsource part of your business process to an external company in exchange for your expertise.

    6. Build a sales funnel

    The next step is creating a sales funnel. Don’t start a staging business without considering the clients, which means making a funnel for your potential clients. It will act as a collection to conversion method based on the Attention, Interest, Desire, Action (AIDA) model that taps into the consumer’s mind.

    Here are some sales funnel tips:

    • Build a company website and social media profiles.
    • Post relevant topics to generate leads.
    • Create attractive images and offers.
    • Give discounts, freebies, and incentives for trying your products or services.
    • Have clients book a free consultation or call so you can pitch how you can help them.
    • Retain the client with excellent customer care and assistance after availing of a product or service.

    Outline the demographic profile to make the correct funnel for your virtual staging business. Creating the funnel will let you maximize every opportunity so that you don’t waste any time, effort, or money in the process.

    7. Improve current offers

    There are hundreds of agencies offering almost the same products and services. Your firm will stay competitive by updating and modifying offers from time to time. Customer satisfaction is a top priority for every successful company, so you must work on your retention and sales methods.

    8. Add in-demand complementary services and products

    Upon conception, when you ask how do I start a virtual staging business? You are only thinking about the opening steps. The next factor is upselling your current requests with other complementary services to increase profits and give you a competitive edge.

    For example, offer discounted image decluttering, lawn removal, copywriting, or virtual twilight with your virtual staging service. Finding ways to serve your clients better than competitors will ensure high profits, retention, and scaling.

    9. Invest in marketing efforts

    Solid branding will make the customers come to you, and that’s where marketing comes to play. Create an excellent identity that clients will recognize and patronize, then ramp up your lead generation and exposure with social media efforts.

    However, some businessmen don’t understand the value of marketing, so you mustn’t make the same mistake. You need to finance marketing efforts with a budget of around 1 to 5% of your expected revenue. It may be better to have a dedicated marketing team.

    Here are some marketing efforts that new small businesses can make:

    • Email marketing via newsletter campaigns
    • Organic social media efforts and advertising through Facebook, Instagram, Twitter, Linkedin, and Tiktok. Each platform caters to different demographics and markets.
    • Free ebooks and coaching
    • Google My Business and Adwords
    • Content marketing
    • Search engine optimization (SEO)
    • Use chatbots for social media platforms and your website
    • Offer free consultation services
    • Traditional media advertising if you’re a solid local business hoping to get customers in your city
    • Write articles on other websites or blogs
    • Attend mixers and functions for potential partners or clients

    Marketing can help you spend less time finding customers and letting them pursue you instead. Marketing works hand in hand with your sales funnel, so you should strategize your campaigns accordingly.

    10. Maintain good relationships with your network

    Every successful virtual staging business has excellent relationships with partners and clients. People are likelier to recommend companies that have given them terrific service on top of a fruitful collaboration, so be sure to invest in reliable customer service.

    Always ask for feedback or testimonials after every project. Reviews will help you learn how to service your clients better and improve your output standards. Aside from that, those opinions will make other people trust your services enough to try them themselves.

    Therefore, you should keep close tabs on your previous clients, networks, and connections. Send them emails or messages from time to time to maintain that rapport. Invest in automated emails as you grow your client base.

    Bottomline

    A real estate virtual staging business is a promising endeavor with high demand. As long as you set the proper foundation, you don’t need much entrepreneurial experience to start a staging business with impressive lead generation, marketing, and client care skills.

    The competitive real estate photography post-production services are cutthroat, and you don’t need to find graphic talent immediately. Once you partner with reliable service providers like Phixer or other real estate editors, you will gain confidence in your quality and client retention ability.

  • How to Stage Your Rooms for Amazing Virtual Staging Results

    How to Stage Your Rooms for Amazing Virtual Staging Results

    Real estate marketing is quickly evolving, with consumers finding multiple options with a few clicks and taps. Digital listings and social media platforms have made finding, buying, and selling real estate properties both easier and harder at the same time. More effortless due to the convenience of seeing all the offers without leaving your home, yet more challenging because several prospects are readily available.

    Real estate agents compete on several listing websites and turn to experts for help. Virtual or digital home staging is one of the proven conversion methods of real estate marketing. This blog post will discuss virtual staging and how you can prepare your property for a photoshoot.

    [lwptoc]


    However, people ask how to do virtual staging without knowing why they have to do it. Before telling you how to set and style your home for a pre-virtual staging photoshoot, we’ll answer that question first.

    Why You Need to Stage

    Virtual staging is one of the many creative ways to present your real estate property to potential customers or buyers. Similar to showroom techniques developed by real estate companies, virtual staging reimagines a room, home, or property according to the target audience or demographic.

    Digital staging is more cost-efficient than showroom decorating or actual home staging because you don’t have to buy new furniture or remodel the rooms. The cost for virtual staging is merely a fraction of what developers used to spend for illustrative home constructions. The next question would be, “how do you do virtual staging effectively?”

    There’s an art to perfecting virtual staging. For starters, you have to prepare the spaces for the shoot. After which, you must find the perfect editor, app, or software to bring your virtual staging fantasy to life.

    Preparing for Virtual Staging

    You should design the entire virtual staging look before you take photos of your property. You need to know how virtual staging could affect your target buyer markets. The guiding principle is to reduce the amount of editing on the digital stage.

    Here are some ways to plan for virtual staging:

    • List down your property’s and neighborhood’s best features. Those qualities will be some of the many reasons your client will purchase that property. Those features will reflect the possible demographics, so ensure you take note of them before your virtual staging.
    • Set a target demographic and create a buyer profile. Would your potential buyers be male or female? Would they be living alone or with family? Would they need space for a home office? Would they prefer a furnished or unfurnished home?
    • Find inspiration online. It would help to know specific pegs before doing a photoshoot. This method would also improve your chances of getting the results you want when sending your raw images to professional real estate editors.
    • Suitable photography equipment. You may opt to hire a real estate photographer or do it yourself with proper guidance from the virtual stagers. Either way, you need to include equipment in your plan considerations.
    • Find a virtual staging company. You should know who will do your virtual staging as early as the planning stage. It would help if you knew how to do it yourself, but plenty of virtual staging companies are available online.

    Once you’ve mapped out what you want and how to achieve them, it’s time to prepare the photoshoot areas appropriately.

    Rooms to Stage

    Prioritize the spaces you need to shoot because you won’t have the time or energy to do everything. You don’t need to orchestrate the entire house since your target market is more inclined to look at critical areas rather than the whole property or home.

    prepare room for virtual staging

    According to the National Association of Realtors, these are the areas you need to stage for real estate listings in order of importance:

    1. Living room or receiving area
    2. Master bedroom or the largest bedroom
    3. Kitchen or pantry
    4. Dining area
    5. Outdoor or yard
    6. Bathroom or comfort room

    Targeting specific parts of the house will improve your chances of landing a client from the listing alone. However, you also need to prepare even the rooms you’re not planning to style since you may get potential visits.

    Photoshoot Preparations

    After planning it all out, it’s time for the nitty gritty. You need to prepare the rooms and areas you want to stage for the shoot, whether you’re doing photoshoots yourself or employing the help of professionals. Physically preparing the spaces will lessen the time needed for virtual staging edits or reworks.

    Here are some of the ways to visually orchestrate the rooms for virtual staging:

    General

    Clean the house as much as you possibly can. Even if you can virtually edit items and furniture, you should declutter the area to ensure a smooth virtual staging process. Trash and other unwanted objects would cost extra to remove during the virtual staging process; they may interfere with lighting and cause awkward shadows in post-production.

    There are ways how to do virtual staging, effectively clearing things, but you should still remove personal effects and decor.

    Indoors

    Do a quick inspection of every room in the house to determine the ones you can submit for virtual staging and those you can do minor edits on. Remember that even when you put an image through post-production, your listing photo shouldn’t look too fake, or it may put off potential buyers.

    Here are some of the tasks you should do before the pre-virtual staging photography session:

    • Remove personal items and effects, especially photos or portraits.
    • Clean and scrub the floors.
    • Check and repair the walls.
    • Rearrange the furniture to open up the space.
    • Open or remove the curtains to expose the windows to full sunlight.

    The indoor preparations often involve removal rather than replacement because the edits usually take care of adding items. You should clear the space by creating a blank canvas for your virtual staging.

    Outdoors

    Check the curb appeal since most people click on a listing with an attractive overall appearance. Aside from that, it would help if you also prepared your outdoors for a possible potential buyer visit since first impressions last. An excellent first impression could be the defining factor between an almost-purchase and a closed deal.

    Here are some of the preparations you need to do on the property’s surroundings:

    • Trim the bushes and mow the grass.
    • Clean the pavement and walkways.
    • Repair the cracks or faded paints.
    • Inspect and fix the roof.
    • Rake and clear the leaves.
    • Arrange the plants and flower pots.
    • Repaint the front door and porch if needed.

    Most people don’t virtually stage outside their property unless through lawn replacement or virtual twilight, but it may end up looking disappointing when the potential buyer finally tries to visit.

    Camera Settings

    Employ a Digital Single Lens Reflex (DSLR) High Dynamic Range (HDR) camera with a feature of bracketing exposure to prepare for virtual staging. The camera does half the work, so it should be suitable for the planned post-production treatment.

    camera settings for virtual staging

    Here are some important reminders when shooting photos before virtual staging:

    • Shoot in landscape.
    • For indoors, the room should take up 2/3, and the ceiling should be 1/3 of the picture.
    • Use minimum 18mm and maximum 200mm lenses, and avoid stylized, distorted, or warped ones.
    • Make use of HDR at different exposure levels.
    • Use external lighting instead of the built-in flash unless you want rigid shadow effects for virtual twilight.

    If unsure about your camera settings, do test shots on specific areas with your tripod to estimate how each space would look.

    Time Your Photoshoot Perfectly

    For real estate photos in general, you should target the time closest to noon or the hour that the sun is at its highest or brightest in the sky. The sun’s natural lighting will improve your image’s post-production results. Taking indoor photos with a bright sun will also cast dramatic shadows and make the room look wider.

    Influencers on Instagram are obsessed with the golden hour, the sweet spot, an hour before sunset, or the hour after sunrise. The golden hour is excellent if you plan to do twilight shots and create an eye-catching and picturesque main listing photo. Just be careful that you don’t underexpose your photo’s lighting during this time.

    Make Sure Photos are in High Quality

    Finally, you should use high-quality raw photos, especially when planning to stage them virtually afterward. The high definition would improve your image in the final photograph, and it’s easy to adjust natural pictures in HD than in lower ones.

    Having low-quality photos would interfere with how you do virtual staging, mainly because anything externally rendered or added would look fake on your real estate listing. Aside from that, sending over low resolution would result to even lower resolution after edits.

    Bottomline

    These days, you can tell how virtual staging affects the real estate buying market, with 95% of buyers browsing through online platforms and 40% of buyers setting appointments after seeing homes staged virtually. Professionally-made real estate virtual staging images are gradually becoming part of real estate marketing standards, and Phixer offers high-quality outputs for attractive listing photos.

  • How is Photo Manipulation Different or Similar to Photo Editing?

    How is Photo Manipulation Different or Similar to Photo Editing?

    The onset of digital technology has forever changed the way we process photographs. The days of processing images through films in darkrooms are over, as Digital Single-lens Reflex (DSLR) cameras have become the standard for photography. Computer programs and phone apps have also improved how quickly people can communicate, send or show pictures.

    Photo manipulation and editing have also progressed with digital cameras, as most real estate post-production companies would only take a few days to accommodate your order. There are differences in how various companies treat real estate photos, whether through manipulation or editing.

    When hearing about the different post-production methods, you may wonder, “Are photo editing and photo manipulation just the same?” Read on to learn more about the differences and similarities between photo editing and photo manipulation.

    Photo Manipulation

    First off, what is photo manipulation? Photo manipulation is the alteration or improvement of a photo by adding, replacing, and transforming various elements in the photograph. The modification could be as minor as replacing the sky or something significant, like creating new objects or features from scratch. These changes could be subtle or glaring depending on their purpose and creative vision.

    The best photo professionally-done manipulations look as natural as possible, using elements that one would typically find in such environments. In real estate photography, innovative post-production techniques like creating twilight, replacing lawns, or virtual staging can be considered photo manipulations depending on the project specifics.

    Let’s define photo editing before going into the similarities and differences.

    Photo Editing

    Photo editing is post-processing an image through software or program to enhance, improve and adjust the visual effect. Photo editing involves a wide range of tonal, brightness, contrast, shadow, spot, hue, tint, color balance, and other adjustments to help achieve your vision.

    Current technology makes photo editing so readily accessible that you can even do it on your smartphone. Most phone apps have preset hue, tint, color, or saturation filters that accomplish specific looks or moods that are impossible to set on a camera.

    At this point, you may wonder, “how do you differentiate photo manipulation from photo editing?” If you want simple terms to help understand the difference, photo manipulation means creation, while photo editing implies improvement.

    Differences

    Most people consider any post-production treatment photo editing, especially with flawless professional photo manipulations. There’s also a taboo regarding photo manipulation since people often expect pictures to be realistic rather than stylized.

    Here are some of the critical differences between photo manipulation and photo editing:

    Raw image elements

    If you want to know what is the difference between photo editing and photo manipulation, the first answer is straightforward: the original image elements. If the original image is an exact copy of the treated image but has a different lighting or color balance, it falls under photo editing. Photo editing doesn’t change what’s inside the photo since it only adjusts the lighting, colors, mood, or temperature.

    Photo manipulation alters reality. In the case of real estate photography, you may need photo manipulation to remove trash or unwanted objects in the background that your photographer missed during the shoot. Sometimes, you may want to remove sensitive information like a house number or visible address that is in the original photo.

    You know the image underwent photo manipulation when it’s missing some of the original image elements or if it has new details.

    Image layers

    One subtle way to determine an edited or manipulated image is by checking the layers. An edited photo has only one layer, while a manipulated photo has several layers depending on how many added or removed elements. It’s often subtle yet still noticeable due to light and color patterns.

    Here are some tips on checking the photo manipulation layers:

    • Watch out for misplaced sharp and blurred edges or cut lines. Since photo manipulation adds or removes elements, there will be cut lines. Most artists blend these out with the blurring tools, but the blur will seem out of place.
    • Check for repetitive elements like the same leaf or cloud formations since removals or subtracting elements will make it necessary for the artist to borrow some existing patterns.
    • Notice the difference in lighting behavior. Sometimes, you don’t find light where it’s supposed to be, or you find light where it’s not supposed to be.

    The untrained eye won’t immediately notice the layers, but with consistent practice and exposure, you’ll be a professional at spotting the differences in no time.

    Skill level and effort required

    Professional photo editing and manipulation take considerable skill, practice, patience, and hard work. You need to master these post-production techniques much like other endeavors or abilities. The more you do photo edits or manipulations, the better you’ll be.

    Often, graphic designers that can perform professional and flawless photo manipulation have already mastered at least basic photo editing since they have to work with different elements and make them appear as if they belong in the same picture.

    As a rule of thumb, the fewer layers in the picture, the less time you need for post-production. Photo manipulations take more time than photo edits because you need to remove or add elements to the original image.

    Similarities

    Photo editing and photo manipulation are comparable in enhancing images through post-processing. Although the former reworks color and shade while the latter creates new elements, they both modify a photo with creative intent.

    In most cases, photo editing and manipulation require the same color and exposure adjustments. The difference is that photo manipulation uses them to stylize the entire image and blend new elements. Each result creates a specific style that matches the photographer’s creative vision.

    Bottomline

    You may be wondering what are the limitations of photo manipulation compared to photo editing? The answer lies in the artist’s ability to bring images to life as realistically and as seamlessly as possible. You can rely on experienced companies like Phixer to pull off excellent real estate photo editing and manipulations without the hefty price tag.