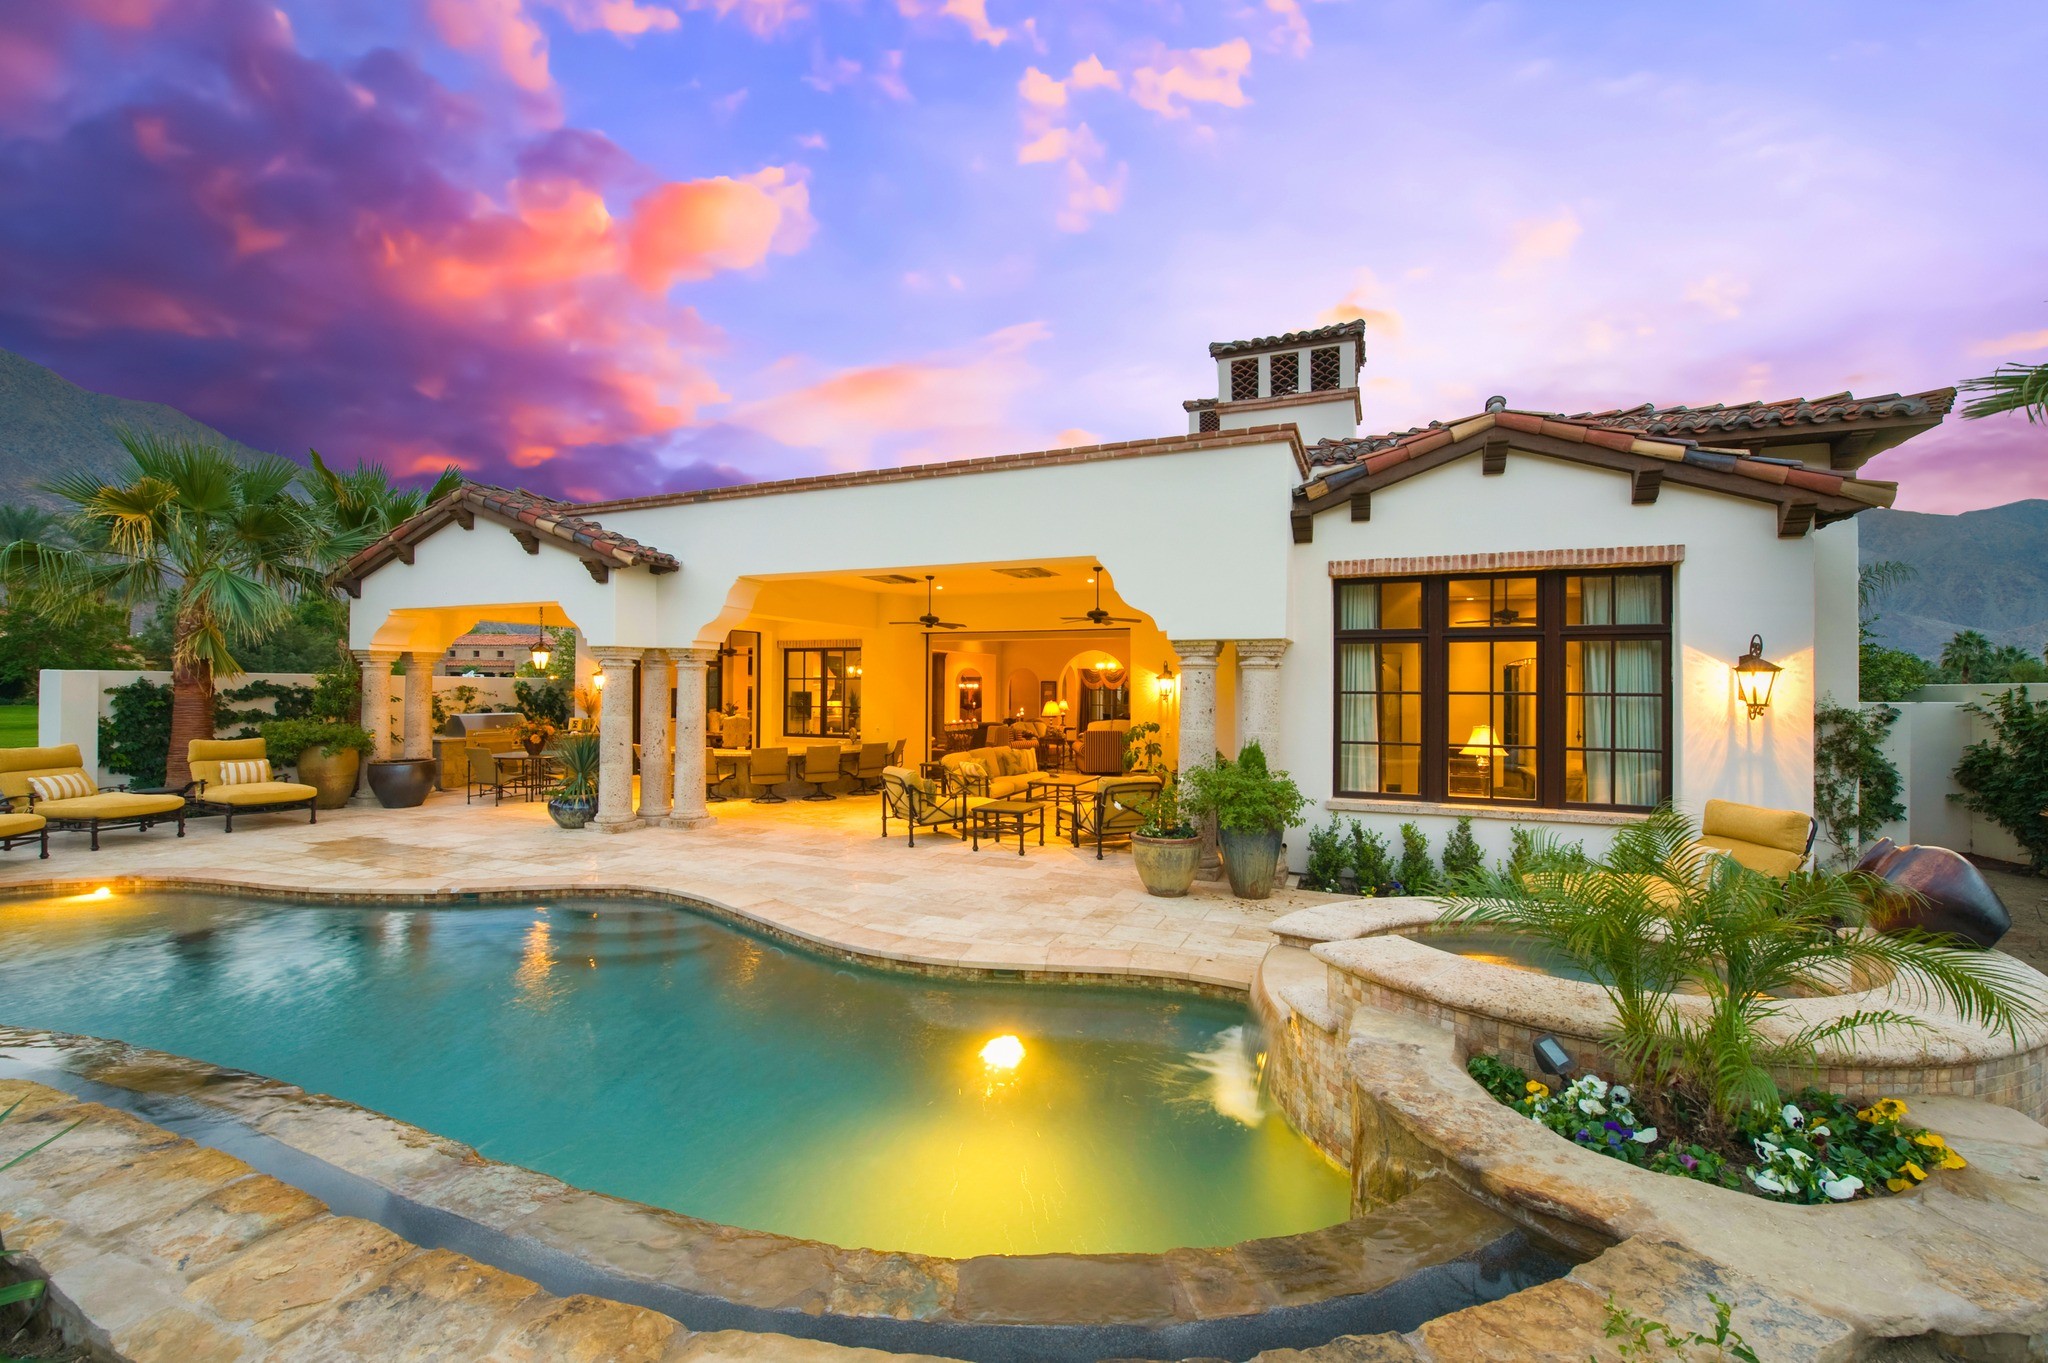
There are infinite ways to present rooms, properties, or houses in 2022. Most platforms accommodate various file types, from 3D graphics to virtual tours. With innovative technology at your fingertips, it’s easy to pull off excellent post-production methods even with minimal technical skills.
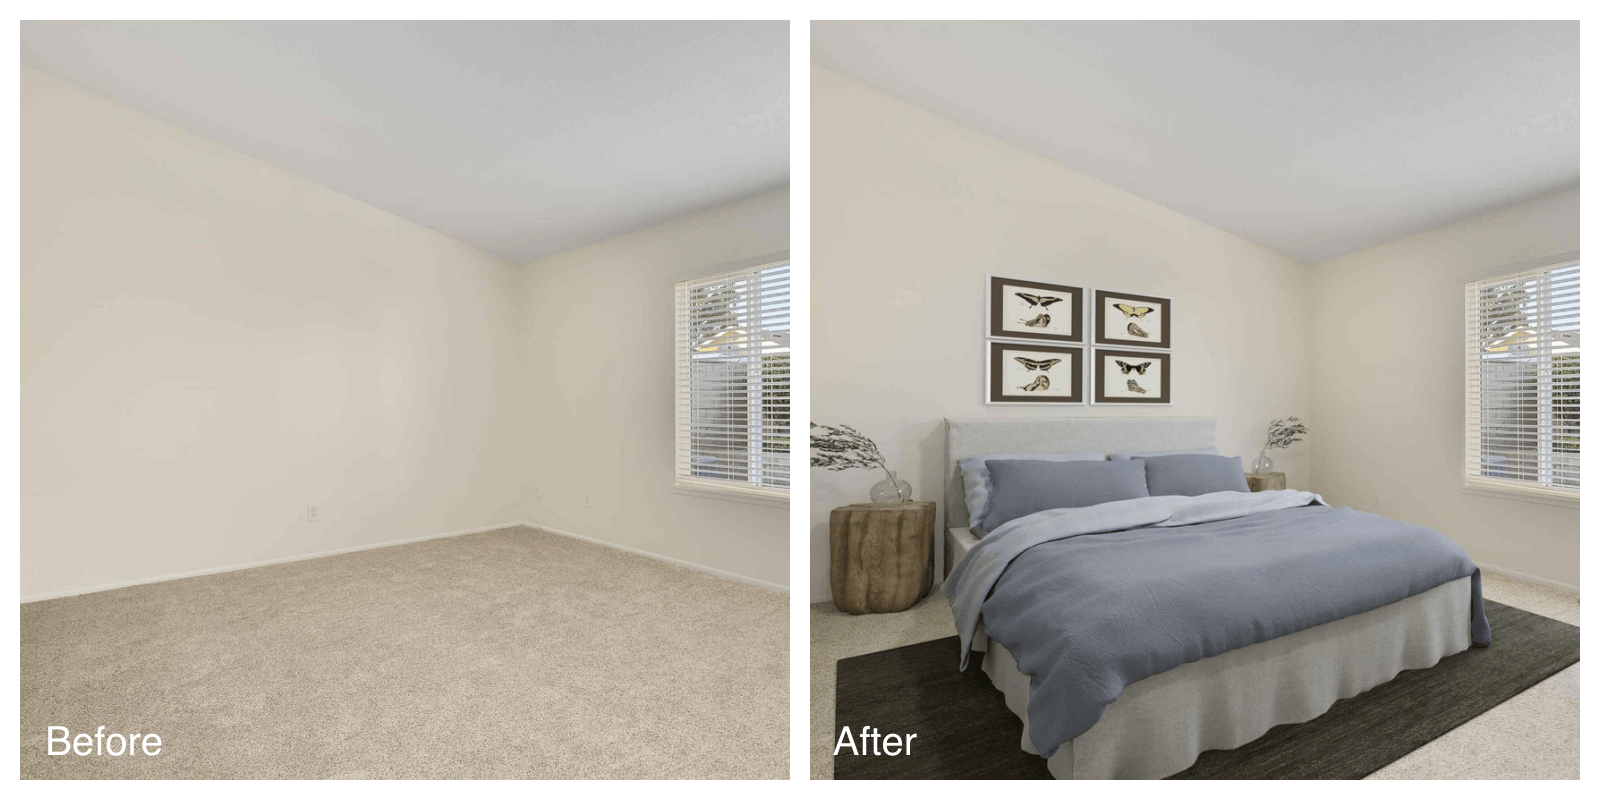
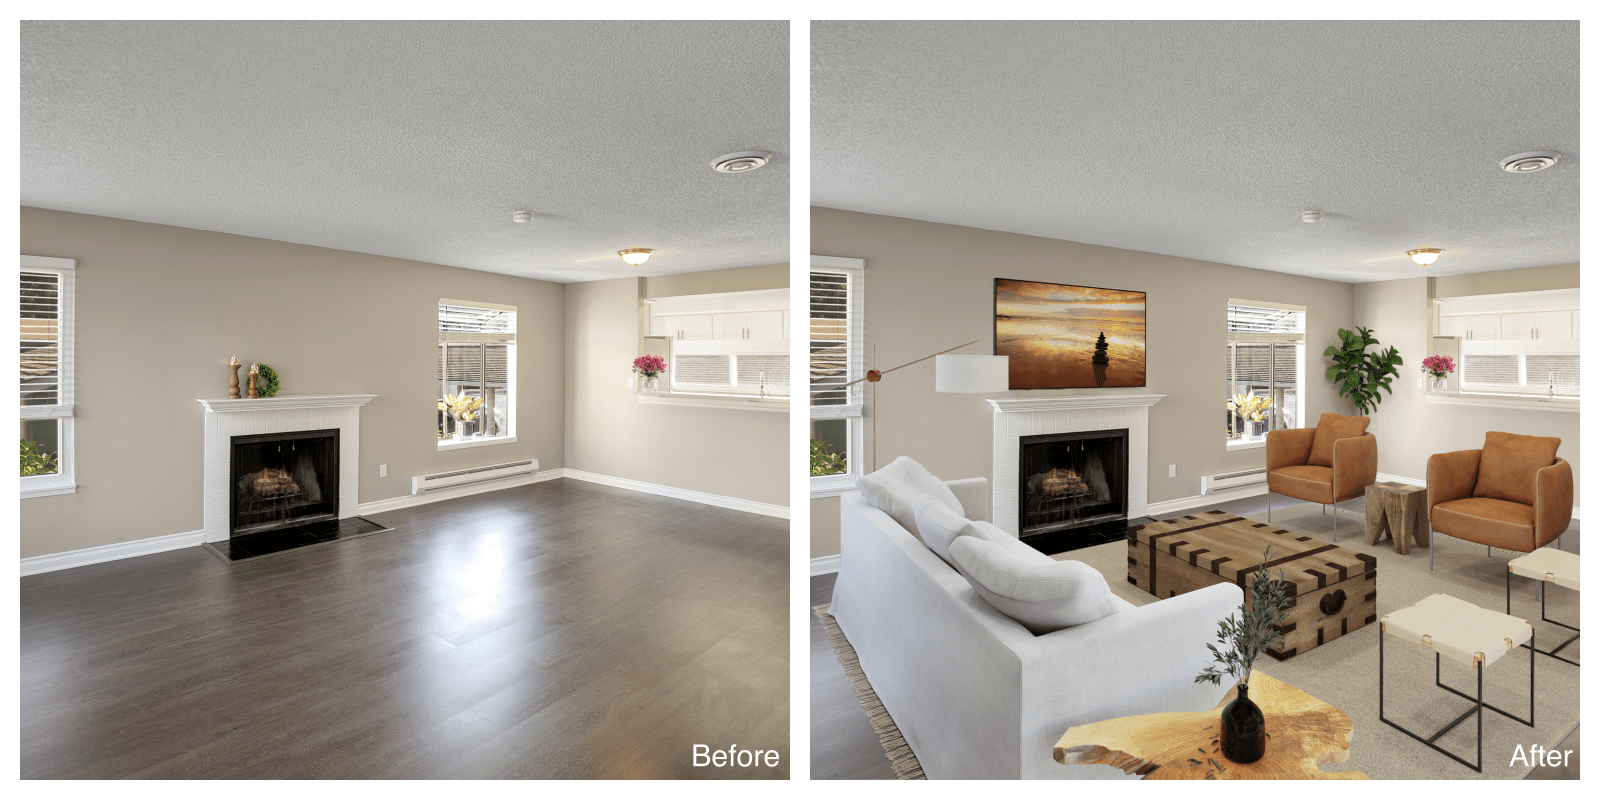
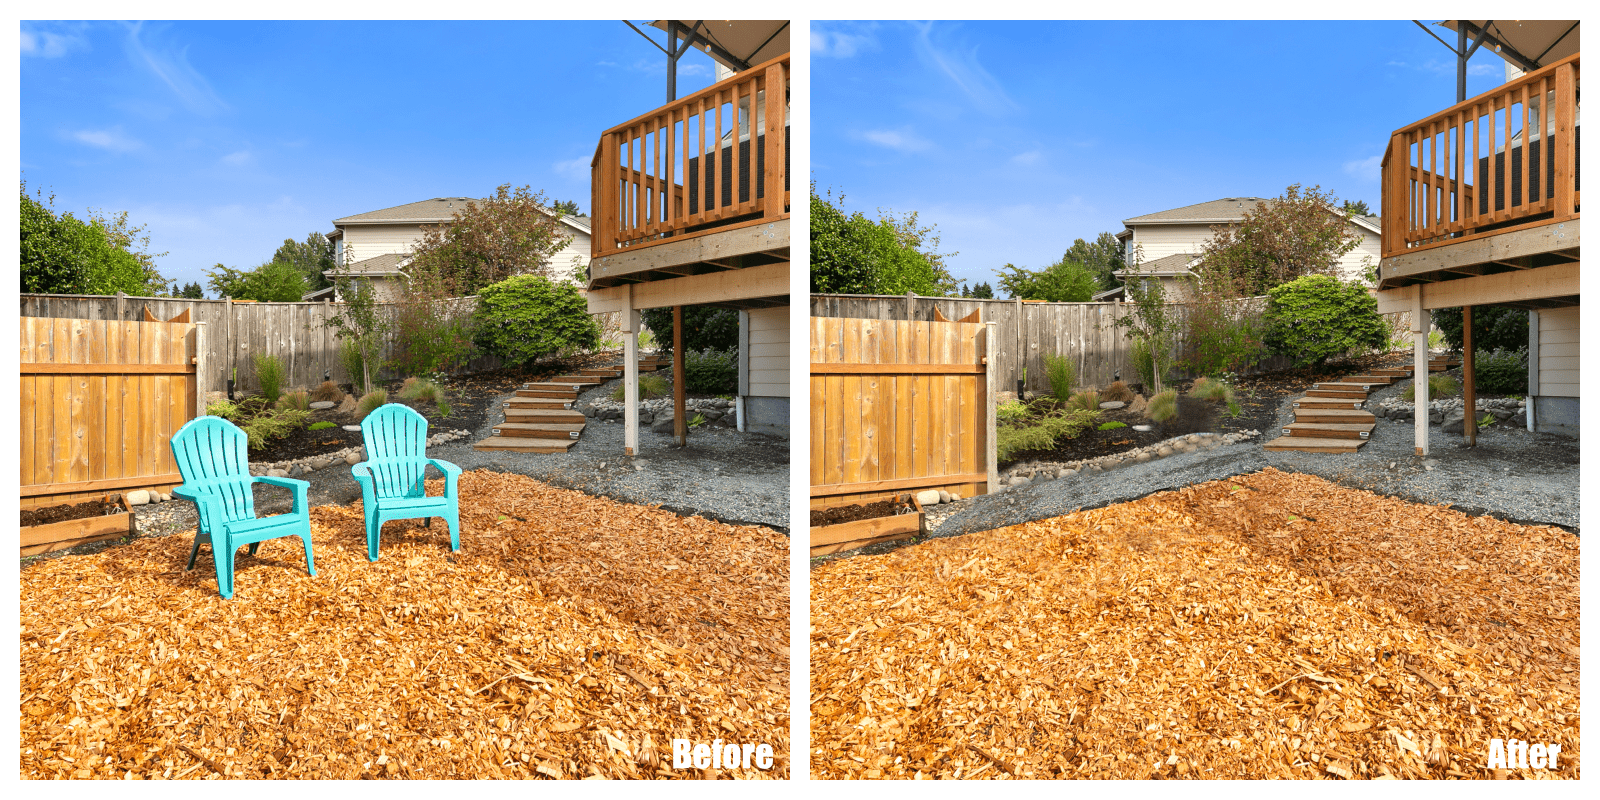
Virtual staging is a great way to gain potential real estate buyers because it allows clients to see the bare space without clutter. Real estate listings are very competitive, with most agents using their best photo editing techniques with software or apps. If you want to do staging, you may ask yourself, “What program do virtual stagers use?” This blog post will give you a list of different options available. Luckily, there are several virtual staging options you can choose from.
[lwptoc]
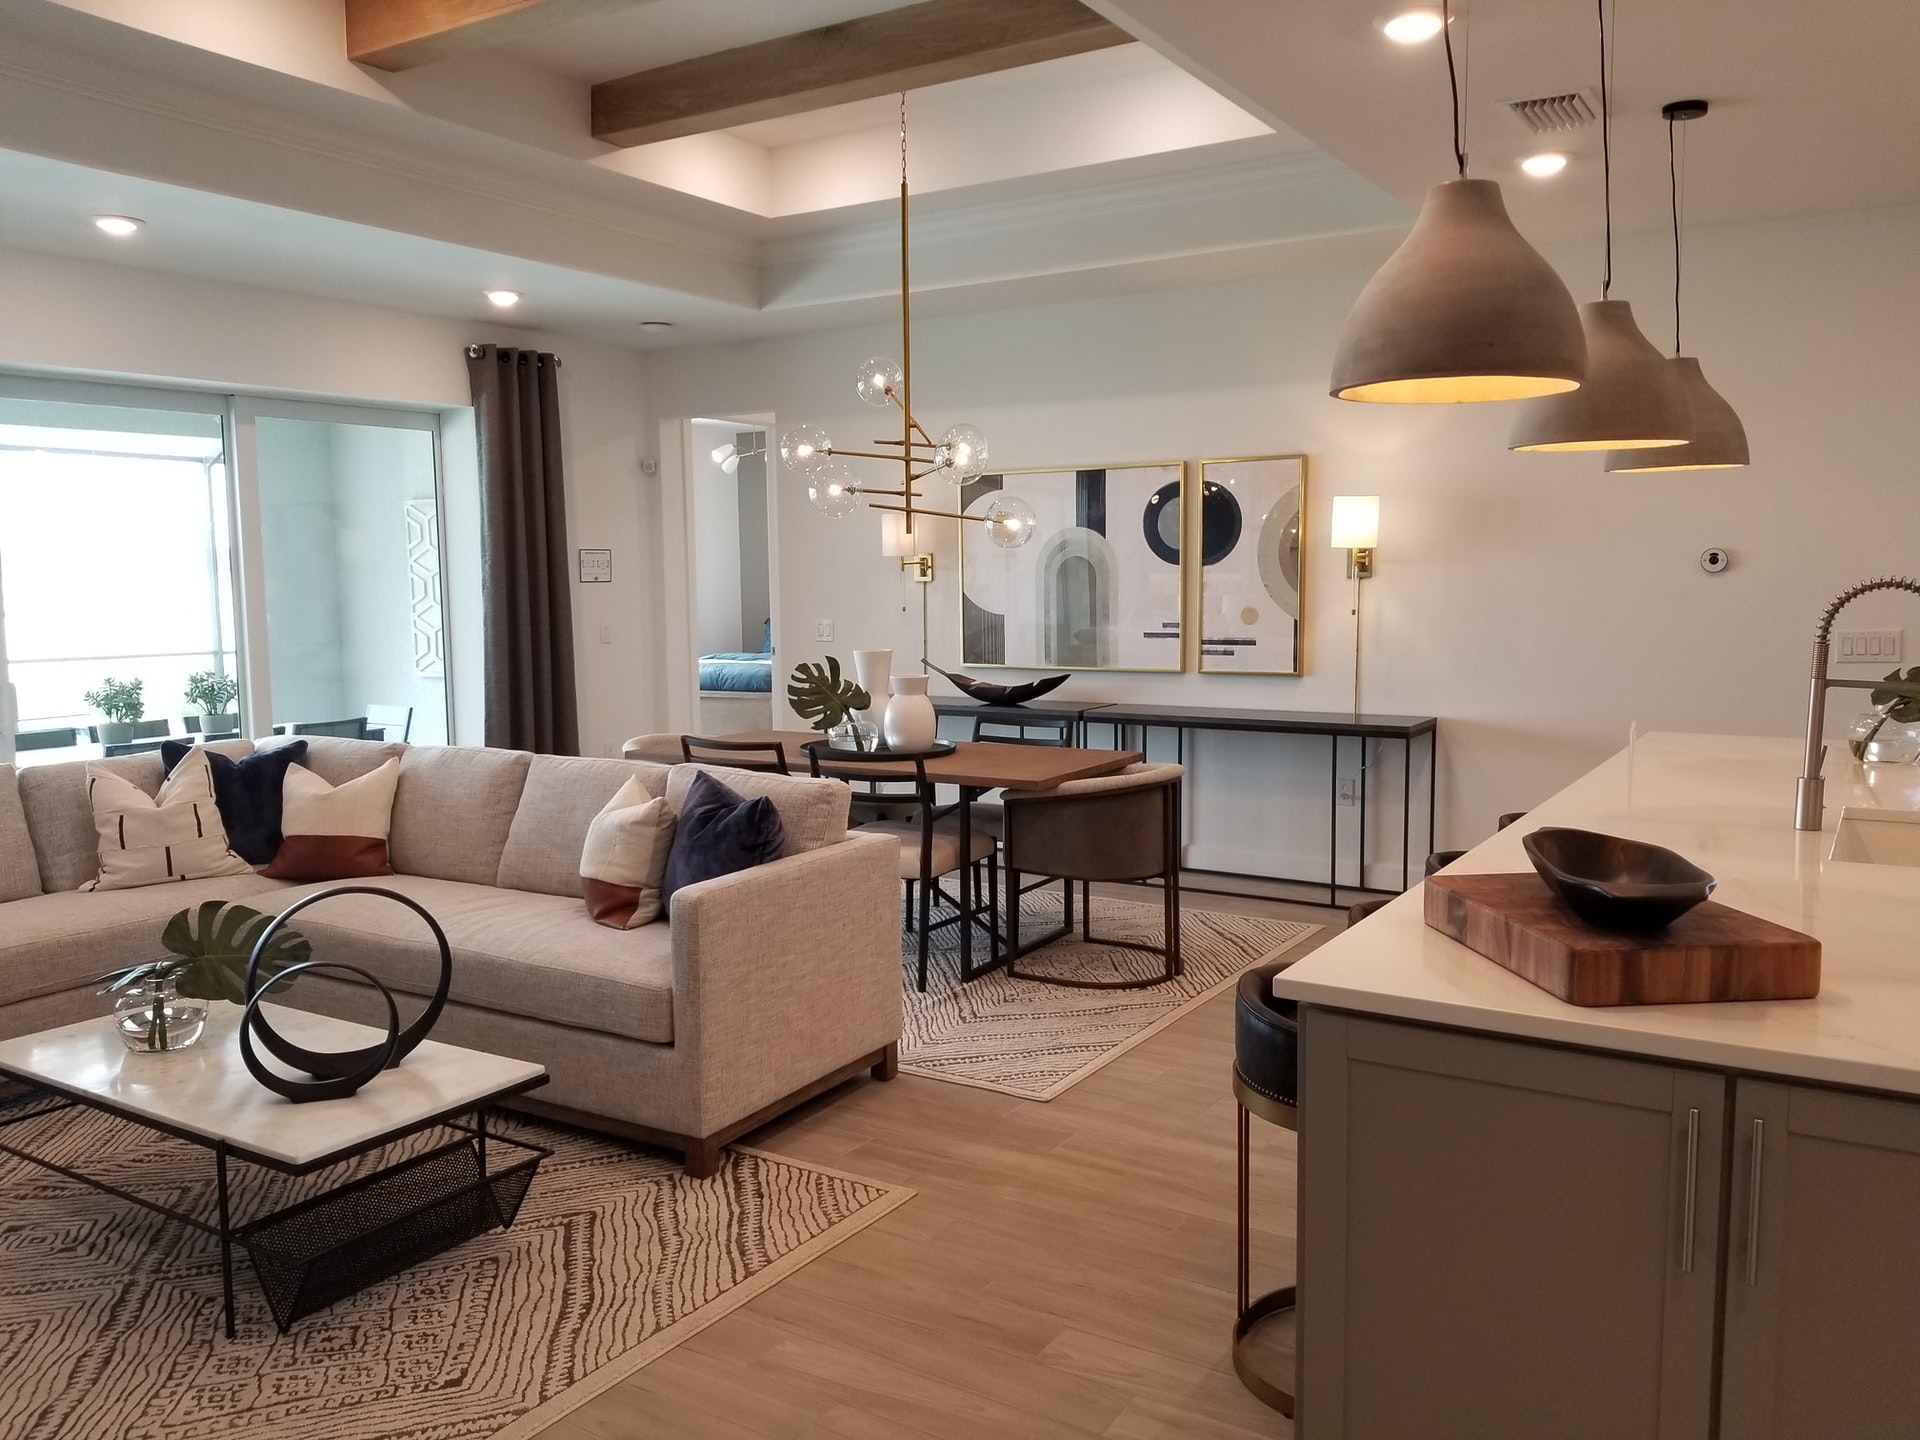
You only need a phone or laptop and creativity to improve your real estate listings. You can highlight important aspects of space and conduct room personalizations since most buyers make their decisions on the spot. For example, some apps allow you to fit particular furniture into a space so that you can show your client how their favorite couch would fit into the living space.
Virtual Staging Apps
Recent technological developments have improved how we create, convert and deliver information. Devices have become more compact and accessible, increasing our expectations of speed and reliability. Real estate applications and programs are evolving rapidly, which brings about more marketing potential.
Real estate agents can use photo editing apps for minor photo adjustments, especially those with creative backgrounds. You can choose reliable virtual home staging software accessible on your phone for more complicated work. Several real estate photo editing companies also offer such services.
Mobile apps provide cost-effective and quick real estate space improvement options as trends progress. These programs will allow you to showcase your imagination on the go through AR or VR imaging.
Here are 15 of the best virtual staging software and apps available:
The Phixer app allows you to take real estate photographs from your mobile device and have them edited within 24 hours. You can also manually make adjustments within the app for real-time edits. The mobile app is available for iOS devices, and you can go to their website to have a download link sent to your phone.
Here are the pricing options for Phixer:
- Pay as you go for $1 = 1 credit with an 8-hour turnaround time.
- Standard for $357/month (5% off) from $475/month with 500 credits, 4-hour revision turnaround time, video editing, and unlimited file size.
- Advanced for $675/month (25% off) from $900/month with 1,000 credits, 2-hour revision turnaround time, video editing, free 18-hour turnaround, priority support, and unlimited file size.
- Business for $1,913 (25% off) from $2,550 with the same features in Advanced but with 2,000 credits more.
Outside of the app, Phixer offers services such as photo and video editing, lawn and sky replacement, virtual staging and twilight, decluttering, etc. The company provides a quick turnaround time and has been in the business for over a decade. Phixer has a $30 free editing for new account signups for a limited period.
The first app on the list, Homestyler, is excellent for simple show and tell with new buyers, and the mobile application enables quick decoration and execution. Homestyler is a free virtual staging app for real estate Android and iOS devices. Although it may seem more like an application for homebuyers rather than realtors or real estate agents, Homestyler allows the client to see the possible furniture placements and designs. The app helps interior designers quickly illustrate their suggestions.
This virtual staging software primarily focuses on interior decoration using augmented reality (AR) to add three-dimensional pieces of furniture in room images. It’s one of the best virtual staging software in 2021 due to its compatibility with computers and mobile devices; you don’t have to pay for installation.
The second app on the list, Housecraft, allows you to improve empty spaces on the go for viewings. Housecraft is a free virtual staging app for real estate on iOS or Apple devices. Like Homestyler, Housecraft is an app that uses AR to place fully-rendered 3D furniture pieces in open areas. It’s an app that allows you to stage virtually anywhere in real-time.
It’s an app primarily for individual customers, but real estate agents may use it for quick illustration during on-site tours and visits. Since people are more likely to purchase something they know would suit their lifestyle and expectations.
The third app on the list, IStaging, allows real estate agents to do virtual staging. IStaging is a virtual staging app that turns compatible smartphones and devices into virtual reality cameras to capture and render 360-degree space tours in real time. You can transform any basic listing into a one-of-a-kind visual experience, and they have many options available on their software and website.
The app is remarkable in creating virtual tours and staging, and you can choose a plan to suit your needs and demand:
- $20 monthly for Basic, including one account, one editor, unlimited quantity, unlimited space storage, 2,000-page view a month, public showroom, 20 tag slots, and data dashboard
- $120 monthly or $1,290 annually for Professional, which has Basic features with added social functions.
- Enterprise by demand for up to 1000 user accounts, a customized showroom with 10,000 monthly page views, more space and tag slots, avatar mode, and more public spaces.
The showroom has the following price options:
- $5/month Pay for Usage digitizes properties through mobile, online editing platforms, capture by smartphone, and Google street view.
- $55/month for Standard with Pay for Usage features, advance tagging, live video communication tool, and free onboarding session.
- $95/month for Business includes all Standard plan features, subaccount management, conference tool, narrator function, and advanced analytics.
You can check the pricing details on their website.
The fourth app, RoOomy, offers paid professional staging opportunities if you have neither creativity nor time to pull off complicated designs. RoOomy is a virtual staging app for Apple devices with realistic three-dimensional AR and VR images. It’s suitable for creating stunning virtual enhancements to real estate photography. You can offer listing photos, select your design style, and then reinforce virtual staging to your real estate listing.
The app has three payment Tiers:
- $415.00 Tier One for four virtual stagings
- $589.00 Tier Two for six virtual stagings
- $835.00 Tier Three for nine virtual stagings
It’s one of the more expensive apps on this list, but it guarantees high-quality images that you can use for real estate listings and other purposes.
The fifth app, Room Planner, is intended to dress up and modify rooms. Room Planner is a virtual staging software for Android and iOs devices to create stunning visuals for your real estate listing. You can measure your space and scale your design according to plan dimensions. Create beautiful and professional two-dimensional and three-dimensional visualizations for your floor plans to furnish and decorate with world-famous brands.
Room Planner has the following design rates:
- $4.99 for Interior Design
- $14.99 for Architecture
- $59.99 for Design & Room maker
- $74.99 for Floor plan creator
- $119.99 for Room decoration.
Room Planner has the following subscription prices:
- $7.99 Basic
- $19.99 Weekly
- $59.99 Annually
- $149.99 Lifetime
You can select the subscription that works for you. The app has predesigned layouts for different house rooms like living rooms, bathrooms, bedrooms, etc., to act as inspiration for your visualization.
Planner 5D is a graphics app available for web, iOS, Android, macOS, and Windows. You can create 2D and 3D interior designs from scratch by an automated query, uploaded plan, designed template, or hired designer. The app is free for download, but there may be in-app purchases.
The company’s website offers different interior design activities for both amateur and professional designers. You can upload a floor plan and convert it into a digital project.
MagicPlan is an intuitive app that allows you to create floor plans for iOS and Android devices. The application automatically detects elements like doors, floors, windows, and walls so that you can accurately sketch 2D and 3D floor plans similar to virtually-staged images. You won’t need to hire a professional architect for floor plans and measurements.
MagicPlan offers three pricing plans, and all of them come with two free months for annual payments:
- $9.99 monthly for Sketch. The plan features unlimited projects, measure and sketch, 2D and 3D sketch exports, and team collaboration.
- $29.99 monthly for Report. The plan has all Sketch features, sharing photos and 360-degree images, notes, markups, custom forms, objects, and premium integrations.
- $89.99 monthly for Estimate. The plan has all Report features, including cost estimates, custom price lists, and phone support.
Although this app is not strictly for virtual staging, MagicPlan deserves a place on the list because it helps real estate agents collaborate with other graphic artists.
Virtual Staging Software and Website
Real estate professionals often work with expert photographers and editors to get the best results. What program do virtual stagers use? What happens if you don’t have proficiency in using it? You may want to leave your photos to creative specialists with the right tools and equipment to make your virtual staging come to life. You can drop off your images and pick them up after edits.
Several companies offer such services with their respective specializations and terms:
PadStyler is a software that creates virtual staging services. The company maintains an extensive library of 3D products from lights, artworks, rugs, furniture, decors, throws, pillows, and more. PadStyler offers two business days or less turnaround time for standard delivery virtual staging with rush delivery of 6 to 12 hours available. The team delivers most rush orders under one day on weekdays.
PadStyler offers bulk discounts, rush delivery, live chat support, unlimited free revisions, and a money-back guarantee. Clients can request a refund within a week from the initial order date if the project hasn’t been received and downloaded. They also offer nonrefundable custom 3D home renders. The downside to PadStyler is its extensive 3D catalog; most virtual stage photos look too digital and rendered.
The Spotless Agency is a company that offers a wide range of real estate photo editing and rendering services, from virtual staging to architectural visualization. Its services could help real estate agents envision their ideas or concepts.
Spotless Agency virtual staging offers three options:
- $79/image for Light with premium quality, one change, and up to four days turnaround time.
- $99/image for Standard performed by top stagers with attention to details, premium quality, up to two changes, and up to two days turnaround time.
- $199/image for Professional performed by top stagers with utmost attention to detail, quality controlled by CEO, premium quality, up to five changes, high priority, and next-day delivery.
Aside from virtual staging, the company also offers 2D and 3D floor plan services starting at $79/image for 2D and $350/image for 3D.
If you’re asking, what program do virtual stagers use? The answer may be Sweet Home 3D, a free, open-source interior design application that was first released in 2006 and is still upgrading in 2022. It’s a classic digital 2D and 3D design program developed by eTeks. Unlike the other apps in the list, it has a retro and traditional web design.
The application has the following virtual staging features:
- Construct photorealistic videos and images controlling sunlight and customizing lighting according to the geographic location and timezone.
- Import room blueprint to draw walls, customize surface textures, and 3D models to finish the catalog.
- Design free home plans.
Sweet Home 3D is available for Windows, macOS, and Linux operating systems, compatible with any WebGL browser, and translated into 29 languages.
Real Tour Vision or RTV creates 2D or 3D virtual home staging or real estate tours and offers a range of full-service photo and video options, including drones. Real estate agents can benefit from their staging services, especially for digital listings.
Here are the pricing options for virtual staging:
- $15 for every still photo
- $25 for a 360-degree photo
- $10 for every staging revision
RTV offers item removal, virtual renovation, 3D rendering, twilight conversion, etc.
BoxBrownie is an Australian-based real estate photography and video service company that offers a 24-hour turnaround for a wide range of photo and video selections. It’s an excellent virtual staging option for real estate agents with no technical image and video editing skills.
Here are the BoxBrownie virtual staging prices:
- $24 for 2D virtual staging.
- $48 for 360 degrees virtual staging.
- $16 to $24 for 360 degrees virtual tours.
The company also offers other services for real estate photography, such as image enhancements, virtual dusk, item removal, virtual renovations, renders, etc.
Augmented Reality Virtual Staging
The last two programs in this list have augmented reality (AR) virtual staging software as part of their ecommerce offers. They have more marketing than staging functions since these applications promote their items, but you see a demonstration of what the products look like in natural settings.
Here are the AR virtual staging applications:
The Armstrong Flooring design visualizer uses AR technology to show flooring styles you can order on their site. You can select a premade space, upload a project, choose and compare, or design your floor. You can have the product delivered to your address.
Real estate agents can show this to customers for flooring ideas in a virtual staging aspect. You can pick a product to see how it would fair with specific colors and furniture.
IKEA is one of the most well-loved brands in the do-it-yourself or DIY furniture category. Their planner app is more product-focused than room-focused, unlike virtual staging. However, this deserves a slot on the list because real estate agents often use them to show a room’s visual potential with furniture.
Bottomline
Real estate buyers often rely on photos, images, and other representations before making decisions. Sometimes, handling a virtual home staging software is not enough, and you need a professional’s touch. Real estate agents heavily rely on mobile apps or computer software to communicate and create digital innovation.
If you think the apps are too complicated to operate on your own, Phixer offers a wide range of real estate editing services, from virtual staging to decluttering. You can check out the company’s portfolio and pages to know more about the best-suited real estate editing services for marketing efforts.