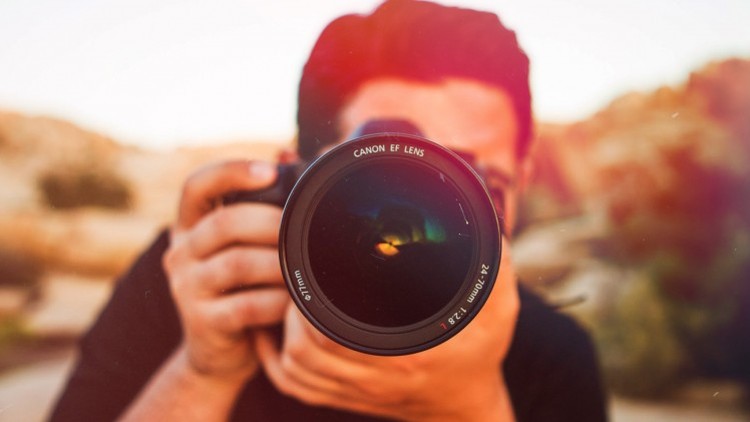
It’s no secret that Real Estate is a photo-driven industry. According the to the National Association of Realtors, 9 out of 10 home buyers today use the internet as their go-to source when searching for a property, meaning, your listing photos can determine whether or not your property is worth a walk-through. It’s 2018, having a really great photo makes all the difference in the world.
Surprise! Getting “the best angle” is not only useful when taking selfies, this also applies with real estate photography. With today’s technology, a single photo can reveal almost everything in a single room, it’s best to know at what angle your living room will look stellar. Take a lot of test shots, find the things that are complimentary to your property and accentuate it.
Avoid taking photos of the interior from the corner
This is a common rookie mistake. Sitting tight in one corner while trying to capture the other three corners is just wrong. and boring. You really don’t need to show everything, the viewer’s eyes and brains will fill in the gaps. Get around, and again find the best angle of your property.
Keep the straight lines straight
When taking interior photos, the images will show various objects ie, stairs, wall lines, furniture. If your lens is slightly tilted, the lines will be going diagonally. This is a distraction you don’t want. Make sure to keep those lines straight to keep the viewer’s orientation of the photo simple.
Make use of props
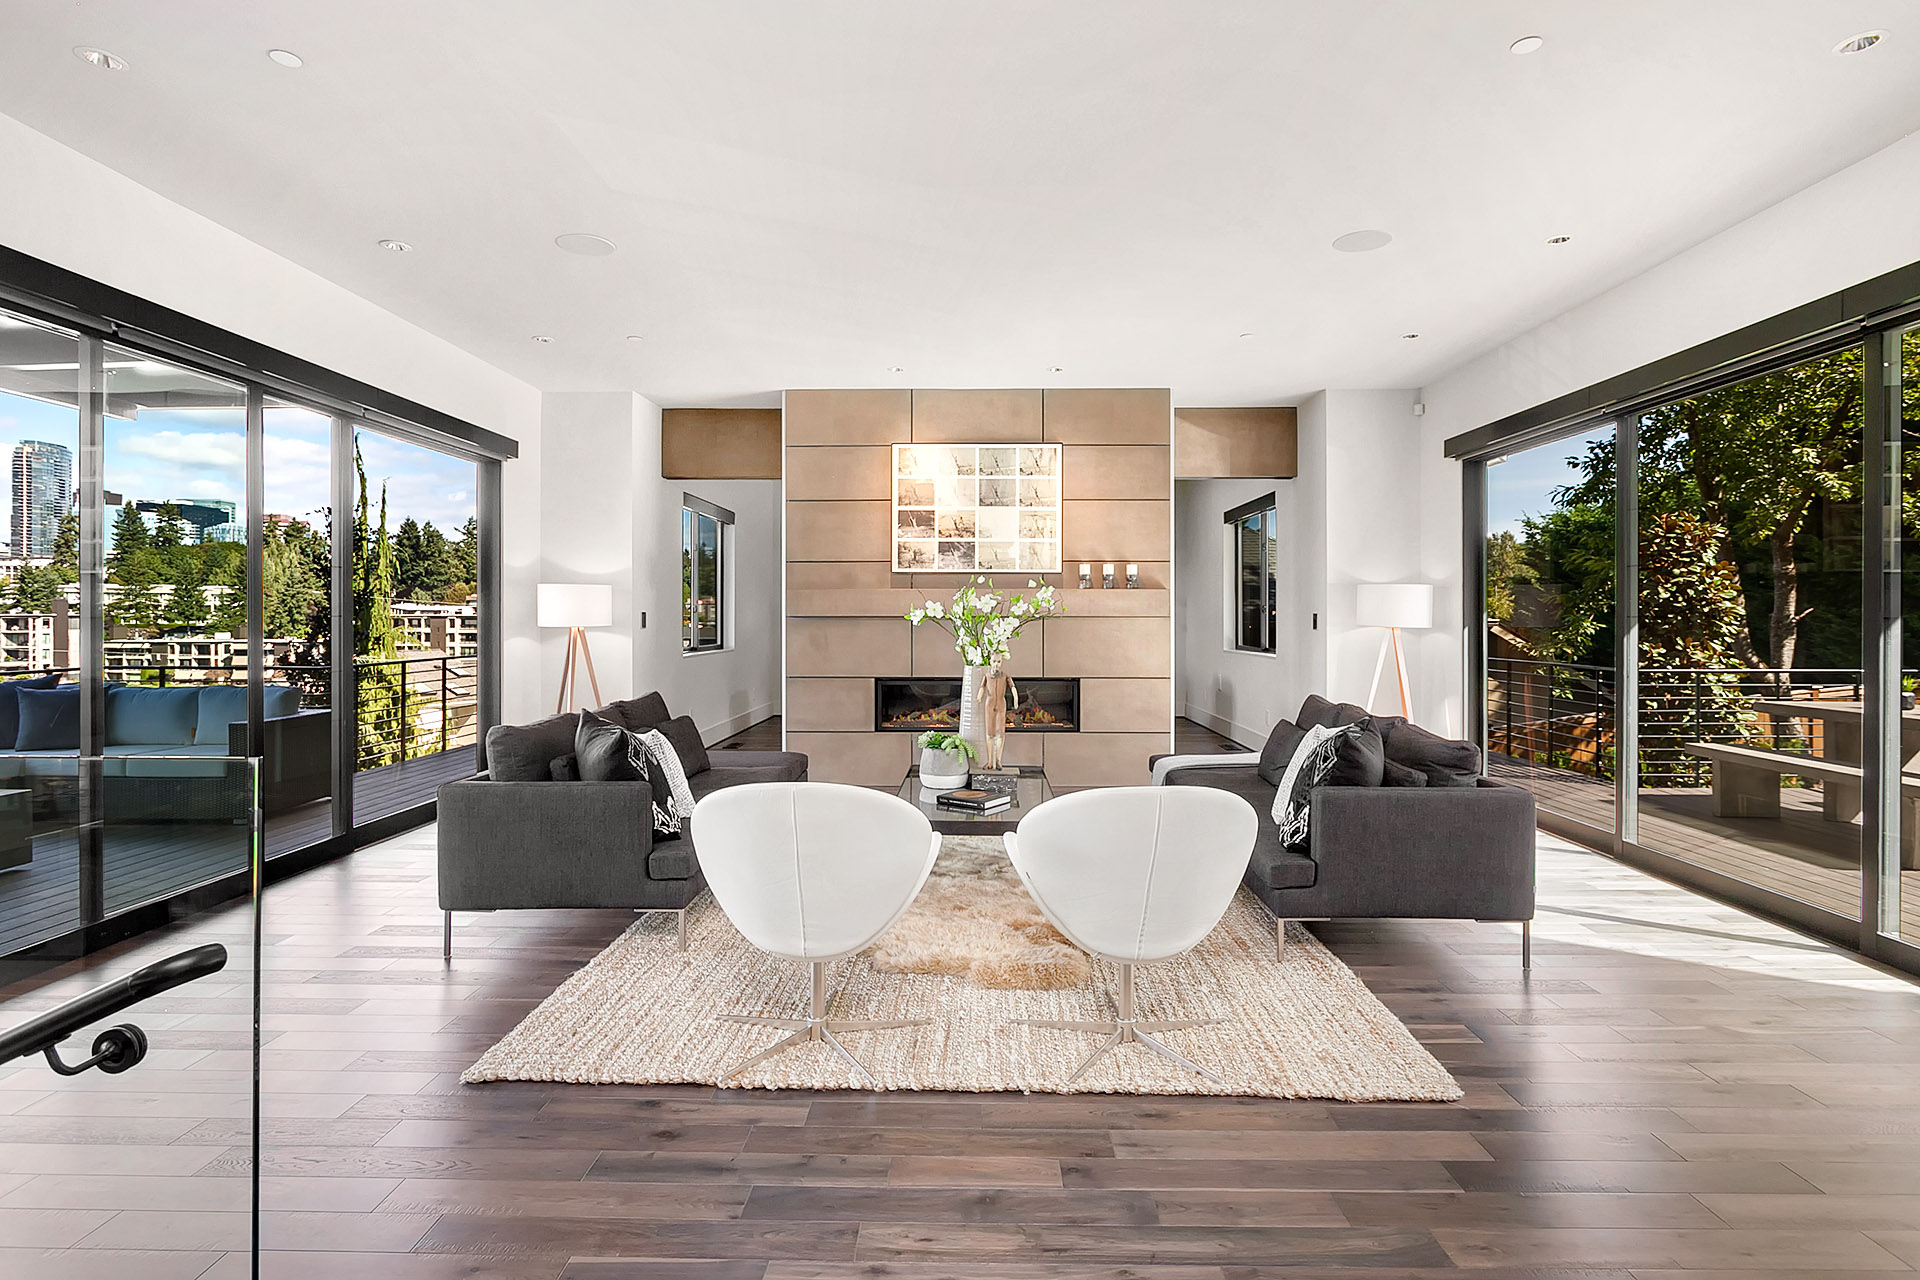
Props will add color and life to any shoot. Add features to a room to create this certain mood or atmosphere. Before you shoot, walk around your room and get a feel for it. Be careful not to overdo it though, a pop of color here and there is enough. Proper styling will make your photos look professional.
Lighting is everything
It cannot be emphasized more how natural light can make all the difference. Find out at what time the lighting falls perfectly in your property, and take advantage of it. You want to make sure that you have the ideal lighting in your photos to keep it crisp and bright. If you think the existing light in your space is not enough,
Get rid of dirt & clutter, old & damaged furniture
This one is a no-brainer. If you want the best results, everything has to be squeaky clean, from the windows & tables, to countertops & floors. Potential aesthetic hazards, such as worn-out furniture or damaged blinds, should be dealt with in advance. Remove anything that can compromise a good-looking photo, and add objects which you think will add charm.
Make friends with post-shoot editing
While it’s important to get good raw photos, it’s rare that those will come out exactly as you like. Colors have to balanced, menacing shadows have to be taken out, lines have to straightened out…the list can go on. There are several tools available that can help you with that; make your research. If the thought of editing makes your shudder, experts are more than willing to help you with that.
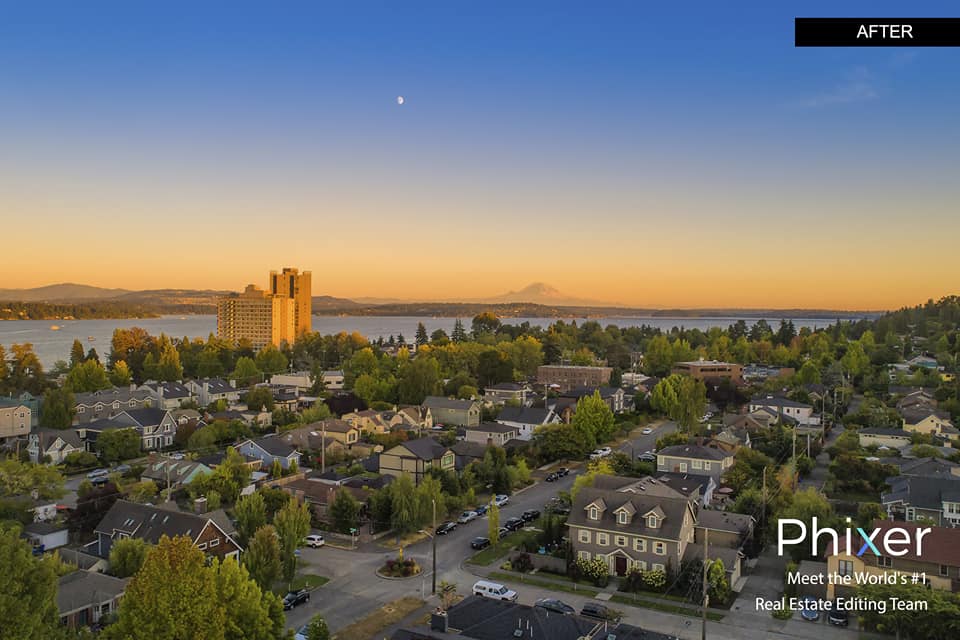
The real estate industry is one of the top users of drones around the world. A third of the drones are sold to real estate brokers or to real estate photographers. Drones are effective in taking aerial photos of a property, be it commercial or residential. In listings, this can be a great addition to your photos so potential buyers can see a better view of the entire property. The drone is a proper investment that can make a difference in your business. This helps in selling properties way faster while also giving amazing photos for clients to use in their listings.
If you are looking into purchasing a drone for your business, here are the top drones that you can use for real estate:
• DJI Inspire 2
The first DJI Inspire was the drone that made a difference in the filmmaking industry. The new Inspire 2 came with a new imaging system that can record 5.2K in cinemaDNG, 4K at 60fps, or other file formats at 30fps. The drone can go from 0 to 50 mph in less than five seconds. It can fly up to 58 mph. The Inspire 2 comes with a dual battery system that helps in lengthening the flight time to 27 minutes. It also works great in low temperatures so you will encounter less issues with the weather. The DJI Inspire 2 is a professional drone so it is a bit pricey. The accessories can even cost you more.
• DJI Phantom 4 Pro
This is one of the most popular drones in the market today. The DJI Phantom 4 Pro has a 20 MP camera and a 4K video feature at 60 fps. It also comes with a mechanical shutter and a one-inch sensor. What’s interesting about this drone is that it can automatically evade obstacles, track subjects, and travel to a designated point. It’s also easy to use the Phantom 4 Pro with its preset cinematic modes. Use it with the DJI GO 4 app for adjustments in the camera settings, image transmission, and video content downloading.
• Yuneec H920 Tornado
This is another pricey yet heavy-duty hexacopter, or a six-rotor drone, that comes with different safety mechanisms. It also has an advanced flight system that will provide ease to the user. This Yuneec drone has carbon fiber frame for extra durability. The H920 Tornado is made to fly Panasonic’s mirrorless GH4 camera to shoot stills and footages. This camera is great for capturing high-quality images and videos with its 16.05-megapixel sensor. What’s great about this drone is that it has auto-landing and return-to-home features.
• DJI Mavic Pro
For real estate, having both interior and exterior photos are also essential. With the DJI Mavic Pro, shooting interiors has become easier. It’s a compact drone that’s versatile and durable. It shoots 4K videos at 60 fps. It can fly up to 40 mph for 27 minutes. It’s ideal to use it for high-ceiling properties with mezzanines or those with large interiors. The drone also has an optical avoidance systems that steers it clear from any obstacles.
This drone is designed to carry bulky DSLRs and action cameras. I is portable and compact and can be easily brought to any locations for flying. It can operate up to 60 minutes in the air because of its battery capacity. This makes it the perfect companion for longer shoots and aerial videos. The QR X800 is made of strong carbon which makes it a sturdy drone.
• Yuneec Typhoon H
This drone comes with unique features that are quite useful for real estate. For its price, the Typhoon H is packed with robust capabilities. It’s a hexacopter that can be used for rugged purposes. It comes with a fail-safe mechanism and a collision prevention system. It has eight smart flight options, automatic landing, take-off and flying, and GPS Stabilization. Using this drone requires little to no effort. It has a 12-megapixel camera that can take 4K videos.
Taking photos of real estate can be tricky. It’s not just something that you can do quickly and send to clients in the hopes of being able to sell their properties. Real estate photography is more than just taking pictures. There’s more work to be done after every photo shoot. The real estate photography retouching and editing can take a lot of time, especially if you want to produce amazing photos for clients. Retouching and post-processing is an essential part of real estate photography. Having mastery of Photoshop and other post-processing software is important.
Retouching in Photoshop
There are different things that can be done in Photoshop for real estate. The goal is to make the image look realistic, as well as make the property look its best. Through Photoshop, you can adjust the colors and the lighting of the property or change the sky.
One of the most useful editing tricks is to blend ambient photos with flash photos. This can be most effective for interior photos. Often, you do not capture the perfect image just with your camera. The lights can be off and you have a variety of light source that makes the image look crazy. To combat this problem, most real estate photographers take multiple photos of the same subject in different lighting settings. Then, you merge the photos in order to get the best lighting in the image.
Blending ambient and flash photos
Blending different photos in order to create one seamless image with amazing lighting can be tricky but doable. If you need to blend ambient and flash photos into a single photo, follow these steps:
1. Open all of your images. Make sure that you have opened all the ambient and flash photos in your Photoshop. You might have photos of the lighting fixtures inside on and another photo with the lighting fixtures off. Arrange the photos and make the ambient photo your base layer for blending.
2. Edit your lights-on photo first. Before you start blending, make appropriate corrections for each the photo. On your lights-on photo, switch the blending mode to lighten. If you have visible lighting fixtures, you might want to brush in the lights. Put a black layer mask. Click on the brush tool and set the flow to 30 percent. Brush the area where the lights are. Make sure that the lights are already visible.
3. Correct your lights-off image. Retouch your lights-off layer by putting a black layer mask on top. With this, you want to tone down the bright areas of the image, like where the ambient lights are hitting and other sources of light.
4. Use stamp visible. This is a very helpful function that creates a new layer of the content that you want to merge. Make sure that you make all your working layers visible. Then, go to Layers menu and click Merge Visible while holding the Alt key.
5. Align your verticals. Make sure that you have straight lines on your image. The problem with shooting interiors is that you get slanted lines all over. First, you can try to use the Lens Correction function under the Filter menu to see if Photoshop can automatically straighten the lines. Photoshop usually matches the camera and lens used to create the image and automatically corrects the minimal distortion. You can also use the Skew function under Transform. This allows you to align your verticals manually. Just pull the corner until your verticals line up with your guide.
6. Remove unwanted objects. If there objects in your frame that you want to remove, like some light stands that are in the frame, make a new layer. Click the Spot Healing Brush tool and go over the areas that you want to remove.
Crop the photo as needed. Make sure that you don’t include unnecessary parts in the photo. Click on the Crop tool. Crop the image as needed in order to bring the focus into the interiors. This also removes unnecessary areas in the photo.
7. Flatten the image. Once you are happy with how the photo looks like, make sure that you flatten the layers to create one image. This would be your deliverable to the client. To flatten, make sure that the layers you want to retain are all visible. Then, go to the Layer menu and click Flatten Image. Now, you have a single photo that has all the edits that you’ve done.
There are still a lot of other Photoshop tricks and edits that you need to be familiar with as a real estate photographer. Just like being in photography, everything takes practice. Make sure that you train your eye and keep shooting. Find angles that will work for the specific space andproperty. Editing in Photoshop is time-consuming. Once you are used to it, you can easily find a flow that works for you.
The post-processing for real estate photography takes a good amount of time for many photographers. This usually takes a huge amount of time as this is an important step in creating amazing images that will help clients in selling their property.
There are different techniques that photographers can use and do in order to retouch and make the properties look great in photos.
Here are some of the basic and most commonly used editing techniques for real estate photography:
1. Perform color correcting.
Color correction is probably one of the basic and essential steps in real estate photo editing. Color correction can be done on Lightroom and Photoshop. However, it’s easier and quicker to do it on Lightroom. With the eyedropper tool, just click on a neutral area to correct the colors of the entire image. Depending on the photo, you might need to adjust the saturation, hue, and tint in order to get a more realistic image.
2. Straighten the lines.
When shooting properties, you need to be extra careful with your lines. You need to make sure that these are straight and not bent in some way. Whether you’re shooting interior or exterior, you have to look at the lines and shoot them properly. However, you can always retouch them after a shoot. To align the lines in Photoshop, you can use the Free Transform. Make sure that you select the entire image and drag the corner of the image opposite to where the lines are leaning towards.
3. Even out the light.
When shooting interiors or exteriors, you might encounter problems with the shadows and uneven lighting. To combat this, use Lightroom to adjust shadows, highlight, whites, and blacks. Drag the Shadows bar to the right in order to open up the shadows a little bit. Make sure that it is a safe middle ground. If you have harsh highlights on the photo, you may want to drag your highlights bar to the left in order to bring down the hot spots. To adjust the whites and blacks, hold down the Alt key on your PC or the Option key on your Mac. Bring the whites or the blacks bar to the right until you see specs of white or black on the image.
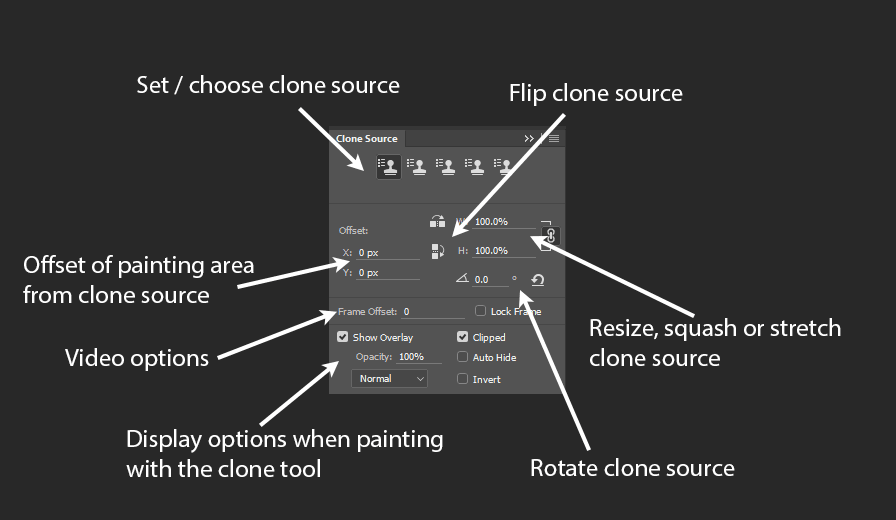
4. Clean up the image with cloning.
Remove unwanted objects in your photo using the clone stamp tool in Photoshop. Click the clone stamp tool and choose the source area. Then, you can start cloning and painting over the object that you want to remove.
5. Adjust clarity.
On Lightroom, just push the clarity to the right in order to polish the photo. With adjusting the clarity, you might want to adjust the blacks as well in order to add depth and crisper look to the image.
6. HDR.
High dynamic range (HDR) is a technique that many real estate photographers use to create a greater dynamic range of luminosity. To create HDR images, make sure that you have shot your subject in different bracketed images. Then, all you have to do is merge the photos into one to show its highlights and shadows.
7. Lens correction.
This is a handy tool that you can use in Lightroom. It corrects the optical issues found in most lenses. To use this, just go to the Lens Correction module and click Enable Profile Corrections. Then, click on Remove Color Aberration.
8. Curves.
The Curves is a powerful tool in Photoshop. This can be used for color correcting and optimizing your colors. However, it can be an extensive tool that can be challenging to master. To use Curves, go to the Image menu, choose Adjustments and click on Curves. Click Auto in the dialog box. Drag the diagonal line at the center and pull it up to brighten the image or down to darken it. When you’re already happy with the outcome, click OK. You can freely play around with this tool and experiment in order to achieve the look that you want.
9. Using image processor.
The image processor allows you to resize your photos in batches. This is a time-saving tool, especially if you are working on hundreds of images that will have to be used in different mediums. To use the image processor tool, select File menu and click on Image Processor. Choose Folder in the dialog box and save in the same location. Choose JPEG as file type and click on Resize to fit and put in your desired dimensions. Make sure that you include the ICC profile and click Run.
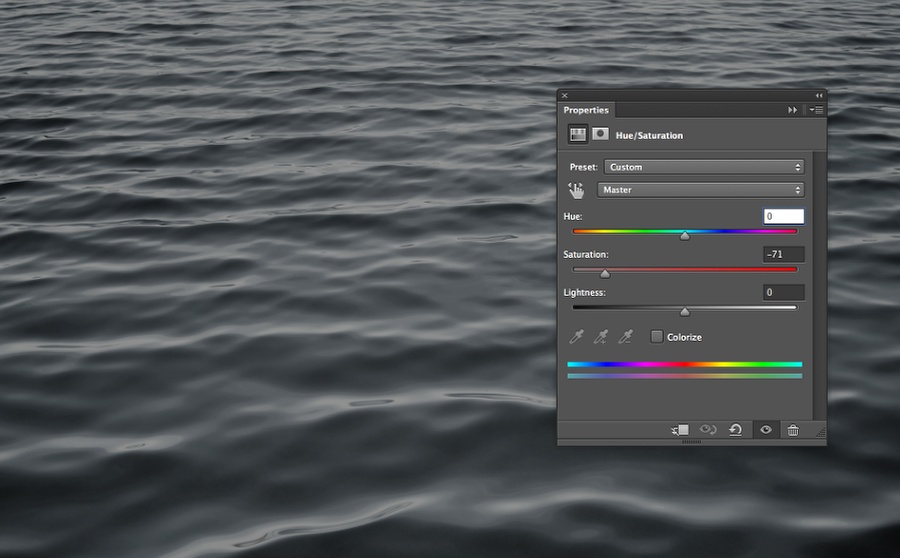
10. Playing with hue and saturation.
Hue and Saturation is another helpful tool in Photoshop. This can be used for color correction and is also similar to Curves. However, Hue and Saturation can be used to enhance the greens on exterior and landscape photos. To use Hue and Saturation, go to Image menu, choose Adjustments, and click on Hue and Saturation. Choose Yellow from the dialog box. Increase the hue and decrease the saturation and lightness. Change the option from Yellow to Green and repeat the changes you’ve made to hue, saturation, and lightness. Then, click OK.
11. Do composites.
Composite is an ingenious technique that merges different photos to create a seamless image. This can be used in real estate when you’re blending together different images, such as stitching flash and ambient shots into a single photo. This is often done on instances wherein the subject is manually lit by the photographer using a handheld flash.
12. Batch edit, if possible.
If you’re working on similar edits on a number of photos, it’s best to batch edit them using Lightroom. This allows you to save time and do the minor edits all in one go. Just do the retouches and adjustments on one photo and sync these changes into the rest of the images.
13. Keep it natural.
The final yet most important photo editing technique when retouching real estate photos is to keep it natural. It can be too easy to go overboard when editing photos. However, you need to make sure that you create a more natural look in order to make the photos believable. The goal in real estate photography is to sell the property. Make sure that you err on the natural side every time you retouch your images.
The following famous architects changed the way we think about construction and gave us some the most breathtaking buildings to photograph.
Frank Lloyd Wright
George Barton House
Easily the famous American architect, Frank Lloyd Wright designed 1,114 works of various types which turned into 532 completed projects. Over 7 decades he was one of the most innovative, prolific designers ever and changed the way we live by changing the way we build.
Antoni Gaudí
Park Guell
Antoni Gaudí believed the essence and the meaning of architecture are found in the very patterns of nature and its laws. Gaudí himself once said: “originality consists of going back to the origins.” Gaudí tremendously impacted subsequent generations of modernists architects. His genius created a unique, personal and incomparable style that defies typical classification.
Ludwig Mies van der Rohe
Chicago Federal Center
Starting as an innovative architect in 1920’s Germany, Mies was the last director of the Bauhaus, a seminal school in modern architecture. After Nazism rose to power, due to it’s strong opposition to modernism, Bauhaus was closed. Mies emigrated to the United States and accepted the position to head the architectural school at the Illinois Institute of Technology in Chicago. Mies sought to establish a new architectural style that could represent modern times just as Classical and Gothic did for their own eras. He created an influential twentieth-century architectural style of extreme clarity and simplicity. He made use of modern materials such as industrial steel and plate glass to define interior spaces and strove toward an architecture with a minimal framework of structural order balanced against the implied freedom of unobstructed free-flowing open space. He is often associated with his quotation of the aphorisms, “less is more” and “God is in the details”.
Philip Johnson
The Crystal Cathedral
Johnson’ role as the founding director of Museum of Modern Art’s Department of Architect meant that he helped to shape architectural trends from 1935 onward. In 1979, Johnson was the first recipient of the Pritzker Prize. From his early modern structures to his later postmodern buildings, Johnson defined several architectural movements over the course of his decades-long career.
Eero Saarinen
The Gateway Arch
The modernist ideal of simplicity became a form of corporate conformity after the war, and it is against this backdrop that Eero Saarinen’s mid-century designs provided a fresh perspective. In contrast to the standardized box adopted by the International Style, Saarinen employed swooping curves that gave his architecture a sense of soaring transcendence which is evident in projects such as his 1947 design for St. Louis’s magisterial Gateway Arch.
In the world of real estate, competition can be tough. As a realtor, it is essential to make sure that you rise above your competitors and are able to sell your properties fast. Marketing the properties in a certain way would help you attract more potential buyers. More importantly, using superb photos to depict and sell the properties is a must. This is the key to keeping your business flourishing.
To do so, you need to hire professional photographers to make sure that the property is given justice and that you can get amazing photos for your listing.
How much does real estate photography cost?
One of the major considerations, when you are hiring a real estate photographer, is the price. This usually varies depending on the area and the experience of the photographer. Other things that would affect the pricing are your specifications for the shoot, including the frames and images that you want and the number of photos that you want.
Real estate photography pricingwill vary on the city that you’re in. For the 50 largest cities in the US, the photography price range is from $95 up to $300. This pricing is usually based on typical 3,000 square-foot property or less. You should scout the price range within your area. Ask around to become familiar with how much you should be paying your photographer in your region.
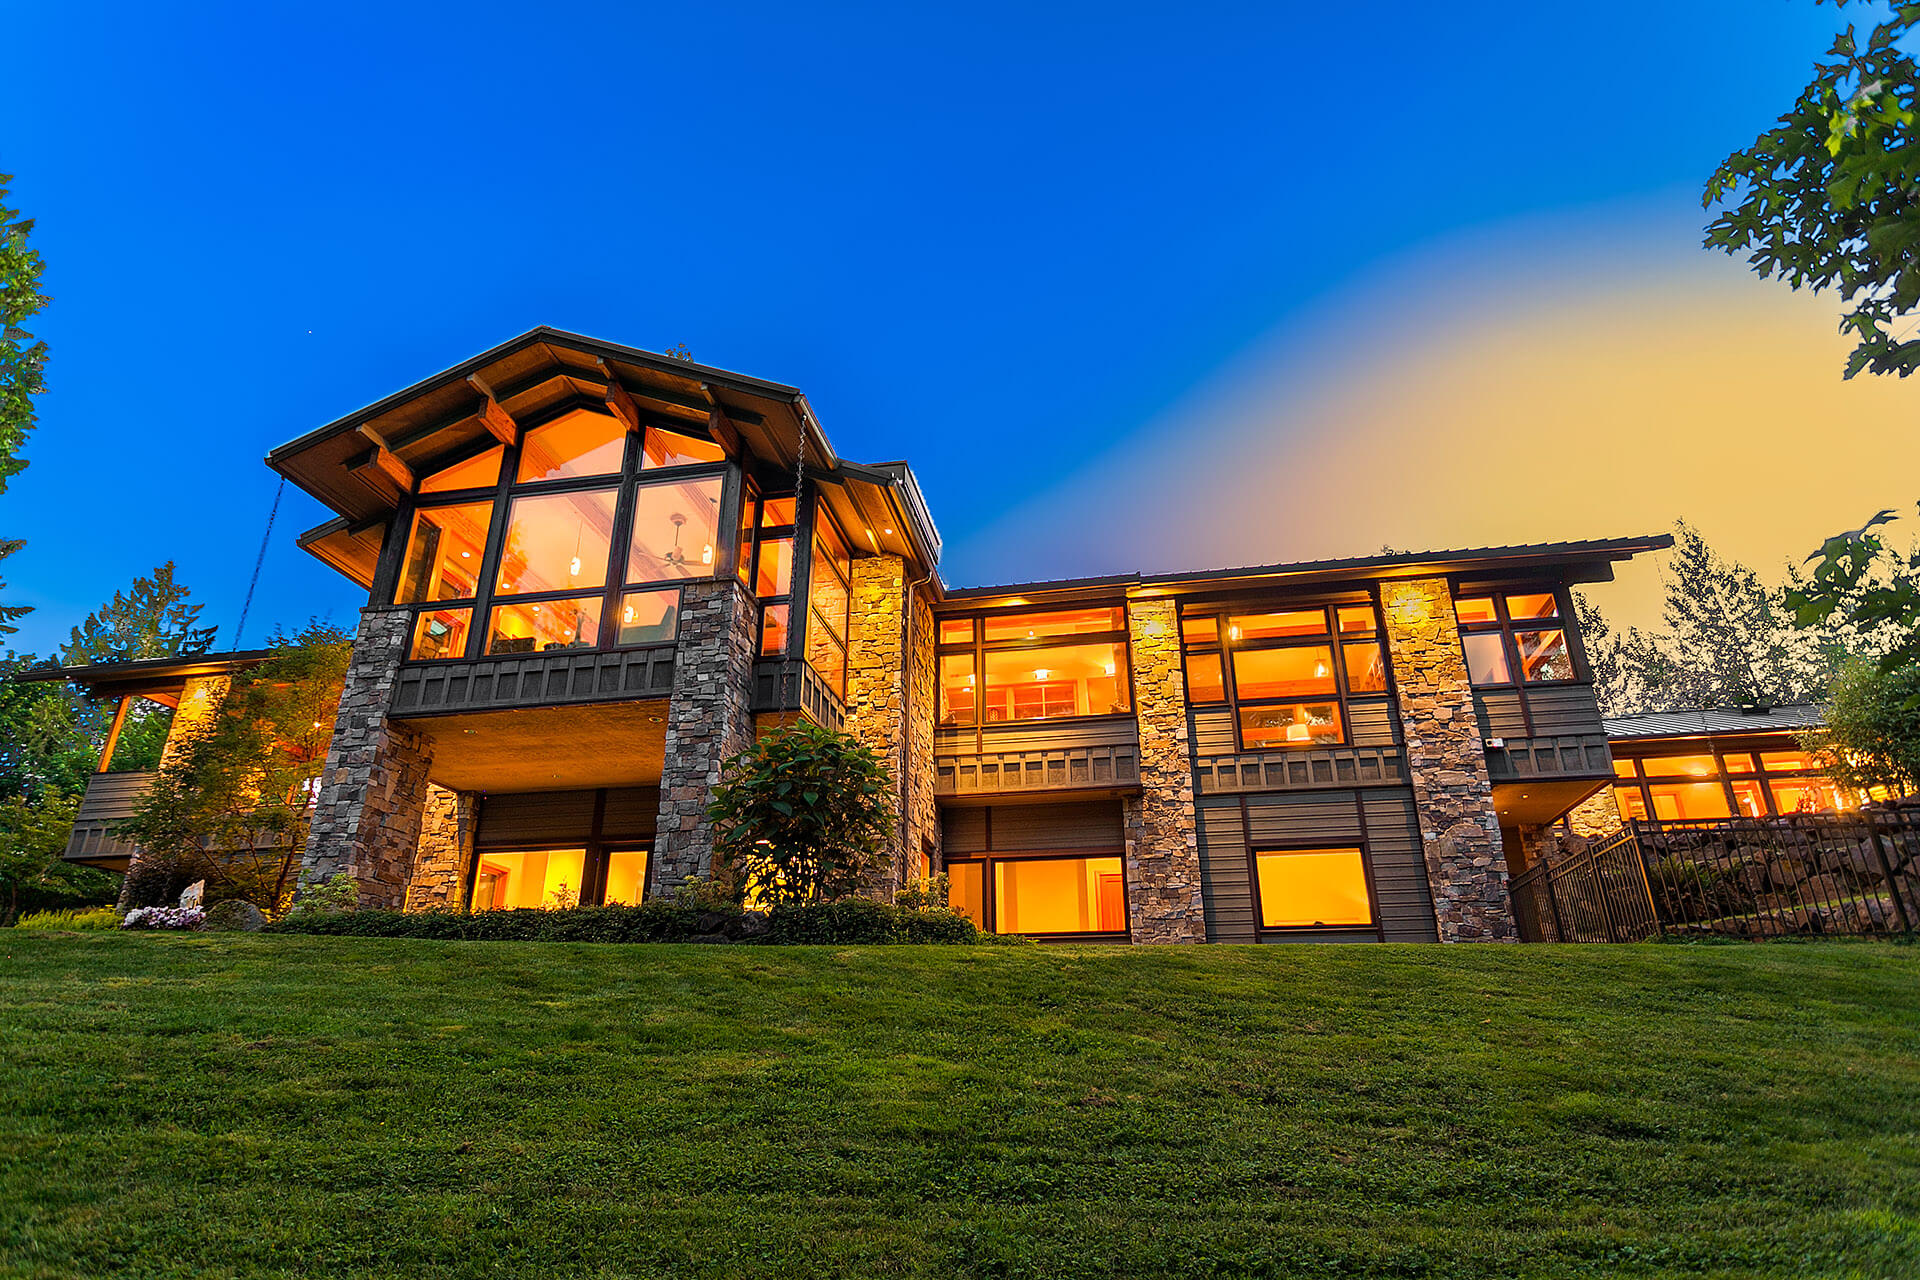
Aside from that, photographers also charge differently. There are those that charge on a per image basis while others charge per day. The time of the shoot will also affect the pricing. Most photographers charge double for shoots that have to be done on dusk or twilight often ranging from $750 even up to $900.
Mid-rise office buildings are also charged higher and can go up to more than $2,000. Large mixed-use developments, on the other hand, are priced at more than $3,000 due to the number and quality of the spaces. This type of property might also require a day or two depending on how large it is. Retail properties can be priced around $1,300. This type of property doesn’t usually need interior shots as the location and amenities should be highlighted instead.
The inclusions and your needs
For the most commissioned real estate photo shoot, you can get around 10 to 25 ready images. However, you can always ask the photographer if he can do virtual tours or aerial drone photos if your property needs it. This will definitely affect how much the photographer will charge you.
Identify your needs and how you want the property to look like. You need to be specific with the number of photos that you need and the list of rooms that you want to be shot. Inform the photographer if you want a 3D tour, aerial shots, videos, and if you want the images to be rushed.Usage license is also another thing that you have to talk to your photographer with.
An extra aerial drone photography can be priced up to $300 or more for 10 photos. 3D tours on the other hand can go from $300 up to $500. An extra video tour will take you around $250. An aerial video tour will also be priced around $150 or higher.
Make sure that you know the current rate in your area and that you’ve identified your needs for the property. Find a way to marry your needs with your budget while not sacrificing the quality of the output. Always prioritize the wow factory of your listing and making sure that your needs are met.
Choosing the real estate photographer
Don’t just go for the cheapest real estate photographer that you can find. Although it is important that you stick to your budget but you arguably will get what you pay for. You have to make sure that the photographer that you hire will deliver the quality of work that you want. There is a big difference in the quality of output that an amateur photographer and a professional photographer respectively produces.
Research. Before you jump right in, ensure that you do your research first. Look online for suitable photographers. You can also check other listings and find the photographer who took the photos. Ask around for recommendations from your friends and those who have recently hired a real estate photographer. Look for photographers within your area that have good reputation and are experts in the field. You can also look for real estate photographers from photography associations or artist directories in your area.
Experience. Look for experience. This is something that is important for any projects. Ask potential photographers for their portfolio and how long they have been shooting real estate projects. Make sure that the quality of work that they do matches the kind of quality that your business represents. Their output should not be amateurish. Some photographers also specialize in a certain sector, like condos or commercial development. This is something that you need to ask first before you hire a photographer.
Work ethic and professionalism. Being an excellent photographer is only one thing. Another factor to consider when choosing the right photographer for your projects is to find one that can handle different types of working situation. Real estate photography can be challenging and there will be times when the shoot won’t go as planned. It is a must to have a photographer that can cope with any given situation. You need someone you can work well with and you are comfortable with throughout the shoot, as well.
Pricing.Aside from making sure that the rate is within your budget, you need to scout if the photographer’s price is within the pricing scale in your area. Ensure that the price is worth the quality of the output and how the photographer works.
After you’ve got everything checked, you are now ready to hire a photographer for a real estate photo shoot and maybe after you need to hire a real estate photo editor, we also have tips for it found in this other blog post.
In shooting real estate, the important task is to keep or improve the property’s value by prepping it properly. This is your responsibility as a photographer. However, you also have to follow the taste and preference of the agent or the homeowner and meet their marketing goals. Remove objects that will devalue the property and think of how you can beautify it with every shot.
Q&A Interview with US Topnotch Realtors (in random order):
Realtor: Jason Townsend | http://capitalcommunityproperties.com Phone No.: 202-415-7400 Question: Who is your favorite real estate photographer and why? Answer: We love our real estate photographer because they are reliable, consistent, & superior! The quality of work is top-notch & we can be confident regardless of weather or type of home, the photos are going to present our listing in its very best light while underscoring every strength. Their photos allow prospective buyers to see themselves in the home and cultivate irrational exuberance which is an invaluable skill. In the age of the internet, photos are your lifeline in real estate- our photographer understands this and has been a key part of our listing growth and success. Photographer’s Name: Linen & Lense Photographer’s Website:http://www.linenandlens.com/
Realtor: Casey Aboulafia | www.homeswithcasey.com Phone No.: 202-780-5885 Question: Who is your favorite real estate photographer and why? Answer: My favorite photographer is Magin Urdanick. Besides being friendly and great to work with as a person in general, her skills and “eye” for photos are really great. Not merely ‘room’ shots, she takes some wonderfully artistic shots that set the tone and feeling of connection for potential buyers looking online. It really bumps up the draw to get buyers into the house, and the sellers love her shots. Photographer’s Website:www.exposurere.com
Realtor: David Marks | www.davidkmarksre.com Email: david@davidkmarksre.com Question: Who is your favorite real estate photographer and why? Answer:Steve Hanson….good quality work, prompt turnaround and open to suggestions based on the type of marketing material I want produced. Photographer’s Website:http://www.hansonphotogroup.com/
Realtor: Heather Dolin | www.heatherdolin.com Email: hdolin@windermere.com Question: Who is your favorite real estate photographer and why? Answer:Jenny Jenkins with Vicaso. She has a gift in capturing the space; both in size and feel. She’s also great about making slight adjustments to the room to maximize the photo. Photographer’s Website:www.vicaso.com
Realtor: Fred Sed | FredSedRealty.com Question: Who is your favorite real estate photographer and why? Answer: We love to work with Rancho Photos in Southern California for all of our listing photos. Not only do they do a great job, but their photos are very elegant as is evidenced by their website design and extensive portfolio giving us confidence that we will give our clients the quality they expect. They have a very fast turnaround time with a large team of highly qualified photographers. Within less than a week, we can order photos, have them shot, edited, and sent back to us in multiple formats and complete the payment through their website making our job quick, easy, and seamless. Photographer’s Website:https://ranchophotos.com
When establishing yourself as a real estate photographer it is key that the work that you produce is professional and shows no signs of amateurism. Here we will cover a few of the common errors new photographers make, how they happen and how to avoid them.
1. Converging Verticals/Incorrect Horizontals
This is one of the most common issues with people just beginning to work in real estate photography, Converging verticals and misaligned horizontals are particularly problematic for real estate as the aim of good real estate photography is to give a realistic and pleasing view of the property. Humans like things straight and if things looked crooked, it throws our sub-conscious perception out of balance.
Converging Verticals describes the effect in images when two parallel lines in an image, such as the two sides of a house seem to get converge – as if they are leaning in towards one another at the top.
This effect is very apparent when while trying to take the exterior photos you angle your camera up in an attempt to fit the whole structure into the frame. It’s particularly noticeable when using a wide angle lens and while capturing a tall building. This also happens when your camera is not fully level while taking our shot.
Incorrect Horizontals describes the effect in images when the horizontal lines in an image are on different planes. It is particularly noticeable in one point interior shots of the home.
The Fix:
There are 3 keys to dealing with these problems.
Try to move further back from the home that you’re photographing. This decreases the angle that image is taken from and the more parallel you are to the subject the better. This may require you to stand across the street from the home and you will probably get more of the foreground in your image.
The next key on site is to use a tripod that contains a tripod head with a bubble level to check each shot or you can alternately use your live view and line up the edges of the photo with edges of the wall and make sure verticals are straight by using shift and tilt modifications.
The final key comes in post-production. Since, in order to mitigate the converging lines effect, you probably have more of the foreground in the shot than you would prefer to make sure to crop the image accordingly
2. Open toilets
Although it seems obvious, this error comes up oftentimes with new real estate photographers. Leaving the toilet seat open invites the viewer to imagine what might be inside. That is never good.
Obviously, the fix here is to close the toilet seat before taking photos but this error speaks to a bigger overall issue with proper project preparation.
3. Weak Perspectives
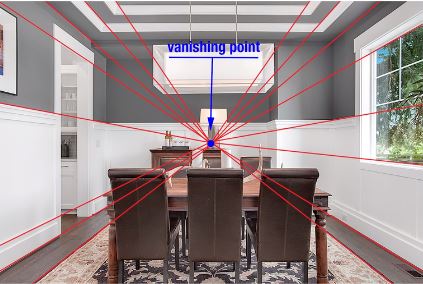
In order to present the best work, all of your shot compositions should show a strong one point or two-point perspective. A one-point perspective is defined as a shot in which all orthogonal lines converge on a single vanishing point.
Most real estate photography is taken with a two-point perspective. Since there are more diagonal lines this is a more dynamic way of composing your shots. A two-point perspective is defined as a shot in which the orthogonal lines converge on two different vanishing points.
The Fix:
Two Point Perspective: Make sure to only capture two walls in your two point perspective compositions. It is always better to let the viewer imagine the third wall rather than have it impinge on the space in your shot. A proper two-point perspective makes the space feel larger, which is key in real estate photography.
One Point Perspective: Make sure to line up your vertical and horizontal lines in your one point perspective compositions. Everyone notices a picture frame that is not properly aligned on their wall so even the untrained eye will notice mistakes here and the photo will look hastily composed and unprofessional.
4. Hot Flash Spots
Hot flash spots like the ones shown below can distract from the important factors of the space and they are also just not aesthetically pleasing. This can happen a number of different ways but the most common cause of this problem is when you are using an on-camera flash and shooting that flash straightforward with no diffusion.
Try using umbrellas to diffuse the light or bouncing your flash off the ceiling or other surfaces for soft fall off light.
5. Bad Tone Mapped HDR
HDR photography can sometimes look overprocessed. While it can be used as a tool for artistic expression it is not something you aim for in real estate photography.This common error occurs because users tend to use invalid settings for tone mapping in post-production. This is common with batch processing of raw images. This can also occur when taking only ambient exposures with no flash or without proper lighting. This can be especially problematic for real estate photography since prospective buyers may be disappointed when they actually tour the home and it doesn’t meet their expectations based on the images they saw online.
OVERPROCESSED
The Fix:
In order to avoid this issue, you should make sure to light the space properly. Try mixing your own lighting with ambient light in your shots. In post-production manually edit the image for a quality color balance.
6. Improper White Balancing
White balancing is the process of removing unrealistic color casts so that objects which appear white in person are rendered white in your photo. A telltale sign of real estate photography amateurism is finished photos that don’t accurately represent the true color of the space. Even if the real estate agent doesn’t notice this you can be sure that their client the homeowner will. This typically occurs because there are too many different light sources with different temperatures and there was no flash used to overpower these ambient light sources or the photographer did not properly adjust the white balance in post-production.
UNBALANCED
The Fix:
Use of a proper flash to overpower multiple light sources and colors and use of post-production software to balance the raw image properly.
7. Lens Distortion
The key to real estate photography is to “keep it real” The use of a “Fish Eye” lens or cheap lenses along with the subject of the photograph being too close to the lens or a lack of proper post-production adjustment techniques can cause your completed work to suffer from lens distortion.
The Fix:
Invest in higher quality lenses as they will pay you back with better end results and happy clients who refer you more business. Make sure the subject is at a proper distance from the subject matter. You also can correct the lens distortion in camera raw or Lightroom by profiling the lens and camera combination.
8. Hard shadows
Hard shadows make rooms look dark which is a bad result since most buyers prefer homes with a lot of light. These shadows can also make walls and ceiling appear stained and dirty.The most common cause of this is something we have covered before; using on-camera flash and shooting that flash straightforward with no diffusion
The Fix:
Try using umbrellas to diffuse the light or bouncing your flash off the ceiling or other surfaces for soft fall off light. You can also manually remove the hard shadows in post-production.
9. Photographer or Camera Reflections
The Fix:
This issue occurs due to improper positioning when taking your shot. If it is impossible to get the right shot without exposing the gear or yourself to a reflective surface you can fix this in post-production with a software such as Adobe Photoshop by using the clone tool.
10. Lack of decluttering the shot
It is important that a real estate listing appear orderly and organized in order to be pleasing to the eye. Although the example below is extreme, it is important to preserve clean lines for your image.
The Fix:
Items such as soap on the sink or remotes on the coffee table take away from the shot. Also be aware and remove any personal photos, garbage cans, security system signs, toys or other uneccessary personal items from the frame.
For more in-depth training on real estate photography follow the links below:
Real Estate is a lucrative industry. The total value of all the housing stock in the United States has never been worth more than it is right now, according to a new report from Zillow. The report says the total value of U.S. housing stock grew to a total of $29.6 trillion in 2016, marking an all-time high. Listing Agents are willing to invest in effective marketing and in this highly competitive market, they are always looking for the best photos and media to sell their properties fast.
How to Get Started in Real Estate Photography
There is always a need for a good photographer. No matter what the economy looks like houses are always for sale. This makes real estate photography an attractive pursuit for many.
1. Master the basics of photography.
Before you venture into any type of photography, mastering the basics is a must. Although there are exciting technological advancements that are very prevalent in the field, it pays to take the time to get to know your equipment and basic the techniques in photography first. Take workshop classes that focus on fundamentals and just keep on shooting.
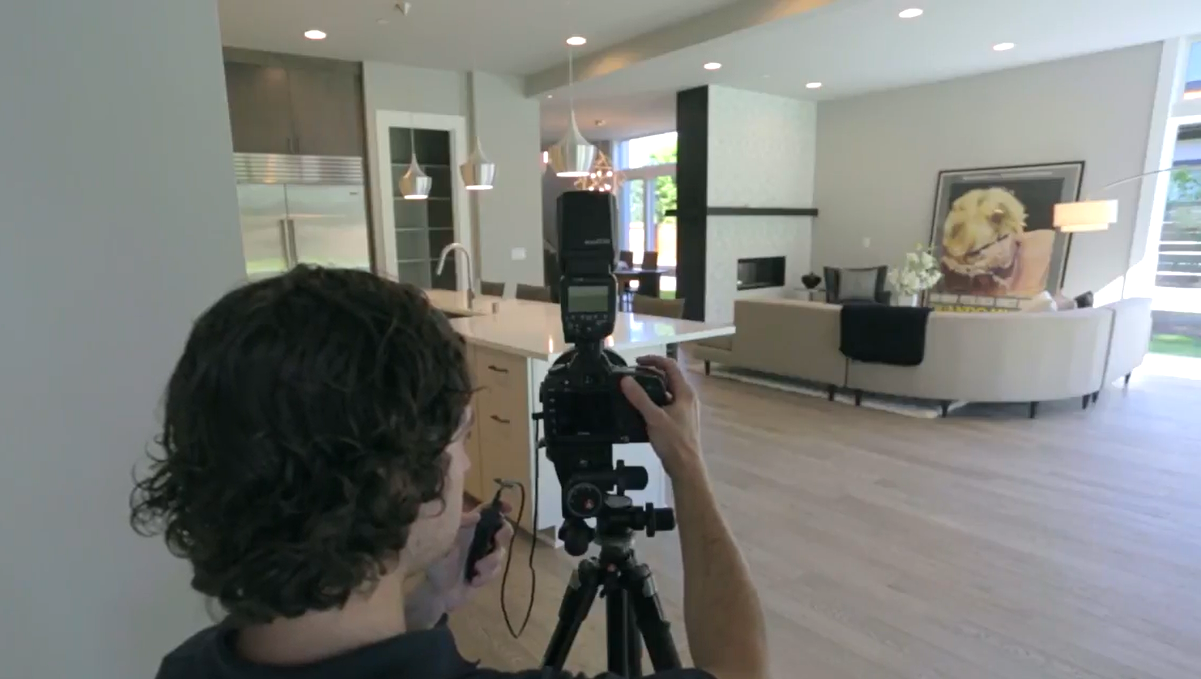
2. Choose the right tools.
A craftsman is only as good as his tools. Invest in the right gear so that you deliver quality work. Invest in a camera with good ISO performance and make sure that it is a full-frame DSLR model. A wide-angle lens is also a must for shooting real estate. This is a staple for shooting large bedrooms, interiors, and even exteriors of homes. A tilt-shift lens can help to minimize distortion when dealing with a wide angle lens without sacrificing composition. A sturdy tripod with an adjustable head will come in handy and save you a lot of time when moving your setup about the property. This will drastically improve your consistency as far as composition is concerned, which is necessary for HDR processing, which has become very prevalent in the real estate industry. A powerful flash unit and a remote shutter are accessories that will make a difference in your output.
3. Network and shoot.
If you’re just starting out in real estate photography, it pays to know people who are currently working within the industry. Connect and network with real estate agents or brokers and consider offering your services for free. This is something that you should strongly consider if you’re still building your portfolio. You can use this as an opportunity elicit referrals. You, at a minimum, will build a strong portfolio so you can land paid projects in the future.
4. Find out the industry rates.
Research what other real estate photographers are charging and charge appropriately. If you’re still new, you can compete with veteran photographers by offering more bang for the buck.
5. Plan ahead.
Once you’re booked for a shoot, make sure to carefully plan every detail. Talk to your clients openly and discuss their wants and expectations. Create a shot list based on your client’s desires and identify the setup and lighting you will need in order to achieve the desired result. Arrive a few minutes early in order to survey the location. It is also key to find the best hours to shoot based on the Sun’s location relative to the property, especially for exterior photos.
6. Learn, learn, learn.
Learning never stops, no matter what field you’re in. You need to always strive to be better and work hard to learn more techniques to better your craft. Learn more editing techniques and figure out how to streamline your processes. The style and trends in photography change rapidly.