Imagine you’re a home buyer and you come across a property that on paper is perfect for you. You read the description with glee but, alas, the photos of the home you want to buy are dull, grainy and out of focus.
What’s your first reaction? Usually, it’ll be to simply skip the listing altogether and look at another one offering you better insights.
This example is the reason getting real estate photography right is so critical. You need to be professional if you want to sell.
Getting real estate photography right is partly about technique. However, it also relies on using the right equipment for stunning shots. If you make the wrong choices, you’ll never get the results you want.
Fortunately, this guide is here to help. We run through the products you need if you want to snap eye-catching real estate photos that sell. By the end, you should have a better understanding of what to get and how to use it.
Essential Cameras for Real Estate
The camera you get will be the most important equipment choice you make when it comes to real estate photography gear. Nothing else will determine photo quality to the same extent.
When choosing a camera, you’ll need to consider:
- The sensor size: Does the camera offer full-frame modes or crop options?
- The megapixel count: Is the sensor sufficiently high fidelity? Most cameras top out at around 100MP, but even 20MP is sufficient for detail shots
- Dynamic range: Does the camera have an option that enables it to capture more colors than standard options, and upload them to digital devices capable of displaying them?
- Compatibility with wide-angle lenses: Is the camera compatible with lenses needed for difficult interior shots?
For real estate shots, you’re usually okay with middling megapixel counts. You don’t necessarily need the highest fidelity. However, high dynamic range is a good idea for realtors. It helps you capture high-contrast interiors and bring out more colors.
Wide-angle lens compatibility also helps. Cameras accepting more lenses are better able to deliver high-quality shots that entice buyers and capture key features (like pool outlines or rooflines).
Types Of Cameras
As you explore equipment for real estate photography, you’ll discover multiple different types of cameras. Understanding how these differ from each other is critical for learning to get the best shots.
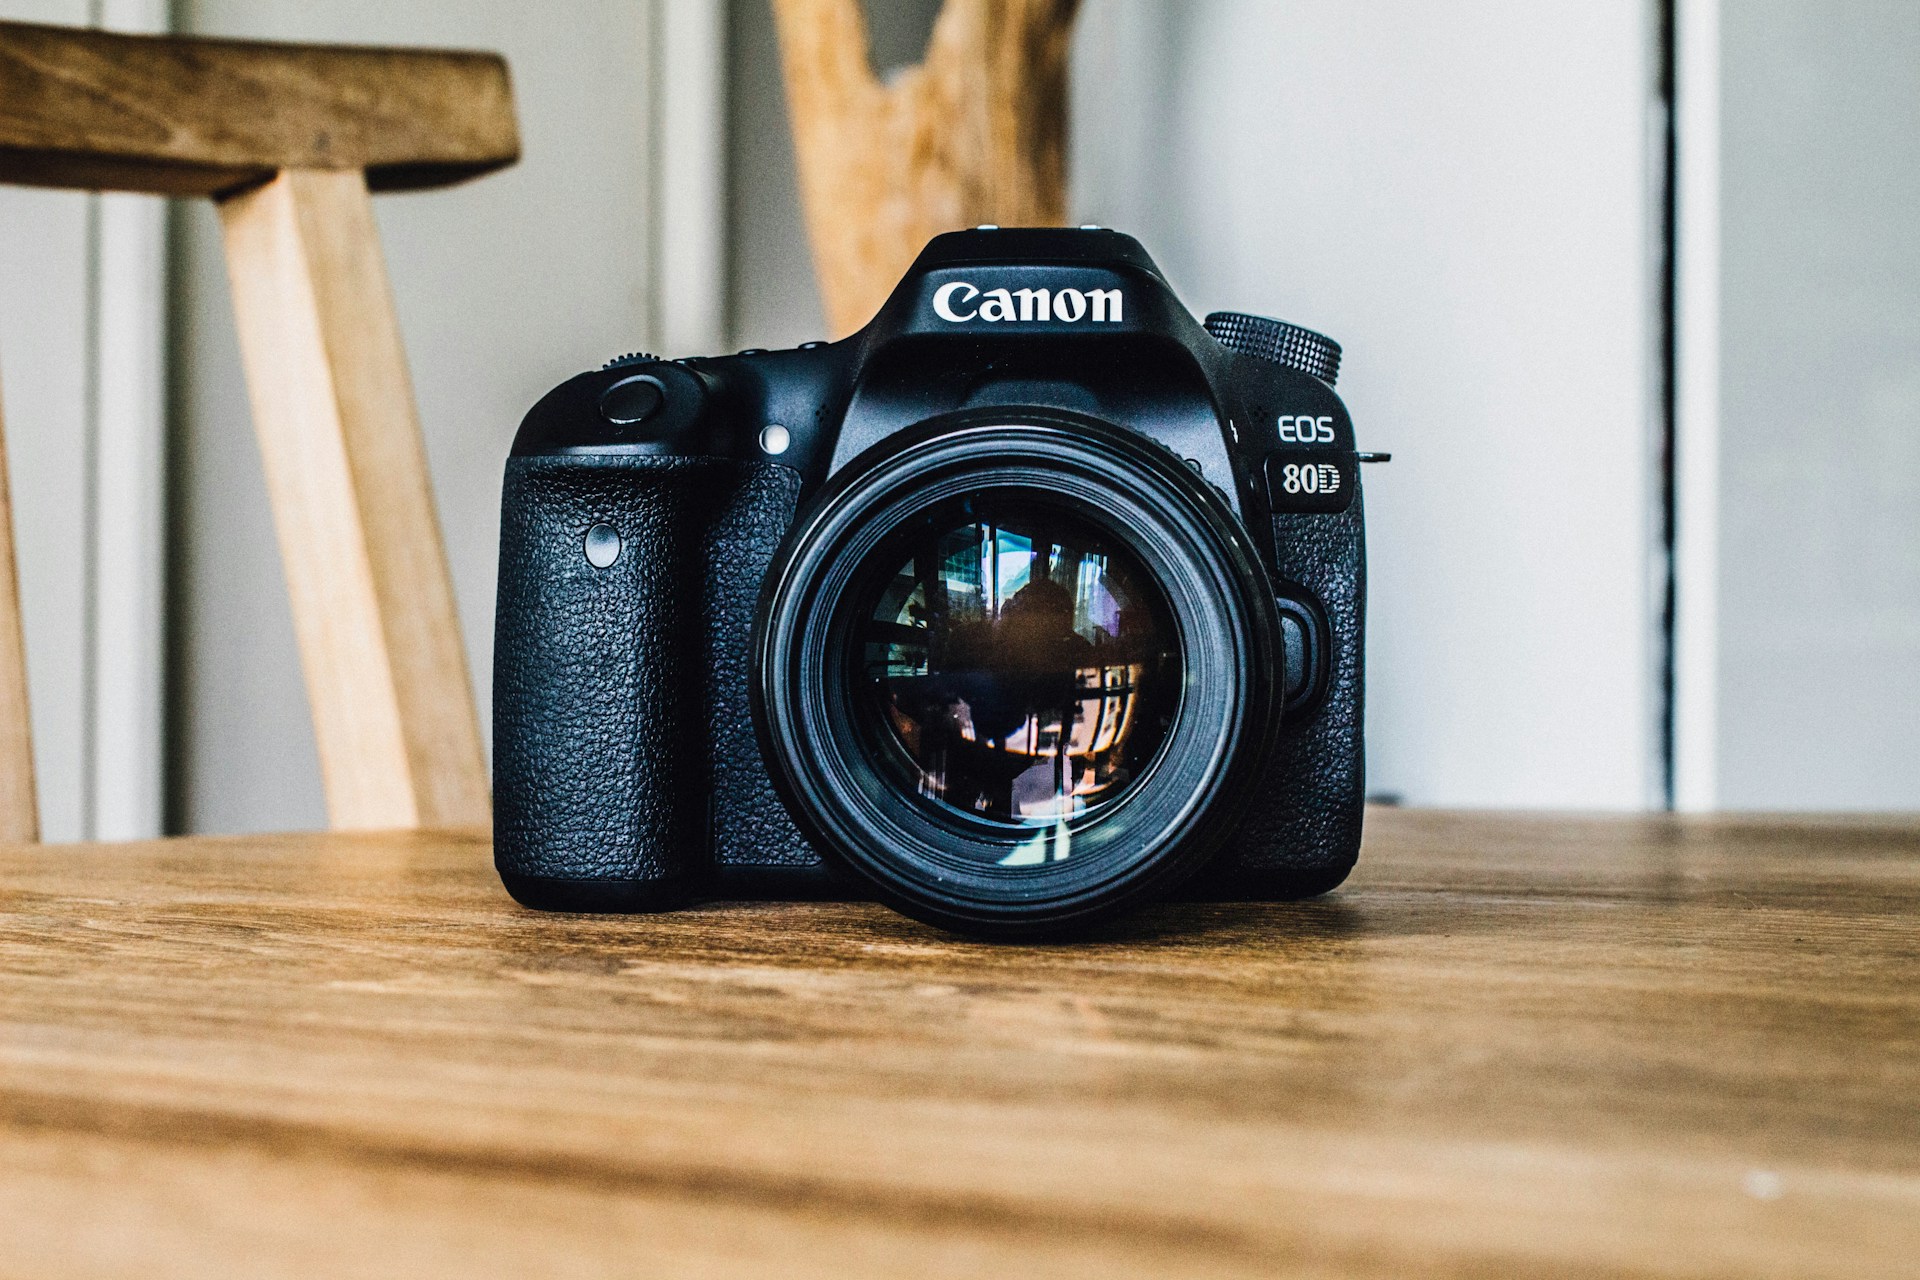
DSLR Cameras
DSLR cameras used to be the gold standard for real estate photography (and still are by many metrics). Their primary benefit is their optical viewfinder.
As a class of cameras, they’re easy to use and have a robust design. This makes them suitable for realtors and estate agents needing to photograph a large number of rooms or properties over an extended period.
DSLR’s downside is their bulk. Because they have so much traditional equipment onboard and an optical design, they need more glass and materials to construct.
Here are some examples of popular DSLR cameras you should consider if you want to go down this route:
- Canon EOS 5D Mark IV: Well-known in the real estate industry because of its lower price and high performance in a lightweight package.
- Nikon D850: A premium option photographers love for its cropping details and exceptional resolution.
Mirrorless Cameras
Mirrorless cameras are the other big category of real estate cameras. These are significantly lighter and less bulky than standard DSLRs and usually come with nice digital features, like auto-focus. This latter makes them better able to capture details in walls, furniture, and ceiling molding.
The downside is the risk of overheating while recording videos and the shorter battery life. Mirrorless cameras are often energy-hungry and will drain cells quickly.
Overall, though, the real estate industry — like many others — is shifting toward these cameras. Their electronic viewfinders are just more convenient and photographers can get previews of their images in real time to determine their quality.
Top options include:
- Sony A7 III: Loved for its sharp images and its full-frame sensor (no cropping or distortion)
- Canon EOS R6: Offers in-body stabilization for hand-held shots, reducing blur and increasing photo professionalism
Compact/Point-and-Shoot
Finally, some beginner real estate agents use compact and point-and-shoot cameras. These don’t really offer the same level of fidelity as the options discussed above. However, they still can be a good choice
We’d suggest looking into compact or point-and-shoot products if you’re a beginner. Try to find models with wide-angle lenses built-in. These help you bypass some of the limitations that are present with other compact cameras in this category.
General Camera-Buying Advice
If you are in the market for a real estate photography camera, we suggest the following:
- Must have RAW shooting capability. This functionality makes images from the camera easier to move and edit.
- Should have bracketing for HDR. This feature is where the camera takes multiple shots of the same scene but with different exposure levels. Then, editing software can stitch the various image layers together for a richer appearance.
- Weather sealing. Equipment that can keep out of the rain and moisture is relevant to real estate photography, too. Cameras you can take outside in the rain are more useful than those that require dry conditions.
If you have a low budget, start by renting the real estate photography equipment you need. Then, later, consider buying if you get the volume of gigs you need.
Alternatively, hire a photographer. If they’re contractors, they’ll have their own equipment.
Note that while cameras are the core of the equipment you need, additional accessories enhance the potential to take great shots.
Must-Have Equipment for Real Estate Photography
As you explore real estate photography equipment further, you’ll discover that cameras aren’t always enough. Yes — they’re useful and essential, but there’s so much more you need to consider.
Supporting gear helps with lighting control and stability. Getting it right can mean the difference between a high-resolution grainy or blurry shot, and one that looks like it should be in a real estate magazine. Additional equipment deals with common challenges, like uneven lighting and image distortions.
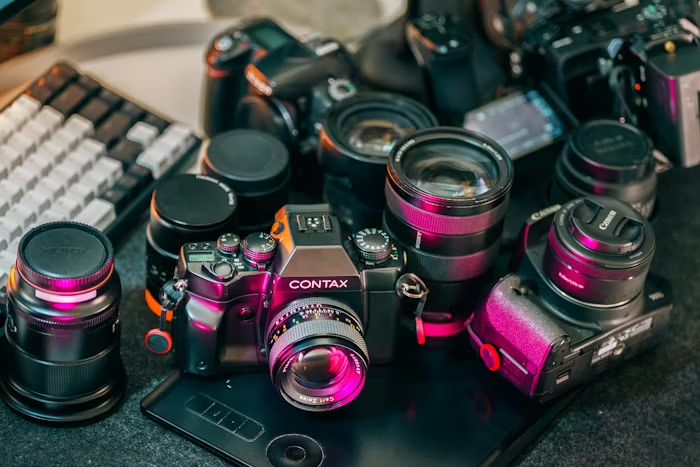
Lenses
No matter what camera you have, you will need an assortment of lenses to go with it. These are essential for achieving the correct focal length and aspect ratio in interiors.
Wide-angle lenses are what they suggest: lenses that let you take letterbox-style shots. These can upgrade the aesthetics of interior photography significantly, making it more compelling.
The Canon EF 16-35mm lens is popular because it offers minimal distortion. Close-range interior shots look true to life with minimal fish-eye effect.
The Sigma 14-24mm is another option that works well in low light and has an adjustable focal length. Real estate photographers can choose the 10-24mm for APS-C or 16-35mm for full-frame.
Tilt-shift lenses are another option for correcting perspective. These are helpful when you need to control depth of field in a real estate setting.
For example, you can use tilt-shift lenses for architectural correction. If vertical lines aren’t straight, tilt-shift lenses can change the angle of the lens in relation to the sensor so everything lines up.
The Canon TS-E 17mm is a top tilt-shift choice for real estate agents. It makes it easy to keep vertical lines straight and prevent them from bowing in ways that might make buyers suspicious.
Finally, you could explore macro lenses. These are ideal for close-up photography, allowing you to capture more detail.
For example, suppose a property has a hand-hammered copper sink. Macro lenses would be ideal for capturing the detail in the hammer marks.
Macro lenses also make sense for stone countertops, the texture of soft furnishings, and indoor plants. Essentially, you can use them for anything requiring a crisp, up-close image.
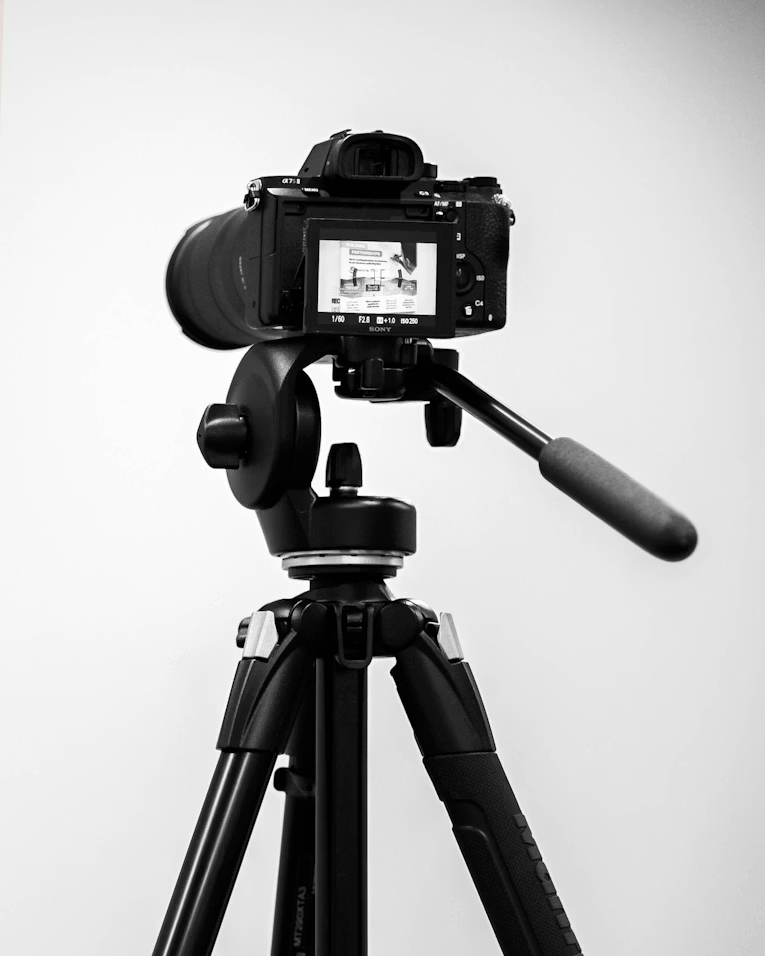
Tripods And Stabilizers
Next, you’ll want to look into tripods and stabilizers. These are critical for taking sharp, level shots.
Again, what you use for real estate depends on your requirements and how you want to take photos. It is possible for photographers to hold cameras in their hands and take shots, but it isn’t advised.
For fixed options, consider the Manfrotto MT055XPRO3. This tripod is made of aluminum (making it easier to carry) and has an adjustable camera mounting point. Each leg is also extendable, so you can raise or lower your camera relative to the rest of the room.
For video explainers or walkthroughs, we recommend a gimballed option, like the DJI Ronin-S. These devices have smart tracking, keeping the camera pointing at you, even as you move around.
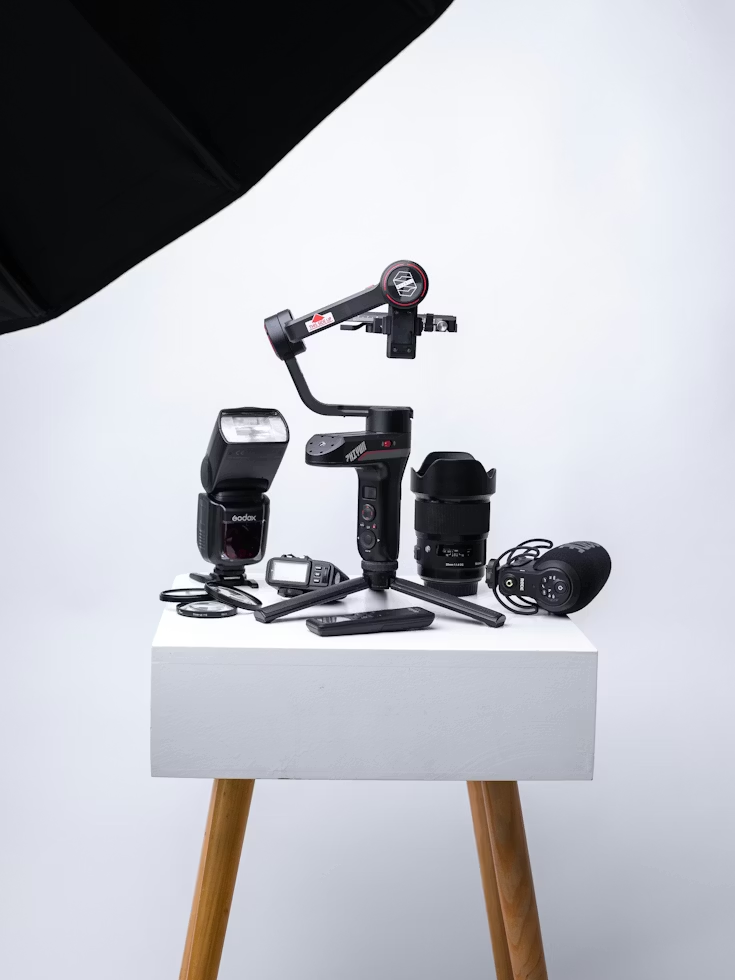
Lighting Equipment
Lighting equipment can come in several forms for real estate photography. Whether you need it depends on the amount of natural and artificial light already present in the environment, and the angle it comes into the frame.
External Flashes
You don’t often see external flashes in the real estate photography world. However, they can still be a helpful addition to camera equipment when looking to fill shadows.
For example, suppose you need to photograph a storage room with a single ceiling light and no windows. A flash is essential in this situation.
Softboxes
Softboxes may be needed in a few situations, too, especially when you need consistent illumination. If a full-size softbox isn’t in your budget, you can get less expensive LED panels.
Natural Light Modifiers
Lastly, it might be worth investing in natural light modifiers you place over windows. These make incoming light seem less harsh, especially on bright, sunny days.
Miscellaneous Items
Other miscellaneous equipment you might need includes things like remote shutter releases. These are handy when trying to avoid camera shake (and editing nightmares).
We discuss other camera-specific accessories in the next section.
Overall, you are looking at spending around $800 to $1500 for the equipment listed in this section. Lenses will comprise the bulk of this cost, although professional lighting can be costly, too.
Camera Accessories for Real Estate Shots
Accessories are “nice-to-haves” that complete your shots and make your images pop even more. They make your life as a real estate photographer easier, especially if you’re a startup and you haven’t done much of this before.
Camera accessories essentially make your work more efficient. When you have the right tools, you can get more done and make faster progress. With the right products, you can photograph multiple properties in a single day and still have energy left over.
But what items do you need specifically?
Filters And Protectors
Camera filters are additions to conventional transparent lenses that adjust the nature of the light entering the sensor. Some interior shots may require these in specific situations.
Neutral density filters are like sunglasses: they reduce the amount of light reaching the lens, allowing for superior shots in bright rooms. For example, you might use these if sunlight is blazing through an open window in the morning and you have no other way to soften it.
Polarizing filters are also sometimes necessary in these situations. These are useful when trying to cut down on reflectivity from non-metallic surfaces in the presence of bright lights. They help with color gradients, making things like leaves greener and the sky bluer. You can add these in the editing phase, of course, but it just cuts down on extra work later.
Lastly, some real estate photographers use UV light filters. These aren’t as common now among digital cameras, but they used to be essential in rooms with skylights photographed at midday. UV filters reduce annoying gray “haze” in film-based images, bringing out truer colors.
Protectors are more straightforward. These are simply to protect the lens’s sensitive glass from damage. If protectors get scratched, you can replace them at low cost.
Clear protectors are protectors you can leave on your lenses during shots. These cut down on tasks when shooting rooms, but they need to be in perfect condition to avoid harming image quality.
You can also get opaque, removable protectors that you remove and fit each time you use your camera. These make sense if you’re regularly boxing and unboxing cameras, or storing lenses loose.
Bags And Storage
Bags and storage are also equipment needed for real estate photography. Don’t leave the office without them!
Bags are like lens protectors, but they protect the entire camera and associated accessories. Many have reinforcements to protect against crush damage, and separate compartments for all the parts you need, like flashes, additional lenses, filters and so on
The downside, of course, is that you need a bag that fits your equipment, so choose wisely. A generic bag might not be sufficient for your requirements.
Generally, you’ll want to buy the bag with the camera, ensuring they go together. Then, if you need additional equipment, like lenses, buy them with separate, bespoke cases that fit them.
Also, check the bag is ergonomic if you or your photographers are going to be carrying it around all day. Most camera bags have handy straps that make them more comfortable to carry around.
Some camera bags also have additional versatility. For example, they might have space for things like water bottles, laptops, tripods and so on. You’ll need to decide which of these additions you need.
Editing Tools
As a real estate company, you also need editing tools for your images. These help you improve them further, making them more compelling.
Historically, editing was the most time-consuming part of the process. However, with today’s AI tools, it’s considerably more efficient.
Phixer, for instance, offers multiple AI-based tools to improve real estate images. These include:
- Lawn replacement – automatically removes unwanted items from lawns, making them look green and verdant
- Sky replacement – transforms dull gray skies into blue or blue with some light clouds for more appealing aesthetics
- Virtual twilight – adjusts the image settings to mimic twilight, showing what the property would look like in this light level (even if you took pictures at midday)
- AI room decluttering – automatically removes clutter from rooms in a single click, making properties look more staged
- Object removal – eliminate specific items from frames to improve images
Phixer also offers more conventional real estate photo editing for improved real estate photography. For example, you can do things like correct colors for more natural and appealing images. You can also improve HDR, balancing things like bright window openings and dark corners.
Phixer using a drag-and-drop interface for ultimate simplicity. Photos are available in various output formats for convenience when uploading to specific platforms.
Drone Accessories
If you’re photographing commercial properties or luxury homes, then you might need drone accessories. These devices are handy for taking aerial shots and photography of hard-to-reach areas.
For example, suppose you want to capture unique home features, like crenellations or clock towers. Drones are the perfect tool for getting up high and filming or photographing these elements. Plus, they can also be useful for capturing videos of large tracts of land or gardens surrounding a property.
The best drone options are made by DJI, like the Mini 3. Just make sure you take spare batteries with you for long filming days since they can run flat fast.
Apps For Remote Control
Some camera brands also have apps that let you control things like camera shutters remotely. These are handy when you want to control shots from a phone or notebook.
Here are some examples:
- Nikon SnapBridge
- Sony Imaging Edge
- Canon Camera Connect
- BT Cam (a third-party option)
- Shutter
- SayCheese (a mobile app)
- Airdroid (for Android only)
What’s nice about these apps is that they eliminate the need to interact with the camera directly. You simply establish a wireless connection and then click “shoot” on your device, removing the risk of wobble.
Mistakes To Avoid
When buying camera equipment for real estate photography, make sure you avoid the following mistakes:
- Skipping The Lens Cleaning Kit
First, you’ll want to ensure you have a proper lens cleaning kit. Getting this wrong can make your lens look hazy.
Don’t use any non-specialist product on the lens. The wrong types of cloth or leaning agent could cause permanent (and expensive) damage, forcing you to replace the lens.
- Buying A Drone Before Licensing
Depending on where you are, you may also need to get a license to fly your drone. Don’t buy one before you have the proper clearances.
Usually, you can get a license pretty quickly, especially as a real estate firm. Just ensure that you have permission from the authorities in writing and a letter from the client if applicable.
- Purchasing Multiple Speedlights
Purchasing multiple speedlights you don’t need is another mistake you’ll want to avoid. Many realtors jump in and add several of these to a room, creating ugly shadows and color shifts.
To avoid this, stick to a single high-quality flash. Options like the Canon 600EX-RT or Godox V1 can work really well in the right setting. If you need to add more at a later date, you always can.
- Buying Fast Primes For “Low Light”
Don’t fall into the trap of buying fast primes for so-called “low light” settings. As a realtor, you’ll usually only need f/8–f/11 for depth of field and sharpness. Anything shorter than that is almost always useless unless you know you’re going to photograph objects up close.
- Using A Cheap Tripod
Finally, don’t fall into the mistake of purchasing a cheap tripod. A lot of realtors try to cut corners here, but it can make your shots less steady (and ruin them in the process).
For this reason, budget around $200 for each tripod you use. If you can use carbon-fiber instead of aluminum, that’ll improve performance further.
Wrapping Up
Reading this full guide, you should have a much better idea of the camera equipment you need as a realtor. We suggest beginning with a solid camera and then building from there. Going down this route allows you to add what you need as you develop your business without wasting money.
As always, we encourage you to experiment and try different types of gear. You can also use Phixer to quickly edit images with AI, saving you time and effort.
To close, the right equipment empowers you to create professional-looking real estate images that sell properties. After all, that’s ultimately what you want to do.
Leave a Reply
You must be logged in to post a comment.