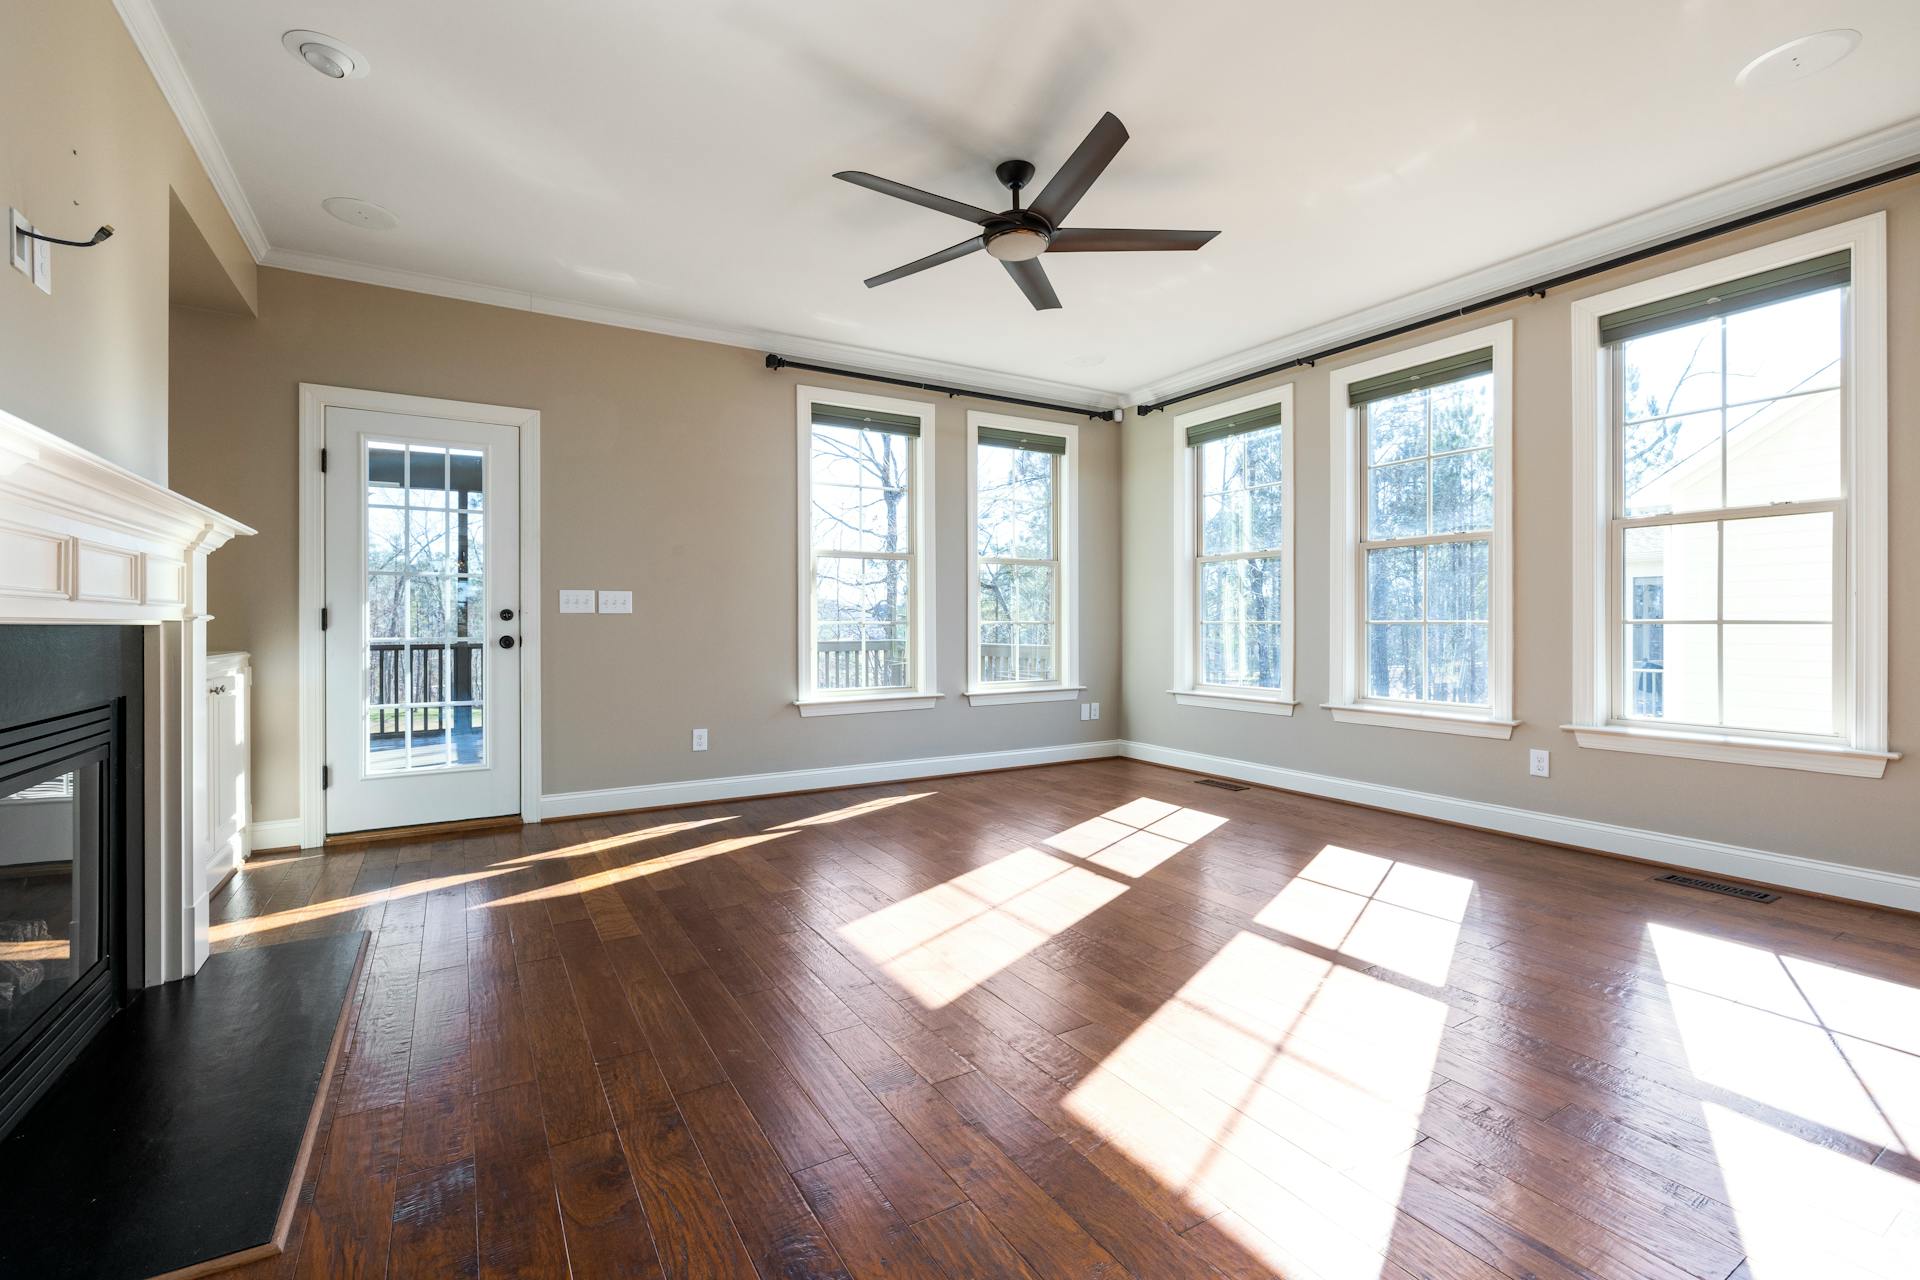
Blown-out windows are one of the most annoying artefacts that can creep into real estate photos. These make window panes look bright and washed out, contrasting negatively with interior exposures, making shots look amateurish.
Unfortunately, buyers pay a lot of attention to property photos. When pictures don’t accurately convey the quality of the property, it can put them off, causing them to skip to the next listing.
If you are suffering from blown out windows in your real estate photos, this comprehensive, step-by-step guide is here to help. It walks you through what blown out windows are, how you can edit them, common pitfalls people make when trying to capture real estate interiors, and when you should edit yourself versus using an expert. By the end, you’ll know what to do to create professional-grade interior photos.
What Causes Blown-Out Windows in Property Photos
Blown-out windows in property photos are caused by issues relating to dynamic range. When daylight is visible in an interior shot (usually via a window), it creates a large disparity between the brightest and the darkest areas of the exposure, which camera sensors find it difficult to capture in one shot.
For example, exterior brightness can be 10 to 15 times higher than interior brightness on sunny days, generating contrast regular cameras simply can’t deal with. The camera is trying to expose for long enough to keep darker interior walls and furniture visible, but then over-exposes on the windows, making them look much brighter than they should. The result is darker interiors with a murky appearance. Rooms seem dingy and unwelcoming.
Even high-end mirrorless cameras and DSLRs struggle to process the extreme contrast between the light coming in from windows and the rest of the room. They can’t compete with the dynamic range of the human eye, which is why images look odd (even if equipment is properly calibrated). .
Added to this, other factors can make blown-out window problems even worse, including:
- Shooting at midday when sunlight is harshest
- Shooting in program modes or auto modes
- Relying too much on a single exposure
- Using mixed lighting setups
When photographers fall into these traps, photos can look flat and unprofessional. They don’t spark interest, so buyers move on to the next listing, hurting the property’s performance.
What Is Window Pull Editing?
Window pull editing is the art of bringing together an exposed exterior view and an interior shot for a specific room. Photographers “pull” the properly exposed portion of the view into the shot for the rest of the interior so exposure levels match in a way that the human eye would recognize.
Software tools make this possible by layering the dark exterior shots over the main interior image, using masks to blend the transition. This approach reveals the window area with more crisp details like the outside landscape, sky and sea. Meanwhile, the interior of the room remains perfectly lit, looking bright and welcoming.
Window pull editing is not magic; it’s a common technique photographers have been using for a long time. When done correctly, rooms look natural.
Editors use window pulls for virtually every listing on major platforms like Realtor.com and Zillow. However, they are particularly important for luxury listings where buyers want to view properties in context. Window pulls may not matter for small townhouses lacking exterior areas, but they do matter for properties overlooking expansive gardens, beaches, cities, or oceans since these are a major selling point for wealthy buyers..
Methods to Fix It
What can be done to fix blown-out windows in real estate photography? Here are some options:
HDR blending
High dynamic range (HDR) blending is one of the most popular approaches to deal with blown-out windows. It’s also relatively simple to do with modern tools.
Set up your camera on a tripod and then set manual mode to aperture f/7 to f/8, ISO 400 or lower. Then shoot three to five exposures.
Once you have these, use an editing tool to perform an HDR real estate editing merge. Depending on the tool, you’ll need to select specific menu options. You may be able to adjust aspects of the merge, like the level of highlight or the level of shadow. This can help to make images look more realistic.
Be careful when using HDR. Most professionals leverage the tool in cases of moderate contrast. However, it can look unnatural if there is excessive tone mapping.
Manual blending
By contrast, manual blending gives you more artistic control without relying on algorithmic HDR approaches. Many professionals believe this produces a more realistic and natural looking result. However, it is more challenging to achieve because the work has to be done manually.
Start this process by shooting your interior exposure in a properly lit room and then using a window pull exposure for the exterior, ensuring that you retain exterior detail. Then edit in and open layers in your software tool. You should have an option to edit and adjust the darker window layer. Placing this on top of the regular interior exposure and then using a blend tool brings the whole image together.
Flambient technique
Finally, you might want to use the flambient technique, which combines “flash” and “ambient” shooting. Many real estate agents see this as the gold standard for the best-looking real estate photos. You get a flash for accurate interior colors with ambient light for realism and a dedicated window pull.
Start this method by taking the ambient shot, using a middle exposure for a well-rounded light level. Then you use a flash shot that exposes the walls and any furniture enough so that they look bright. The final step is the window full pull shot. Here you turn off the lights so that the interior looks darker than the exterior.
After assembling these images, you can then edit them. You’ll need a tool that allows you to open all three images at once and then blend and mask them together. Continue adjusting things like sharpening, color balance, and vignette to the point where the image feels natural.
Common Mistakes to Avoid
When fixing blown-out windows, you’ll need to avoid some common mistakes that even the pros make. Here’s what many people get wrong:
Over-reliance on a single exposure
Don’t expect one frame to enable you to create stunning interior shots for property listings on bright days. You will always need at least two exposures, and preferably three.
Poor masking
Avoid elements like reflections that make editing look obvious. Mask them using proper blending tools or AI software.
Excessive post-processing
Trying to use post-processing to remove the haze from skies can make real estate images look cartoony. Buyers are often switched off by photos that seem inauthentic so avoid excessing processing.
Skipping tripods
Don’t skip the use of a tripod for shooting interior shots. If layers are misaligned, it will become obvious in the final edit.
Incorrect white balance
If you use a flash and daylight mismatch, it can lead to yellow and blue casts. To fix this, edit in RAW first.
Flashing too much
Overflashing can lead to unnaturally harsh hotspots in your interiors. Always rely on ambient light where possible.
DIY vs Professional Editing (Important for conversion)
Knowing whether you should edit yourself or get professionals to do it for you is a significant question for real estate agents and anyone looking to sell a property.
The benefit of DIY editing is that it doesn’t cost you anything extra. You have full creative control, and you can turn around images quickly. The downside is that it’s a time sink, and the quality can be inconsistent.
Many real estate agents spend two to four hours editing a single 20-photo shoot for a property, which is often between 5-10% of their week. And even after all of that work, the final result may not be what buyers were expecting.
Professional photo editors produce consistent, high-end results, but they are much more expensive. Expect to pay between 50 cents and $2 per photo, depending on how many you want editing.
When to Outsource Real Estate Photo Editing
You should outsource real estate photo editing when:
- You’re scaling a business and want to reduce the amount of time spent editing
- You shoot more than three properties per week
- You Have a large number of photos requiring editing
- You value your time more than the small cost of paying a professional to edit for you
- You need to rush editing jobs to get listings on platforms quickly
- You need consistent images quality that reflect well on your real estate brand
So there you have it, how to fix blown out windows real estate photos. Ultimately, window pull real estate photography is easier than you might think with proper techniques. You can fix overexposed windows interior photos with relative ease and use enhancement tools to bring out the best in all your images.
Leave a Reply
You must be logged in to post a comment.