Blog

  • 13 Mysteries of Real Estate Photography that Few Only Know

    13 Mysteries of Real Estate Photography that Few Only Know

    Being a complete beginner in real estate photography is like a toddler attending his very first day in school. One of the requirements in this business is by using quality photos and this happens to be the big difference and great advantage. Many would say that they have read and heard about the tried and tested formulas in real estate photography but the real recommendation here is how to apply these formulas.

    Quality photos really matter in real estate.It helps people jumpstart their imagination that becomes a trigger to their emotions especially when they are in search of another place to stay. Majority of those home seekers will look for photos first and read property specifications before deciding to have an ocular trip. This is where quality photos become so important.

    Having the perfect equipment is the initial phase in this business. And everything boils down to four objects – the camera, lens, tripod, and flash. Every photographer does not need to spend much buying these things. Real estate photography is less demanding. Just use wide lenses, a camera with good ISO and sensitivity performance, a stable tripod and off-camera flash and wireless triggers.

    Real Estate Photography Mysteries

    There are so many mysteries with regard to real estate photography. Instead of hiring a professional photographer, you can do it on your own. This venture is not as challenging as rocket science. But the demand and money is there. It only takes effort to get where want to go. Spending time mastering photography skills is the only thing you need.

    Instead of hiring a skilled professional, why not consider the thirteen (13) mysteries of real estate photography listed below?

    1. Photo Editing from Day to Dusk Lighting

    There are countless ways to edit photos from day to dusk lighting. Dusk is the time of the day when photographers find it hard to get a perfect image of the property.

    2. Wide Angle Lens is a Good Investment

    The use of wide angle lens is important to get the best description of the space. It allows wider shots and this is what potential buyers are usually looking for.

    photo via AliExpress.com

    3. Maximize the Use of Tripod

    To get sharper image when shooting using natural light, the use of the tripod is all what you need. Most pictures taken with the use of tripod become appealing because it is better to use them rather than taking chances on steady hands. Tripods will let you shoot at slower shutter speeds.

    shooting using natural light
    Quote “Erin Spain, Home and DIY Blogger” http://ErinSpain.com

    4. Use Landscape Mode

    Although real estate photography is about choices and creativity, it is always better to decide all the necessities during a shoot – lenses to bring, angles to make, the depth using correct aperture and more. Since almost all real estates are taken as horizontal subjects, horizontal viewing is more preferred than the portrait mode.

    5. Prepare 3D Presentation

    Another great visual choice to present to potential buyers is 3D model. Most clients wanted to see a virtual tour of the property, not only on the property itself but they also wanted to look what surrounds the property. This should be a part of the many services that you offer them.

    6. Making Persuasive Videos

    Presenting traditional photos might be a brilliant way of presenting the rooms and other parts of the house. But with the advancement in technology, people wanted to include compelling videos as part of the service you offer.

    7. Make Emphasis of the Property’s Best Features

    One good trick for real estate photography is making emphasis of each location’s selling points. You can take pictures of the best features of every corner of a room, a kitchen and even the lawn, and show how spacious the place is.

    8. Prepare the Room for a Shooting Schedule

    This is one of the mysteries on hoe to sell properties quick. It is advisable to prepare all the rooms included for a photo shoot. It is always good to see clean areas as a preparation for your photo. Kitchen’s counter must be cleared of anything and free from dirt. Bathrooms, on the other hand, should have its toiletries hidden, being backed up by clean mirrors and any glass surfaces.

    9. Proper Timing at Dusk

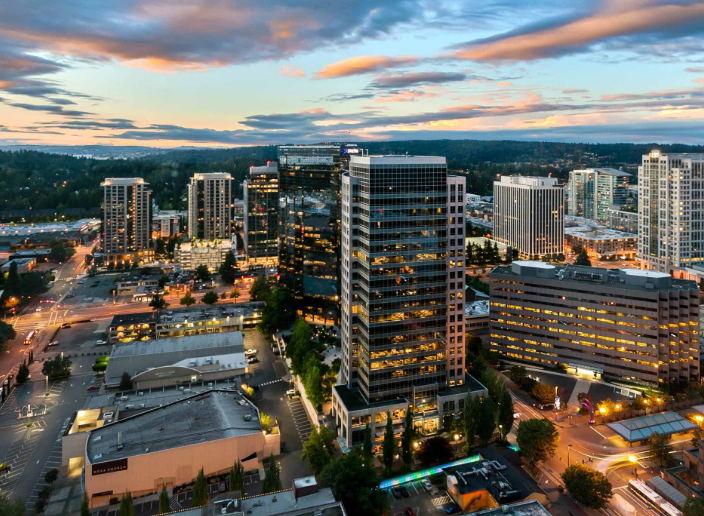
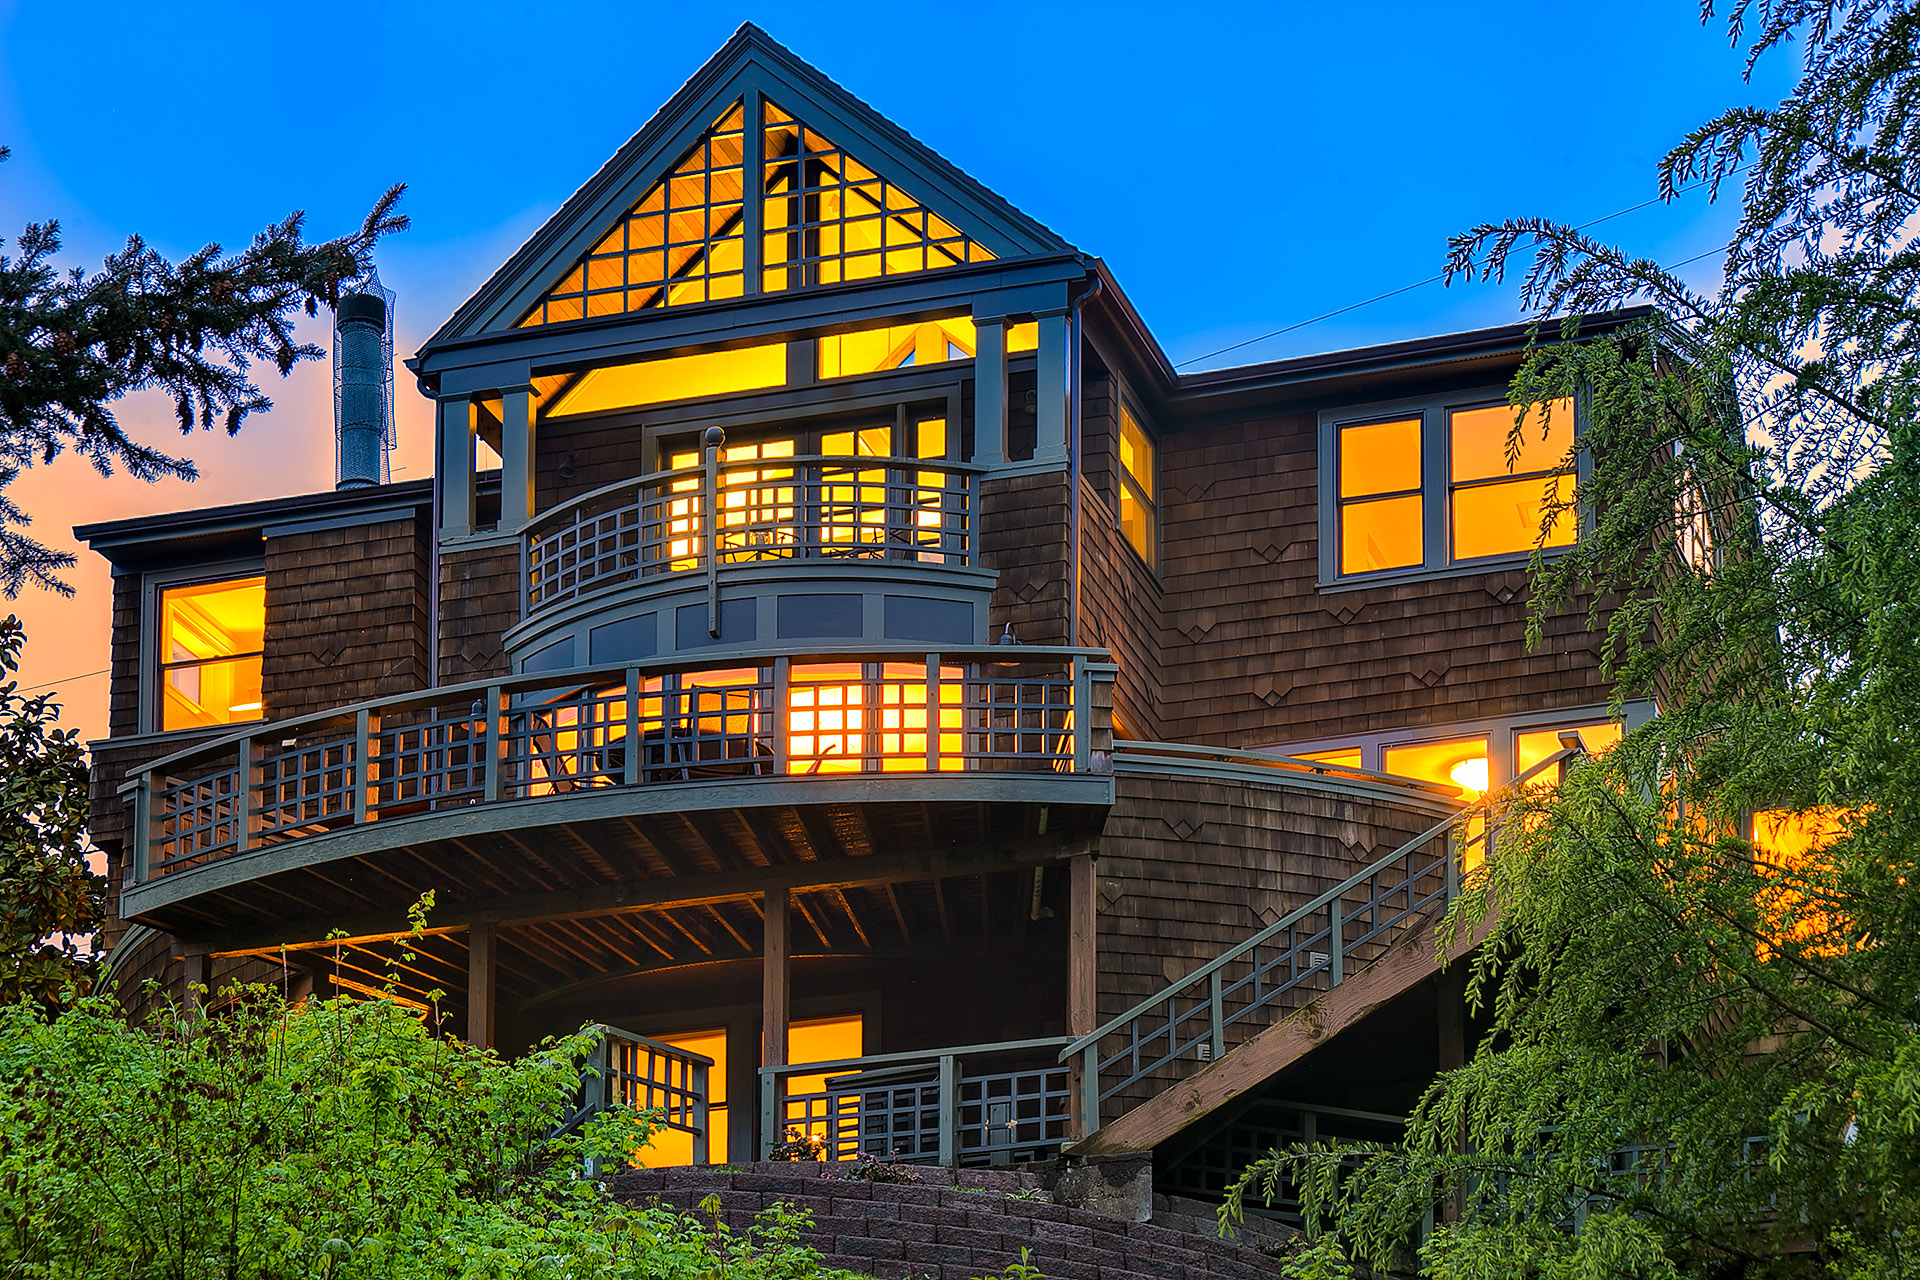
    Timing is everything when it comes to real estate photography. It is either you, as photographer, create perfect timing, or anticipate it. When shooting the exteriors of a property, the so-called magic hour at dusk can yield dramatic results.

    10. Straighten the Distorted

    If you want to learn the real essence of real estate photography, do not end the photo at the shot. Most of the time, the human eye is very tricky. Make it sure that the real estate photos are well reviewed because there are architectural features, called the keystone effect, that occur unintentionally. Sometimes there are distorted lines that are being added to the photo, making tall lines appear bowed. All you need to do is consult Photoshop.

    11. Always Begin with the Preset Buttons

    Starting with preset editing buttons will make your photos professionally made. This is the key in producing quality real estate photos. When Photoshop’s Lightroom is properly used, it is noted that your real estate photos are crafted designs and styles that will give you the professional edge.

    12. Utilize the Capability of Modern Technology

    Aside from editing pictures using Photoshop, increase you real estate photography a notch higher. Drones are used to show the proper aerial view of the property. Moreover, it aesthetically shows the correct perspective and range of space that traditional photos cannot take.Hence, with the use of modern technology like drones, it creates a positive impact to potential buyers.

    13. Create Space by moving Furniture

    As a preparation for a photo shoot, shooting the interiors of the property is not as easy as everyone thinks. Aside from using the natural light and shooting in a RAW mode, you can shoot directly straight into the room. You can capture the real beauty of the room when furniture is moved from one place to another to create the space you desire. After which, you can now manipulate the aperture and the depth of field.

  • 4 Advance Photo Editing Techniques You Need To Know

    4 Advance Photo Editing Techniques You Need To Know

    A good real estate photo is a sum of various techniques in photography and post processing. While a beautiful property will definitely help, its success depends on the agent and what happens in front & behind the photographer’s lenses.  We have established the intricate processes every photo goes through to make it flawless, here we dish on 4  advance photo editing techniques to step up your career in real estate photography.

    Blending Layers

    When taking photos of a project, make sure to take an ample number to be able to make a composite. Composites are usually useful for interior shots, and what a professional photographer would do is to take varying flash shots of a room then blend it. Adobe Lightroom is a great tool that can help in blending layers. However, if you want to the colors to be more precise, it’s best to blend flash layers and fuse layers in Photoshop. To start, open all your images and make sure to include both ambient and flash photos. Ensure that all layers or layer sets that you want to merge are visible, then merge.

    Removing Hard Shadows

    If you don’t want to look like an amateur, it’s important to keep your photos looking neat and sharp. Thus, a hard shadow is unacceptable and should be removed. You can reduce shadows in two steps; first, you layer masks and second make use of your brush tool.

    In fact, brush tool is your new best friend. Set brush to 0% Hardness & 100% Opacity. If you want more control, you can lower the opacity. After setting up your brush, smoothen out the shadows.

    Color Replacement

    Even with the best lighting possible, sometimes raw photos don’t have the best color. The worst thing really is to have a flat-looking photo, other than manipulating hues and saturation, it’s a great advantage if you know how to use the color replacement brush. This technique is also useful in balancing out colors as well as correct color of your photo.

    In the photo above, notice how the wall color is slightly different than the original, replacing the color will remove any imbalances caused by for example window reflections or glare.  To select the color replacement tool, go to the regular brush tool, right click, then choose the color replacement tool from the fly-out menu.

    When choosing a replacement color, however, make sure to pick the nearest possible color from the original.


    Window Pool

    To get the most of your interior photo, it is important to check any exterior that can be seen from the inside. For example, in the photo above colors outside the window appear to be dull. To fix this, look for the lasso tool found in adobe photoshop and start cutting out the areas to be able to edit this specific area (see photo below) then adjust colors accordingly.


    There you have it! Photo editing really takes time and effort. If you don’t have ample time to post process your real estate photos, there are companies that offer photo editing services with the most sophisticated tools you can think of. Check out our final photo after applying the 4 techniques mentioned above!

  • Basic Exposure Settings for Real Estate Photograph

    Basic Exposure Settings for Real Estate Photograph

    It is very hard to take quality photos indoors. It is a big challenge to every real estate photographers. The most notable problems these photographers encounter is the use of lighting gear. Once you are not skilled and knowledgeable to this equipment, chances are glitches will frequently come your way. Nevertheless, when the skills are developed in the proper settings of the camera, shooting of professional quality photos will just be around the corner. The correct setting of the camera must be thoroughly practiced to succeed in this field.

    In the field of photography, there is always what we call duality. This duality refers to the light, and the other one is the subject. The light may be a broad term as it can be the use of natural light or the setting up of household lights. Using constant light will allow you to notice what adjustments are needed to the effects on the subject. This is a better way to understand lighting placement which will also benefit you when you are going to use flash.

    Photography Editing Techniques

    On the other hand, the subject of photography is where the story will revolve. Every photographer must know how the viewers will see his story on the subject. It is the feeling, emotion, poetry and pure science in general that will convey the message of the subject. Additionally, a simple photo can bring everything on the table including the creativity it underwent.

    Exposure stop is just one of the many confusing elements of a good photograph. There is what is commonly called the exposure triangle parameters which largely involve the technicalities of a camera. They are the shutter speed, aperture and the ISO sensitivity. This parameter correlates with each other in as far as capturing an image during the exposure to light is concerned.

    Two-Stop Rule in Real Estate Photography

    In this two-stop exposure rule, we will consider two basic things. These are the Ambient Exposure and the Flash Exposure. To do numerous interior shots, ISO 320 can be used as the best sensitivity piece. But there are questions that arise once interior real estate photography is being considered. Questions like, “How do I balance between ambient exposures?”, or “How do I know what to use with my lighting exposure?”These questions must be answered constructively to show the proper ways on how to deal with the exposure rule.

    Ambient vs. Flash in Real Estate Photography

    To perfectly use the ambient exposure, sensitivity starting point must be 320, aperture of f/6.3 at 1/10 of a second. At 1/10 second, a click is equivalent to 1/3 stop. The ratio at 1 full stop is 3 clicks. This is a good ambient shot to use which will give a good result.

    What is normally done in an ambient shot is to start at 1/6 sec at ambient exposure going to 1/25 sec flashed exposure with the use of the lights, increasing the exposure to 2-full stop.You can always refer to the Exposure of the Original Photo at the upper right hand corner of your screen. It is noticeable that the photo is not completely neutral with perfect blend of brightness. At 1/25 sec exposure, it gets rid of lots of ambient artifacts. Comparing the two shots, both of them delivered almost the same results.

    Upon comparing the two shots, it is then advisable to go at 1/40 sec exposure and the difference is now clearly seen.At 1/40th sec, it helped a little bit in the removal of glare in some parts of the area. But there are still spaces that are still dark, like the corners of the room. The best way to put brightness on that dark spot is to put some light and use 1/40 sec exposure and adjusting the exposure to -0.5.It would be sensible if you always monitor the graph at the right side corner and make it a point that the histogram is at equilibrium.

    Photo Repair for Real Estate Images

    After choosing what exposure is best for your shot, it is time to make some finishing touches using the Layers. What you must do is to look at the ambient shot first and hide it for a while.Once hidden, it must return to its original composition not considering the composite frame. This is the time to do the repair frame and fix some unnecessary spots. This process is done by dragging the repair frame. Go to Layer Mask and Hide All.

    Using Low flow Brush, you can then fix all the composites that are not important in the frame. Brushing has two purposes. One is the removal of the unimportant elements in the picture and second is the removal of glare. To remove the glare, turn Normal into Luminosity Mode to take away the ambient color of the picture and to basically to correct the color of the photo.

    This is the main idea behind the use of lights. It is desirable to use the Mask under Reveal All. Utilize the Low flow Brush time most especially to ceilings and windows to make all the colors natural. To conclude the exposure refurbishment, you need to change Normal to Darken mode and then the Layer Mask to Hide. Again with the use of the Brush, try to do the finishing touches at the outside area of the window to make everything look normal and fine-looking.

    For the final image to be really exciting to look at, it is always the idea of the photographer to which he thinks the viewer will be comfortable at with the use of the two-stop exposure – ambient and flash exposure. This is how the lighting makes a sweet spot of the photo which makes use of brightness and darkening of selected areas where it can be applicable.


    For more tips and tutorial videos, check this link.

  • 15 Lightroom Tips and Tricks

    15 Lightroom Tips and Tricks

    One of the most sought after editing applications is Adobe’s Photoshop. Because anybody can use Photoshop’s assortment of features even without the Internet, editing of different pictures can be done easily. This goes to show that you can take any editing works for as long as you want.

    One of the Best features of Adobe Photoshop is the Lightroom. With its Smart Previews, it makes the user reconnected to the computer anytime without connecting the hard drive. By design, it syncs anything that has been edited using the Smart Previews and these files can be then easily be handled without conceding the original version.

    Best Tricks that can be Used Everyday

    It is known to every photographer the different beneficial features Adobe’s Lightroom has in its arsenal. It is filled with numerous helpful attributes that can make every photographer’s life easier. But this is not exclusively for photographers only. Adobe Photoshop’s Lightroom is for everyone to enjoy – from people working at home, to students, to office workers, for everybody. Once you learn these features exist, you can edit photos as enjoying as look at them.

    Below are some of the tricks and tips on how to operate Lightroom effortlessly.

    1. Lightroom – a game of space

    Foremost, you need to go to the Library screen. This is the initial step where you can want to see sets of photos. Note that you will see a bar on top of the screen. The bar is deemed useless so it is better to get rid of it. If you want to import a photo and you want a specific library screen and you want to move to develop that particular shot, just hit the D button. This is the easiest way to move to the developed panel.

    2. Add a White Backdrop

    If you want to add a white backdrop or any color of preference, all you need to do is Right Click and you have all the options of assortment of colors to select from.

    whitebackdrop lightroom


    3. Straighten the Horizon

    This technique involves making the . Whenever you have a shot that shows uneven horizon, what most people do is go to Angle slider and select the proper angle that will straighten things up. Since this is time-consuming, all you need to do is hit the Command button for you to draw a level line across the photo. After dropping it, you will notice that the uneven horizon will automatically become straight.

    horizon of a photo straight


    4. Straighten Crop Orientation

    All photos oriented as landscape can be automatically changed by Lightroom to portrait by hitting the X Key and instantly, your cropped photo will turn into portrait.

    Straighten Crop Orientation


    5. Utilize Transform Tool

    Transform Tool is a feature in Lighthouse where it corrects distorted horizontal and vertical lines, and change the perspectives or anything that needs to be straightened. Scrolling down to Transform Tool, you can just choose whether it is vertical or horizontal lines that you want to be corrected. This is a perfect tool to make lines symmetrical to each other.

    Utilize Transform Tool

    6. Isolating Photos for Viewing

    To do photo isolation, it is just hitting the L Key twice and image will be back-dropped by a black screen. If you want to return back to the original photo, just click the L Key for the third time.

    Isolating Photos for Viewing


    7. Bringing Panels back to the Screen

    This feature is similar to photo isolation. Here you need to click the Develop module and you want to have your left side bar show its presets. You need to hit the Tab bar and the left side of the screen will show all its presets. To close both the left and right bar, just hit the Tab once again and the photo will be shown against the same background that you set.

    Bringing Panels back


    8. Making the

    This is done by going to the leftmost part of the bar. You need to click it and drag it to the right as far as you can go to make right module bigger. The reason for doing this is to fine-tune all the editing works you are going to make.

    Side Bar Bigger


    9. Slider Adjustment

    To make small adjustment to the sliders, all you need to do is to bring your curser to the slider and go to the Up and Down Arrow Key. If you want to make higher increments of adjustment, press Shift + Up and Down Arrow Key.

    Slider Adjustment


    10. Use the Brush Tools

    One way to speed up your work flow using the Brush is by hitting the Left or Right Bracket Key. To adjust the Feather, just press the Shift + Left or Right Bracket Key. Utilizing the Right Bracket will make the Feather bigger and smaller if otherwise.

    11. Copy settings

    This is done by right clicking the image and press Settings and go to Copy Settings. The main goal of this is to primarily copy whatever color set up of this picture and use it to other photos. This is done by copying all the presets of the current photo and the going to the photo these presets will be applied by pressing Paste Settings.

    12. Getting Rid of Specific Sections

    Removing features that are seldom used is to go directly to the module and right click the section you want to remove.

    Getting Rid of Specific Sections


    13. Sharpening the image

    Going to the Masking option under Sharpening, click the ALT/Option Keys of the keyboard and hold them down. This time, adjust manually the Masking slider. Anything that is black cannot be sharpened and anything that is white can be sharpened. This function eventually cuts the noise of the photo.

    14. Spot Removal Tool

    The purpose of this tool is to remove unwanted spots of the photo. You only need to drop a point from the area of consideration and hold down the Shift Key and a line is created that will remove all the spots of the photo that you want to remove.

    15. Video editing using Lightroom

    Under the Develop module, a “not supported” message will pop out. If you want to capture a particular frame of the video, edit this by clicking Sync in the bottom-right corner.

    If you want us to edit your photos contact Phixer right away.


    Video tutorial version below: Credit to Evan Ranft

  • 4 Basic Steps to Create a Stunning Real Estate Video

    4 Basic Steps to Create a Stunning Real Estate Video

    A real estate video is a great material to showcase a property, and if you’re planning to list one, this is one of the most effective ways to please your ever-changing, hard-to-please market. Real estate is as cut-throat as you expect it to be, especially with people getting busier and digital more than ever. A 2-minute video is enough for an interested buyer to get a feel of your home, just like they’re having a walk-through minus the hassle. However, not all videos are created equal.

    Real estate video editing—no matter how “common”—is pure talent, and an outcome depends on how good or not your video was created. Everyone may be able to cut or import music, but it takes creativity plus an immense amount of particularity & patience to make an impactful 2-min real estate video (or any kind of video for that matter). 

    To give you an idea, here’s a step by step process when creating a real estate video.

    Color Grading

    Color affects mood. Getting a positive response from a client depends on how your property looks and feel on your video. Granted that proper lighting is important, achieving the right color grade can do so much.  At this stage, colors will be enhanced by adjusting RGBs, saturation, and hues.

    We prefer to use the DaVinci Resolve software to color grade videos. With its color matching, primary color adjustment, secondary color adjustment, LUT support, and HSL curve abilities, guaranteed your property will look attractive. The software’s video scopes also helps in ensuring the colors are balanced accordingly.

    Music Selection

    Just as color grading makes your property look visually appealing, music will add excitement and personality. You can make your property appear fun and cozy, or luxurious and majestic depending on the audio you chose to go with your video. It is crucial to find the right audio. One common mistake is thinking that audio is just an afterthought of your visuals; no, both goes hand in hand.  

    In addition to that, if you want have the best music possible, you must be willing to spend a little money. Make sure it’s copyright clear, and obviously of good quality.  Good music is everything.

    Cutting and Transition

    There are a lot of techniques in video cutting and transition, but because we’re in real estate videography, our choices are a bit streamlined. The simple cut is the most basic technique in video transition, it will give your video a clean and professional look. You’ll simply select a clip, drop it in the timeline, drag it up to the previous clip (make sure there’s no gap in between), and that’s it!

    A cross-dissolve transition is a useful transitional editing technique as well that shows/represents passage of time. All you have to do is put your clips up against one another, find the cross-dissolve effect and drag it on over your cut. Don’t overuse it though!

    More so, be mindful of your transitions and audio, both has to be in sync or your video will look all over the place and awkward. The Adobe Premiere Pro is a powerful tool for this step, not to mention versatile and adaptable.

    Animated Effects

    It’s no secret: animation is luxury. It’s a sophisticated addition to your video, that needs a sophisticated software—Adobe After Effects. This tool allows you to imbed information about your property within your video in a very creative manner. It could be a small description about your property including labels, price, address, size. If you are promoting your brand, animation is a great effect to add on your video.


    Curious on how we applied all these steps? Below is a real estate video we created! I dare you not to get attached with this property (and its horses).

    https://vimeo.com/281040215

  • Interior Design Photography Tips and Editing Using Adobe Photoshop Lightroom

    Interior Design Photography Tips and Editing Using Adobe Photoshop Lightroom

    One of the best sources for photography business is Interior Designing. Whatever a photographer wants to shoot, he can do so. But there is a difference between a topnotch photographer and an amateur one. In the genre of interior design photography, it is great to have the skills necessary to make every work easier.

    The idea of trying to sell the images you have taken to impress the viewers is to know what size and details of the area of consideration. The best way is to do simple interior design photography and to take a picture of a room to get the best features of the room.

    Photography is thought to be an easy job. But in reality, it has a lot to do with perspective and visual storytelling. There are perspective distortions which needed to be adjusted, corrected and processed. When doing interior design photography, it is best to take away all components that stand out as distractions. Every photographic and imaging detail should be considered.

    Photography Editing Tips on Interior Design using Adobe Photoshop Lightroom

    The following are tips on how to edit interior design photography with the use of Adobe Photoshop Lightroom.

    1. Use wide-angled lens

    Canon 6d
    photo https://www.lonelyspeck.com/canon-eos-6d-review/

    On the photographic side of images, aside from using a tripod, the use of full-fine sensor is generally required. Specifically the use of Canon 3 Mark II or II or the Canon 6d, they are great options when it comes to the type of camera to be used. As mentioned, it is basically necessary to use wide-angled camera lens. The preferred size may be from 17mm to 40 mm lens. With this size, it connotes more peripheral vision and it can fill spaces to cover the whole frame.

    2. Find the proper angle

    find the right angle

    As a rule, when going inside a room try to go in each corner and get the proper angles first. Do not go in parallel with the furniture and bed inside. Try to find the perfect perspective angle instead. With using a wide angle lens, you will probably get a lot of distortion. [Read more]

    3. Start with the Shadows and Highlights

    Shadows and Highlights

    To start editing using the Lightroom of Adobe Photoshop, begin the retouching by opening up the shadows. It is advisable to go to about half of the shadow balance and about 75% for the highlights.

    4. Correct the Whites and Blacks

    Whites and Blacks

    By holding the ALT key and moving the cursor to the right, you can open the whites you needed in your photo.

    5. Establish the White balance

    White balance
    photo colorvaleactions.com

    White balance is important to the photograph as a whole. It is the removal of unacceptable colors that are relative to color temperature of the source of light. By having knowledge about digital white balance, it improves photos under wider lighting condition perspectives.

    When the white balance seems wrong use the picker to determine the areas that are pure white or very light gray. This time, you need to adjust the temperature and contrast to make the whole area warmer. It is important to open up a little more shadow and adjust the highlights for checking. Take note that the white balance is more on the artistic side of the photographer.

    6. Consider adjusting Sharpening and Noise Reduction


    video credit Anthony Morganti
    In the Lightroom, the Noise Reduction tab luminance is lowered to 40 and the Sharpening to 90. This is usually applied to the dark side of the floor. Masking is not good in interior designing which is why the Masking balance is untouched.

    7. Application of Lens Correction

    Because of the lens used, there is always a slight correction that will be done. These imperfections can be the blemishes from the glass of the lens. These blemishes are lens elements which will minimize the reflection. To correct all these lens flaws and get rid of the imperfections, proceed to Lightroom “Lens Correction” tab and click “Enable Profile Correction” including “Remove Chromatic Aberration”.

    Most of the time, Auto Upright is a reliable tab. But in the case of Lens Correction, it does not work according to your liking. In this case, it can be fixed manually so that the treatment of the vertical and horizontal lines can be done immediately. These lines are bases of interior designing and architectural photography. To make the Vertical lines highlighted, add +5 to the “Vertical” setting and -2 to “Distortion“to remove some bumpy effects.

    8. Supplement the so-called Ramelli Lightroom secret ingredients

    Making the photos more dramatic is to enhance the photo for the perfect perception of viewers. You can optionally delete what you do not want to be included in your photo. You can also use the Brush to polish floors that are parquetted or tiled. You can also brush the whole area to remove all the dust to bring the message to the people.
    When light seems boring, try to create a drama by selecting radial filter and set exposure to 1.95. Masking and feathering the place all over again to revitalize the different areas of the room. The real purpose of masking is to create light complexities to make the pho more interesting.

    9. Use Post-Crop Vignette

    Better known as Post-Crop Vignette in Adobe Photoshop, the sole purpose of this feature is to darken edges and corners of the room. You need to correct the balance in Lightroom “Effects” and slide it down to -23 to diffuse some unnecessary light.

    10. Duplicate the layer and start removing wrinkles

    When doing the final touches of interior design Photoshop editing, you need to open the photo in Photoshop and duplicate the layer by choosing Photoshop CC. You need to copy the layer by dragging it to the bottom and select Duplicate Layer.

    To finalize the editing, one important tip is to remove the wrinkles. This is to eradicate any lumpy parts of the photo. This is done by going to Filter>Blur>Gaussian Blur and move the balance adjuster to 10.

  • 7 Fail-Proof Tips To Make Your Real Estate Photos Noteworthy

    7 Fail-Proof Tips To Make Your Real Estate Photos Noteworthy

    It’s no secret that Real Estate is a photo-driven industry. According the to the National Association of Realtors, 9 out of 10 home buyers today use the internet as their go-to source when searching for a property, meaning, your listing photos can determine whether or not your property is worth a walk-through. It’s 2018, having a really great photo makes all the difference in the world.

    If you’re adamant to take the photos by yourself (instead of hiring a professional real estate photographer), here are 7 fail-proof tips to make your real estate photos noteworthy.

    Find the best angle of your property

    Surprise! Getting “the best angle” is not only useful when taking selfies, this also applies with real estate photography. With today’s technology, a single photo can reveal almost everything in a single room, it’s best to know at what angle your living room will look stellar. Take a lot of test shots, find the things that are complimentary to your property and accentuate it.

    Avoid taking photos of the interior from the corner

    This is a common rookie mistake. Sitting tight in one corner while trying to capture the other three corners is just wrong. and boring. You really don’t need to show everything, the viewer’s eyes and brains will fill in the gaps. Get around, and again find the best angle of your property.

    Keep the straight lines straight

    When taking interior photos, the images will show various objects ie, stairs, wall lines, furniture. If your lens is slightly tilted, the lines will be going diagonally. This is a distraction you don’t want. Make sure to keep those lines straight to keep the viewer’s orientation of the photo simple.

    Make use of props

    Props will add color and life to any shoot. Add features to a room to create this certain mood or atmosphere. Before you shoot, walk around your room and get a feel for it. Be careful not to overdo it though, a pop of color here and there is enough.  Proper styling will make your photos look professional.

    Lighting is everything

    It cannot be emphasized more how natural light can make all the difference. Find out at what time the lighting falls perfectly in your property, and take advantage of it. You want to make sure that you have the ideal lighting in your photos to keep it crisp and bright. If you think the existing light in your space is not enough,

    Get rid of dirt & clutter, old & damaged furniture

    This one is a no-brainer. If you want the best results, everything has to be squeaky clean, from the windows & tables, to countertops & floors. Potential aesthetic hazards, such as worn-out furniture or damaged blinds, should be dealt with in advance. Remove anything that can compromise a good-looking photo, and add objects which you think will add charm.

    Make friends with post-shoot editing

    Straightening the home or property

    While it’s important to get good raw photos, it’s rare that those will come out exactly as you like. Colors have to balanced, menacing shadows have to be taken out, lines have to straightened out…the list can go on. There are several tools available that can help you with that; make your research. If the thought of editing makes your shudder, experts are more than willing to help you with that.


  • Top 8 Mobile Cameras for Low-Budget Panoramic Photography

    Top 8 Mobile Cameras for Low-Budget Panoramic Photography

    In today’s generation, everybody owns a smartphone. And the camera technology of these smartphones is better than ever. It has improved tremendously. The ability to capture precious moments is quickly and easily done with the use of these gadgets. Alongside with text messaging, taking photos is the most used component of smartphones.

    Before the advent of the Internet, you have to carry a separate camera just to take pictures. Now, you only need to bring your smartphones with you and you already have the access to an excellent camera right inside your pockets. Many individuals depend on the built-in cameras of their smartphones primarily to take photos of some of the most important moments of their lives.

    Smartphone manufacturers are obviously exploiting how to create an outstanding camera. The quality of the camera is one of the features buyers are looking for. It has been a common knowledge that megapixels of camera determine the quality of the pictures being taken. But in reality, the quality of the photos depends on many factors like the resolution, sensors and aperture that help in preventing picture inaccuracy.

    Top Eight Mobile Cameras for Low-Budget Panoramic Photography

    1. Honor 7X
    At a very low price, Honor 7X offers great performance. For budget-conscious people, this is a smartphone owning a decent camera that is worthy of a consideration. Made by Huawei, the camera is set at 16 megapixels backed by 2 megapixels lens. Although capturing a video using this camera offers only up to 1080p at 30fps, you can dig into its settings to alter the focal point because of its wide aperture mode.

    hihonor


    2. OnePlus 6
    Since each individual venturing in panoramic photography has different budgets, bargaining a phone could still be the best thing to establish. For a number of reasons, OnePlus 6 can give you everything you need from a cheap phone. At 1,080 pixel resolution, its dual-lens rear camera backed by a second 20-megapixel camera is a complete package in taking a photo in a portrait mode. Its aperture I f/1.7 and is composed of additional bokeh effects.

    oneplus 6


    3. Moto G4 Plus
    At 16 megapixels and f/2.0 lens, Moto G4 Plus exhibits detailed color reproduction because of its dual-tone flash using its 5.5-inch Full HD screen. Owning a 5-megapixel front camera, Moto G4 Plus is a better alternative in getting panoramic pictures because of its fairly economical price.


    4. Samsung Galaxy S5
    Galaxy S5 has a remarkable six frames-per-second inside a 30-second burst. It picture-taking abilities are noteworthy as it sports a 31-mm, f/2.2 lens for digital image stabilization. Galaxy S5 can capture detailed photos of either near or distant objects at a speed of ISO800. It is also sensitive to noise while color reproduction is short of remarkable and accurate.

    Samsung Galaxy S5


    5. HTC U Play
    Featuring a 16-megapixel camera, its lens has an aperture of f/2.0 which determines its cone angle for better and faster auto focus. It also possesses a dual LED flash and displays 5.2 inches Full HD screen with optical image stabilization. Available at cheaper price, it also has optical image stabilization where sensitivity to light is a major smartphone issue when it comes to picture-taking.


    6. Moto G (3rd Generation)
    Testing of different smartphones for its excellent panoramic photograph starts from capturing social events to shooting photos for an article. It is very important to have an outstanding camera in your smartphone when you try to snap many shots as possible. Third Generation Moto G features 13 megapixels with 28mm lens. Its aperture is f/2.0 that does not produce distorted images while maintaining perfect sharpness. Its selfie front camera produces good quality image and video production is vibrant and detailed.

    moto g 3rd gen


    7. Moto X Play
    X Play has dynamic 21 megapixel sensor and is considered as an average Motorola model. It has an aperture of f/2.0 rear camera combined with 5 megapixel front-facing camera. It can easily detect high contrast environment because of its automatic HDR mode. The colors produced by this cheap camera are vibrant and its difference in intensity effects is noticeable.

    Moto_X_Play


    8. Huawei P8
    The feature proportionality of this smartphone is remarkable. It owns a slim body but with a large 5.2 inches full HD screen. With a bright f/2.0 lens aperture at 13 megapixels, Huawei P8 has a number of significant photographic features which includes a light painting mode. It has a reasonable quality image and is considered a good smartphone for its cheap price. Its Sony sensor makes its camera well suited for any environment and is designed for low light performance.

    Conclusion

    There are numerous surprising landscapes to be taken around us. Panoramic images, for example, can be a very hard thing to create. But with the use of modern digital cheap smartphones, there are various tricks that can be enjoyed by everyone. Having a definitive picture taken can be a start of providing yourself with excellent examples of startling panoramic photos.

    Depending on the environment you are into, light changes play an important factor. The shape scene, light diffusion and other influences may pose certain problems, too. To make a very consistent panoramic photo, always look for a particular effect in the atmosphere of the place, by considering whether you are indoor or outdoor. One also needs to consider positioning and stability, and maximize the use of the different most up-to-date apps in creating a perfect panoramic photo.


    Featured photo credit to http://www.easypano.com/panorama-software.html

  • What’s in a Picture?

    What’s in a Picture?

    It’s easy to appreciate a good photo. Scan through the pages of Town & Country magazine, or any real-estate magazine for that matter, and you will find yourself gaping at the beautiful bedrooms, kitchens, or lawns. Everything looks perfect, you imagine yourself living in it.

    The Art of Photo Editing

    Suffice to say, a good photo evokes emotion(it’ll make you see or feel things!), but what is commonly overlooked is the amount of work that goes behind it一the intricate art of post process photo editing. For starters, it’ll take an average time of five minutes to edit a living room photo in one property, imagine doing 40 of them!

    What really goes behind photo editing, you ask? Well, a lot. Here are the basic photo editing processes we apply in every photo we get:

    1. White balance

    White balance (WB) determines how accurately the colors of your photo will come out, thus playing a vital role in photo editing. It is important to get the right amount of temperature or tint, in say, a bedroom photo to make it look attractive; a too cool or too warm WB can completely affect the interpretation of a photo.

    2.  Contrast & Exposure

    Contrast in photography is the difference between dark and light. High contrast means an extreme difference between dark and light, while low contrast is a gradual or lesser difference between dark and light.  Exposure is the overall brightness of an image or the amount of light in the photo. A photo will appear too dark if exposure is set too low, and too bright if it’s set too light.

    3. Vibrance & Saturation

    These fun color-boosting settings can either make or break a photo. Vibrance tool increases the intensity of a more muted color and leaves the well-saturated ones alone. Think of it like a fill light, but exclusive for colors.

    On the other hand, Saturation bumps up the intensity of all colors in an image, regardless of the starting point of the colors. It’s best to be careful and not to go ballistic with these two.

    4. Noise reduction

    Images can be noisy too. In photography, however, noise refers to the random, irregular, and grainy specks in an image. When it comes to noise reduction, we have two main goals. First is to get rid of any digital noise in the image, but as much as possible preserve the details that comes with it. Noise reduction in an image can be a little tricky and time consuming as increasing noise reduction means losing details on your image.

    5. Alignment

    To get that perfect photo, it’s best keep all lines in your photo aligned. It never hurts to pay good attention to the image background or scene, make sure no lines appear tilted or curvy. Proper alignment will make your photo look balanced.

    6. Masking

    The term “mask” is simply a way to apply something to a very specific portion of an image. Layer mask and clipping mask are the two primary types of masks, and are closely related in concept but different application. Sometimes, it is necessary to mask photo to achieve a much-need effect.

    7. Resizing and Cropping

    These two may be the easiest photo editing process, but it’s still important to note that both require careful consideration or risk compromising image quality.

    Obviously, there are only two way to resize a photo: smaller or larger. When reducing a size, image pixels will be reduces as well and discarded, enlarging it makes each pixel appear larger. Cropping is simply removing a part of the image that appears out-of-focus or unnecessary.

    Final Stage

    After a rigorous photo editing process, the photos will undergo quality assurance from our very keen QA team.  We’ll look into every detail to make sure no photo will look flat, foggy, dark, or too bright, destructive editing is to be avoided at all times. 

    The amount of scrutiny is as thorough as the actual editing itself. Each processes mentioned above has to be done just right, and we take pride in the fact that our photos look naturally & consistently beautiful.

    Rest assured every photo will be handled with utmost quality from the beginning up until its final stages, even with our most economical package.