Category: Photo Editing

  • Real Estate Photo Editors: Making your Photos Perfect

    Real Estate Photo Editors: Making your Photos Perfect

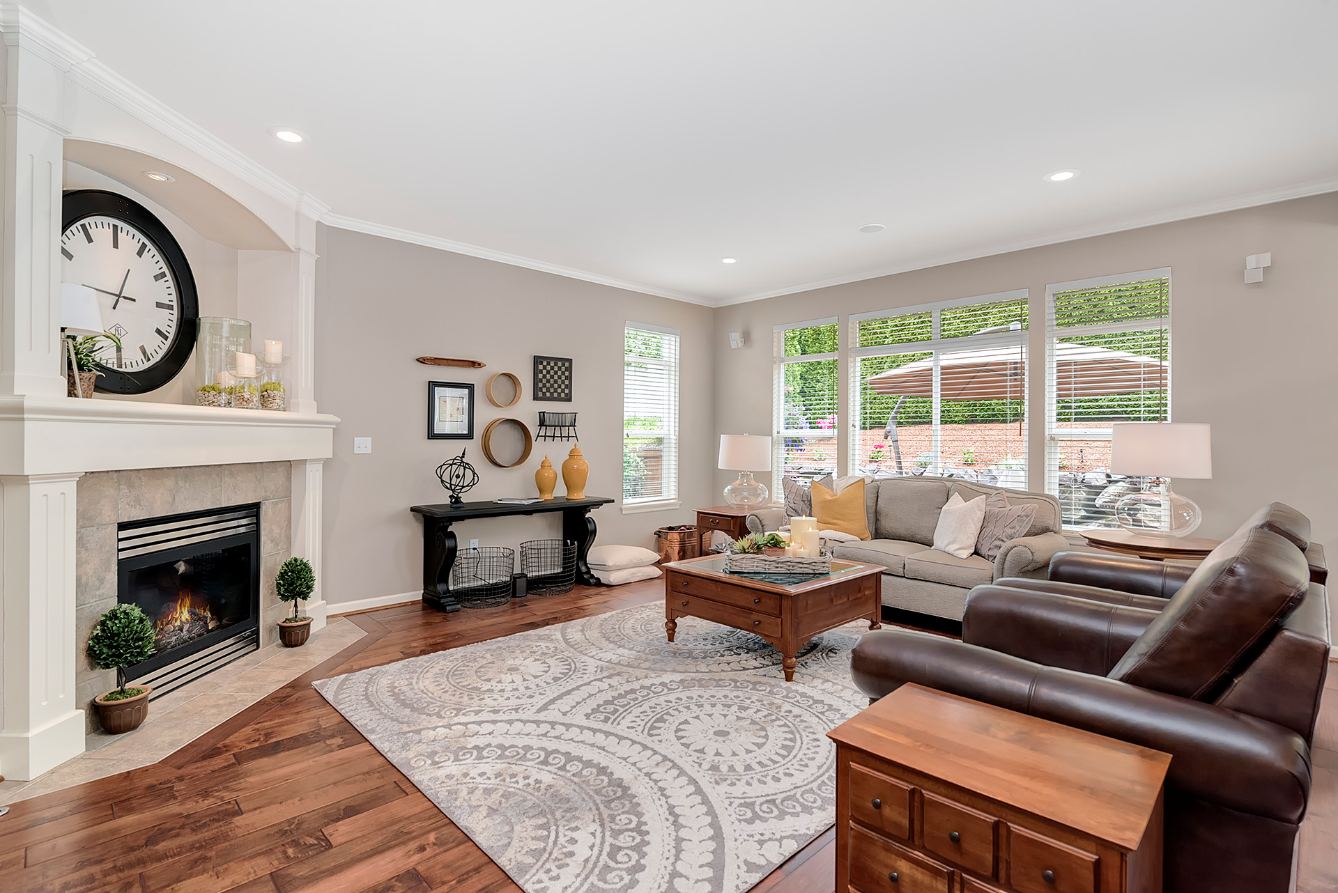
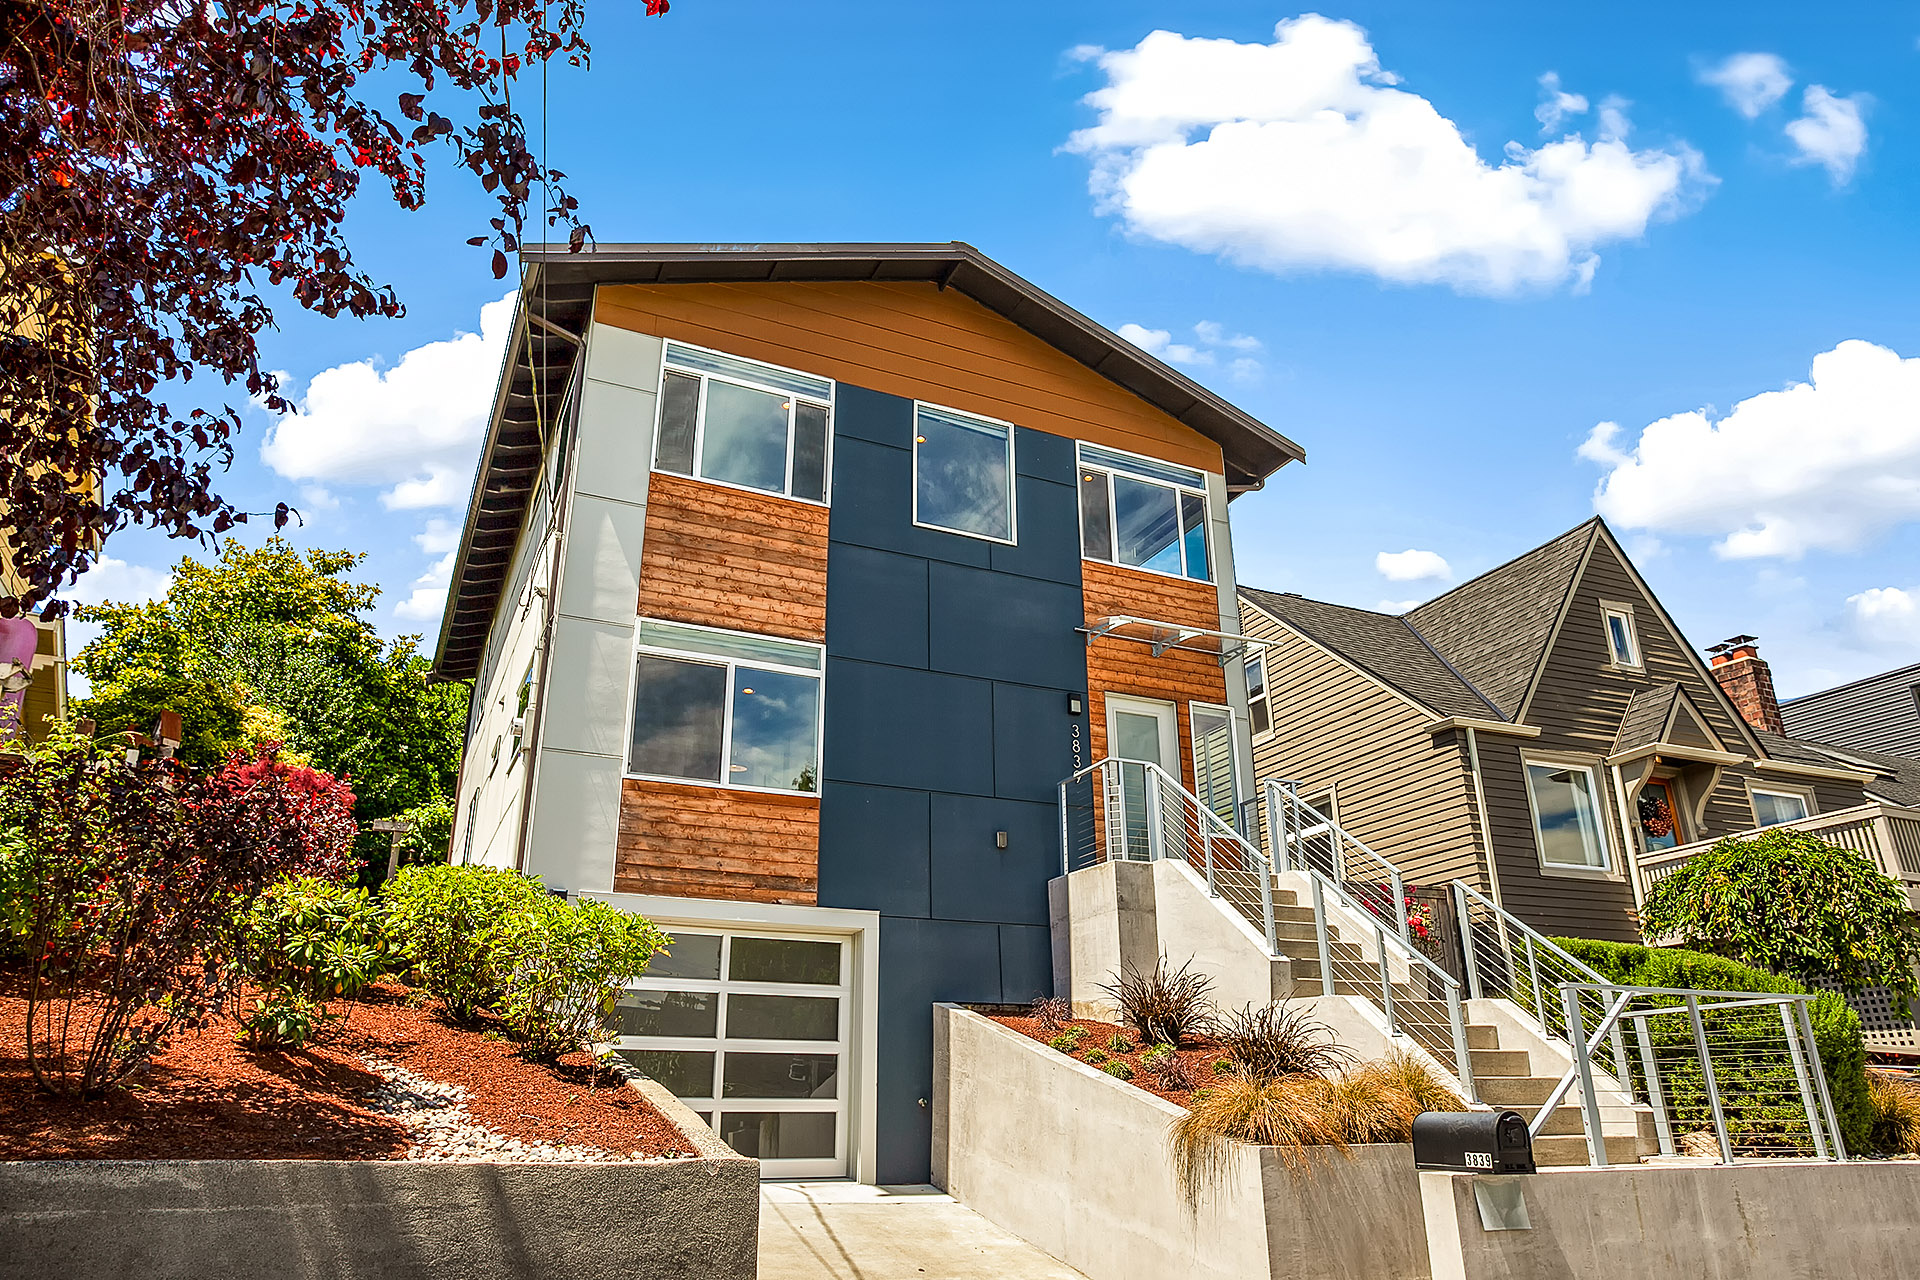
    It is familiar to everyone that a picture can paint a thousand words. In this way, it is imperative to create great photos to make the property look attractive. In the advancement of technology, everything can be made amazing and spectacular in the snap of a finger. This means that we technology can literally make unlimited and astounding photos that are enticing to buyers.

    Potential buyers wanted a vibrant photograph to refer to whenever they want to own a new property. They wanted a clear, crisp and cool images by referring to high-quality photos of the property they are interested in buying. Real estate photographs and videos are vital parts in the marketing and sales viewpoint.

    For these photos to be processed to its best quality, they needed to be improved. Enhancement of photos requires the services of the different photo-editing applications, tools, and techniques because this job is very critical in a real estate photography business. Furthermore, in the advent of the social media like Instagram, Tumblr and Flickr, photos and videos alike are greatly shared for business promotion.

    Photo-editing jobs today are commonly outsourced. There are many advantages of outsourcing someone to professionally edit and process a real estate photo. There are perhaps thousands of real estate photo editing companies that we can see online and they have the best equipment and the most skilled people to do the job.

    Reasons behind the Need of Professional Real Estate Photo Editors

    The creation of high-quality, saleable, stunning, and professionally-made photos is the primary goal for a real estate photographer. Below are the reasons why photo-editing is in demand these days.

    1. It saves you time

    real-estate photo-editing company
    photo via Capterra Blog

    Hiring a professional real-estate photo-editing company saves you the much-needed time for your other works. Exhausting most of your time editing photos to make them look good is not that advisable for a photographer because there are experts in this field that have a faster turnaround time to edit photos.

    Even if your photos would show that they only needed basic enhancement, tasks such as window masking, sky replacement, or object cropping not only double but triple your time doing these special tasks.

    2. Process the way you want

    One of the better reasons why there is always a need for professional photo editors is that they can enhance your photos the way you want. Photo editors are trained to specifically cater the needs of their clients. They have the capability to easily edit the photos and deliver them exactly the way you want. All they needed is thorough explanation and giving them the checklist of the parts of the photos you want to be edited.

    3. Photo editors are experts in their own field

    Since photo editors are experts in the use of photo-editing software, they know all the tricks and techniques behind making your photo look spectacular. These people are skilled in a way that they know the ins and out of the different editing software such as Photoshop and Adobe Lightroom. They are familiar of all the features and functionalities of these tools. The know-how of these photo editors will be their advantage to create an improved photo and deliver it in the most efficient way.

    4. Creation of profit

    With the help of the skilled and professional photo editors, your business can create more sales. Instead of spending much time in trying to improve your photos by your own, you can exert much of your time and effort in actual shooting real estate photos. The benefits of hiring an expert can expand your time closing out better deals and transactions. As photographer, you can also work on other business matters.

    5. High-quality image

    Because of the experience of professional and skilled photo editors, they can produce very high quality images because of the latest technology they possess. These people work all day long improving their skills in using different editing tools. The only thing their minds are set into is how to produce tons of quality images the best and quickest way possible.

    6. Gets you ahead of the competition

    Outsourcing your photo-editing experts from around the world will let you choose the best and highly-skilled person to do the job. In this way, you can have the edge that will help you get ahead of the over-saturated real estate photography business. While others are spending much in producing processed photos, it will be your advantage when you outsource editing jobs at a reasonable price. In this way, upon selecting the right person who will work for you for over a long period and minimize time looking for someone to entrust your photo-editing jobs, the distinct advantage of getting ahead of your competitors is enjoyed.

    7. Photography Website

    Digitization is the culprit why a website for real estate photography is important. This is not part of the gear you are bringing to the site. It is also not the equipment you are using during photo shoot but it is self-explanatory why one needs to have his own website. Having the right tools and equipment is essential it is also viable to have an online space in the Internet.

    Having an attractive website is what entices clients to visit it. Make it a point that the template you are using for your website will offer a correct and complete package for every individual visiting your website.

  • Edit your HDR Real Estate Photography the Quickest Way

    Edit your HDR Real Estate Photography the Quickest Way

    High Dynamic Range Photography or commonly called HDR in the world of photography is a procedure in which a photographer can replicate or even replace what a standard photography can offer. This technique makes use of illumination as the main concept of photography which creates different exposures. These exposures are blended together to develop a better shot than what the original photo shows.

    HDR is also used in real estate photography. There are moments when the photos taken are over-exposed which means some parts are brightly taken while there are dark parts somewhere. Many photographers make proper use of sunlight to avoid using lighting equipment. But in reality, sunlight exposure has its limitations. Time is of great importance when using sunlight as exposure source.

    In photography, sunlight is usually good when you are shooting outdoors. It would be very hard taking photos indoors. A good HDR photography must always be accompanied by different equipment common to photographers. He needs to have a remote trigger to minimize movement, a tripod to stabilize the shots taken, a flash for indoor shoots and a trusted software like Photoshop CC for easier real estate photo editing.

    Simple HDR Editing Guide

    According to this post, there are countless techniques that photographers can utilize in order to make editing touches. This is for the purpose of making the photos look better. It is always time-consuming to edit real estate photography and this huge amount of time you devote in editing is the most important time in the post-processing of the photos.

    According to appolicious, High Dynamic Range is the difference between the brightest and the darkest parts of photo. HDR Exposures Calculator on the other hand is an application where it automatically does the calculations to optimize the settings of the camera. This is a perfect tool to simplify the HDR feature of photography.

    Below are the HDR steps in editing real estate photos.

    • Turn off the flash of the camera, set to Aperture priority mode and switch the camera to metering mode. Metering is used to calculate the brightness of the real estate interiors and exteriors. This is responsible in maximizing the exposure of the shot taken by shutter speed adjustment.

    • By positioning the focal point over the brightest part of the scene to avoid sunlight reflection. This is the time that you can open the HDR Exposure Calculator and make sure of the shutter speeds is properly entered. By automating the HDR Exposure Calculator, you can optimize HDR automatically. Since photography is both technical and a confusing context of artistry, HDR is essential to maximize the potential of the technical aspect of editing.

    • After switching the camera to Manual mode and setting the Shutter Speed for the bracketed set, you have the option to use the AEB. HDR Interior Tutorial, you can see the Exposure Bracketing Setup page. You can even consult the manual of the equipment you are using.

    • Choose the Continuous Shooting and press the shutter button to get the first few sets of the bracketed photos. Make use of the bracketed sets by the HDR Exposure Calculator.

    • Make it a point to merge these photos once that the darkest part of the interior and brightest parts are determined using Photomatix Pro. You have the choice to open this app and click Browse and Load to choose the photos you wanted to merge. Then finally choose Merge Options.

    • Align the source image and Reduce noise on the Merge to HDR Options dialog. You can find the Preset thumbnails panel and select Architecture on top of the thumbnails. Select the preset thumbnails on the Preview Image. With the sliders on the left, you can click Next: Finish if you are pleased with the effects applied on the merged photos.

  • Real Estate Photoshop Retouching Guide for Newbies

    Real Estate Photoshop Retouching Guide for Newbies

    Being a real estate photographer entails lots of days of photo shoot not only as part of marketing purpose but also to perfecting the small details of some common mistakes. A photographer does not only consider the right time of day to create good shots. Other factors like right lighting and good angle are also important in developing good quality real estate photos.

    According to this post, the work of a photographer however is just a speck of the many tasks he does beyond the shoot. There are editing and retouching works that will take a lot of time to enhance real estate photography. These skills are essential to create magnificent photos for potential clients to become interested in the property you are offering.

    Photoshop Retouching Guides for Neophytes

    • Hue and Saturation

    hue and saturation

    Photoshop has many different options that you can play around with. Hue and Saturation is a great tool to correct colors. Adjusting greens is a common color error in real estate photography. You need to capture the dynamics of the exteriors that can be challenging to newbies.

    What you will do is choose Adjustment after selecting Image. Select Yellow afterwards from the drop down menu to adjust the Hue to +15 and Saturation to -5. You can also adjust the hue, saturation and lightness by selecting Green from the drop-down menu.

    • Adjust the Brightness

    brightness adjustment lightroom

    Getting balanced light is important when shooting exteriors especially when shooting under a direct sunlight. To balance light, edit the photo in Photoshop is the best solution so far. Opening the Image menu, choose Adjustments then click Levels. By dragging the center bar to the right tones down the overexposed areas.

    • Darken the Bright Grass Colors

    Garden is always a part of the exteriors of real estate photography. Seeing grass a bit bright definitely needs retouching. Going to the Toolbar, you need to click the Burn tool. Select the right size of the brush and drag over the brush to the grass afterwards to darken the area.

    • Adjust Curves

    According to InMan, Curves is a powerful Photoshop tool that is used for a color correction. Just open Image and Adjustments followed by Curves. After seeing the dialog window, click Auto. To brighten the curves, pull up the diagonal line at the center. To darken, pull it down otherwise. Click OK afterwards. You may also opt to use the eyedropper to choose for the black and white tones of the photo. Any slight difference will be corrected.

    • Straighten Property

    Straightening the home or property

    A straight line is always important in making the property look great. This happens when the camera is not angled properly. That is why diagonal and slant lines are visible. From http://54.201.150.30/real-estate-photography-using-photoshop/,you need to click on the Rectangular Marquee from the Toolbar and select the entire image. Click the Edit and Transform. From there, click the Skew from the drop-down menu.

    Drag the corner of the picture to the left if the property is leaning to the right. Make it a point that you need not to pull too far because this might be very unrealistic. Click the Check button after the edges are aligned and are all straight.

    • Lighting up the Corner

    interior editing using lightroom 3

    Lighting up the corners of the interiors of any property is always a challenge. It is always needed to even out the lighting of the interior because there are always situations when part of the photo is darker that the other part.

    To balance and even out lighting, go to Dodge tool. Select the right size of the brush to work with. To add brightness to the darker part, drag the Dodge tool over the darker area. You then need to go to Filter menu and select Sharpen and click on Unsharpen Mask. To get clearer and quality details, increase the amount then finally click OK.

  • Blending Exposures of Interior Photos using Photoshop

    Blending Exposures of Interior Photos using Photoshop

    The techniques in blending exposures using Photoshop’s Lightroom seem endless. These techniques will actually allow you to blend interior photos perfectly. They are also great in editing photos seen in any exposure blend.

    With the proper use of Photoshop CC of Adobe, you can easily blend interior designs under the city lights. The primary concern in this modification task is to develop the skills in the familiarization of Adobe Photoshop with the use of Raya Pro.

    Tips on How to Blend Exposures of Interior Photos

    This article is more about preparing for exposure blending than the actual exposure blending itself.


    video credit to Jimmy McIntyre
    1. Creating new photos from dark and overexposed highlights

    One basic technique when the photo is a little bit dark and some areas are partly exposed. You can immediately change the character of the picture with some few simple steps using Photoshop. When comparing the exposures of three identical photos with different exposure blends.

    They can be dark picture which covers the highlights, a normal picture with basic exposure, and a picture with brighter exposure that needs to bring back some of the shadows. One of the purposes of this tutorial article is to push the knowledge of any individual about exposure blending to the highest level.

    To start the editing process, select all the images and hold down SHIFT. Notice that the Open Images at the lower right of the screen changes to Open Objects. You need to press Open Objects and use the Stack button in Raya Pro. With the use of the Stack button, all the images will appear over the spaces below the panel.

    You can make adjustments and editing in your normal photo by retrieving some of the highlights included in your dark and bright photos. Especially for the photo to blend with the normal, it would be very hard at some point to do it.The main objective of this exposure blend is to avoid making the contrast look flat. To fix this problem, go to How to use Precision Masks and click AUTO BLEND DARK.

    There are instances wherein we need to have a very contrasting photo and the only way to do this is by clicking the value of your desire. The greater the value of the AUTO BLEND DARK, the darker the picture becomes. The resulting photo will highlight the parts that are overexposed.

    To compare the previous photo with the new one, press Select under Precision Masks and bring down the Capacity back. You can press the Thumbnail to make adjustment to the Exposure, Highlights and Contrast.

    After the correct adjustment has been made, just press OK and you will see the natural blend of the picture. You will notice that the critical parts in the image before exposure blend are very well edited after modifications were done. Make it sure that you will zoom in to check the picture before and after modification.

    2. Check the blend of contrast

    By clicking the Thumbnail that you want to edit, you need to zoom in and check every small detail of the picture. Check the contrast masks if they match your taste. Adjust it to your liking by pressing either the exposure or the contrasting buttons.

    There is also a better and quicker way to do contrasting masks without Raya Pro. You only need to select the thumbnail, press Image, Apply Image and Press OK afterwards.You need to do this few times to create a much contrasting masks.

    Or if you want to, you can make the dark image visible once again. Choose the actual mask itself by pressing the Command and L in the micro-control and you just can create a more contrasting mask while the Level control pops out.

    This is just a pretty easy task to do because you can actually invert the situation by pressing Image and selecting Apply image. This time around, you will be selecting the Invert, and press OK.This is done for the photos with brighter exposure. Once this is done, you will notice that you have created an inverted mask.If you are not happy and contented with the result, you need not to panic. There is the Adjustment button to press to and all you have to do is adjust the levels of exposure and highlights.

    For more tutorials, you may check this out.


    Good reads:

  • 4 Advance Photo Editing Techniques You Need To Know

    4 Advance Photo Editing Techniques You Need To Know

    A good real estate photo is a sum of various techniques in photography and post processing. While a beautiful property will definitely help, its success depends on the agent and what happens in front & behind the photographer’s lenses.  We have established the intricate processes every photo goes through to make it flawless, here we dish on 4  advance photo editing techniques to step up your career in real estate photography.

    Blending Layers

    When taking photos of a project, make sure to take an ample number to be able to make a composite. Composites are usually useful for interior shots, and what a professional photographer would do is to take varying flash shots of a room then blend it. Adobe Lightroom is a great tool that can help in blending layers. However, if you want to the colors to be more precise, it’s best to blend flash layers and fuse layers in Photoshop. To start, open all your images and make sure to include both ambient and flash photos. Ensure that all layers or layer sets that you want to merge are visible, then merge.

    Removing Hard Shadows

    If you don’t want to look like an amateur, it’s important to keep your photos looking neat and sharp. Thus, a hard shadow is unacceptable and should be removed. You can reduce shadows in two steps; first, you layer masks and second make use of your brush tool.
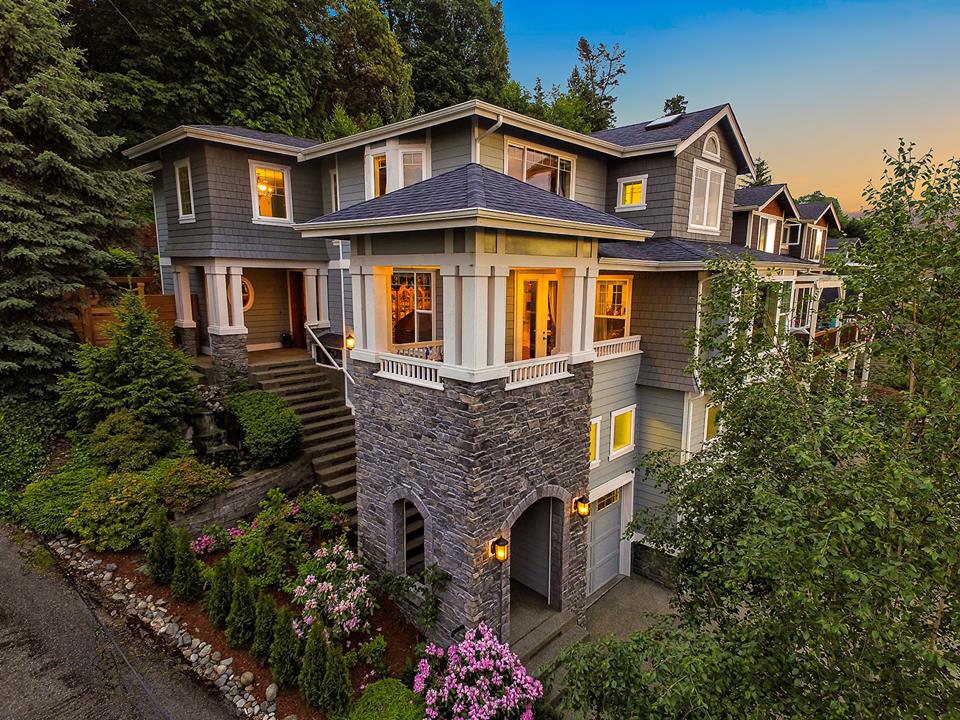
    In fact, brush tool is your new best friend. Set brush to 0% Hardness & 100% Opacity. If you want more control, you can lower the opacity. After setting up your brush, smoothen out the shadows.

    Color Replacement

    Even with the best lighting possible, sometimes raw photos don’t have the best color. The worst thing really is to have a flat-looking photo, other than manipulating hues and saturation, it’s a great advantage if you know how to use the color replacement brush. This technique is also useful in balancing out colors as well as correct color of your photo.

    In the photo above, notice how the wall color is slightly different than the original, replacing the color will remove any imbalances caused by for example window reflections or glare.  To select the color replacement tool, go to the regular brush tool, right click, then choose the color replacement tool from the fly-out menu.

    When choosing a replacement color, however, make sure to pick the nearest possible color from the original.


    Window Pool

    To get the most of your interior photo, it is important to check any exterior that can be seen from the inside. For example, in the photo above colors outside the window appear to be dull. To fix this, look for the lasso tool found in adobe photoshop and start cutting out the areas to be able to edit this specific area (see photo below) then adjust colors accordingly.


    There you have it! Photo editing really takes time and effort. If you don’t have ample time to post process your real estate photos, there are companies that offer photo editing services with the most sophisticated tools you can think of. Check out our final photo after applying the 4 techniques mentioned above!

  • 15 Lightroom Tips and Tricks

    15 Lightroom Tips and Tricks

    One of the most sought after editing applications is Adobe’s Photoshop. Because anybody can use Photoshop’s assortment of features even without the Internet, editing of different pictures can be done easily. This goes to show that you can take any editing works for as long as you want.

    One of the Best features of Adobe Photoshop is the Lightroom. With its Smart Previews, it makes the user reconnected to the computer anytime without connecting the hard drive. By design, it syncs anything that has been edited using the Smart Previews and these files can be then easily be handled without conceding the original version.

    Best Tricks that can be Used Everyday

    It is known to every photographer the different beneficial features Adobe’s Lightroom has in its arsenal. It is filled with numerous helpful attributes that can make every photographer’s life easier. But this is not exclusively for photographers only. Adobe Photoshop’s Lightroom is for everyone to enjoy – from people working at home, to students, to office workers, for everybody. Once you learn these features exist, you can edit photos as enjoying as look at them.

    Below are some of the tricks and tips on how to operate Lightroom effortlessly.

    1. Lightroom – a game of space

    Foremost, you need to go to the Library screen. This is the initial step where you can want to see sets of photos. Note that you will see a bar on top of the screen. The bar is deemed useless so it is better to get rid of it. If you want to import a photo and you want a specific library screen and you want to move to develop that particular shot, just hit the D button. This is the easiest way to move to the developed panel.

    2. Add a White Backdrop

    If you want to add a white backdrop or any color of preference, all you need to do is Right Click and you have all the options of assortment of colors to select from.

    whitebackdrop lightroom


    3. Straighten the Horizon

    This technique involves making the . Whenever you have a shot that shows uneven horizon, what most people do is go to Angle slider and select the proper angle that will straighten things up. Since this is time-consuming, all you need to do is hit the Command button for you to draw a level line across the photo. After dropping it, you will notice that the uneven horizon will automatically become straight.

    horizon of a photo straight


    4. Straighten Crop Orientation

    All photos oriented as landscape can be automatically changed by Lightroom to portrait by hitting the X Key and instantly, your cropped photo will turn into portrait.

    Straighten Crop Orientation


    5. Utilize Transform Tool

    Transform Tool is a feature in Lighthouse where it corrects distorted horizontal and vertical lines, and change the perspectives or anything that needs to be straightened. Scrolling down to Transform Tool, you can just choose whether it is vertical or horizontal lines that you want to be corrected. This is a perfect tool to make lines symmetrical to each other.

    Utilize Transform Tool

    6. Isolating Photos for Viewing

    To do photo isolation, it is just hitting the L Key twice and image will be back-dropped by a black screen. If you want to return back to the original photo, just click the L Key for the third time.

    Isolating Photos for Viewing


    7. Bringing Panels back to the Screen

    This feature is similar to photo isolation. Here you need to click the Develop module and you want to have your left side bar show its presets. You need to hit the Tab bar and the left side of the screen will show all its presets. To close both the left and right bar, just hit the Tab once again and the photo will be shown against the same background that you set.

    Bringing Panels back


    8. Making the

    This is done by going to the leftmost part of the bar. You need to click it and drag it to the right as far as you can go to make right module bigger. The reason for doing this is to fine-tune all the editing works you are going to make.

    Side Bar Bigger


    9. Slider Adjustment

    To make small adjustment to the sliders, all you need to do is to bring your curser to the slider and go to the Up and Down Arrow Key. If you want to make higher increments of adjustment, press Shift + Up and Down Arrow Key.

    Slider Adjustment


    10. Use the Brush Tools

    One way to speed up your work flow using the Brush is by hitting the Left or Right Bracket Key. To adjust the Feather, just press the Shift + Left or Right Bracket Key. Utilizing the Right Bracket will make the Feather bigger and smaller if otherwise.

    11. Copy settings

    This is done by right clicking the image and press Settings and go to Copy Settings. The main goal of this is to primarily copy whatever color set up of this picture and use it to other photos. This is done by copying all the presets of the current photo and the going to the photo these presets will be applied by pressing Paste Settings.

    12. Getting Rid of Specific Sections

    Removing features that are seldom used is to go directly to the module and right click the section you want to remove.

    Getting Rid of Specific Sections


    13. Sharpening the image

    Going to the Masking option under Sharpening, click the ALT/Option Keys of the keyboard and hold them down. This time, adjust manually the Masking slider. Anything that is black cannot be sharpened and anything that is white can be sharpened. This function eventually cuts the noise of the photo.

    14. Spot Removal Tool

    The purpose of this tool is to remove unwanted spots of the photo. You only need to drop a point from the area of consideration and hold down the Shift Key and a line is created that will remove all the spots of the photo that you want to remove.

    15. Video editing using Lightroom

    Under the Develop module, a “not supported” message will pop out. If you want to capture a particular frame of the video, edit this by clicking Sync in the bottom-right corner.

    If you want us to edit your photos contact Phixer right away.


    Video tutorial version below: Credit to Evan Ranft

  • Interior Design Photography Tips and Editing Using Adobe Photoshop Lightroom

    Interior Design Photography Tips and Editing Using Adobe Photoshop Lightroom

    One of the best sources for photography business is Interior Designing. Whatever a photographer wants to shoot, he can do so. But there is a difference between a topnotch photographer and an amateur one. In the genre of interior design photography, it is great to have the skills necessary to make every work easier.

    The idea of trying to sell the images you have taken to impress the viewers is to know what size and details of the area of consideration. The best way is to do simple interior design photography and to take a picture of a room to get the best features of the room.

    Photography is thought to be an easy job. But in reality, it has a lot to do with perspective and visual storytelling. There are perspective distortions which needed to be adjusted, corrected and processed. When doing interior design photography, it is best to take away all components that stand out as distractions. Every photographic and imaging detail should be considered.

    Photography Editing Tips on Interior Design using Adobe Photoshop Lightroom

    The following are tips on how to edit interior design photography with the use of Adobe Photoshop Lightroom.

    1. Use wide-angled lens

    Canon 6d
    photo https://www.lonelyspeck.com/canon-eos-6d-review/

    On the photographic side of images, aside from using a tripod, the use of full-fine sensor is generally required. Specifically the use of Canon 3 Mark II or II or the Canon 6d, they are great options when it comes to the type of camera to be used. As mentioned, it is basically necessary to use wide-angled camera lens. The preferred size may be from 17mm to 40 mm lens. With this size, it connotes more peripheral vision and it can fill spaces to cover the whole frame.

    2. Find the proper angle

    find the right angle

    As a rule, when going inside a room try to go in each corner and get the proper angles first. Do not go in parallel with the furniture and bed inside. Try to find the perfect perspective angle instead. With using a wide angle lens, you will probably get a lot of distortion. [Read more]

    3. Start with the Shadows and Highlights

    Shadows and Highlights

    To start editing using the Lightroom of Adobe Photoshop, begin the retouching by opening up the shadows. It is advisable to go to about half of the shadow balance and about 75% for the highlights.

    4. Correct the Whites and Blacks

    Whites and Blacks

    By holding the ALT key and moving the cursor to the right, you can open the whites you needed in your photo.

    5. Establish the White balance

    White balance
    photo colorvaleactions.com

    White balance is important to the photograph as a whole. It is the removal of unacceptable colors that are relative to color temperature of the source of light. By having knowledge about digital white balance, it improves photos under wider lighting condition perspectives.

    When the white balance seems wrong use the picker to determine the areas that are pure white or very light gray. This time, you need to adjust the temperature and contrast to make the whole area warmer. It is important to open up a little more shadow and adjust the highlights for checking. Take note that the white balance is more on the artistic side of the photographer.

    6. Consider adjusting Sharpening and Noise Reduction


    video credit Anthony Morganti
    In the Lightroom, the Noise Reduction tab luminance is lowered to 40 and the Sharpening to 90. This is usually applied to the dark side of the floor. Masking is not good in interior designing which is why the Masking balance is untouched.

    7. Application of Lens Correction

    Because of the lens used, there is always a slight correction that will be done. These imperfections can be the blemishes from the glass of the lens. These blemishes are lens elements which will minimize the reflection. To correct all these lens flaws and get rid of the imperfections, proceed to Lightroom “Lens Correction” tab and click “Enable Profile Correction” including “Remove Chromatic Aberration”.

    Most of the time, Auto Upright is a reliable tab. But in the case of Lens Correction, it does not work according to your liking. In this case, it can be fixed manually so that the treatment of the vertical and horizontal lines can be done immediately. These lines are bases of interior designing and architectural photography. To make the Vertical lines highlighted, add +5 to the “Vertical” setting and -2 to “Distortion“to remove some bumpy effects.

    8. Supplement the so-called Ramelli Lightroom secret ingredients

    Making the photos more dramatic is to enhance the photo for the perfect perception of viewers. You can optionally delete what you do not want to be included in your photo. You can also use the Brush to polish floors that are parquetted or tiled. You can also brush the whole area to remove all the dust to bring the message to the people.
    When light seems boring, try to create a drama by selecting radial filter and set exposure to 1.95. Masking and feathering the place all over again to revitalize the different areas of the room. The real purpose of masking is to create light complexities to make the pho more interesting.

    9. Use Post-Crop Vignette

    Better known as Post-Crop Vignette in Adobe Photoshop, the sole purpose of this feature is to darken edges and corners of the room. You need to correct the balance in Lightroom “Effects” and slide it down to -23 to diffuse some unnecessary light.

    10. Duplicate the layer and start removing wrinkles

    When doing the final touches of interior design Photoshop editing, you need to open the photo in Photoshop and duplicate the layer by choosing Photoshop CC. You need to copy the layer by dragging it to the bottom and select Duplicate Layer.

    To finalize the editing, one important tip is to remove the wrinkles. This is to eradicate any lumpy parts of the photo. This is done by going to Filter>Blur>Gaussian Blur and move the balance adjuster to 10.

  • What’s in a Picture?

    What’s in a Picture?

    It’s easy to appreciate a good photo. Scan through the pages of Town & Country magazine, or any real-estate magazine for that matter, and you will find yourself gaping at the beautiful bedrooms, kitchens, or lawns. Everything looks perfect, you imagine yourself living in it.

    The Art of Photo Editing

    Suffice to say, a good photo evokes emotion(it’ll make you see or feel things!), but what is commonly overlooked is the amount of work that goes behind it一the intricate art of post process photo editing. For starters, it’ll take an average time of five minutes to edit a living room photo in one property, imagine doing 40 of them!

    What really goes behind photo editing, you ask? Well, a lot. Here are the basic photo editing processes we apply in every photo we get:

    1. White balance

    White balance (WB) determines how accurately the colors of your photo will come out, thus playing a vital role in photo editing. It is important to get the right amount of temperature or tint, in say, a bedroom photo to make it look attractive; a too cool or too warm WB can completely affect the interpretation of a photo.

    2.  Contrast & Exposure

    Contrast in photography is the difference between dark and light. High contrast means an extreme difference between dark and light, while low contrast is a gradual or lesser difference between dark and light.  Exposure is the overall brightness of an image or the amount of light in the photo. A photo will appear too dark if exposure is set too low, and too bright if it’s set too light.

    3. Vibrance & Saturation

    These fun color-boosting settings can either make or break a photo. Vibrance tool increases the intensity of a more muted color and leaves the well-saturated ones alone. Think of it like a fill light, but exclusive for colors.

    On the other hand, Saturation bumps up the intensity of all colors in an image, regardless of the starting point of the colors. It’s best to be careful and not to go ballistic with these two.

    4. Noise reduction

    Images can be noisy too. In photography, however, noise refers to the random, irregular, and grainy specks in an image. When it comes to noise reduction, we have two main goals. First is to get rid of any digital noise in the image, but as much as possible preserve the details that comes with it. Noise reduction in an image can be a little tricky and time consuming as increasing noise reduction means losing details on your image.

    5. Alignment

    To get that perfect photo, it’s best keep all lines in your photo aligned. It never hurts to pay good attention to the image background or scene, make sure no lines appear tilted or curvy. Proper alignment will make your photo look balanced.

    6. Masking

    The term “mask” is simply a way to apply something to a very specific portion of an image. Layer mask and clipping mask are the two primary types of masks, and are closely related in concept but different application. Sometimes, it is necessary to mask photo to achieve a much-need effect.

    7. Resizing and Cropping

    These two may be the easiest photo editing process, but it’s still important to note that both require careful consideration or risk compromising image quality.

    Obviously, there are only two way to resize a photo: smaller or larger. When reducing a size, image pixels will be reduces as well and discarded, enlarging it makes each pixel appear larger. Cropping is simply removing a part of the image that appears out-of-focus or unnecessary.

    Final Stage

    After a rigorous photo editing process, the photos will undergo quality assurance from our very keen QA team.  We’ll look into every detail to make sure no photo will look flat, foggy, dark, or too bright, destructive editing is to be avoided at all times. 

    The amount of scrutiny is as thorough as the actual editing itself. Each processes mentioned above has to be done just right, and we take pride in the fact that our photos look naturally & consistently beautiful.

    Rest assured every photo will be handled with utmost quality from the beginning up until its final stages, even with our most economical package.


  • How to Edit Basic Real Estate Photos Using Adobe Photoshop CC?

    How to Edit Basic Real Estate Photos Using Adobe Photoshop CC?

    Photo editing can recreate ordinary pictures to look extra amazing. Enjoining your family on a trip to a splendid vacation, attending parties with your friends or possessing great memories of special occasions, taking pictures from these events can eventually make the event more extraordinary.

    In these times of digitization and information age, almost everything we think of can be completed at the tip of the fingers. Picture editing is one of the most common tasks to be done when it comes to enhancement of pictures. Old images, photos and videos are the ones which are preferred to be edited. Image restoration of these types of pictures ultimately needs a particular set of skill.

    With proper knowledge on photo editing, it can be guaranteed that profits can grow exponentially when used in a correct and professional manner. Photo editing is valuable to portraits for personal representation of pictures. It can be utilized for special occasions like birthdays, anniversaries, weddings and other eventful ceremonies. It is also suitable for commercial projects and businesses, like real estate, in particular.

    Photo editing can also help service and advertising firms for real estate companies and brokerage systems. It can increase the aesthetic beauty of properties by the enhancement and enrichment of images. Images are edited by making the color more vibrant and to make the photos look more entertaining to stare at. These modified images may turn out to be used for listing services for other websites.

    Some of the things that can be achieved when editing photos include the changing and enhancing the colors. Unwanted background can also be removed by means of cropping. Photo enhancing also includes adjustment of contrast, brightness and sharpness. What is more remarkable is by making a black and white photo turn to a colored photograph.

    Photoshop CC Overview


    video credit Just Alex Halford

    To make photo editing clearer and more detailed using Adobe Photoshop CC, it is important to have this application downloaded to your PC or Mac. Editing and previewing of Canvas should be done first in order for the blank page to show up.

    Unlocking the background layer is done by the LOCK symbol. You need to double click this so that a new layer screen will pop out. To add more layers, simply click DUPLICATE LAYER or NEW LAYER. Take note that if you have three new layers, you need to work on a separate layer for circle, colors and always save your work.

    There are other special features that are built-in in an Adobe Photoshop CC. The list includes changing color background or foreground by means of editing the stroke pixel, stylizing the gradient background, filtering and more.

    Since it is assumed a real estate photos are the ones needed to be edited, it is automatic to identify the tool box on the left part of the screen and familiarize all the feature given in that box. Noticeable at the right side of the screen is a setting for file storage. Make it sure that the storage must be spacious enough as Photoshop files are relatively big.

    How to Use Adobe Photoshop CC Effectively

    The most popular tool used in real estate photo editing is Adobe Photoshop Creative Cloud (CC). This is considered by many as the most advanced digital imaging software. The very basic step to use this is to download Photoshop CC. Adding effects to real estate pictures can be limitless unless your retouching skills are exceptional. This is not to discourage beginners but it is a popular notion that whenever you have competitive background when it comes to technology, you certainly have the edge.

    Below are the steps on how to make real estate photos enticing to viewers.

    1. Resize photos via Image Processor

    photo credit slrlounge.com

    Using Image Processor to enhance real estate photos, you need to choose “Select Folder” and select JPEG for resizing. You need to choose “Include ICC Profile” afterwards then click “Run”. Image Processor can basically resize a number of photos that will save you lots of time. This is a significant tool of Photoshop CC.

    2. Use “Curves”

    More often than not, picture editing largely involves correction of colors. With the use of Photoshop CC’s powerful tool called Curves, correcting the colors to what you desired can take some precious time to master because “Curves” is a complex feature of Photoshop CC.

    Since the image is assumed open in Photoshop, go to “Image”, proceed to “Adjustments” and finally select “Curves”. You need to click “Auto” for you to be able to grab the diagonal line located at the center. This line is used to brighten or darken the image.

    Another feature of the “Curves” is the presence of eyedropper. Eyedropper is used to select the black and white qualities of a photo. It can locate and optimize even the slightest color difference. This is a small process that a photo needs to undergo during enhancement.

    3. Try “Hue and Saturation”

    Hue and Saturation

    Mimicking the functions of “Curves”, “Hue and Saturation” is another feature that is very significant in the augmentation of color correction. Although this feature seems common to use, it will take to perfect this feature. “Hue and Saturation” has a variety of options. This feature is very relevant and important to real estate photos because the enhancement of greens and grass is a challenge for all users.

    After getting your image opened, go to “Select”, followed by “Adjustments” and then click “Hue and Saturation”. You can easily adjust the hue to +15, and saturation/lightness to -5. Once these adjustments are made, simply click OK. This feature should make the tone of the photo more vibrant.