Category: Real Estate Photo Editing

  • Top 5 Editing Techniques That Make Small Spaces Look Bigger in Property Photos

    Top 5 Editing Techniques That Make Small Spaces Look Bigger in Property Photos

    Whether you are a property owner, real estate developer or agent, making small rooms look bigger in photos is often essential. The roomier they appear, the more likely buyers and guests will show interest. 

    The key to making small spaces look bigger is to know the editing techniques that the pros use. Once you understand how to make small rooms look bigger in photos, you can apply it to all your properties, today and in the future. 

    So, which techniques work? Here’s our top five photo editing tips for small rooms:

    1. Use A Wide Angle Lens

    Pexels – CC0 License

    Your top priority is to use a wide-angle lens. These allow you to capture more of the room in one shot, giving it the impression of size (and making it feel less closed-off). 

    Wide angle lenses are available for most DSLRs and broaden the light coming into the lens from the sides. The camera then processes this information, allowing it to expand the boundaries of the room and create more depth. 

    However, you need to be careful when using a wide-angled lens. Distortion around the edges can make rooms appear unrealistic because of the excessive bending of straight lines. Therefore, keep the wideness of the angle within the envelope of what the image will allow. 

    2. Use The Rule Of Thirds

    Real estate photo editing for small spaces should also make proper use of the rule of thirds. Segmenting rooms into three equal shares adds balance and makes even the smallest spaces look functional and useful. 

    The best way to apply the rule of thirds in most rooms is to pick a key feature and build the rest of the image around that. For example, you could focus the shot on the kitchen island in the lower and middle thirds, and then use the sides or the top of the image to capture the remainder of the kitchen. 

    Applying the rule of thirds unconsciously can take time, but most cameras have a grid overlay function. This feature overlays the image with lines divided into thirds, showing you the location of all the objects in your room relative to the shot. 

    3. Leverage Height

    Pexels – CC0 License

    Another way to make a small space appear larger is to take your shots from elevation. Shooting rooms from higher angles gives the impression of size (since most people aren’t accustomed to viewing rooms at these angles).

    High angles work well in storage spaces, for example. Taking shots from above gives you a better vantage point and lets you show buyers and clients the functional or practical layout of the room. 

    High angles also allow you to show the full expanse of the floor. This detail is often missing from conventional real estate photos, but could sway their decision one way or another. 

    To capture more of the room in a single frame, use a step ladder. Make sure it is sturdy and you can hold the camera motionless while you take snaps. 

    4. Use Leading Lines

    Pexels – CC0 License

    If you want to make a room look longer, you could also try using leading lines. These work by drawing the eye in one direction, creating a path through the room. 

    For example, you could use a kitchen counter as the “leading line” and then use a rule-of-thirds shot where the edge of the counter creates a sense of distance and depth (even if the kitchen is shallow). You can also do the same with furniture in the living room, even if the outline isn’t perfectly straight. Even regular floor patterns can work sometimes (especially if you have fishbone wood flooring or tiles). 

    Some real estate developers use architectural features in the doorways and window frames to provide additional leading lines. These work best in period properties with striking features and entryways. 

    5. Use Vignetting

    Finally, you could explore vignetting to make small spaces look roomier. Adding elements, like the sky, can extend perceived space and roominess. 

    You often see real estate agents performing this trick on balconies where physical space is limited. Emphasizing the surrounding environment makes the available space feel larger. Another approach is to take exterior shots of rooms with the doors or windows open to increase the implied square footage — an option for garden rooms and conservatories with bi-folding doors. 

    Conclusion

    These techniques should provide you with a solid basis for using photos to make small rooms look larger. The more you get used to incorporating them, the more attractive properties and rentals will become to your audience. 

  • How Professional Photo Editing Increases Property Value Perception by Up to 20%

    How Professional Photo Editing Increases Property Value Perception by Up to 20%

    Introduction

    A growing number of buyers view property listings online. Data from the National Association of Realtors suggests that over 40% of US homebuyers started their search for a new property by visiting websites and perusing online listings in 2023. Viewing images is one of the most influential aspects of the buyer journey. 

    Studies show that prospective buyers spend around 60% of their time looking through photographs compared to just 20% reading the property description (source). This information is key when you consider that professional real estate photo editing can increase property value perception by up to 20%. 

    Getting the images right can make the difference between impressing clients and closing a deal, and failing to secure even a viewing. In this guide, we’ll explore the incredible benefits of real estate photo editing services.

    What is Real Estate Photo Enhancement?

    Images play a pivotal role in influencing perceptions and creating impressions of properties. Whether you’re building an online listing or a glossy brochure, including professional, high-quality, relevant images can help you boost lead creation and encourage prospective buyers to arrange a viewing, take a virtual tour or contact your real estate agency. 

    Real estate photo enhancement involves using cutting-edge technology to improve the quality and clarity of photographs and video footage. The aim is to optimize the chances of selling properties by showcasing them in their best possible light. 

    Professional photo editing for real estate agents, sellers, and photographers covers a wide range of services, including photo galleries, virtual twilight, video editing, and virtual staging

    What Are the Benefits of Real Estate Photo Editing?

    There are several benefits of real estate photo editing. Key advantages include:

    1. Increased value perception

    One of the most significant benefits of real estate photo enhancement is how edited photos affect property value. A large-scale study by AXA revealed that buyers estimated the asking price of a property at 21% higher when comparing professional and basic images of the same home. 

    1. Selling properties faster

    ‘Does photo editing help sell homes faster?’ is a common question posed by vendors and real estate agents. The answer, according to research from Redfin, is yes. On average, homes that are marketed using professional real estate photo editing services sell 32% faster. 

    1. Achieving higher sales prices

    Studies indicate that using professional images for real estate not only increases value perception and the speed of sales, but it also boosts sales prices. An analysis of over 200,000 listings by VHT revealed homes with professional photographs sold for over 30% more than those with basic images. Asking prices can be up to 47% higher. 

    1. Generating more interest

    It’s not always easy to make a property stand out or attract attention, especially if the market is slow, demand is low, or there are multiple similar homes up for sale in the area. One of the key reasons to invest in professional real estate editing is to generate more interest and make your listings catch the eyes of interested buyers. Listings that feature professional-grade photography can increase views by over 115% (source). 

    1. Attracting buyers

    The vast majority of buyers consider images important when viewing listings and online brochures. Almost 80% of buyers would be less interested in viewing a property if the listing featured poor-quality or unattractive photographs (source). 

    1. Maintaining authenticity

    Real estate photo enhancement is designed to make images look more appealing and attractive to engage buyers and create a positive impression. The best professional real estate photo editing services achieve this goal while maintaining authenticity. One of the main risks of using services is creating gaps between real life and online galleries. As an agent or property owner, you don’t want to present a home that looks completely different, causing buyers to be underwhelmed or disappointed when they visit. 

    The Phixer Difference: Making Your Listings Stand Out

    Phixer specializes in real estate photo editing and enhancement to make your listings stand out and shine. Utilizing cutting-edge techniques and tools, Phixer optimizes photographs to create stunning image galleries and generate high-quality leads. 

    The image below demonstrates the incredible impact of subtle, authentic real estate photo enhancement services:

    Phixer real estate photo editing

    Summary

    Data suggests professional photo editing can increase property value perception by up to 20%, but that isn’t the only benefit of real estate photo enhancement. Professional photo editing for real estate agents and owners can increase listing views, boost asking and sales prices, and help agents and vendors sell properties faster.

    If you’d like to learn more about the amazing advantages of real estate image editing, contact the friendly, experienced Phixer sales team today.

  • The Role of High-Quality Images in Accelerating Property Sales

    The Role of High-Quality Images in Accelerating Property Sales

    In the world of real estate, first impressions are everything. They are also quite often the deciding factor in whether your property sells. With the increase of digital platforms for property listings, images have become an essential tool in accelerating sales too. Professional, high-quality images can impact how your property is perceived. Here, we are going to explore the role that image quality plays, and why it is so important that you invest in photo editing when trying to sell your home.

    The Power of Appeal


    Humans are visual creatures. The brain can process an image 60,000 times faster than text. It’s not hard to see why visual content is so important, and powerful when it comes to making decisions. In the world of real estate, images are often the first interaction that people have with your property as well. A listing’s photos are, in essence, the very first impression that a property is going to make. If you do not use professional images, or if you don’t edit your images properly then you risk your home being overlooked. This is especially the case when you are competing with other properties that have high-resolution, professional images. 


    Quality images help to highlight a property’s appealing features, and it also helps to make your rooms look way more spacious, and brighter. It also goes a long way when it comes to making it look more inviting overall. Whether you have a modern kitchen, or have used quality materials when renovating your property, in a competitive market, things like this are critical if you want to catch the eye of a prospective buyer.

    Increased Engagement


    The digital age has helped to transform the way that properties are both bought and sold. Properties with higher-quality images tend to stand out in the search results. If you use blurry or low-quality images, or if your images are dark and out of focus then this will work against you. A well-lit and crisp photo will make your property more clickable, which translates to more interest and more potential offers. Quality images also help to drive more traffic to your listing.

    Enhancing Perceived Value


    Quality photos can enhance the value of your property. A well-executed photograph gives the impression that a seller really cares about their home, and it also shows that they want to display it in the best possible light. It indicates professionalism and it also shows attention-to-detail as well. A home that looks cared for and stylish in photos can be seen as a higher-value home overall, even if it has similar characteristics to several other homes on the market. Professionally-edited images can also help to correct imperfections and distractions that might end up reducing the appeal of your home. If you have a photo edited to remove clutter or if you raise the brightness of a photo then this can make the room appear bigger. By creating polished images and by taking the time to make sure that your property is positioned as being desirable, you can help to ensure that it fetches a premium price on the market.

    Expediting the Process


    Property buyers often find that they are pressed for time and as a result of this, they evaluate photos to make sure that a property is worth looking around. When browsing a listing online, buyers may spend a few seconds on every photo before they move on to the next. This means that you only have a few seconds to capture someone;’s attention overall. In a lot of cases, buyers form their opinions based on photos alone. If an image helps to convey a sense of style, spaciousness, and warmth then they are much more likely to schedule a viewing. Conversely, if you have a poorly-taken photo or if you have one that doesn’t look professional then this can lead to a lot of misconceptions. For example, if you have a blurry or dimly-lit photo then this will make your home appear smaller or less inviting overall, which is the last thing you need when you are trying to generate interest.

    Increased Trust


    In the world of real estate, it’s important to know that trust is everything. Buyers have to feel confident that they are making a sound investment. Quality photos and images can go a long way when it comes to establishing credibility. It also helps to demonstrate that a seller is serious about their property and that they want to present it in the best possible way. When you look at the flip side, amateur photos often appear untrustworthy and they also indicate that the seller is cutting corners, or not paying attention to detail. In a market where buyers have access to a plethora of listings, it’s very easy to ignore a property that has poor photographs.

    Emotional Appeal


    Another thing you need to consider is emotional appeal. Real estate photography isn’t just about evoking an emotional response. It is also about showcasing a home that a buyer can imagine themselves in. You also want to try and create a sense of attachment and desire if you can. Images that have been professionally edited can help with this. You can adjust the colors, lighting, and more to evoke a sense of warmth. When buyers feel as though they can connect to a property emotionally, you can help to create a sense of home, with visual imagery being a powerful tool when it comes to selling your home.


    In some cases, properties may be outdated or empty. This results in them being less visually appealing. Virtual staging can play a huge role here, and it is a great way for you to elevate your property beyond photo editing. With that said, for most properties, photo editing is one of the best ways for you to not only increase your chances of making a sale but to also make sure that you are not overlooking small details that make a big difference.

  • From Cluttered to Clean: How Object Removal Enhances Real Estate Photos and Boosts Property Appeal

    From Cluttered to Clean: How Object Removal Enhances Real Estate Photos and Boosts Property Appeal

    First impressions matter in real estate. When potential buyers browse listings online, they make split-second decisions based on photos. Cluttered spaces with personal items, excess furniture, or distracting objects can make even beautiful homes look small, messy, and unappealing.

    Object removal techniques can transform cluttered real estate photos into clean, attractive images that showcase a property’s true potential. Professional digital object removal services eliminate everything from furniture and personal items to temporary eyesores like garbage bins or parked cars. This simple enhancement can make spaces appear larger, brighter, and more inviting.

    We’ve seen properties that struggled to attract interest suddenly generate multiple showings after updating listings with decluttered photos. The investment in professional photo editing pays off through faster sales and potentially higher offers, as buyers can better visualize themselves in the clean, spacious environments they see online.

    Key Takeaways

    • Professional object removal in real estate photography makes spaces appear larger, cleaner, and more appealing to potential buyers.
    • Removing distracting elements from photos helps buyers focus on a property’s best features rather than its temporary flaws.
    • Properly edited real estate photos can lead to increased buyer interest, more showings, and potentially faster sales at better prices.

    The Importance of Professional Real Estate Photography

    In today’s competitive real estate market, the quality of listing photos directly impacts buyer interest and selling speed. Professional photography showcases properties in their best light and creates a strong first impression.

    Benefits of High-Quality Images in Listings

    High-quality real estate photos attract significantly more views online compared to listings with amateur photography. According to industry data, homes with professional photographs sell faster and for higher prices than those without.

    Professional images help potential buyers form an emotional connection with properties before they even visit. These photos highlight a home’s best features while minimizing distractions.

    When buyers browse multiple listings, professional photography helps your property stand out from competitors. Clear, well-lit images signal to buyers that the property is well-maintained and valuable.

    Professional photographers understand how to use lighting, angles, and composition to make spaces appear larger and more inviting. They can emphasize important selling points while downplaying less appealing aspects.

    The Role of a Real Estate Agent in Photo Preparation

    We believe real estate agents play a crucial role in preparing properties for professional photography. A good agent will advise sellers on decluttering and staging before the photographer arrives.

    Agents should create a comprehensive shot list highlighting the property’s key selling points. This ensures no important features are missed during the photography session.

    Experienced agents understand which items should be removed or rearranged to improve visual appeal. They can guide homeowners on how to prepare each room for maximum impact.

    When physical decluttering isn’t possible, agents can arrange for virtual decluttering and object removal services. These digital solutions can transform cluttered spaces into clean, attractive images.

    The best agents maintain relationships with professional photographers who specialize in real estate. This collaboration ensures consistent, high-quality results for every listing.

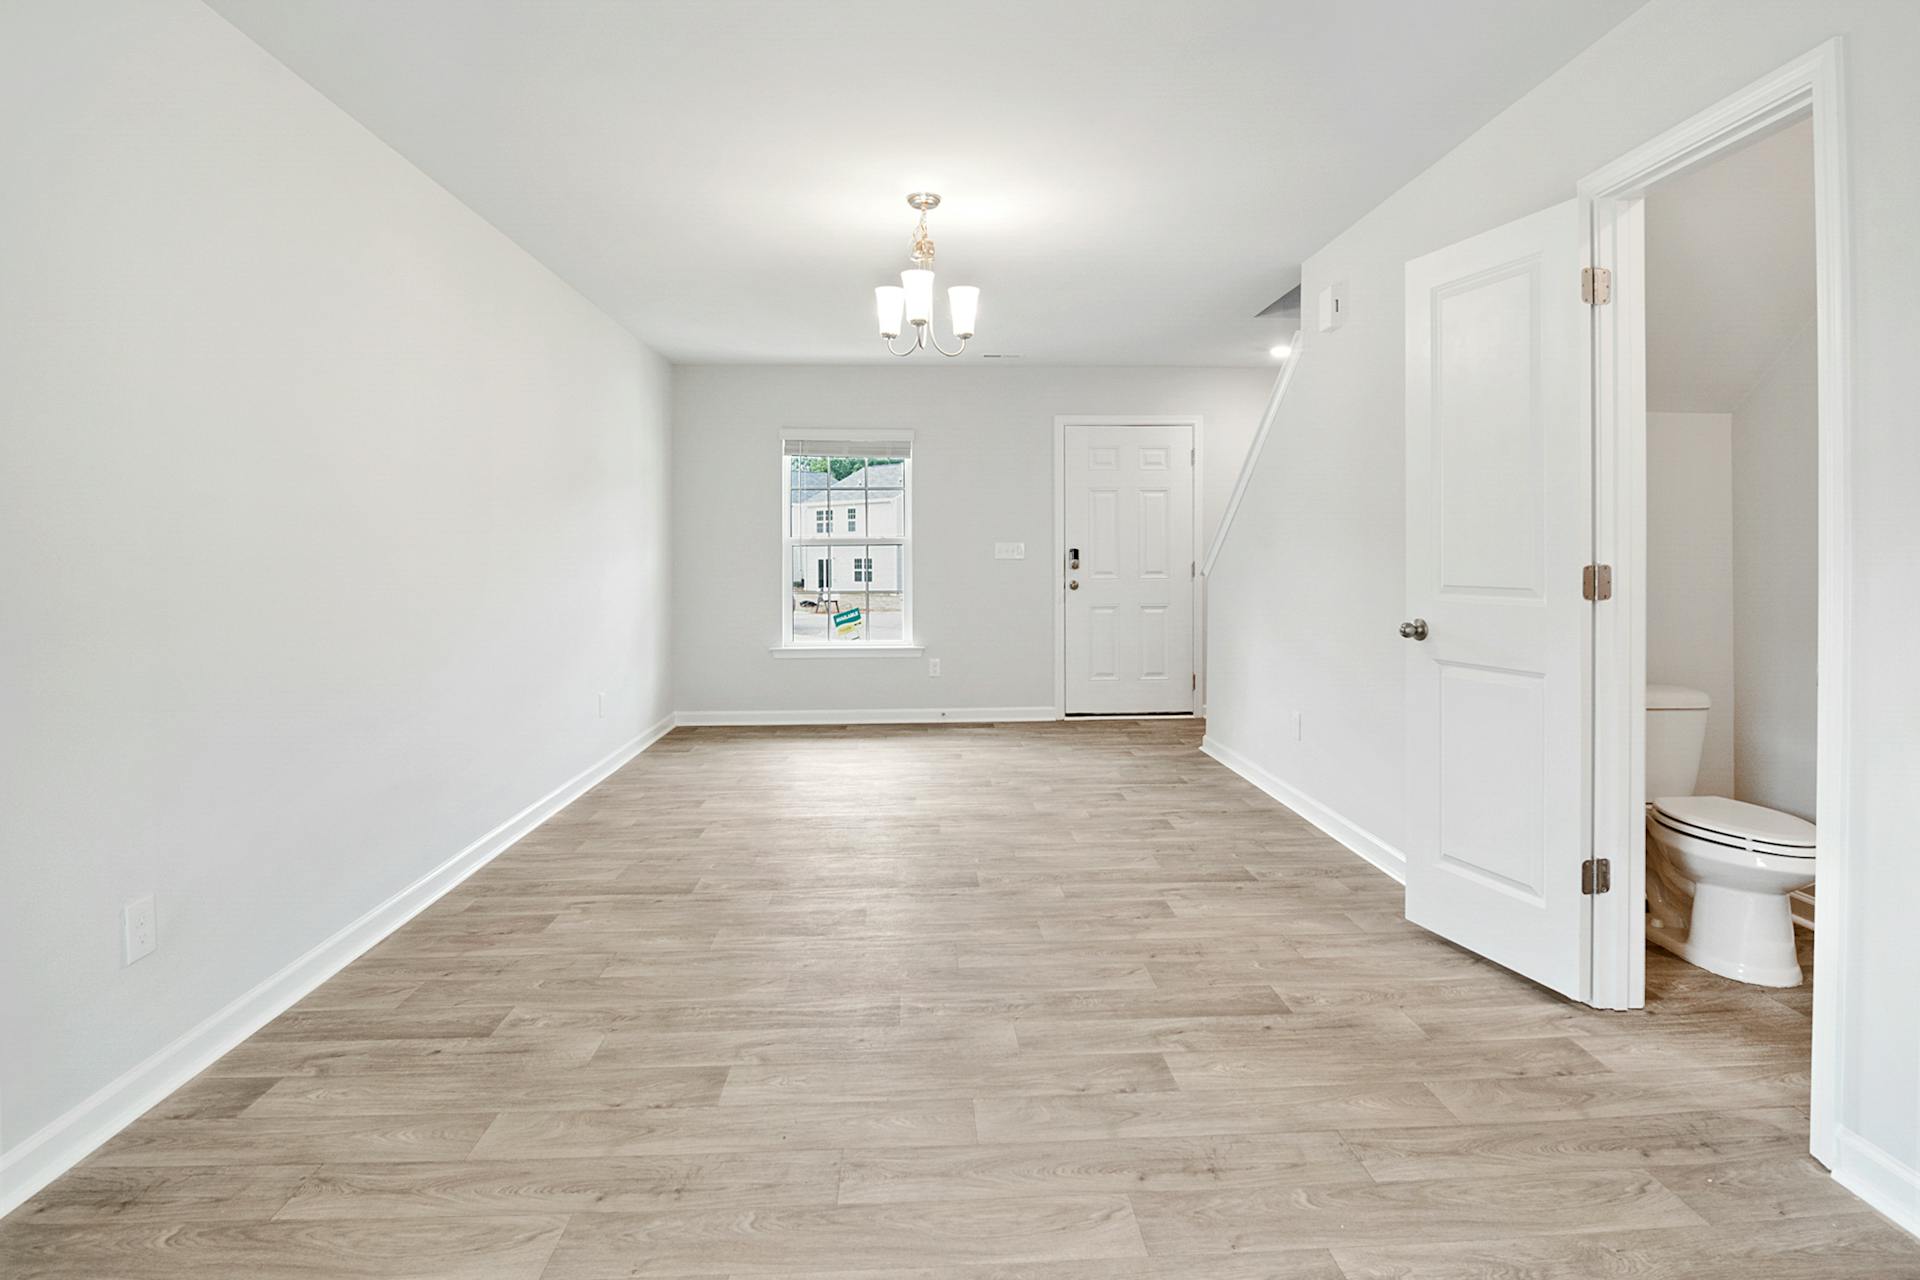
    Staging and Decluttering Home Interiors

    Proper staging and decluttering transform ordinary real estate photos into compelling visual stories that attract potential buyers. These techniques help showcase a property’s best features while creating spaces that feel welcoming and full of possibility.

    Decluttering Techniques for a Clean Look

    Removing personal items is essential for creating neutral spaces where buyers can envision themselves living. Family photos, collections, and personalized décor should be the first items to go. We recommend focusing on creating a professional and clean look in your real estate photos.

    For physical decluttering, follow these steps:

    • Remove excess furniture to make rooms appear larger
    • Clear countertops in kitchens and bathrooms
    • Organize bookshelves and display only a few decorative items
    • Hide cables and electronics for a cleaner appearance

    For digital decluttering, object removal techniques can eliminate items that couldn’t be physically removed before the photoshoot. This includes distracting elements like trash bins, pet items, or excessive décor.

    Essentials of Effective Home Staging

    Home staging goes beyond decluttering to actively arrange spaces for maximum appeal. We focus on creating balanced compositions that highlight a property’s strengths while minimizing weaknesses.

    Key staging principles include:

    • Furniture arrangement that improves flow and showcases room functionality
    • Strategic lighting to create warmth and highlight architectural features
    • Neutral color schemes with selective accent pieces
    • Appropriate scale of furniture and décor for each space

    Virtual staging offers a cost-effective alternative to physical staging, allowing empty or poorly furnished spaces to be transformed digitally. This technique helps buyers imagine what the home could look like with their own furnishings.

    For quick digital transformations, AI decluttering tools can remove unwanted items from photos in seconds, making even furnished rooms appear clean and inviting.

    Object Removal and Its Effect on Perception

    The way potential buyers perceive a property is heavily influenced by the visual presentation of real estate photos. Object removal techniques can transform cluttered spaces into clean, appealing environments that help viewers imagine themselves living there.

    The Process of Item Removal for Clearer Spaces

    We start by identifying distracting elements in the photo that detract from the property’s appeal. Common items we remove include personal belongings, excess furniture, wall fixtures, and unsightly objects like garbage bins or cords.

    Professional editors use advanced software tools to carefully erase these elements while maintaining the natural look of the space. This isn’t simply deleting objects—it requires skillful reconstruction of what would appear behind them.

    The goal is to create cleaner and more visually appealing images that showcase the property’s best features. When done correctly, object removal makes rooms appear larger, brighter, and more inviting.

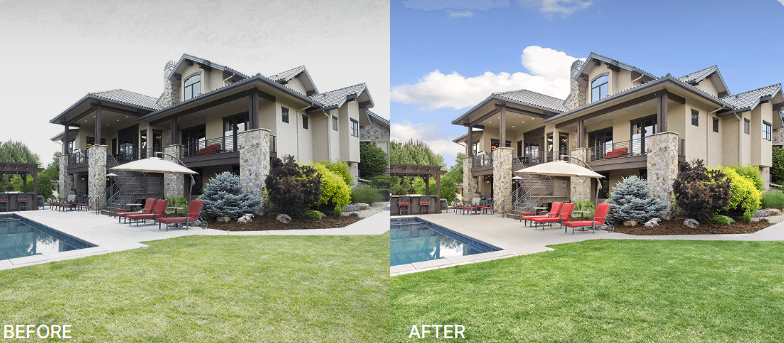
    Before-and-after comparisons often show dramatic improvements in how spaces are perceived. A cluttered living room can transform into an elegant, spacious area that highlights architectural features and selling points.

    Ethical Considerations in Photo Editing

    While enhancing real estate photos through object removal is effective, we must balance improvements with honest representation. The line between enhancement and misrepresentation requires careful navigation.

    Acceptable editing practices:

    • Removing temporary objects (toys, laundry baskets)
    • Eliminating seasonal items (holiday decorations)
    • Erasing cords, small wall marks, or minor blemishes

    Questionable practices:

    • Removing permanent fixtures or structural elements
    • Digitally repairing significant damage
    • Making rooms appear substantially larger than reality

    We believe buyers deserve accurate representations of properties while still seeing them in their best light. Transparency about editing is key to maintaining trust in the real estate marketplace.

    The goal should always be to help buyers visualize potential, not to hide flaws they’ll discover during viewings. This balanced approach increases perceived value without crossing ethical boundaries.

    Maximizing Natural Light and Lighting Techniques

    Lighting makes all the difference in real estate photography, transforming ordinary spaces into appealing, welcoming environments. Proper light management can make rooms appear larger, highlight architectural features, and create an inviting atmosphere.

    Incorporating Natural Light for Enhanced Photos

    Natural light is the best friend of real estate photography. It creates a warm, inviting atmosphere that makes properties more appealing to potential buyers. To maximize natural light, we recommend removing distractions that block windows or cast unwanted shadows.

    Clean windows are essential for letting in maximum light. Ensuring windows are free of smudges will allow natural light to flood the space beautifully. This simple step can dramatically improve photo quality.

    For best results, schedule photo shoots during the “golden hours” – shortly after sunrise or before sunset. This timing provides soft, flattering light that minimizes harsh shadows and creates a warm glow throughout the property.

    Position furniture to allow light flow rather than blocking it. This strategic arrangement enhances the perception of space and brightness in your photos.

    Artificial Lighting Solutions for Even Exposure

    When natural light isn’t sufficient, artificial lighting becomes crucial. Poor lighting cannot be completely fixed in editing, so getting it right during the photoshoot is essential.

    We recommend using a combination of these techniques:

    • Flash diffusers: Soften direct flash to prevent harsh shadows
    • Portable LED panels: Provide even, controllable light in dark corners
    • Multiple light sources: Create balanced illumination throughout the space

    Light layering is particularly effective for interior shots. This involves using different light sources at varying heights to eliminate shadows and create depth.

    For rooms with mixed lighting (natural and artificial), use color temperature balancing tools. This prevents the orange or blue color casts that make properties look uninviting or institutional.

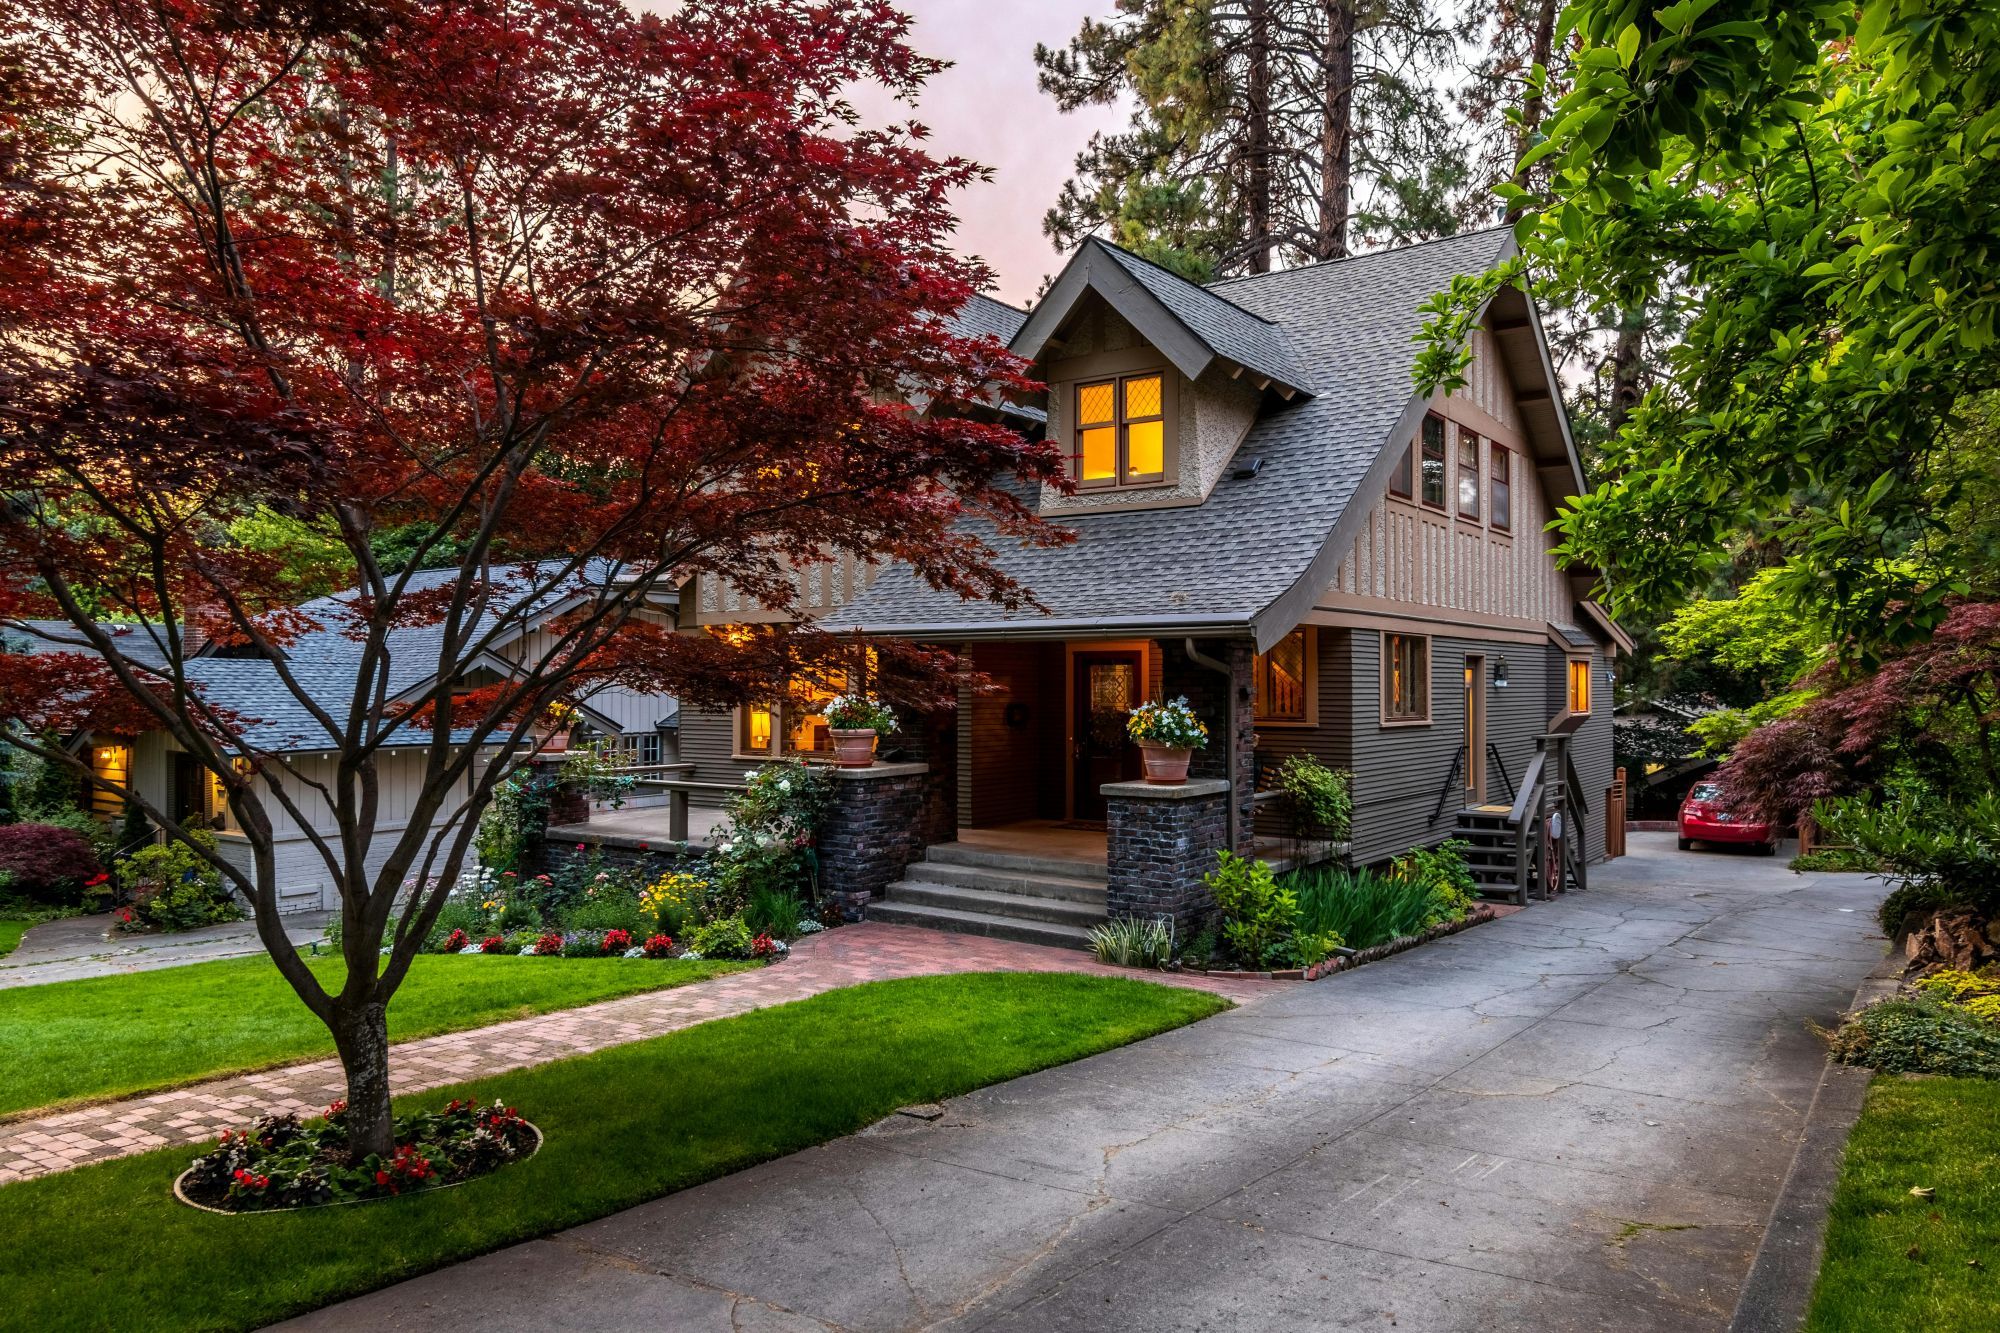
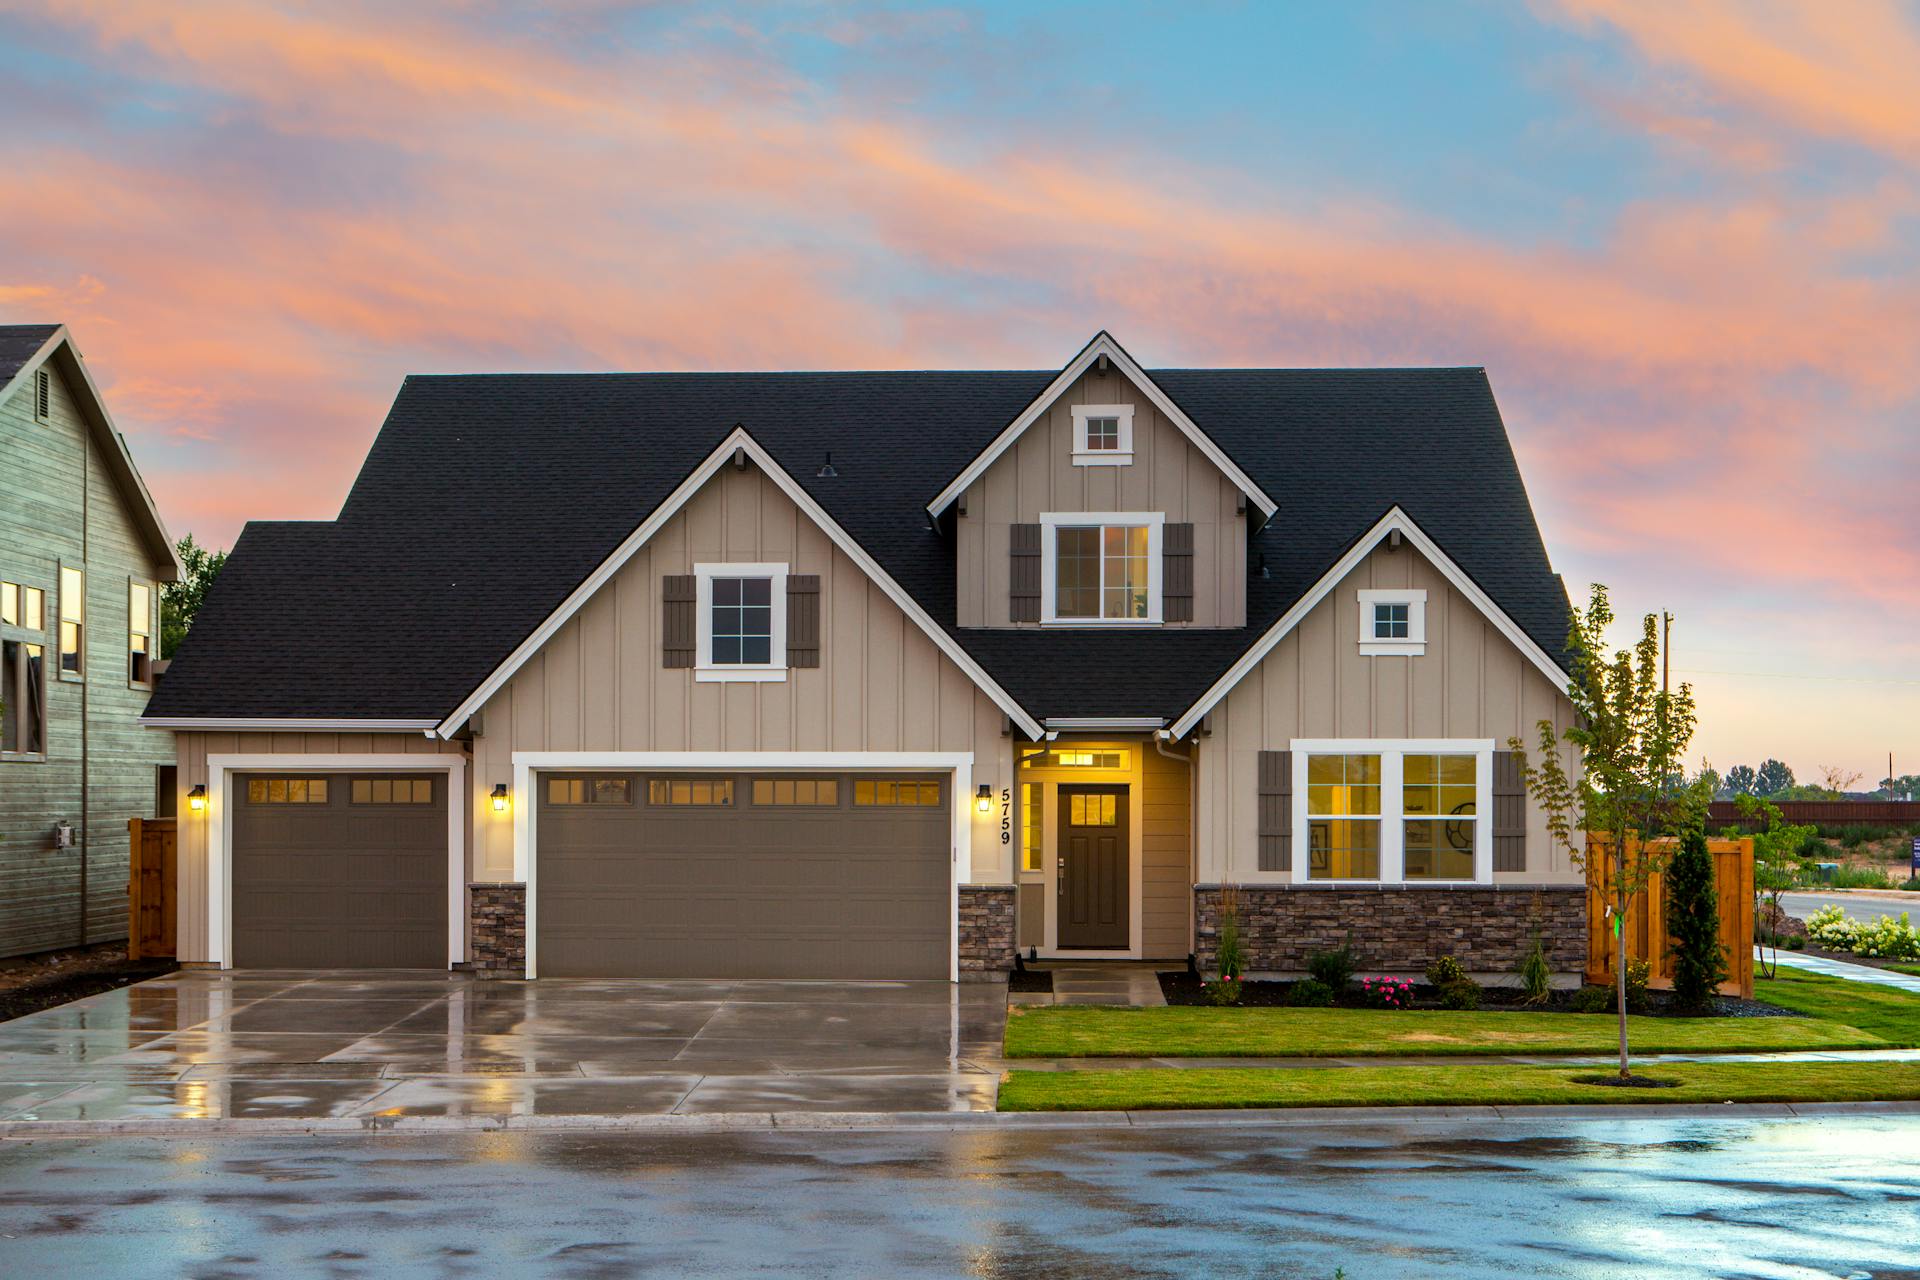
    Enhancing Curb Appeal Through Photography

    The exterior of a property creates the first impression for potential buyers. With effective photography techniques, we can transform ordinary property exteriors into striking images that attract more interest and possibly higher offers.

    Strategies for Capturing Attractive Exteriors

    When photographing property exteriors, timing is crucial. The golden hour (shortly after sunrise or before sunset) provides soft, flattering light that enhances visual appeal of any property.

    We recommend using a wide-angle lens to capture the entire facade while maintaining proper perspective. This gives potential buyers a comprehensive view of what they’re considering.

    Object removal plays a vital role in exterior photography. Garbage bins, parked cars, utility boxes, and seasonal decorations can be digitally removed to create cleaner, more appealing images.

    Sky replacement is another powerful technique. A bright blue sky or dramatic sunset can dramatically improve a property’s curb appeal, even if the weather wasn’t cooperative on shooting day.

    Proper exterior editing techniques should also include lawn enhancement, fixing patchy grass, and ensuring vibrant landscaping colors that make the property stand out from competitors.

    The Final Touches: Cleaning and Decor

    Beyond digital item removal, physical preparation of spaces creates the foundation for stunning real estate photography. Proper cleaning and strategic decor placement work together to showcase a property’s best features.

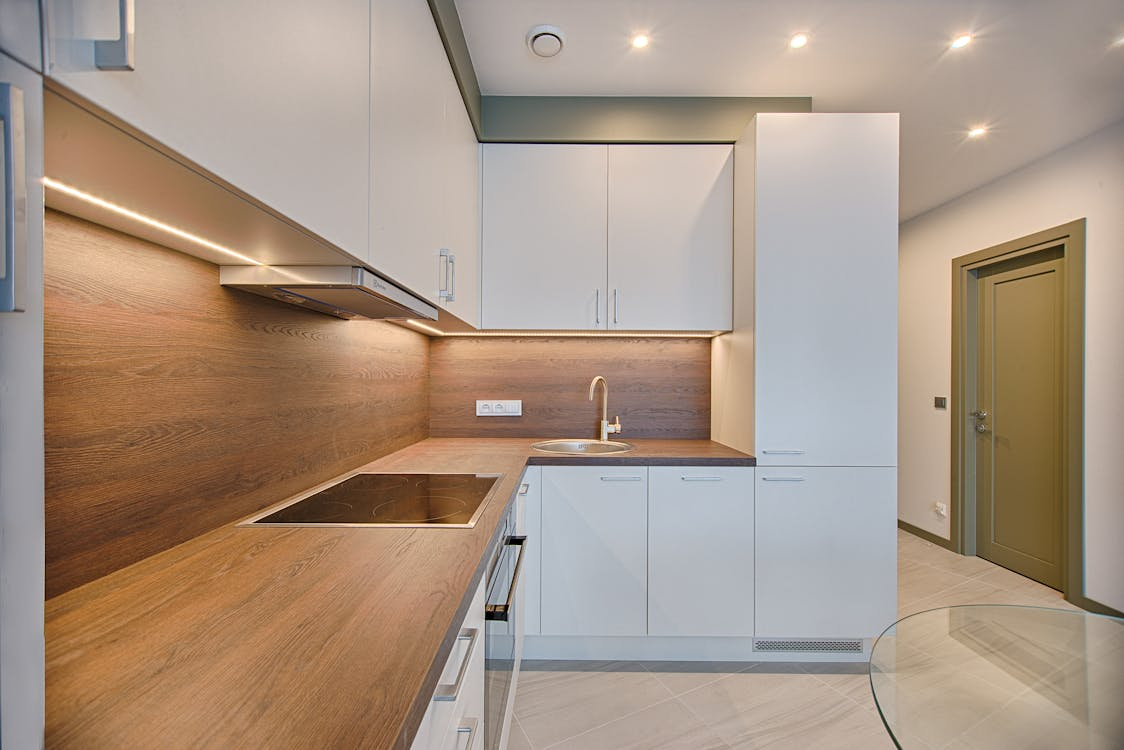
    Cleaning Best Practices for Immaculate Spaces

    When preparing for real estate photos, a spotless environment is non-negotiable. A clean, clutter-free kitchen makes a big difference in how spacious a property appears. We recommend starting with a deep clean of all surfaces, particularly in high-value areas like kitchens and bathrooms.

    Windows should be crystal clear, as smudges become highly visible in professional photography. Floor cleaning is essential—vacuum carpets and mop hard surfaces until they shine.

    Pay special attention to these often-missed spots:

    • Ceiling fans and light fixtures
    • Baseboards and trim
    • Appliance exteriors
    • Shower doors and mirrors

    Remember to empty all trash bins before the photo session. Even small details like organizing cables or removing pet items can significantly improve the final image quality.

    Selecting Decor to Complement Real Estate Imagery

    Strategic decor can elevate real estate photos from good to exceptional. We suggest using minimal, tasteful decorative elements that add warmth without overwhelming the space. Object removal services help enhance visual appeal, but starting with thoughtful decor makes this process easier.

    Fresh flowers or simple green plants add life to sterile spaces. Consider these proven decor approaches:

    Do:

    • Use neutral artwork that complements wall colors
    • Place a few coordinated throw pillows on sofas
    • Add a single decorative bowl or vase as a focal point

    Don’t:

    • Overcrowd surfaces with personal items
    • Use bold patterns that distract from architectural features
    • Display controversial or taste-specific decorations

    Balance is key—we want just enough decor to make spaces feel inviting but clean enough that potential buyers can see every aspect of the house without distractions.

    Advanced Marketing Techniques

    Modern real estate marketing goes beyond simple object removal. These digital enhancements create powerful visual experiences that connect with potential buyers on an emotional level and drive faster sales at better prices.

    The Impact of Virtual Staging on Buyer Interest

    Virtual staging transforms empty or cluttered spaces into beautifully decorated rooms that help buyers envision themselves living there. This technique costs 90% less than traditional staging while achieving similar results.

    We’ve found that virtually staged listings receive up to 40% more inquiries than those showing empty rooms. The investment typically ranges from $25-75 per photo but can increase offer prices by 1-5%.

    Key benefits include:

    • Flexibility to show multiple design styles for the same space
    • Speed with 24-48 hour turnaround times
    • Cost-effectiveness compared to physical staging

    Virtual staging works best when combined with item removal to first create a clean canvas. This two-step process highlights architectural features while adding emotional appeal.

    Creating a Compelling Virtual Tour Experience

    Digital decluttering enhances virtual tours by removing visual distractions and creating seamless experiences. High-quality tours require pristine spaces where buyers can focus on the property’s features.

    We recommend including these elements in your virtual tours:

    1. Interactive hotspots highlighting special features
    2. Measurement tools for furniture planning
    3. Natural lighting enhanced through editing

    Tours that incorporate decluttered images keep viewers engaged 5-7 times longer than standard photo galleries. This increased engagement translates directly to more in-person showings.

    Remember that consistency matters. Each space should maintain the same level of cleanliness and enhancement throughout the tour to maintain professional credibility.

    The Impact on the Real Estate Market

    In today’s competitive real estate market, the quality of property images directly affects buyer interest and sales outcomes. Clean, decluttered photos have become a crucial marketing tool that influences property perceptions and purchase decisions.

    How Improved Photography Influences Sales

    Properties with professionally edited photos where distracting objects have been removed sell faster and often at higher prices. When potential buyers browse listings online, their first impression comes from photos. Clean, decluttered images make spaces appear larger and more inviting.

    We’ve observed that homes with decluttered photography receive:

    • More initial inquiries (up to 61% more online views)
    • Shorter time on market (typically 32% faster sales)
    • Higher final sale prices (3-5% premium on average)

    The removal of distracting items enhances visual appeal and helps buyers envision themselves in the space. This psychological connection is crucial for moving prospects from casual browsers to serious buyers.

    Trends and Expectations Among Modern Realtors

    Today’s successful realtors recognize that object removal in property photos is no longer optional—it’s expected. The standard for listing photos has risen dramatically in recent years.

    Current trends among top-performing agents include:

    1. Comprehensive editing packages that include decluttering, color correction, and virtual staging
    2. Consistent visual branding across all listings
    3. Regular training on latest photo enhancement technologies

    Most buyers now expect to see pristine, magazine-quality images when shopping for homes. We’ve found that 92% of realtors report that clients specifically comment on photo quality during property discussions.

    Poor execution of item removal can backfire, creating unnatural-looking spaces. This highlights why many agents now partner with professional editing services rather than attempting amateur edits.

    Conclusion

    Object removal in real estate photography is a game-changer for property marketing. We’ve seen how removing distractions can transform ordinary listings into compelling visual stories that attract more potential buyers.

    Professional editing services make removing distracting objects accessible to all real estate professionals. The investment in decluttering photos typically pays for itself through faster sales and higher property values.

    Remember these key benefits:

    • Enhanced visual appeal – Cleaner photos create stronger first impressions
    • Highlighted property features – Removal of clutter draws attention to selling points
    • Emotional connection – Decluttered spaces help viewers envision themselves in the home

    In competitive markets, every advantage matters. We encourage incorporating object removal as a standard practice in your real estate marketing strategy.

    The best approach combines thoughtful physical staging with strategic digital decluttering. This dual method ensures your properties shine online and in-person.

    As technology advances, we expect even more sophisticated tools for property presentation. Staying current with these developments will keep your listings ahead of the competition.

    Clean, decluttered images aren’t just nice to have—they’re essential in today’s digital-first real estate market.

    Frequently Asked Questions

    Object removal and decluttering are essential aspects of real estate photo editing that significantly impact property marketing. These common questions address the technical and ethical considerations involved in preparing professional real estate imagery.

    What are the benefits of decluttering real estate photos for property listings?

    Decluttering real estate photos helps properties appear more spacious and attractive to potential buyers. When we remove distractions, we draw attention to the home’s best features rather than personal items or mess.

    Cluttered images make properties look smaller and less desirable. By eliminating visual noise, we create an inviting atmosphere that allows buyers to envision themselves in the space.

    Professional photo decluttering also helps properties stand out in online listings where first impressions happen in seconds. Clean, uncluttered images typically result in more inquiries and faster sales.

    What techniques are used by professionals to remove unwanted objects from property photos?

    We use advanced photo editing software with specialized tools like clone stamping, content-aware fill, and patch tools to remove unwanted objects. These techniques allow us to replace distracting elements with appropriate background textures.

    For larger objects like furniture, we carefully rebuild the background while maintaining proper perspective and lighting. Some edits require layering techniques to ensure natural-looking results.

    Professional editors often create custom brushes that mimic textures of walls, floors, and ceilings for seamless object removal. The goal is always to make edits undetectable to viewers.

    How can decluttering a space visually affect the potential buyer’s perception?

    Decluttered spaces appear larger, brighter, and more valuable to potential buyers. When we remove distractions, buyers can focus on architectural features and the property’s potential rather than current occupants’ belongings.

    Removing distracting features can increase a home’s perceived value. Studies show that decluttered spaces create emotional connections with buyers who can more easily imagine their own possessions in the space.

    Clean, organized photographs also suggest the property has been well-maintained, which builds buyer confidence. This subtle psychological effect can significantly impact purchasing decisions.

    Can object removal in real estate photos be considered misleading to potential buyers?

    We follow ethical guidelines that differentiate between enhancement and misrepresentation. Removing temporary objects like clutter, vehicles, or garbage cans is generally considered acceptable enhancement.

    However, permanently removing structural flaws, cracks, water damage, or other property defects crosses into misleading territory. Most real estate photography ethics codes require disclosure of significant alterations.

    The industry standard is to present the property in its best light while maintaining honesty about its fundamental condition. Different regions may have specific regulations regarding what constitutes misleading real estate imagery.

    What software tools are commonly used for cleaning up real estate imagery?

    Adobe Photoshop remains the industry standard for professional real estate photo editing with its comprehensive tools for object removal and image enhancement. Lightroom is often used for initial adjustments and batch processing.

    Specialized real estate editing software like Phixer offer streamlined workflows for common editing tasks. These platforms often include templates and presets specifically designed for property photos.

    For teams with multiple editors, cloud-based solutions with collaboration features help maintain consistency across property listings. Many professionals use a combination of tools depending on the complexity of the edits required.

    How does the process of virtual staging differ from object removal in real estate photography?

    Object removal focuses on eliminating unwanted items from existing photos, while virtual staging adds furniture and décor to empty spaces. Both techniques help buyers visualize a property’s potential.

    In virtual staging, we digitally insert realistic 3D furniture models into vacant rooms after removing any existing items. This process requires careful attention to scale, perspective, and lighting to create convincing results.

    While object removal typically aims to enhance what’s already present, virtual staging completely transforms empty spaces into lifestyle vignettes. Both techniques serve different purposes in the real estate marketing toolkit.

  • Top 10 Real Estate Photo Editing Mistakes (And How to Avoid Them)

    Top 10 Real Estate Photo Editing Mistakes (And How to Avoid Them)

    In today’s real estate market, high-quality property photos can make all the difference between a quick sale and a listing that lingers. We often see agents and photographers make critical editing mistakes that diminish the impact of their property images. Understanding these common photo editing errors can help you create more appealing and effective real estate photography that attracts potential buyers.

    A real estate photographer editing a photo, making common mistakes

    Many real estate professionals struggle with finding the right balance in their photo editing process. From over-editing that creates unnatural appearances to inconsistent lighting that confuses viewers, these mistakes can significantly impact a property’s marketability. We’ve compiled the top photo editing pitfalls and practical solutions to help you showcase properties in their best light.

    1) Neglecting Proper Image Analysis

    A real estate photo with overly saturated colors and unnatural lighting, lacking proper image analysis

    Before diving into editing, many real estate photographers skip the crucial step of analyzing their images. This oversight can lead to inefficient workflows and subpar results.

    A proper image analysis helps identify specific issues that need addressing. We recommend taking time to evaluate each photo for lighting, composition, and potential distractions before touching any editing tools.

    Proper image analysis sets the foundation for successful real estate photos. When we examine images thoroughly first, we can create a focused editing plan rather than making random adjustments.

    Look for issues with white balance, exposure problems, and perspective distortion during your analysis. These common problems are easier to fix when identified early in the editing process.

    We’ve found that spending just 30 seconds analyzing each image can save several minutes of editing time later. This practice also helps maintain consistency across an entire property listing.

    Remember to check both technical aspects and aesthetic elements during analysis. Are walls straight? Is the lighting balanced? Does the room feel inviting? Answering these questions before editing makes the entire process more effective.

    2) Over-Editing Photographs

    Over-editing is one of the most common mistakes in real estate photography. It happens when editors go beyond enhancing the image and start creating an unrealistic representation of the property. Over-editing can lead to misrepresenting the property, creating false expectations for potential buyers.

    Signs of over-editing include unnaturally bright skies, excessively saturated colors, and extreme HDR effects that make interiors look artificial. When photos don’t match reality, buyers feel misled when they visit the property in person.

    We recommend maintaining a balance between enhancement and authenticity. Real estate photo editing should showcase a property’s best features without crossing into misrepresentation.

    Avoid over-saturating colors, which is a particularly common mistake. Vibrant colors may catch attention, but they quickly signal to viewers that the images have been heavily manipulated.

    A good rule of thumb is to edit until the property looks its best while still looking like the actual property. This builds trust with potential buyers and maintains your professional reputation.

    3) Ignoring Lighting Consistency

    A real estate photo with inconsistent lighting: bright sunlight on one side, shadow on the other, creating an unbalanced and unprofessional look

    Lighting consistency is one of the most crucial aspects of real estate photo editing that many professionals overlook. When photos of the same property have different color temperatures or brightness levels, they create a jarring experience for potential buyers viewing the listing.

    We often see this problem when mixing natural and artificial lighting sources without proper correction. Some rooms appear warm and yellow while others look cool and blue, creating a disjointed visual narrative throughout the property.

    Poor lighting is frequently cited as one of the top mistakes in real estate photography. Inconsistent lighting can make a property look unprofessional and poorly maintained, even when that’s not the case.

    To fix this issue, we recommend adjusting white balance settings across all images to create a cohesive look. Color temperature should remain consistent from room to room unless there’s a specific design reason for variation.

    Proper image analysis before editing can help identify lighting inconsistencies. Take time to review all property photos together rather than editing each in isolation.

    Professional editing software offers batch processing features that can help maintain consistency across multiple images, saving time while ensuring quality results.

    4) Incorrect White Balance

    White balance is one of the most critical aspects of real estate photo editing. It affects how colors appear in your photos and can make or break a property’s appeal. When white balance is off, rooms can look yellowish, bluish, or have other unnatural color casts.

    Many photographers struggle with incorrect white balance that makes interiors appear too warm or too cool. This distortion can misrepresent the true colors of walls, furniture, and fixtures.

    Poor white balance can make a pristine white kitchen look dingy or give a cozy living room an uninviting cold appearance. This issue often occurs when shooting in mixed lighting conditions, such as rooms with both natural and artificial light.

    To avoid this mistake, we recommend using a gray card during your shoot for accurate reference in post-processing. Alternatively, you can select the white balance eyedropper tool in your editing software and click on a neutral gray or white area.

    For consistent results across a property, batch adjust similar rooms together. Remember that proper white balance ensures colors are accurately represented and reflects the property’s true appearance, which builds trust with potential buyers.

    5) Misaligned Verticals and Horizontals

    A photo of a modern building with misaligned vertical and horizontal lines, creating a distorted and unprofessional look

    One of the most obvious signs of amateur real estate photography is converging verticals and misaligned horizontals. These distortions create an unprofessional look that can make potential buyers feel disoriented when viewing property images.

    When walls appear to be leaning or floors seem tilted, it creates a sense of imbalance that detracts from the property’s aesthetics. This problem is particularly troublesome for real estate photography because the goal is to present a realistic and pleasing view of the space.

    We often see this mistake when photographers shoot without a tripod or fail to use a level during setup. Even a slight tilt of the camera can result in noticeable distortions that make rooms look unstable or poorly constructed.

    Professional editing software includes tools to correct these issues. We recommend using the transform tools in Lightroom or Photoshop to straighten horizontal lines and fix converging verticals.

    For best results, we suggest addressing this issue during the shoot by using a tripod with a level. However, if that’s not possible, professional real estate photo editing can help correct these problems in post-production.

    6) Overuse of HDR Techniques

    HDR photography can transform real estate images by showing more details in both bright and dark areas. However, many photographers push this technique too far, creating unnatural-looking results that can drive away potential buyers.

    Overprocessing is one of the most common mistakes in HDR real estate photography. When colors become too saturated and contrasts too extreme, properties look fake rather than appealing.

    We recommend using HDR subtly to enhance images without making them look artificial. The goal is to create a balanced photo that shows the property accurately while highlighting its best features.

    Professional real estate photo editing can help eliminate these errors. A good rule is that viewers shouldn’t notice you’ve used HDR—they should just see a beautiful, realistic property.

    Many beginners fall into the trap of pushing HDR processing too far, creating unrealistic images. Remember that HDR should enhance reality, not replace it.

    When using HDR techniques, we suggest checking your work by comparing it to how the property looks in person. This helps ensure your photos remain truthful representations.

    7) Distorting Room Proportions

    A room with exaggerated proportions, where the walls and furniture appear distorted and out of scale

    One of the most problematic editing mistakes in real estate photography is distorting room proportions. Using ultra-wide angle lenses and improper editing can make spaces appear significantly larger than they actually are.

    While it might be tempting to make a small bedroom look spacious, distorting room size or layout is misleading to potential buyers. This practice can create unrealistic expectations when people visit the property in person.

    We recommend using a moderate wide-angle lens (24-35mm) rather than an extreme one. This helps capture the room while maintaining more accurate proportions.

    When editing, be careful with perspective correction tools. While they’re great for fixing vertical lines, overusing them can stretch rooms unnaturally.

    Proper real estate photography should accurately represent the property. Professional editors focus on making spaces look their best without changing their fundamental dimensions.

    Remember to keep furniture and architectural elements properly sized in your edits. Distorted furniture is often a clear sign of misleading proportions that savvy buyers will notice immediately.

    8) Leaving Clutter in Images

    A cluttered room with poor lighting and distracting objects, such as personal items or messy furniture, in need of real estate photo editing

    One of the most common mistakes in real estate photo editing is failing to remove clutter from images. Homes with visible personal items, excess furniture, or random objects distract potential buyers from seeing the property’s true potential.

    Even with the best camera equipment, cluttered photos make spaces look smaller and less appealing. Buyers want to envision themselves in the space, not navigate through someone else’s belongings.

    While you can remove some clutter during photo editing, it’s much more effective to declutter before the photoshoot. We recommend asking homeowners to put away personal photos, excess decor, kitchen appliances, and bathroom items.

    For items that couldn’t be removed during shooting, professional real estate photo editing can help eliminate distractions. Virtual staging and object removal tools can transform cluttered spaces into clean, inviting rooms.

    Remember to check corners and backgrounds for overlooked items like cords, trash bins, or pet supplies. These small details often get missed but can significantly impact the overall impression of a property.

    9) Over-Saturating Colors

    One of the most common mistakes in real estate photo editing is over-saturating colors. When we’re trying to make a property look vibrant and appealing, it’s tempting to push the color saturation slider too far.

    Over-saturation makes a property look unnatural and often unprofessional. Potential buyers can be turned off by photos that don’t represent the true appearance of the home they might visit in person.

    This problem is especially noticeable in images of lawns, skies, and interior walls. Grass shouldn’t look neon green, and blue skies shouldn’t appear artificially electric.

    We recommend increasing saturation subtly, typically no more than 10-15% above the original image. This enhances colors while maintaining a natural character of the property.

    A good rule of thumb is to step away from your edit for a few minutes, then look again with fresh eyes. If the colors jump out as “too much,” they probably are.

    Using calibrated monitors and checking your images on different devices can help ensure your saturation levels look appropriate across various screens.

    10) Using Low Resolution Files

    One of the most common mistakes in real estate photo editing is working with low resolution images. Low resolution files might seem acceptable on a small screen, but they quickly lose quality when enlarged for marketing materials or viewed on larger displays.

    We often see real estate professionals trying to enhance photos that were originally captured at a low resolution. Unfortunately, no amount of editing can truly fix a fundamentally low-quality image.

    When potential buyers view pixelated, blurry property photos, they may question the professionalism of the listing. This can directly impact their perception of the property’s value and your credibility as an agent.

    To avoid this mistake, we recommend always shooting in the highest resolution your camera allows. Professional real estate photo editing works best when starting with high-quality source material.

    If you’re receiving images from photographers, ask specifically for high-resolution files. We suggest a minimum resolution of 3000×2000 pixels for property photos that will maintain their quality across various marketing platforms.

    Remember that resizing works only in one direction – you can make high-resolution images smaller, but enlarging low-resolution images will only highlight their flaws.

    Importance of Quality Real Estate Photos

    High-quality real estate photos serve as the first point of contact between potential buyers and properties. According to the National Association of Realtors, 87% of homebuyers find photos to be the most important feature of online listings.

    Impact on Property Listings

    Quality photos significantly increase a property’s visibility and time-to-sale ratio. Properties with professional photos receive 61% more views online than their counterparts with amateur photography.

    Listings with high-quality images typically sell 32% faster than those with poor visuals. This reduction in market time can save sellers thousands in carrying costs and price reductions.

    Professional real estate photos also allow for higher listing prices. Homes with quality photography sell for 1-3% more on average, potentially adding thousands to the final sale price.

    In today’s digital-first market, captivating images can be the determining factor that draws a potential buyer’s attention to your listing instead of a competitor’s.

    Influence on Buyer Perception

    First impressions happen quickly, and in real estate, they usually occur online. 61.3% of brokers believe high-quality photography is crucial for selling homes.

    Well-edited photos create an emotional connection with potential buyers before they ever step foot in the property. They help buyers visualize themselves living in the space, making them more likely to schedule viewings.

    Poor quality images, conversely, can deter buyers regardless of the property’s actual condition. Dark, blurry, or poorly edited photos suggest neglect and lack of attention to detail.

    Professional photos also build credibility for agents and sellers. They demonstrate professionalism and care, signaling to buyers that the entire transaction will be handled with similar attention to detail.

    Technical Aspects of Photo Editing

    Mastering the technical elements of photo editing is crucial for creating compelling real estate images that attract potential buyers. Proper technique ensures properties are shown accurately while still looking their best.

    Balancing Exposure and Contrast

    Finding the right balance between exposure and contrast can make or break your real estate photos. Overexposed images wash out details, while underexposed photos hide appealing features in shadows.

    We recommend starting with basic exposure corrections before adjusting contrast. Aim for well-lit rooms where both window views and interior details are visible. This often requires multiple exposures blended together.

    Quick tips for proper exposure:

    • Keep highlights under 90% brightness to preserve detail
    • Lift shadows to 15-20% minimum for visibility
    • Use graduated adjustments for rooms with varying light levels

    Many editors make the mistake of creating unrealistic lighting that can disappoint potential buyers during in-person viewings.

    Correcting Lens Distortion

    Wide-angle lenses are essential for real estate photography but introduce distortion that requires correction. Vertical lines that lean inward or outward create an unprofessional look that can diminish property appeal.

    We find that proper lens correction involves:

    1. Straightening converging vertical lines
    2. Correcting barrel or pincushion distortion
    3. Maintaining proper proportions of rooms and features

    Most editing software offers automatic lens profiles that correct known distortion patterns for specific camera/lens combinations. For manual corrections, adjust perspective transform tools until vertical lines are truly vertical.

    Be careful not to overcorrect distortion, as this can create unnatural stretching at the edges of your image. The goal is natural-looking rooms that match human visual perception.

    Frequently Asked Questions

    A real estate photographer editing photos, surrounded by a computer, editing software, and various printed examples of common mistakes

    Real estate photo editing can be tricky, but understanding common issues helps create better property images. Here are answers to questions we frequently receive about fixing and avoiding mistakes in real estate photography.

    What are the typical editing errors that can diminish the appeal of real estate images?

    The most common editing errors include neglecting proper image analysis before editing and over-processing photos until they look artificial. These mistakes can make properties appear unappealing to potential buyers.

    We also see many photographers ignoring lighting consistency throughout a property’s image set. This creates a jarring experience when viewers browse through the listing photos.

    Other frequent issues include incorrect white balance adjustment, which causes unnatural color casts, and misaligned verticals and horizontals that make rooms look tilted or distorted.

    How should one correct overexposed or underexposed property photos?

    For overexposed photos, we recommend reducing highlights and adjusting the exposure slider carefully to recover lost details in windows and bright areas. Window masking techniques can help balance interior and exterior brightness.

    When fixing underexposed images, increase shadows and exposure gradually to avoid introducing noise. Using adjustment layers or masks helps target specific dark areas without affecting properly exposed parts of the image.

    Remember that natural-looking lighting is key. Extreme corrections often result in artificial-looking images that can deter potential buyers.

    What is the impact of poor image composition and how can it be avoided?

    Poor composition creates a disconnected feeling and fails to showcase the property’s flow and features effectively. This can significantly reduce buyer interest in the property.

    To avoid composition problems, we recommend using a tripod at an appropriate height (around eye level) and carefully considering each shot’s framing. Wide-angle lenses should be used carefully to prevent distortions that make spaces look unrealistic.

    Professional editing can help correct some composition issues, but starting with well-composed shots makes the editing process much more effective.

    Which photo editing techniques should be used sparingly to maintain realism in property listings?

    HDR effects and extreme clarity/texture enhancements should be used minimally. Professional real estate photo editing focuses on maintaining a property’s authentic appearance while enhancing its best features.

    We recommend using sky replacements and object removal judiciously. These techniques can improve images but should represent the property accurately without misleading potential buyers.

    Saturation and vibrance adjustments should be subtle. Overly vibrant colors are among the common mistakes that ruin property photos.

    How can real estate photographers ensure accurate color representation in their images?

    Using a color checker card during photoshoots provides a reliable reference point for accurate color correction during post-processing. This simple tool helps maintain consistency across all property images.

    We recommend calibrating your monitor regularly to ensure what you see while editing matches what others will see online. This prevents unexpected color shifts when images are published.

    White balance adjustment should be done carefully, especially with mixed lighting sources. Aim for natural whites and neutrals to give the most accurate representation of wall colors and finishes.

    Why is it important to avoid overly staged photos in real estate listings and what’s the alternative?

    Overly staged photos can create unrealistic expectations that disappoint buyers during in-person viewings. This leads to wasted time and frustration for all parties involved.

    We suggest a balanced approach that enhances the property’s features without misrepresenting reality. Virtual staging can be an effective alternative that shows a property’s potential without permanent physical changes.

    Natural-looking edits that maintain the property’s authentic character will attract genuinely interested buyers rather than those who might be disappointed by an overly enhanced representation.


    Editor’s note: This post was originally published in August 2018 and has been updated for comprehensiveness.

  • Effective Email Marketing for Real Estate Agents: Using High-Quality Photos

    Effective Email Marketing for Real Estate Agents: Using High-Quality Photos

    As a real estate agent, you are already aware of the transformative power of effective marketing strategies. Email marketing, in particular, has emerged as a game-changer, enabling you to reach the right clientele and enhance your services. 

    How important exactly is email marketing real estate, and why should you be using it?

    • Email marketing generates around $42 for every $1 spent (ECI Solutions)
    • The conversion rate for email marketing in real estate is 1.4% (Ruler Analytics)
    • Email marketing converts 40% higher than social media (RealtyBiz)
    • Open rates for real estate have increased by 32% since 2018, with click-through rates increasing by 54% (RealtyBiz) 

    A huge aspect of hitting the mark with your email marketing is real estate photography for email. 

    This isn’t just your standard photography; you need your images to grab people’s attention and entice them to view the content of your email and enquire about the properties if applicable.

    If your email pertains to new or current listings, and the images aren’t hitting the mark, or if they are substandard, then people won’t be buying whatever it is you are selling. 

    Real Estate Photography for Email

    When it comes to real estate agent marketing tips, one of the best ones you can have is to improve your photography.  

    Ideally, you will be using professional shots to shoot your properties for listings to sell them and showcase their best features.

    But how do you get great, not just good, pictures for your listings or use in your emails? 

    Get A Camera

    You might think popping in to snap a few shots on your phone will be good enough for you to add to your email, but chances are your phone won’t be able to capture the property in the way you need to enhance its appearance visually.

    Digital photography with proper camera equipment can’t be matched, and while smartphones can produce good images for real estate photography for email, which can be edited to help enhance the quality, for the best results, aim to always use a camera.

    Choose The Right Shots

    For your emails, you don’t have the luxury of adding copious pictures for them to browse through.

    But here’s the good news: you have the power to pick the best images that showcase the priority and will wow those opening your emails.

    Whether it’s a luxury bathroom, modern kitchen, spectacular indoor outliving features, or an amazing entranceway, you can get the best shot of that feature specifically for email use. 

    Don’t just take one picture; take a range of different shots from various angles so you can choose the best ones. You have the ability to make your emails visually compelling and engaging by paying attention to this small detail.

    Details Matter

    It’s the little things that matter in images.

    That open trash can lid in the kitchen shot, the water bottle left by the sink, the dog bowl present with food in the utility room, wonky blinds, half-open curtains, etc, and so on.

    All these small details are important because if they are noticeable in your email photographs, you won’t be doing the property justice and will be setting the tone for your standards, too.

    Paying attention to these details will set you apart as a meticulous and professional real estate agent. 

    Tripods Are Essential

    The last thing you want is to use off-focus or wonky shots, so using a tripod to take these images can enable you to ensure that all shots are straight and taken steadily.

    Even the best photographs in the world can be “off” because they are not straight. 

    Lighting Is Essential

    Proper lighting is the key to perfect real estate photography for emails.

    The spaces need to be bright and flooded with natural light. If this is an issue, then you need to use the best and brightest light source possible.

    Always keep the light source behind you, use the flash properly, and be mindful of the time of day you host your shoot to get the best possible, even if that means multiple trips to follow the sun around the property or to get evening or dusk images if required. 

    Real Estate Photo Editing

    You have the perfect shots, but now what?

    Now, they need expert editing to help them stand out in your emails. To make the most of these real estate agent marketing tips for email photography, you should go the extra mile and get your shots explicitly edited for email. 

    Everything needs to be perfect, from the resolution to the cropping and the colors within the shot. Think of it as curb appeal but in digital form. If the first time a person sees a property is via your email, it needs to be impactful, and that’s where real estate photo editing comes into play.

    Editing uses tricks and tools such as enhancements, retouching techniques, essential cropping if required, and more.

    Submitting your pictures for professional editing can elevate your imagery, really do you and your properties justice, and be an integral aspect of successful email campaigns.


  • Creating Stunning Twilight Shots for Real Estate Listings: Expert Tips for Eye-Catching Property Photos

    Creating Stunning Twilight Shots for Real Estate Listings: Expert Tips for Eye-Catching Property Photos

    Creating Stunning Twilight Shots for Real Estate Listings: Expert Tips for Eye-Catching Property Photos

    Twilight shots can transform ordinary real estate listings into captivating showcases. These photos capture properties in a magical light, making them stand out from the competition. Twilight real estate photography adds great value to any portfolio and can make a listing more attractive to potential buyers.

    A cozy house with warm lights, surrounded by a serene twilight sky and a hint of sunset colors on the horizon

    We’ll explore the essentials of creating stunning twilight shots for real estate listings. From mastering the right timing to perfecting your camera settings, we’ll cover everything you need to know. We’ll also dive into composition techniques and post-processing tips to elevate your twilight photos.

    Twilight photos are often linked with luxury homes, evoking a sense of elegance and exclusivity. By including these shots in your listings, you can boost the perceived value of a property and potentially attract higher offers. Let’s discover how to harness the power of twilight photography to showcase properties in their best light.

    Key Takeaways

    • Twilight shots can significantly enhance real estate listings and attract more potential buyers.
    • Mastering timing, camera settings, and composition is crucial for creating stunning twilight photos.
    • Post-processing techniques can further elevate twilight images and make properties stand out.

    The Fundamentals of Twilight Photography for Real Estate

    Twilight photography can make real estate listings stand out. We’ll cover key aspects of working with light, choosing camera settings, and creating a cozy atmosphere in twilight shots.

    Understanding Natural and Artificial Light

    Natural light during the golden hour provides a soft, warm glow. We aim to capture this light along with the property’s artificial lighting.

    Balancing natural and artificial light is crucial. We turn on all interior and exterior lights of the property. This creates a welcoming contrast with the darkening sky.

    Ambient light from street lamps or neighboring properties can add depth. We use it to highlight landscaping features or architectural details.

    Selecting the Right Camera Settings

    For twilight shots, we use a tripod to keep the camera steady. This allows for longer exposure times without blur.

    We set the ISO low, usually between 100-400, to reduce noise. The aperture is typically f/8 to f/11 for a good depth of field.

    Shutter speeds vary, but often range from 1 to 30 seconds. We may use bracketing techniques to capture different exposures.

    White balance is key. We often use the cloudy or shade setting to warm up the image.

    Capturing the Cozy Atmosphere of Twilight

    Twilight photos create a sense of warmth and comfort. We focus on making the property look inviting.

    We time our shots carefully. The best moment is often 15-30 minutes after sunset. This is when the sky’s blue tones complement the warm interior lights.

    Composition is vital. We include elements like lit windows, outdoor lighting, and reflections in pools or water features.

    We may use HDR techniques to balance bright interiors with darker exteriors. This helps show both the home’s features and the twilight sky.

    Composition Techniques for Twilight Shots

    Careful composition is key for eye-catching twilight real estate photos. We’ll explore how to highlight architectural details, use classic framing techniques, and create visual impact.

    Working with Architectural Details

    Architectural details shine in twilight shots. We focus on unique features like columns, arches, or decorative elements. Lighting plays a big role here. We make sure interior lights are on to create a warm glow through windows.

    Exterior lighting highlights textures and shapes. We position our camera to capture the best angles of these details. Sometimes, a slight upward tilt can make a building look more grand.

    For modern homes, we emphasize clean lines and geometric shapes. With older properties, we highlight charming period features. The goal is to show off what makes each property special.

    Using the Rule of Thirds and Leading Lines

    The rule of thirds helps create balanced, interesting images. We imagine the frame divided into a 3×3 grid. Key elements are placed along these lines or at their intersections.

    For a house, we might put the main structure on one vertical third. The sky and foreground can fill the other two thirds. This creates a more dynamic composition than centering everything.

    Leading lines guide the viewer’s eye through the image. We use:

    • Driveways
    • Paths
    • Fences
    • Roof lines

    These elements lead to the main subject – the house. This creates depth and draws attention where we want it.

    Framing for Maximum Visual Impact

    Framing adds depth and context to our twilight shots. We look for natural frames like:

    • Tree branches
    • Archways
    • Nearby structures

    These elements can surround the main subject, drawing the eye inward. We’re careful not to let frames overpower the house itself.

    Wide-angle lenses help capture more of the property and its surroundings. But we avoid distortion that can make lines look bent or unnatural.

    Post-Processing and Editing for Stunning Images

    Editing twilight real estate photos can transform ordinary shots into eye-catching listings. We’ll explore key techniques to enhance your images and create a polished final product.

    White Balance and Color Correction

    Getting the right color balance is crucial for twilight shots. We start by adjusting the white balance to remove any color cast and create a natural look. This helps capture the true ambiance of the evening sky.

    Next, we fine-tune the colors using Hue, Saturation, and Luminance sliders. These tools let us bring out the rich blues of the sky and warm tones of the property’s lighting.

    We may need to correct specific areas separately. For example, we might adjust the interior lighting to match the exterior mood. This creates a cohesive look throughout the image.

    Enhancing Exterior Features and Landscaping

    Twilight photos should highlight the property’s best features. We focus on enhancing the exterior elements that make the home stand out.

    We can use graduated filters to add depth and drama to the sky. This technique helps create a striking backdrop for the property.

    Landscaping details are important too. We carefully brighten pathways, gardens, and outdoor living spaces. This draws attention to these selling points without making them look unnatural.

    Subtle light effects can add a magical touch. We might enhance the glow from exterior lights or add a soft shimmer to water features.

    Using Editing Tools to Remove Unwanted Elements

    Clean, distraction-free images are key for real estate listings. We use various editing tools to remove elements that detract from the property’s appeal.

    Common items we remove include:

    • Garbage bins
    • Parked cars
    • Temporary signs
    • Power lines

    We’re careful to maintain the image’s integrity while making these edits. Our goal is to present the property in its best light, not to misrepresent it.

    Advanced techniques like content-aware fill help us seamlessly remove objects. For complex edits, we may use multiple exposures to replace problem areas with clean details from other shots.

    Leveraging Twilight Photography in Marketing Real Estate

    Twilight photos can make real estate listings stand out. These eye-catching images help attract potential buyers and showcase properties in their best light.

    Creating Marketing Materials with Visual Appeal

    We use twilight shots to create stunning marketing materials. Brochures, flyers, and postcards look more appealing with these photos. The warm glow of twilight adds a luxurious feel to property images.

    We often pair twilight exterior shots with bright interior photos. This mix shows the home’s curb appeal and indoor features. Online ads with twilight photos tend to get more clicks.

    Social media posts with twilight images typically get more engagement. We use these photos for Facebook and Instagram ads to reach more potential buyers.

    Boosting Property Listings with Twilight Images

    We always include twilight shots in our real estate listings. These photos help properties stand out in a crowded market. Buyers often click on listings with eye-catching twilight images first.

    Twilight photos show off a home’s best features. They highlight:

    • Outdoor lighting
    • Landscaping
    • Architectural details
    • Pool areas
    • Patios and decks

    We’ve found that listings with twilight photos often get more inquiries. These images can create an emotional appeal for potential buyers. They help people imagine themselves living in the home.

    Frequently Asked Questions

    Twilight real estate photography involves specific techniques and considerations. We’ll address common questions about equipment, settings, staging, editing, weather, and impact on listings.

    What equipment is needed for high-quality twilight real estate photography?

    To capture stunning twilight shots, you’ll need a DSLR or mirrorless camera with manual settings. A sturdy tripod is essential for long exposures.

    Wide-angle lenses (16-35mm range) work well for interior and exterior shots. Off-camera flashes can help balance indoor and outdoor lighting.

    What camera settings are best for capturing twilight photos in real estate?

    Use a low ISO (100-400) to minimize noise. Set your aperture between f/8 and f/11 for good depth of field.

    Shutter speeds vary, but typically range from 1/15 to 30 seconds. Bracket your exposures to ensure you capture the perfect balance of light.

    How can you stage a property for the most effective twilight shots?

    Turn on all interior and exterior lights. Clean windows to reduce reflections. Remove cars from the driveway and close garage doors.

    Add outdoor furniture to create inviting spaces. Consider adding soft lighting to landscaping features.

    What post-processing techniques enhance twilight photography for real estate listings?

    Adjust white balance to create a warm, inviting atmosphere. Use HSL sliders to fine-tune specific colors, especially sky blues and warm tones.

    Blend multiple exposures to balance interior and exterior lighting. Enhance details in shadows and highlights for a polished look.

    What are the optimal weather conditions for taking twilight real estate photos?

    Clear or partly cloudy skies often produce the best results. Aim for 15-30 minutes after sunset when the sky has rich colors.

    Avoid shooting on overcast days, as they lack the dramatic sky colors that make twilight shots appealing.

    How do twilight photos impact the saleability of a real estate listing?

    Twilight photos can increase a property’s perceived value and appeal to luxury buyers. They create a sense of warmth and sophistication.

    These images often lead to more listing views online, potentially increasing interest and offers from potential buyers.

  • Why Virtual Staging Saves Time and Money [Infographic]

    Why Virtual Staging Saves Time and Money [Infographic]

    Virtual staging can help you save time and money when selling your house. If you’re ready to put that ‘For Sale’ sign up, here are some of the key benefits of virtual staging.

    Why virtual staging saves time and money infographic

    Benefits of Staging

    Staging is a great way to optimize the chances of selling real estate rapidly. Staging advantages include:

    • Sell your home faster: A recent NAR (National Association of Realtors) study showed that staged homes sell up to 30 times faster than non-staged properties.
    • Encourage buyers to engage: Effective staging targets ideal buyers, encouraging them to connect and engage with the property.
    • Enhance images: NAR data suggests over 99% of millennials start their new home search online. Beautiful, staged images help listings to stand out and prompt potential buyers to arrange viewings.
    • Maximize space: Staging helps to maximize usable space and improve aesthetics and functionality. 
    • Visualization: Staging can help prospective buyers to visualize spaces and think about how they would use different rooms and areas.
    • Creativity: Some buyers find it easy to conjure up design ideas and make mental plans, but this is not always the case. Staging can inspire buyers and set the design process rolling.

    Traditional vs. Virtual Staging 

    Cost: Virtual staging is over 90% less expensive than traditional staging. 

    Turnaround time: Virtual staging offers a much shorter turnaround time than conventional staging. Choose the style you like and stage your home in just a few clicks. Traditional staging can take days or even weeks, depending on the availability of designers and staging experts. 

    ROI: Statistics show that 75% of sellers secure an ROI (return on investment) of 5%-15% of the asking price when their homes are staged. As virtual staging is over 90% cheaper than traditional staging, the return is likely to be much higher. 

    Creativity: Virtual staging gives you the freedom to stage your home as you please. There are no limitations on how creative you can be. With traditional staging, an interior designer or staging expert will decide on the final look. 

    Phixer Virtual Staging Service

    Phixer delivers high-quality virtual staging with a 24-hour turnaround time. World-class designers style each space, transforming any room into an eye-catching, attractive space in seconds. Designed to entice buyers and optimize the quality and reach of real estate listings, Phixer virtual staging services take buyers on a journey, enabling them to see all of the potential benefits of purchasing the property. For sellers, tried and tested virtual staging services save time, money and effort while providing access to effective, tailored, creative staging. 

    Before:

    virtual staging before

    After:

    virtual staging after

    Most Staged Spaces

    Examples of the most staged spaces include:

    • Kitchens
    • Master bedrooms and suites
    • Bathrooms
    • Dining and entertaining areas
    • Terraces and patios
    • Backyards
    • Living areas
    • Children’s bedrooms
    • Home offices


    Sources:

    https://www.nar.realtor/blogs/styled-staged-sold/why-staging-matters-even-in-a-sellers-market

    https://www.lcpmedia.com/blog/virtual-staging-statistics

    https://www.phixer.net/services/virtual-staging/

    https://www.architecturaldigest.com/reviews/moving/home-staging-statistics

  • 5 Best Photo Editing Software for Real Estate to Enhance Property Listings

    5 Best Photo Editing Software for Real Estate to Enhance Property Listings

    For real estate professionals, high-quality photos are essential in capturing potential buyers’ interest. In today’s competitive market, having the right tools to enhance your property photos can make all the difference. Our goal is to help you find the best photo editing software to elevate your listing images.

    A computer screen showing 5 top photo editing software logos with real estate images on the background

    Why is photo editing software crucial for real estate success? It allows you to improve the aesthetics of your property photos, making them more appealing and professional. With the right software, you can highlight the best features of your listings, ensuring they stand out to prospective buyers.

    1) Adobe Photoshop

    A computer with Adobe Photoshop 5 open, displaying a real estate photo being edited with various tools and adjustments

    Adobe Photoshop is a powerhouse for real estate photo editing. With its advanced tools, we can make precise adjustments to images. This helps in enhancing the visual appeal of property listings.

    Photoshop’s capabilities are extensive. It offers features like layers, masks, and retouching tools. These tools enable us to correct lighting issues, remove imperfections, and even add elements to images.

    The software is especially useful for creating high-quality HDR photos. HDR combines multiple exposures, capturing details in both shadows and highlights. This is crucial for real estate photography as it showcases properties in the best light.

    We can also batch process images with Photoshop. Batch processing saves time by applying the same edits to multiple photos at once. This is particularly helpful when dealing with large sets of property images.

    Another key feature is the ability to work with RAW files. RAW files retain more detail and allow for greater flexibility in editing. This ensures that our final images are sharp and vibrant.

    For those requiring graphic design elements, Photoshop excels. We can create marketing materials, social media posts, and more, all within the same platform.

    Photoshop’s integration with other Adobe products like Lightroom enhances our workflow. We can seamlessly move between software, making the editing process more efficient.

    2) GIMP

    GIMP, also known as the GNU Image Manipulation Program, is a powerful tool in real estate photo editing. Its main advantage is that it’s free to use, making it perfect for those of us on a budget.

    Despite being free, GIMP offers a wide range of features comparable to paid software. We can use it for tasks like color correction, retouching, and image composition. The customizable interface allows us to create a workspace that fits our needs.

    Another great aspect is its compatibility with multiple operating systems. Whether we work on Windows, macOS, or Linux, GIMP supports our workflow without any issues.

    GIMP’s extensive plugin library enhances its functionality. These plugins allow us to add new features and tools, adapting the software to our specific real estate photo editing needs.

    While GIMP has a bit of a learning curve, there are many tutorials and guides available online to help us get started. The software’s community is also very active and supportive, making it easier to find solutions to any problems we might encounter.

    By using GIMP, we can achieve high-quality real estate photo edits without a significant financial investment. For more details, check out GIMP on this helpful site.

    3) Corel PaintShop Pro

    Corel PaintShop Pro is a favorite among real estate photographers, thanks to its user-friendly features. It’s ideal for both professionals and beginners. The software offers a range of tools suited for editing real estate photos.

    One key feature is its ability to correct perspectives. This helps us fix angles in our property shots, making rooms look proportional and appealing. Another useful tool is the color correction capability, which allows us to adjust color gradients and levels to enhance the overall look of our photos.

    We also appreciate its exposure adjustment features. These tools help us brighten dark images and balance lighting throughout the photo. It’s essential for making spaces appear well-lit and inviting.

    Removing unwanted elements from photos is easy with Corel PaintShop Pro. This feature ensures our images are free of distractions, focusing viewers’ attention on the property’s best aspects.

    For more information, check out Corel PaintShop Pro.

    4) Affinity Photo

    Affinity Photo is a powerful tool for real estate photo editing. We appreciate its extensive range of features. It offers advanced photo retouching, layers, HDR merging, and more.

    One of the key strengths of Affinity Photo is its compatibility. It works seamlessly on both Mac and Windows. This makes it a versatile choice for many real estate photographers.

    We also find Affinity Photo’s affordability appealing. Unlike some other software, it does not require a subscription. A one-time purchase grants access to all of its tools, making it cost-effective.

    Another feature we value is its performance. Affinity Photo is known for its speed and efficiency. This helps us quickly enhance property images, saving valuable time.

    Affinity Photo also supports a wide range of file formats. This ensures that we can work with almost any image file easily. It handles RAW files well, which is crucial for maintaining image quality.

    The software includes a robust set of live filters and adjustment layers. This allows for non-destructive editing. We can experiment with different looks without permanently changing the original image.

    5) Capture One

    Capture One stands out as one of the top editing tools for real estate photography. It is well-regarded for its powerful editing capabilities and high level of customization.

    We appreciate how Capture One allows us to finely tune our images, ensuring every detail is perfect. This is particularly important in real estate photography where presentation matters.

    Another remarkable feature is its color grading tools. These tools give us control over the color balance and tones in our photos, making properties look their best.

    Capture One also supports tethered shooting, which means we can see images in real-time as they’re captured. This feature is highly beneficial during photoshoots, allowing for immediate adjustments.

    Despite its advanced features, some users may find Capture One’s interface challenging at first. However, with time and practice, it becomes easier to navigate.

    Professionals often trust Capture One for its strong performance and reliability, making it an excellent choice for serious photographers. For more information, check out this detailed review.

    Why Photo Editing Matters in Real Estate

    A brightly lit room with a large window, a computer with photo editing software open, and a stack of real estate photos ready to be enhanced

    In real estate, well-edited photos are crucial to attracting potential buyers and highlighting a property’s best features. Good photo editing boosts the visual appeal and helps properties stand out in a competitive market.

    First Impressions and Buyer Interest

    First impressions are vital in real estate. Buyers often decide to view a property based on listing photos. Well-edited pictures can make a property look more inviting.

    They enhance lighting, color balance, and remove distractions. This makes the property more appealing. Photos that are too dark or cluttered can deter interest. On the other hand, clear and bright images attract more potential buyers. We’ve seen time and again that properties with great photos get more views and inquiries.

    Enhancing Property Features

    Editing can highlight the property’s best features. For instance, photo editors can enhance the brightness of a room, making it look larger and more welcoming. Removing small flaws like wall marks or light glares also helps.

    We can use techniques like HDR to balance shadows and highlights, giving a more accurate view of the space. Virtual staging tools also allow us to show empty rooms with furniture, giving buyers a better idea of how the space can be used. This can significantly improve the perceived value of the property. Clean, polished photos help buyers envision themselves in the space.

    Key Features to Look For in Real Estate Photo Editing Software

    A computer screen displaying 5 best real estate photo editing software with key features highlighted

    When choosing the best photo editing software for real estate, we need to focus on specific features that ensure efficiency and high-quality results. These features include user-friendliness, advanced editing tools, and integration with real estate platforms.

    User-Friendliness

    A user-friendly interface is crucial. We want software that is easy to navigate and doesn’t require us to spend hours learning how to use it. For instance, tools like Canva and Pixlr are known for their straightforward interfaces. They offer intuitive controls and helpful tutorials that can speed up the learning process.

    Another important factor is workflow efficiency. Software that supports batch editing and easy photo organization saves us valuable time. ON1 Photo RAW, for example, helps manage large photo libraries and apply edits quickly across multiple images.

    Advanced Editing Tools

    Advanced editing tools are essential for making properties look their best. We need features like HDR blending, retouching, and masking to enhance image quality. Adobe Photoshop is renowned for its comprehensive suite of editing tools, allowing precise adjustments and creative enhancements.

    Other useful tools include LUTs (Look-Up Tables) for color grading, layers for complex edits, and retouching tools for removing unwanted objects. Photomatix Pro is excellent for HDR processing, bringing out the best in varied lighting conditions.

    Integration with Real Estate Platforms

    Integration with real estate platforms streamlines our workflow. This feature allows us to upload images directly to listing sites, saving time and reducing errors. Some software solutions offer direct integration with platforms like MLS (Multiple Listing Service).

    Phixer provides cost-effective editing services and help you integrates seamlessly with real estate platforms, simplifying the process of getting images edited from editing software and for you to just upload to listing platforms.

    Frequently Asked Questions

    A desk with a computer, mouse, and keyboard. On the screen, a list of "Frequently Asked Questions 5 best photo editing software for real estate" is displayed

    In this section, we address common questions about essential features, user-friendly software, AI enhancements, free tools, mobile apps, and the significance of post-processing in real estate photography.

    What features are essential in photo editing software for real estate photography?

    When choosing photo editing software for real estate, certain features can make a big difference. Look for tools that offer HDR capabilities, advanced color correction, and distortion correction. Editing programs like Adobe Photoshop are known for these features, making them stand out in the market.

    Can you recommend user-friendly photo editing software suitable for real estate agents?

    Real estate agents often need software that is intuitive and easy to use. For instance, Canva is highly recommended due to its all-in-one design and editing features. It’s user-friendly nature makes it perfect for those who may not have extensive photo editing experience.

    How does AI-enhanced photo editing software benefit real estate photography?

    AI-enhanced photo editing tools can significantly speed up and improve the editing process. Programs like Enhance AI from Skylum automatically adjust lighting, enhance colors, and even replace skies. This helps to consistently produce high-quality images with minimal effort.

    What are some effective but free photo editing tools for real estate images?

    For those on a budget, free tools can still offer substantial editing capabilities. GIMP is a powerful open-source editor that rivals many paid options. It provides features needed to enhance real estate photos without any cost.

    What photo editing apps are preferred by realtors for picture enhancement on mobile devices?

    Real estate agents often rely on mobile apps for quick and effective photo editing. Adobe Lightroom’s mobile app is a top choice due to its cross-device editing capabilities and professional-grade tools. This ensures that high-quality edits can be done on-the-go.

    How important is post-processing in enhancing real estate photographs for listings?

    Post-processing is crucial in making real estate photos appealing and professional. Adjusting aspects like brightness, contrast, and color balance can make properties look their best. High-quality post-processing can lead to more attractive listings and ultimately help in faster sales.