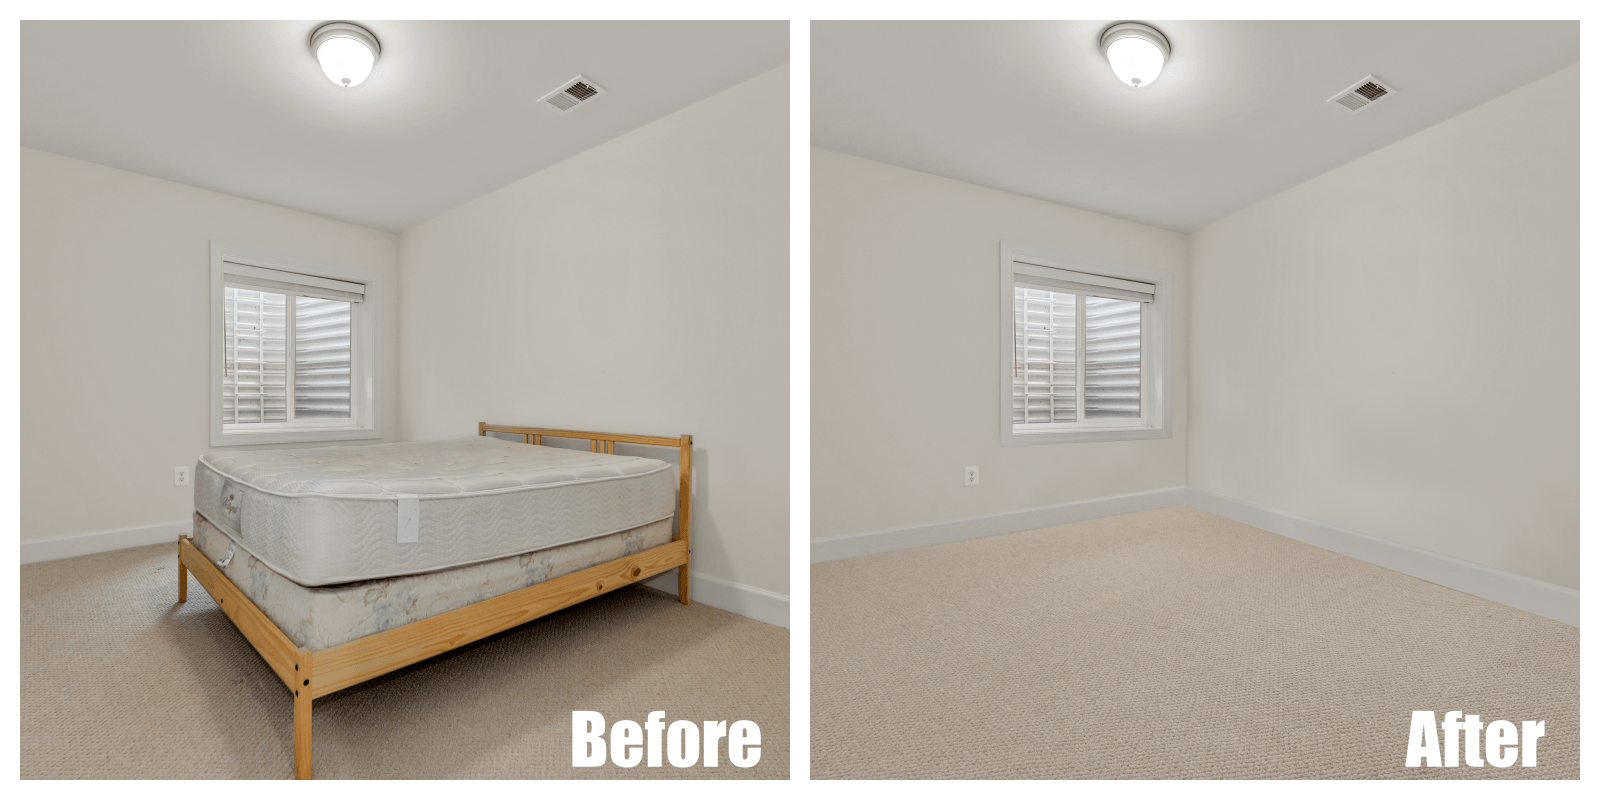
Beautiful listing photos are essential in real estate sales because they provide initial impressions for potential buyers. However, your photos may have unnecessary background items and furniture that cost too much money or time to move. You can guarantee the best possible appearance by having a clutter-free background, and there are plenty of ways to do this process.
Real estate photography services like unwanted objects removal are in-demand, but there are several ways to edit images through photo processing or manipulation programs like Adobe Photoshop. For example, you can perform basic cut and clone stamp methods on your own.
[lwptoc]
TL;DR: Here are some of the object removal techniques that you can do yourself while real estate photo editing:
Object Removal Editing Techniques
1. Lasso and Delete
The lasso allows you to draw freeform sections using a selection border. It is an essential Photoshop tool to master when you’re decluttering items from the image. The lasso tool is versatile and easy to master, and you can use it for any photo.
Here are the steps to unwanted objects removal using the lasso tool:
- With the lasso, select the item/s you want to remove.
- Erase the object/s by pressing delete on the keyboard.
- With the lasso, select a part of the image that’s similar to the place you just cleared.
- Copy and paste to the site of the removed thing/s.
- You may need to zoom in and out several times to smoothen the cut edges.
The lasso and delete method is easy enough to understand and execute for even graphic beginners or those with non-graphic backgrounds.
Pro: Beginner-friendly method for a real estate photo editor.
Con: Challenging to cover up the deleted area realistically.
2. Clone Stamping
The clone stamp tool replaces a part of your image with a section within the same photo. The tool clones pixels or objects to create a more photo-realistic touchup or edit and often replicates areas or scenes to extend a pattern. The result makes photographs look like a real estate photo editing service took care of the post-production.
Here are the steps to using clone stamping for object removal:
- Plan the areas to copy.
- Pick the clone stamp from the toolbar.
- Push Alt on the pixels that you want to copy until it turns into a crosshair.
- Select the surface or objects that you want to copy over.
- A small plus sign will indicate that it will copy the selected area to the current spot.
Pro: Looks more natural than a lasso cut and paste.
Con: Harder to control, especially on images with uneven lighting.
3. Spot Healing Brush
The Spot Healing tool removes small details like blemishes and wrinkles. It’s an essential part of the real estate photo editor arsenal since it can remove small objects like switches and glasses.
Here are instructions on how to use the spot healing brush:
- Select Spot Healing Brush.
- Select Content Aware.
- Brush over the surface you need removed.
Pro: It only takes a few seconds.
Con: May have different results, especially for bigger items.
Option for Newbies
The mentioned steps and tips are excellent for personal and commercial purposes. However, if you tried the most reliable techniques but still couldn’t get rid of the unwanted objects, you can let a real estate photo editing service declutter the images for you.
Final Thoughts
The competitive real estate industry includes some of the most promising sales techniques. Therefore, it’s essential to brush up on real estate photo editing, especially when dealing with multiple listings. Moreover, you can rely on Phixer’s object removal if you need mass decluttering within a time constraint.
Leave a Reply
You must be logged in to post a comment.