Author: Rachelle Moore

  • How to Make a High Dynamic Range Real Estate Photo using Lightroom

    How to Make a High Dynamic Range Real Estate Photo using Lightroom

    In taking photographs of houses and other real estate properties, there are always challenging things that photographers face. The technique called High Dynamic Range (HDR) makes the work of the photographer easier. When he shoots photos from the inside, all the details of the room are obviously visible. What is remarkable is that the view outside the window does not look overexposed.

    Basic HDR - Photo Editing 2

    The use of light is the primary idea when it comes to photography. Yet many of the photographers nowadays are making use of HDR as a solution and emerging alternative to flash guns and the use of multiple lights. In using HDR Photography, the delivery of a fresh and great looking image is exemplary but has a natural feel to it. By the way, an HDR is a set of photos taken at different exposures.

    What to Expect when Making an HDR Real Estate Photo?

    When real estate photos are made in HDR, you will expect that textures are enhanced through manual contrast. When the textures are enhanced, the quality of the photo becomes better. You can add different details for a total makeover of the photo. Similarly, HDR can bring down the brightness of the real estate photo by balancing the inside part with the brightness of the outside.

    In HDR, tone mapping is done after achieving a final product. Real estate properties that underwent HDR, require fine tuning and perfect adjustment. The final product does not rely much on the skills of the editor but on his familiarity in using Lightroom. Agents are always in the hunt for this kind of editor who can really create more appealing and stunning photos that will increase their chances of a sale.

    [lwptoc]

    Simple Steps to Make HDR Real Estate Photos using Lightroom

    1. Import the Photos

    The most basic thing to do if you want to make HDR real estate photos using Lightroom is to import the photos that you’re going to use. These photos are taken at different exposures usually in 5 shots: underexposed, a little less underexposed, photo categorized somewhere in between, overexposed, and the one that’s completely blown out. The purpose is to smash all the properties of these different shots into one amazing super photo.

    Choose import settings [source guide]

    You can import from a computer, hard drive, or camera into your Lightroom Classic catalog.

    Importing from a computer or hard drive:

    • On the left, select folder(s) of photos to import. If you don’t see your photos, make sure Include Subfolders is checked.

    • At the top, click Add to import without moving photos.

    • You can uncheck photos you don’t want to import.

    • On the right, you can choose additional import options.

    import photos on lightroom

    2. Collecting all the Photos

    • To get all the photos.
    • Click the first one.
    • Hold Shift.
    • And click on the last photo.

    You need to Right click your Lightroom screen, to come up with Photo Merge then choose HDR. HDR auto-aligns and auto-tones all the merged photos. You will see in the Preview the raw HDR.

    HDR Merge for Real Estate

    3. Making Adjustment

    If you’re taking multiple exposures and something’s moving through that frame, the Deghost Amount is going to eliminate that problem. In case no movement is seen in the raw HDR, simply hit the Merge button to generate an HDR photo and drop that into the timeline. At this point, you had just edited 5 photos simultaneously to produce one single photo. The shadows are exposed properly and all the other spaces in the picture have exposures that are perfectly balanced. Take note that this photo is still raw in nature as you still need to add Black or White points.

    Video tutorial credit to Peter McKinnon

    In the current picture, Lightroom will suggest the best Black point and White point would be. All you need to do is hold Shift and double-click on Black. Just do the same with White point. And instantly, you will see the new HDR photo. You now have the option to Export this photo or edit the photo to your liking by selecting the preset that best fits your photo before you Export.

    More tips here: https://helpx.adobe.com/lightroom-classic/help/hdr-photo-merge.html

    For photo editing services contact us at this page.

  • 10 Remarkable Skills and Attitudes of a Real Estate Photo Editor

    10 Remarkable Skills and Attitudes of a Real Estate Photo Editor

    Real estate photography is a profitable business at its best. However, to be successful in this field, it requires more than just having the perfect lens and essential photography skills. That is because given that the industry of real estate photography has a lot of competition, one has to be at least better than the average to experience the decent and stable income that this kind of business offers.

    sky replacement - phixer photo editing

    With that said, honing one’s skills with experience is highly recommended. Yet, any novice real estate photographer should recognize that for these experiences to count, each must always be done smartly—making sure that all the remarkable skills and attitudes are always tapped, if not thoroughly enhanced.

    To help you become that real estate photographer every client would come running after, you must take note of having the following:

    1. Color Correction

    Preserving the authenticity of an image is one of the most necessary aspect of creating a good real estate shot. Capturing a variety of color contamination issues, on the other hand, is what makes capturing the rawness of your shot reference a challenging pursuit. To achieve a realistic image without having to sacrifice the quality of your photo, you should be able to practice employing color correction skills.

    color correction - phixer photo editing

    In correcting the overall tone and color, you must opt for manually doing the color blending than simply using Photoshop’s Normal Blend Mode so as not to lose the texture while being able to keep the authenticity of the image.

    2. Image Enhancement

    As much as you need to keep the details of the shot similar to the original, real estate photography is also about assuring that the property’s selling points are emphasized.

    The enhancement of these selling points to the peak of its glory and beauty is a result of incorporating the following editing techniques so that every aspect of the photo adds up exactly to how you envisioned these selling points:

    • Photo manipulation
    • Perspective correction
    • Color cast removal
    • Noise reduction

    3. Addition of Details

    Persuading potential buyers through photography necessitates the element of providing them the ‘feel’ of how living is like in such a place. Hence, adding more details through decoration such as furniture and smaller details within the said could help feed the buyers’ nature of attention to detail. For example, when positioned properly, furniture could help improve the flow of light in that said space and in turn, exposing how much space is left and what use could be made out of it.

    4. HDR Photography Editing

    Basic HDR - Photo Editing 1

    With this technique, a unique shot is made upon achieving sharper details with the use of balancing the brightest spots captured by different lighting. HDR photography editing is done by blending multiple exposures to match the captured image to what is closer to what a human eye can see. Other than that, this method is also used for balancing the external view with the intensity of light found inside the interior space.

    5. Removes Imperfection

    Removing unnecessary objects together with the use of working on white balance, hues, saturation, and alignment of vertical and horizontal lines are all considered necessary for correcting the effects of external factors on the captured image.

    6. Offers a Reasonable Price

    Aside from delivering top quality photos, offering affordable rates for your service not only boosts your sales due to increased market attraction, but also helps you build connection in the field of real estate photography—a combination of which is sure to pay you back several folds than putting out sky-high pricing on a single project.

    7. Easy to work with

    Your portfolio might not reflect how well you’ve worked with your clients, but the number of your future projects will surely communicate it. So, aside from committing to the agreed-upon contract, you should also make necessary adjustments, if the situation calls for it. Clarifying details about the copyright to your image should also be addressed at the earliest possible time to avoid confusion and possible conflicts of interest.

    8. Creative and Flexible

    Understandably, you have your style of doing things and a working process where you’re most effective. However, not all clients are the same inasmuch as their preferences. Therefore, you should always be open to exploration and avoid limiting your creativity just to what you’re comfortable with.

    9. Great Time Management Skills

    Submitting your work on time or earlier is an edge to any industry especially to the likes of real estate photography—which is not only challenging but also a competitive field. Agree on a deadline you know you can pull off, and complete the project in a timely fashion.

    10. Passionate and Committed

    Real Estate Photographer
    Photo By Udemy.com

    Completing every project as a real estate photographer includes practicing a wide variety of photography and editing skills, as well as people skills—there are lot of ways to be discouraged in such setting that’s why if you want to stand out from the crowd, you should learn not to lean on the expectation that everything will go smoothly as planned. Rather, on your passion and commitment especially when unexpected problems arise.

  • 4 Adobe Photoshop Tools to Edit your Real Estate Photo

    4 Adobe Photoshop Tools to Edit your Real Estate Photo

    Post-processing of real estate photos usually takes a lot of time. Photographers spend hours in enhancing photos of a property through editing and retouching in order to produce amazing yet realistic images that are sure to attract potential buyers of the listing, and convert them to customers.

    When it comes to editing real estate photos, Adobe Photoshop comes first on the list of preferred and standard image editing software available in the market. Whether you’re a professional or a rookie in the world of real estate photography, it is likely that you make use of Photoshop in editing your images. The software’s steady rise over the years is because of the exceptional standards and variety of tools it offers its users.

    However, with the many tools that Photoshop has made available to its thousands of users, you might be at a loss in deciding what tools to use and to incorporate in your workflow in improving the quality of your real estate photos through post-processing.

    Worry no more for here are 4 Photoshop tools that you can always utilize to produce incredible real estate images:

    • Curves tool

    A handy tool that can enhance the quality of your work is Curves. This is a vital and extensive tool that can help you perform color correction on your real estate photos in Photoshop. Since this is an extensive and intricate tool, you have to constantly practice using this in order to get the hang of it.
    You can effectively and smoothly improve the coloration of your images through these simple steps. First, open the photo in Photoshop and select ‘Photo’, then ‘Adjustments’ and then, ‘Curves’. Next, click ‘Auto’ on the dialog box that will pop up. You will see a diagonal line—by dragging it up, the image will brighten; and by dragging it down, the image will darken. Drag this diagonal line as you see fit and once you have achieved your desired result, click ‘OK’ to apply the effect.

    • Hue and Saturation

    For color correction, the most frequently used tools are Hue and Saturation. This provides you a wide range of options that can be used for different real estate photo editing requirements which makes it a very important Photoshop tool. It may be difficult to master at first, but you will find that it can reduce your job as it helps correct the most common error of adjusting the grass and greens on your image.
    You can accentuate the greenery by following these steps. Open your desired photo in Photoshop and select ‘Image’. Choose ‘Adjustments’ and click on ‘Hue and Saturation’. From the dialog box that pops up, select ‘Yellow’ from the drop-down menu. Adjust the Lightness to -5, Saturation to -5, and the Hue to +15. Then, select ‘Green’ from the drop-down menu and once again, make the same adjustments to Lightness, Saturation, and Hue. Lastly, click ‘OK’ for the effect to take place.

    • Clone Stamp tool

    Sometimes, you will find that there is dirt or blemish that may be obscuring your image, making it less attractive for potential buyers. You can eliminate these by using the Clone Stamp tool. With this, you can efficiently remove unwanted details on your photos while exercising good control over the brush, creating a cloning effect that appears natural.

    You can utilize this tool by selecting the ‘Clone Stamp tool’ in the tool bar. Next, choose the source area by positioning the cursor over the area that you intend to duplicate, and Alt+click (Windows) or Option+click (Mac). Then, you can start painting over the detail that you want to remove.

    • Image processor tool

    This tool proves to be very helpful when you have plenty of images that need resizing. In essence, this is a time-saving tool that allows you to effectively change the size of pictures in batches as per the requirements of the client.

    To use the Image Processor tool, select File menu, and click on ‘Image Processor’. Choose ‘Select Folder’ from the dialog box that pops up, and save it in the same location. Then, choose the file type as ‘JPEG’ and click on ‘Resize to fit’ then, put in your desired dimensions. Make sure to select ‘Include ICC Profile’ and click on ‘Run’.

    By simply employing these tools, you can create remarkable real estate photos easily and competently. Remember to practice using these tools every time you edit your images for you to develop an efficient workflow. This will help you have a quick turnaround that can certainly become your edge among thousands of real estate photographers in the industry.

  • Top 5 Things to Remember Before Hiring a Real Estate Photo Editor

    Top 5 Things to Remember Before Hiring a Real Estate Photo Editor

    Hiring the services of a highly-trained real estate photo editor has lots of advantages. Aside from saving you the time you exhaust in editing your photos, you are assured that professional photo editors are experts in their own field. They are the people who can produce stunning, high-quality images for your business not only because of their expertise but they also own the latest technology in their field.

    5 Things to Look for When Hiring the Services of a Real Estate Photo Editor

    The creation of high-quality, saleable, and professionally-made photos is the primary goal of a real estate photo editor. Potential buyers wanted a stunning photo to refer to whenever they wanted to buy a house. Presenting them crisp and attractive images of the house propels them a step closer in their buying decision.

    photo editing for real estate

    The following are your instructive tips of the top things to remember before hiring a real estate photo editor. If you’re a real estate broker or agent who is constantly looking for a photo editor, it is important to look for:

    1. The Price or Cost

    Nobody is satisfied with poor, substandard photos. Instead of denying yourself of some unprofessionally developed photos made by some cheap real estate photo editors, look for those who render quality services that ask for a fair price and hold a well-rounded portfolio. You can also search online and ask the help of different companies who offer the same services that you are looking for. At this rate, you will have a better understanding about the cost of a high-end photography.

    2. The Experience

    It’s a common perception that experience is your best teacher. Experience is not gained from education. All theories are tackled in school. But experience alone can be your ultimate guide to a decisive, favorable action. When you’re looking for a real estate photo editor, look for a person (or company) that has years of experience in photography and videography. You can visit the photographer’s website and read their portfolio before contacting them

    3. Turnaround Time

    Turnaround time is one of the most important things to consider before you hire a real estate photo editor. This is an integral part of his/her role as an editor. A photo editor should always have the attitude in properly managing his client’s expectations. As a real estate seller, you must always remember that within 24 or 48 hours of the shoot, you should be able to get you edited photos and videos. Although the price of hiring the services of professionals may be higher, you are saving a lot of time and money when your photos are delivered on the agreed time.

    4. Understanding Copyright Infringement

    The terms of image use, especially when copyright infringement is violated, can extremely pose a big problem in your business. You need to find out that, before hiring the services of photo editors, they know their restrictions on how photos can be used. You can inquire through their website and directly ask the company about these concerns.

    5. Their Passion and Undying Commitment

    You need to remember that the passion and commitment of a real estate photo editor come hand in hand with professionalism. The photos that you have in your listings are products of someone who is passionate and committed in the business. As an agent/real estate broker or owner of the property, you should always look for the editor’s guarantees that he or she takes her job seriously. A passionate and committed real estate photo editor has that particular characteristic of understanding your very needs and is able to always open communication lines that will definitely serve you and the industry in general.

  • How to Edit your Real Estate Video using Adobe Premiere Pro CC

    How to Edit your Real Estate Video using Adobe Premiere Pro CC

    The most advanced digital imaging software used in photo editing is Adobe Photoshop Creative Cloud (CC). Adding effects to real estate pictures can be limitless unless your retouching skills are exceptional. This is not to discourage beginners but it is a popular notion that whenever you have a competitive background when it comes to technology, you certainly have the edge.

    [lwptoc]

    The Top 7 Easy Tools that you should learn before Editing Your Real Estate Videos


    Videos are very important to display the sentiments, feelings, and thoughts of prospective buyers. You can also create a series of informational videos about the property not only to give additional knowledge to customers but to impress the clients in general. You can also create a series of informational videos about the property not only to give additional knowledge to customers but to impress the clients in general.

    real estate video editor

    There are a number of Adobe CC tools that will allow you to edit the video footage you need. You can use these tools to retouch special scenes from the video and create a high-quality output from it. These 7 tools will make it possible for you to achieve the best marketing results for your business.

    1. Using Ripple Edit

    ripple

    To use this tool, you can open it in two ways: Click the Tools window, or hit the B key on the keyboard. Ripple Edit, as the word implies, creates a ripple effect. This tool trims both sides of a layer and can cause a ripple effect throughout the video. If you remove 15 frames from the backend of the footage, the remaining clips will be 15 frames but in a forward manner.

    2. The Use of Slip Tool

    slip tool

    In using Slip Tool, you first need to have footage before or after the in and out points. To access this tool, you also need to go to the Tools window or click the Y key on the keyboard. You will notice that your cursor will become bi-directional arrows, both pointing to straight vertical lines. You need to drag it left or right to start Slipping. The window will show four different panes. The large panes at the bottom show time codes. They are the in and out points of the present clip you’re slipping. Slip Tool allows you to nail cuts in a dynamic motion.

    3. The Slide Tool

    slide tool

    This tool works by preserving the in and out points of your chosen footage. Slide tool is responsible for moving the entire footage to either left or right. The Slide Tool is best used when you are completely pleased with the beginning and the end of the chosen clip. All you need to do is use the Tools menu or click the U key.

    4. The Rolling Edit Tool

    ROLLING EDIT TOOL

    Nearly the same as the Slide Tool, Rolling Edit Tool is used for influencing the in and out clip points. Grouped with the Ripple Tool in the Tools panel, pressing the U button is the shortcut way. Rolling Edit Tool is used whenever the in and out points encounter between footages. Its purpose is to make an update on the points without changing a position of the clips. Changing the position means shortening of one clip and increasing the length of the other. Just click and drag the cut point to use this.

    5. The Rate Stretch Tool

    Rate Stretch tool

    The Rate Stretch Tool (pressing R) is the one that allows change of speed of the footage. You can use this tool efficiently without digging through the menus, right-clicking your mouse, or anticipating what percent of speed you are working at. The Rate Stretch Tool is also found in the Tools window.

    6. The Selection Tool

    Selection Tool

    The Selection Tool shortcut is the V key on the keyboard. This is the most basic kind of tool in Premiere. If you want to move a clip from left to right, or you want to shorten the clip, you can use this tool. When you use this tool at the beginning of a clip, it will show a red arrow pointing to the right. Just click and drag to the right and it will trim the beginning of the clip. You can also do this at the end of a clip with the same procedure to follow.

    7. The Razor Tool

    Razor Tool

    Its shortcut is C. The Razor Tool is used to cut the beginning or the end of a clip. This tool can give you the option where to begin and where to end the clip. You can make a cut by single-clicking on the footage. Now that you have chosen the specific clips that you wanted, you can go to the Selection Tool and select all the footage that you don’t want in the timeline and hit delete.

  • Top 11 Amazing Real Estate Photographers to Follow

    Top 11 Amazing Real Estate Photographers to Follow

    In this era wherein Internet has made almost everything accessible and essentially marketable to most of us, social media platforms have become a staple of marketing for real estate agents. Based on a study conducted by the National Association of Realtors, most real estate agents’ top picks among the existing social networking sites are Facebook, LinkedIn, and Instagram.

    Given that Instagram is recently booming with real estate businesses, you might find it worthwhile to also market your listings here, having created or wanting to set up your own profile on the platform. Whether you are new to the vibrant world of Instagram or you have already spent plenty of your time every day scrolling through your Instagram feed, following these 11 amazing real estate photographers will certainly enhance your Instagram-for-real-estate experience.

    In random order:

    1. @rich_caplan_photography

    • Website: http://www.richcaplan.com/
      Richard Caplan is a New York-based professional photographer. His account presents an aesthetically curated feed that features luxury architecture and interior photos, which has led him to gain a massive following. He is one of the most sought-after real estate photographers in the United States because of his ability to capture stellar real estate photos that sell the property fast.

    2. @basilephoto

    • Website: http://www.basilephoto.com/
      This account is handled by Scott Basile, a residential and commercial real estate photographer based in San Diego. He specializes in shooting photographs ranging from luxury real estate and commercial projects to simple houses in the suburbs. His work has been published in The Wall Street Journal, The New York Times, Dream Homes Magazine, San Diego Magazine.

    3. @brandonbeechler

    • Website: http://brandonbeechler.com/
      Brandon Beechler is an Orange County-based photographer specializing in interior and architectural photography. He first started his career as a real estate professional which made him appreciate the power of real estate photography in marketing a home, eventually leading him to become one of the best real estate photographers with his edge of capturing crisp and clean photos that utilize traditional lighting and modern retouching.

    4. @bhp.photography

    • Website: http://www.breehunterphotography.com/
      This Instagram account is handled by Bree Hunter, an architectural and real estate photographer based in Southern California. She provides real estate photography services with a quick turnaround to real estate professionals, while ensuring that the images are of high quality. Her works which include eye-catching interiors and exteriors that highlights the interesting details of a property are featured in this account.

    5. @harrylimphoto

    • Website: http://harrylimphotography.com
      Harry Lim is a professional photographer who specializes in vacation homes, interiors, and real estate. His work is based in Orlando, Florida to basically cover the area of Central Florida. He focuses on shooting professional photos for listings to accurately present its space, color and light which he believes is crucial in selling properties fast. Through his work, he aims to convey the warmth of every home while representing every detail with accuracy.

    6. @huletphotography

    • Website: https://www.traverse-city-real-estate-photography.com/
      This account features curated images by Jason Hulet, one of the best and most experienced real estate photographer in the United States who began shooting real estate photos in 2003. He is based in Traverse City, Michigan and he specializes in integrating cinematography into real estate photography. His work has been published in Traverse The Magazine, Baylife North Magazine, MI Blue, and Manistee Co. Visitor’s Guide 2014.

    7. @jkissock

    • Website: https://www.jkimaging.com.au/
      This is handled by Jonathan Kissock, an architectural and commercial photographer based in Adelaide, Australia. He specializes in shooting luxury real estate, accommodation, resorts and hotels. The number of homes that he has photographed during his 16 years of experience as a real estate photographer is estimated to be approximately 14,000 homes.

    8. @thehoustonguy

    • Website: https://patrickbertolino.com/
      Patrick Bertolino is a Texas-based real estate photographer who specializes in commercial and architectural photography. He is a certified drone pilot and has over 20 years of experience in commercial photography. His account features stellar images of interiors and exteriors of different properties.

    9. @mikesaundersphotography

    • Facebook account: facebook.com/mikesaundersphotography
      Mike Saunders is a Melbourne-based photographer who captures both residential and commercial real estate properties, as well as new builds and renovations. He also captures aerial images and architecture as shown in his account.

    10. @sarah_braden_photography

    • Website: https://www.sarahbradenphotography.com.au/
      Sarah Braden is a photographer based in the eastern suburbs of Sydney who specializes in photographing interiors and corporate portraits. Her account has gained a large following because of its consistent flow of beautiful photos of real estate interiors.

    11. @realestatebymariomoreno

    • Website: https://www.mariomorenophotography.com/
      Mario Moreno is a photographer based in Marbella, Spain who specializes in real estate, architecture and interior photography. He started with wildlife photography when he explored Africa. He focuses on travel and real estate photography as his usual photo assignments now along with commercial photography for advertising purposes.
  • Learn Real Estate Photography with Zero Knowledge: Featuring Top Realtors in US

    Learn Real Estate Photography with Zero Knowledge: Featuring Top Realtors in US

    Real estate photography is a significant marketing tool that has the power either to attract potential buyers or drive them away. This strong influence to make or break a deal, epitomized in images, brands real estate photographers as important to realtors, making this business a profitable one.

    If you are a newbie who wants to earn big bucks in the world of real estate photography, yet you have zero knowledge and skills in the profession, you might feel a bit discouraged. But, worry no more because here are 12 tutorial guides to kick off your journey towards becoming an expert real estate photographer.

    1) Introduction to Real Estate Photography

    Before delving into the photography side of the job, you need to learn first the best practices to be done once you arrive at a property.

    Firstly, although there are formulas and rules of real estate photography that you will be thinking about every shoot, you have to keep in mind that every agent and broker has different preferences and goals, based on their taste and the distinct features of the listing. Immediately after you’ve met the agent and done brief introductions, ask them to give you a tour of the property so they can share any specific shot ideas, angles and elements that they want to highlight. Doing this will give you a good sense of your client’s marketing goal as well as the layout of the house to aid you in mentally preparing for the upcoming shoot. You may also use this situation to raise your concerns if ever your client has a poor shot idea, which can be politely executed by taking their desired shot and showing them it’s a bad idea. Nevertheless, your ultimate goal is to give the agent what they want, so be flexible and experiment with bizarre ideas if needed.

    Then, start prepping the house for the shoot by turning on all light fixtures and lamps, pulling up blinds, and hiding items that will show poorly in photos and negatively affect the marketability of the listing. Remember, you should not spend more than 15 minutes prepping the property since it is not exactly your responsibilities. If after the said duration, the property still seems unprepared for shooting, ask the agent whether you should reschedule or if they are comfortable with shooting the house in its present condition.

    A general rule on window blinds is to pull them up in every shoot but there are some exceptions to this rule, so leave the blinds down if the view outside is unpleasant, if the agents insists on leaving them down for whatever reason, and if the blinds are broken, unstable or won’t pull up entirely. Excessively heavy blinds are usually twisted open so light can come through the windows. Other practices that are best to remember are removing security signs from the front yard when taking exterior shots, removing hoses and garbage cans out of the view, and keeping the garage doors closed.


    2) Camera Settings

    After you’ve prepped the house, start setting up your camera equipment and make sure your camera settings are dialed in. In no particular order, set your file of numbering settings to continuous to ensure that your photos are organized sequentially when you transfer them to your computer, so it would be an easy task to send them to your real estate image editing company. Set the photo quality to small raw files ideally at about 5 megapixels.

    Go to live view/movie function settings and make sure you are in stills only or exposure simulation live view. Furthermore, you should set your lens to manual focus and dial in manual exposure mode to control both shutter speed and lens aperture or F-stop that should be set between 7 and 10. Before every exposure set, it is wise to set your focal point half the depth of the room, which you can accomplish by using your live view zoom feature for precision focusing. Lastly, set you ISO as low as possible, usually at 160 or 100 for exterior shots.

    3) Basics of HDR and Flash

    HDR or high dynamic range photography is a popular photographic technique that allows real estate photo editors to fuse different exposure photos of the same scene captured at various shutter speed, and then do a composite photo that consists of the best light information of each exposure, creating a balanced tonal spectrum. This means that for each image you take, you will have to shoot between 4 to 7 separate exposures, or more if necessary.

    You will manually bracket these exposures from darkest to mid to brightest, by changing the shutter speed in your camera. Do not change the ISO of the F-stop mid bracket. To ensure that each exposure is crisp and align, you can use a shutter release cable and make sure your tripod is stable and completely still throughout the exposure set.

    Moreover, you have to take a good flash out of the room after you complete your exposure set so get familiar with your flash. As you capture more photos and get more familiar with your on camera flash, you will develop a better sense of what ISO setting you’ll need according to the lighting conditions of the space that you’re shooting. Be gentle while switching the flash so as not to shake the camera out of position. Ultimately, you want the flash shot to line up perfectly with HDR bracket of exposures.

    4) Front Exteriors Photography

    After going over some basic techniques, principles and compositional rules, let’s talk about specific types of shots you’ll take nearly every shoot you do, and shots you’ll come across often in real estate photography. The Multiple Listing Service requires an exterior shot to be the cover photo of every listing, so you would have to make sure that you get at least one outstanding shot of the front exterior.

    The best way to do this is to back up across the street, if possible, and zoom in to frame the house closely since the more of the composition the house takes, the larger it will appear. Remember not to cut off the edges of the structure unless you’re shooting a vignette detail of the front door or another distinctive architectural feature of the front porch.

    In shooting a two-point perspective shot, it’s recommended that you shoot from opposite the garage to have grass and greenery in the photo’s lower foreground instead of the pavement. Lastly, do not shoot directly into the sun, but if it’s unavoidable, place your hand over the lens to block the glare, and prevent lens flare.

    5) Backyards Photography

    Backyards vary a bit in layout, landscape design and space so it is best for you to gather shots of different angles to exhibit the space from varying viewpoints. One common and effective angle you can take is from the house deck or patio area out into the yard from a two-point perspective. You can also shoot from the corner so you can capture a comprehensive sense of the space and fit as much as possible in the frame.

    Another effective shot is a view from the back of the yard looking towards the house, usually a two-point perspective shot. When there is nice patio furniture in the yard, you can take a vignette shot with the furniture in the foreground and the yard behind to prompt prospective buyers to envision spending time in the yard. While you can decide what shots to take, it is prudent and safe to take multiple variations so your client will have a set that they can choose from.

    6) Entryways and Staircases Photography

    It is typically only worth capturing the entryway if there is a decorative front door, French door or a dramatic entryway space. You can approach this section of the house by taking a one-point perspective shot with the French door swung open that will lead your view into the entryway spaces.

    Just like entryways, you only have to take photos of staircases if they are a distinctive selling feature of the property for example, big rounded staircase often photograph very well. In doing so, you would have to prop your camera up higher than usual since you are basically shooting two different levels at once with no ceiling obtruding on the upper part of the composition.

    7) Living Rooms Photography

    Living rooms can also vary dramatically in scale and layout but in shooting this part of the property, there are few general considerations. Typically, living rooms display best in two-point perspective shots but if the room is extremely organized and symmetrical, a one-point perspective shot can be employed. Since this is usually a main selling feature and one of the larger interior spaces of the house, it is ideal for you to shoot between two or three shot of this section. In addition to this, you should take at least one shoot of the living room facing towards the windows because this type of shot are primarily more inviting and colorful, making your photo stand out.

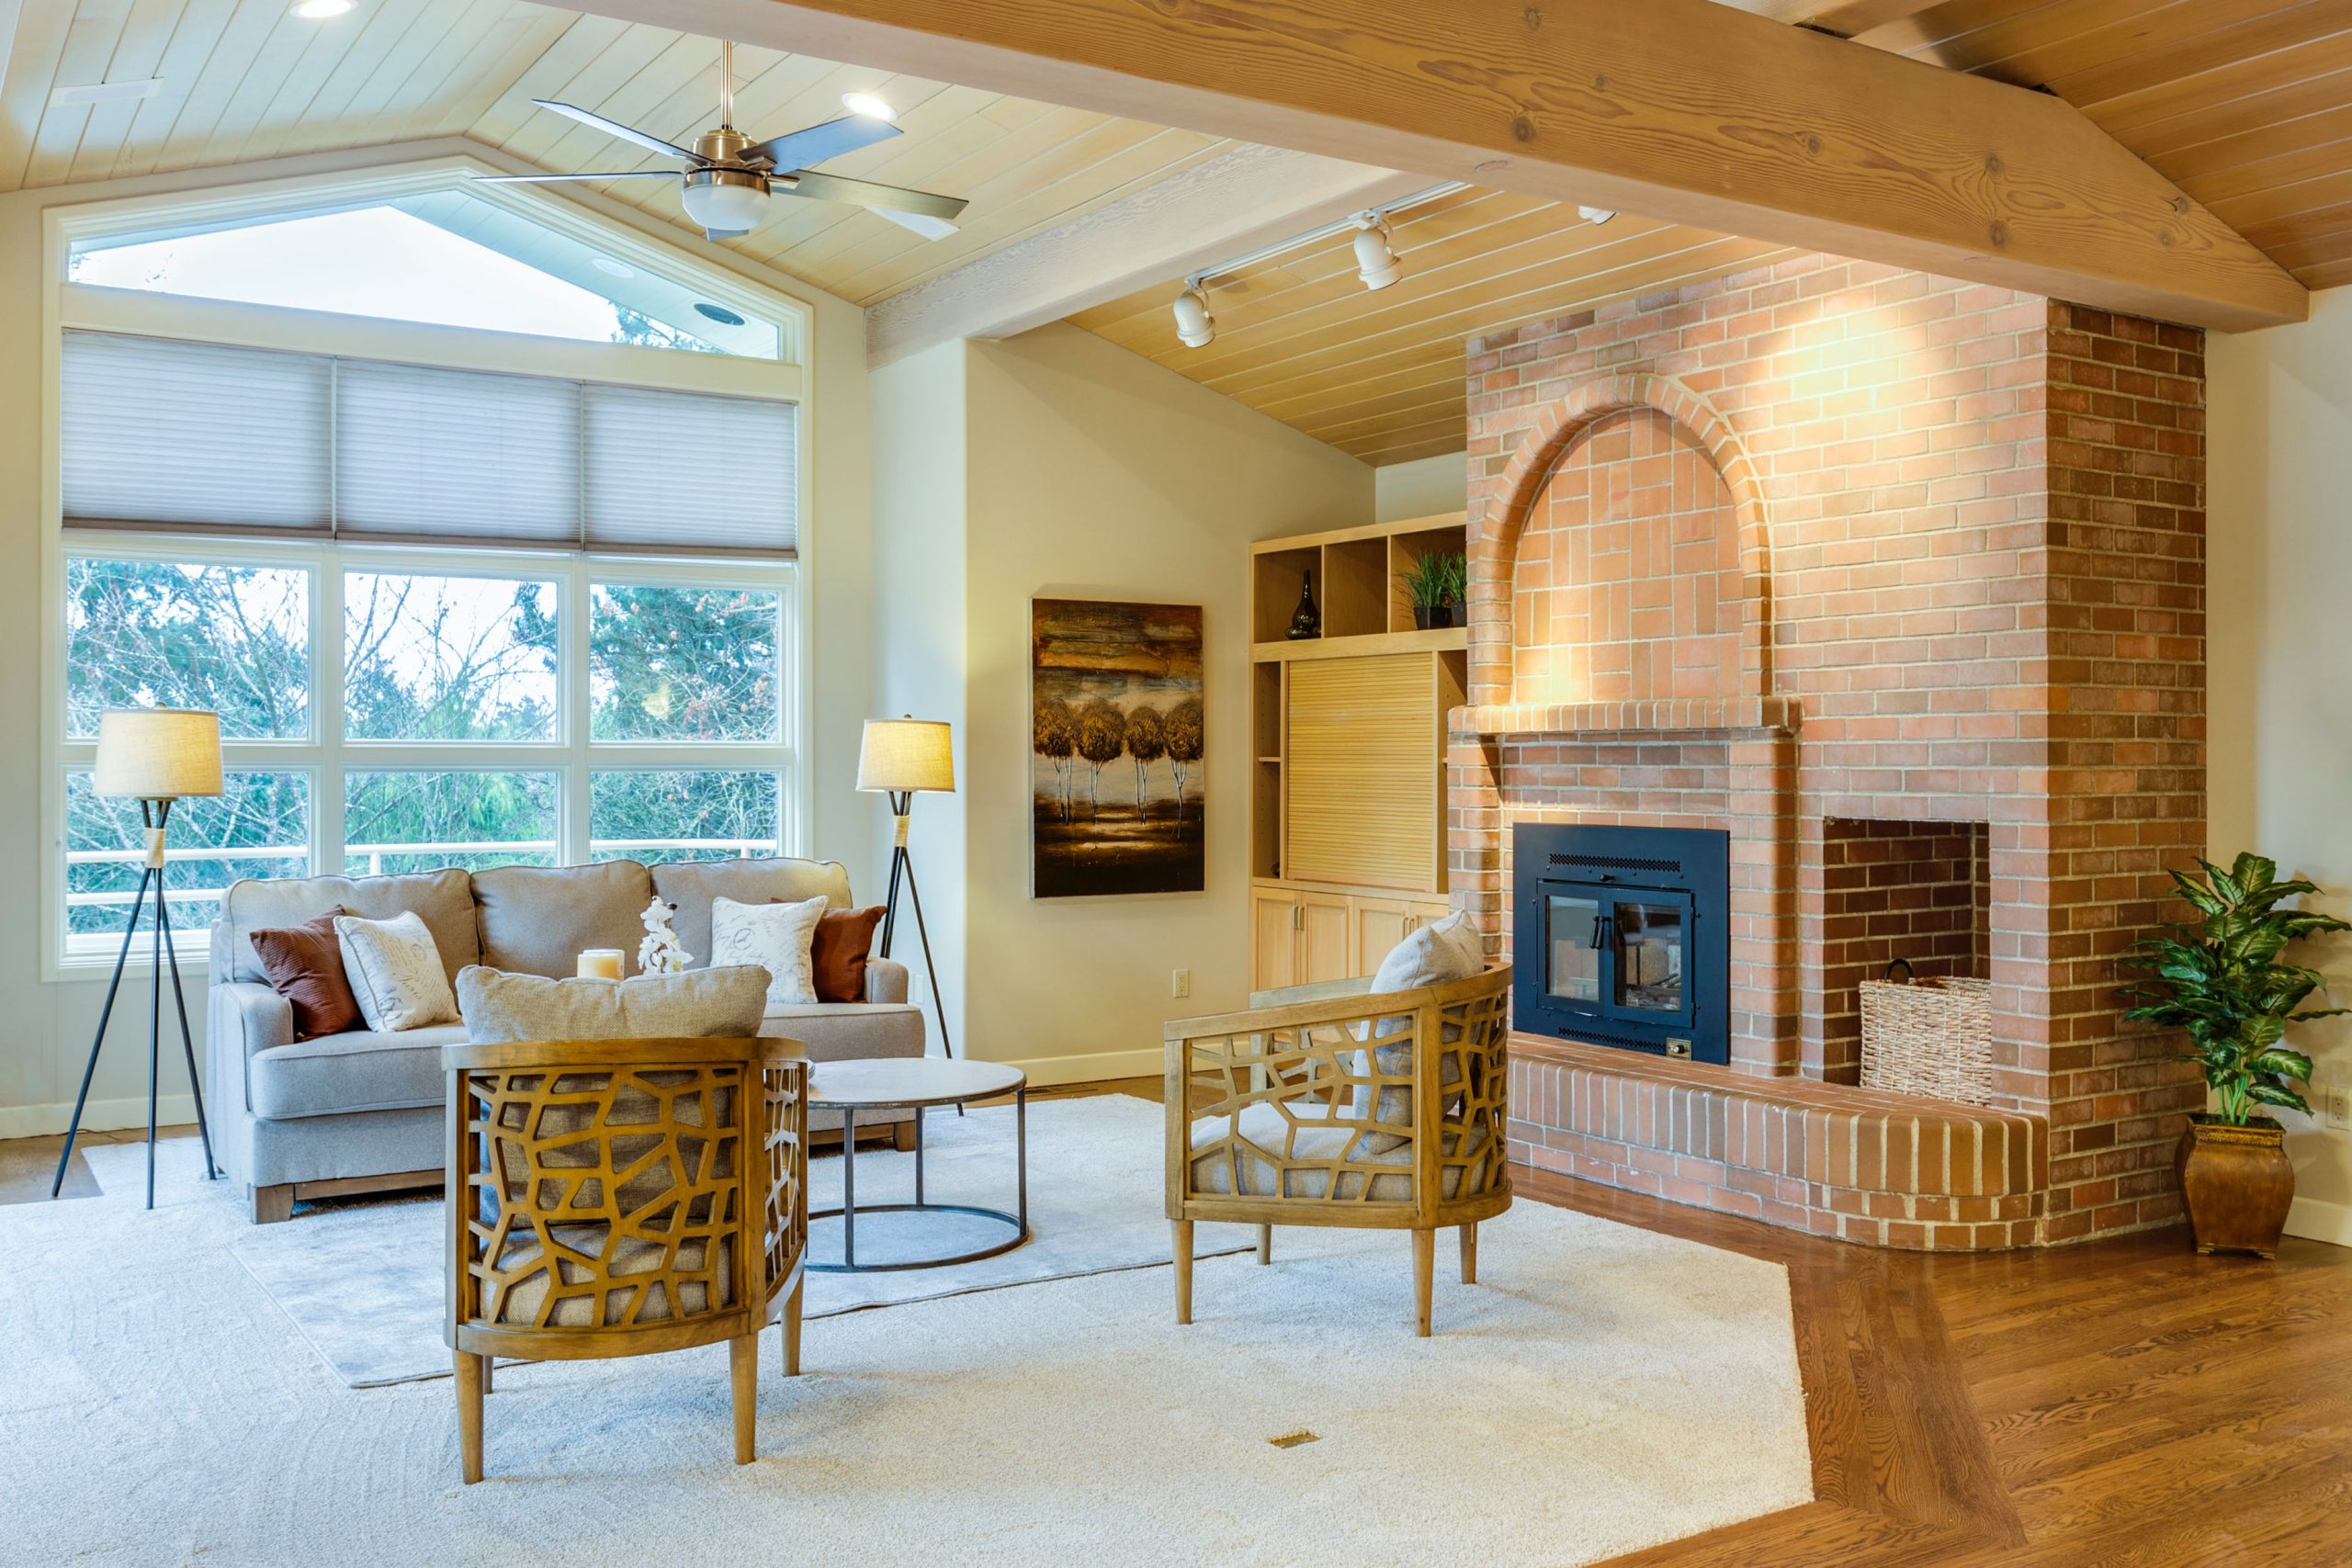
    If the living room has a fireplace, you have to get one shot facing towards it given that fireplaces are also a strong selling point for prospective buyers. Considering that couches can often be obstructive or hard to negotiate with a camera, you can solve this by either shoot over the arms of the couch so the viewer sees the space from a more intimate inclusive viewpoint (subjective approach) or shoot from the corner showing off the whole room with the back of the couch in frame (objective approach). However, it is best for you to take both to give more options to the agent.


    8) Kitchens Photography

    You can take the trademark real estate kitchen shot from outside of the kitchen and with the countertop island looking towards the cabinets and windows, which is typically a two-point perspective shot. But, kitchens are where one-point perspective can prove to be very effective and aesthetic. Examples of this are the shot of the stools lining the countertop island horizontally with the wall side countertops and cabinets in the background, and the shot taken down the corridor between the island and the countertop.

    You can also shoot from inside the kitchen looking out into the space beyond so as to bridge between two spaces, putting emphasis on the layout of different sections of the house and their relation to each other. Always remember to take at least two or two different angles of the kitchen so that your client has options.

    9) Dining Rooms Photography

    Before shooting this area, you have to double-check to ensure that all the chairs are tucked in and evenly spaced so that the display looks orderly and neat, and to declutter the table and surrounding area. You can take photographs of the dining rooms best from a two-point perspective backed up as far as possible and shooting towards the windows. In doing so, you have to make sure to prop the camera up high enough to get a view over the top plane of the table.


    10) Bathrooms Photography

    In shooting bathrooms, you have to focus more on the sink and mirror than the toilet. But, if the toilet fits in the frame, make sure the lid is closed. To get a good shot of this area, you will have to place your camera at the fulcrum of the door to get as much of the space in the frame as possible. Try to avoid capturing the camera’s reflection in the mirror. For half baths, where you need to focus on sinks, counters, and baths, you would have to prop the camera high enough to see the sink concavity, as well as the previously mentioned techniques.

    10) Bedrooms Photography

    Since bedrooms vary less than other rooms, most bedrooms display best from a two-point perspective looking towards the bed and windows. You can do this by backing the camera up, if necessary, into the doorway and zoom in to frame the space excluding the third wall. Another approach in photographing bedrooms is to shoot from the back corner of the bed looking out into the room, which only works when there is enough space to back away from the bed so that it isn’t taking up much of the composition. This shot provides a view similar to what you might experience waking up in the room and is a great one if there are windows with exceptional view of the exterior landscape opposite the bed.

    11) Porches, Views, and Panoramas Photography

    Porch photos are primarily two-point perspective shots. You can shoot this section by backing up the camera through the sliding doors to capture more space while also taking into consideration the sun placement. When touring a property with a view, you have to take note of which vantage point will best highlight the view.

    For view shots, you will need to switch to your zoom lens in order to focus on the most remarkable section of the view. You might find that if a view is so expansive that one photograph doesn’t do it justice, the agent will order a panoramic photo. This is taken just like any other view shot, expect it is repeated across the horizon line 3 to 5 times. In executing the panoramic photographic process, you must make sure that there is at least one third of each subsequent composition overlapping with that of the previous one since the real estate photo editing company will be stitching together your separate HDR photographs to create a successful panoramic shot.

    12) Agent Review Process and Conclusion

    After succeeding to capture all the angles of a particular listing, the last thing you need to accomplish on site is to do a review of your photos with the agent. This is crucial in avoiding unhappy clients and a revisit to the property. Once you’re done with the review, count the photos for the agent so they know how many they will be paying for. This is your opportunity to sell the angles you decided to take, so explain and articulate why you like particular photos.

    Having read the 12 essential guides, you already have all the general knowledge necessary to begin shooting beautiful real estate photographs. However, keeping these all in mind is not enough to start your career as a real estate photographer— you have to internalize these principles and techniques through constant practice. If you need to build up your confidence first before taking any actual shoots, try photographing your own living spaces or those of your family and friends to gain experience. Just keep in mind that the most important thing is to start applying these lessons as soon as possible and to continue honing your photography skills because you never know when a deal will be struck to jump-start your career in this industry.

    real estate photography tutorial

    Top Realtors Talks About using Smartphone for Real Estate Photos

     Wanda Kubat-Nerdin - Wanda Can!

    Real Estate Agent:
    Wanda Kubat-Nerdin – Wanda Can!
    So Utah Residential, Referral & Relocation REALTOR
    St. George, UT — Red Rock Real Estate
    Independent Brokerage
    http://www.buynsellutah.com
    St. George Utah Area REALTOR Insights – Wanda Can!

    Question: Do you hire a professional real estate photography to take your photos?

    Answer: Hiring a professional photographer is the best decision an agent can make. I have seen way too many amateur attempts and that is a disservice to sellers, in my opinion.


     Bob

    Services for Real Estate Pros
    Bob “RealMan” Timm
    Owner of Ward Co. Notary Services, retired Realtor
    Minot, ND — Ward County Notary Services
    Ward County / Minot Notary Services

    Question: Do you hire a professional real estate photography to take your photos?

    Answer: My advice is just DON’T!!! Hire a professional photographer. I don’t care what phone you have, how expensive it is, it’s not a substitute for a professional.

     Ron and Alexandra Seigel

    Services for Real Estate Pros
    Ron and Alexandra Seigel
    Luxury Real Estate Branding, Marketing & Strategy
    Carpinteria, CA — Napa Consultants
    http://www.napaconsultants.com

    Question: Do you hire a professional real estate photography to take your photos?

    Answer: I love my phone with the latest and greatest features….And I have taken some nice photos and we have made a few videos with it.

    I am not a professional photographer or videographer, so we are not recommending that agents take their own. There is so much more to point and shoot. Cheap and DIY are two words I would not recommend in marketing real estate, even if the property is a double wide….A

     Rae Dolan

    Real Estate Agent
    Rae Dolan
    Real estate agent serving the Katy area
    Katy, TX — Roots & Wings Realty Group / Champions Real Estate Group
    Roots & Wings Realty Group | Katy Realtors

    Question: Do you hire a professional real estate photography to take your photos?

    Answer: My two cents is to hire a professional photographer.


     Peter Mohylsky, Beach Expert

    Real Estate Broker/Owner
    Peter Mohylsky, Beach Expert
    TOP LISTING AGENT ALONG THE BEACH
    Santa Rosa Beach, FL — PrimeSouth Properties
    Mobile: 850-517-7098
    Office: peter@bucketlistbroker.com

    Question: Do you hire a professional real estate photography to take your photos?

    Answer: I have not read any other answers prior to answering your questions but I am sure that the majority of the experienced, successful agents use a pro to get pictures taken. Phone photo’s can be of good quality but really, is that the best you are offering to your client?I am an amateur photographer and do own a “expensive camera” I do use photo shop. Adobe light room. but it is for marketing purposes.Your clients deserve a pro.

     Thomas J. Nelson, Realtor e-Pro, CRS, RCS-D, Vets

    Real Estate Agent
    Thomas J. Nelson, Realtor e-Pro, CRS, RCS-D, Vets
    & Host of Postcards From Success Podcast
    La Jolla, CA — Big Block Realty 858.232.8722
    http://www.ThomasJNelsonRealtor.com

    Phone #: 858-232-8722
    Email Address (optional): TJN@ThomasJNelsonRealtor.com
    FB: https://www.facebook.com/ThomasJNelsonRealtor

    As professional REALTORS, I firmly believe we hire should hire professional photographers to help our clients have the best opportunity to get their property sold. iPhone and android phone photos are obvious and they’re often poor quality, poor lighting, not always the best angles and often times shot incorrectly and vertical instead of horizontal. They make the home look less than desirable as there’s an amazing difference between professional and amateur photos. Unless you yourself are a professional photographer with professional equipment; it’s a disservice to your client and a violation of your fiduciary duty to cut corners.

    1. What smartphone are you using to take real estate photos?
    I do not, I use a professional photographer for all published photos well I’ll use my Apple iPhone for photos during a walk-through just for my own personal reminders.

    2. Do you have a professional camera? What is it and when is the best time to use it?
    No

    3. How important is it for you to beautify the photos for real estate?
    Occasionally I’ll use virtual staging for empty properties and I always want the lighting adjusted but, we do not tamper with the photos as to modify them from truth and we do disclose virtual staging when we advertise.

    4. Do you upload your photos without editing them on your website and to other listing channels?
    All my photos are professionally edited before uploading that’s part of the service I paid for with my professional photographer.

    5. Do you know how to edit your photos or do you hire an editor to do it?
    I’ve been a photographer all my life and I do know how to edit my photos however I do not get paid to do so, so I spend my time where it earns money and I hire professionals to edit my photos as part of the service of them taking the photos.

    6. Do you hire a professional real estate photography to take your photos?
    YES

    7. Can you share your editing software or apps which you use in editing your real estate photos?
    Since I use a professional photographer the only photo editing tools I use are the ones that come standard with any windows PC

     John Juarez

    Real Estate Agent
    John Juarez
    ePRO, SRES, GRI, PMN
    Fremont, CA — The Medford Real Estate Team
    Keller Williams Realty Inc.
    http://www.JohnJuarez.com

    Question: Do you hire a professional real estate photography to take your photos?

    Answer: We use a professional to take quality, magazine quality photos.We eschew cell phone mls photos.


     Bob Crane

    Real Estate Agent
    Bob Crane
    Forestland Experts! 715-204-9671
    Stevens Point, WI — Woodland Management Service / Woodland Real Estate, Keller Williams Fox Cities
    Keller Williams Realty Inc.
    http://woodlandmanagementservice.yolasite.com/

    Question: Do you hire a professional real estate photography to take your photos?

    Answer: I see a lot of good photos and bad, having a RE license or not does not seem to be the determining factor.

    Buying an expensive camera and going into the picture business, does not guarantee good photos either.

    Generally it is a matter of following a few simple rules when shooting the pics, taking plenty of photos, then separating the good ones from the bad.

    If enough photos are taken you will have 50 great photos worthy of publication.


    Real Estate Agent
    Roy Kelley
    Gaithersburg, MD — Realty Group Referrals

    LinkedIn

    Question: Do you know how to edit your photos or do you hire an editor to do it?

    Answer: This is a good blog topic for you. Every photograph should be edited. I use iPiccy.com. It is free.


     Debe Maxwell, CRS

    Real Estate Agent
    Debe Maxwell, CRS
    The right Charlotte REALTOR!
    Charlotte, NC — www.iCharlotteHomes.com | The Maxwell House Group | RE/MAX Executive | (704) 491-3310
    RE/MAX International Inc.
    Charlotte’s Most Popular Home Search Site

    Question: Do you hire a professional real estate photography to take your photos?

    Answer: I run across agents doing their own virtual tours and always wonder why sellers are okay with that…and they’re not professionals or semi-professionals either – they’re just you and me – agents.

    My photographers are professionals and their shots and videography take less than ½ the time to take than they do editing. They are at the house for 2.0 hours (at a minimum – without drones) so, if they spend 4.5 – 5 hours editing, I think of the 7 hours they spent doing my shots & editing…and how much prospecting I can do in that 7 hours!! LOTS!  I’m not stopping prospecting to do something that I can easily pay a professional to do. Same with measuring.

    Real Estate Broker/Owner
    Olga Simoncelli
    CONSULTANT, Real Estate Services & Risk Management
    New Fairfield, CT — Veritas Prime, LLC dba Veritas Prime Real Estate
    Real Estate Services, Consulting, Risk Management

    Quote: Good luck with your project! Many smart phones have resolutions superior to some cameras. Also, many professional photographers are over-rated.

    Real Estate Broker/Owner
    Scott Godzyk
    One of the Manchester NH’s area Leading Agents
    Manchester, NH — Godzyk Real Estate Services
    http://www.searchnhhomesnow.com/

    1. What smartphone are you using to take real estate photos?
    – Iphone xs max

    2. Do you have a professional camera? What is it and when is the best time to use it?
    – Yes, mostly indoors, wide shots, close ups and when fine detail is needed

    3. How important is it for you to beautify the photos for real estate?
    – Every time. It is a must to make sure my photos are bright, vivid and eye catching

    4. Do you upload your photos without editing them on your website and to other listing channels?
    -I usually edit all photos. some it is just cropping. Some need brightening.

    5. Do you know how to edit your photos or do you hire an editor to do it?
    – I edit myself

    6. Do you hire a professional real estate photography to take your photos?
    – I am a professional. 34 years experience taking photos that garner viewers eyes

    7. Can you share your editing software or apps which you use in editing your real estate photos?
    – Most every day editing is done right on the iphone that takes pictures as good as some of the best cameras.


     Doug Dawes

    Real Estate Agent
    Doug Dawes
    Your Personal Realtor®
    Georgetown, MA — Keller Williams Realty – Topsfield, MA
    Keller Williams Realty Inc.

    FB | LinkedIn

    1. What smartphone are you using to take real estate photos?
    – Pixel 3XL BUT I use a photographer

    2. Do you have a professional camera? What is it and when is the best time to use it?
    – No but the photographer does

    3. How important is it for you to beautify the photos for real estate?
    – Beautify? The photographer does his magic

    4. Do you upload your photos without editing them on your website and to other listing channels?
    -Before the photographer, I use I did.

    5. Do you know how to edit your photos or do you hire an editor to do it?
    – Not anymore

    6. Do you hire a professional real estate photography to take your photos?
    – Yes, I do

    7. Can you share your editing software or apps which you use in editing your real estate photos?
    – I don’t have any

    Real Estate Agent
    Jeff Pearl
    Full Service Full Time Realtor
    Lovettsville, VA — RE/MAX Distinctive / LIC in VA
    RE/MAX International Inc.
    Search Entire New and Expanded MLS Here

    Quote: I don’t use a smart phone for photography at this time, but the cell camera technology has improved so much, I wouldn’t totally ignore taking photos with a smart phone. There are numerous photo editing apps available now.

    Real Estate Broker/Owner
    Joan Cox
    Denver Real Estate – Selling One Home at a Time
    Denver, CO — House to Home, Inc. – Denver Real Estate – 720-231-6373
    Denver Real Estate – Search for Homes

    Quote: A listing sells with the photos — I would never have a listing without a professional photographer.


     Jerrill Ewing

    Home Builder
    Jerrill Ewing
    Builder
    Eatonton, GA — N & J Lake Properties, LLC

    Quote: phone photos means you need a new agent

    Ryan Huggins

    Real Estate Broker/Owner
    Ryan Huggins – Thousand Oaks, CA
    Residential Real Estate and Investment Properties
    Thousand Oaks, CA — https://HugginsHomes.com
    Independent Brokerage

    Phone #: 805.905.4000
    Email: Ryan@HugginsHomes.com
    My website | LinkedIn

    Yes, I use my phone to take pictures. It’s camera is on par with man of the super expensive standalone cameras and I know a thing or two about composing shots.

    1. What smartphone are you using to take real estate photos?
    – Google Nexus 6P

    2. Do you have a professional camera? What is it and when is the best time to use it?
    – No. Looked into the DSLRs that Costco has. Have a mid-range point & shoot with manual settings. Have used the Point & Shoot in conjunction w/my camera phone and have preferred the camera phone’s photos.

    3. How important is it for you to beautify the photos for real estate?
    – Not sure what you mean by “beautify”. Where needed I’ll do some minor editing (removing people from mirrors, touching up grass, adding a sunny sky, using HDR tune-ups).

    4. Do you upload your photos without editing them on your website and to other listing channels?
    – No, all photos are reviewed (I usually take multiples of a room) and the best ones are kept. Of those, not every room needs to be in the MLS or website.

    5. Do you know how to edit your photos or do you hire an editor to do it?
    – Yes, I know how to edit my photos. Youtube has many great instructional videos on this.

    6. Do you hire a professional real estate photography to take your photos?
    – No. I’m from the old days before there were professional photographers and when you had to wait three days to get your photos developed at the drug store or drive-through photomart. We learned then how to take good pictures.

    7. Can you share your editing software or apps which you use in editing your real estate photos?
    – On the phone I’ll use Snapseed. For anything more involved I use GIMP, which is a free and open source Photoshop clone.

    Real Estate Agent
    Tony Lewis
    Summit Real Estate Santa Clarita & OC Laguna Nigel
    Valencia, CA — RE/MAX of Valencia (Hall of Fame) 30 year Valencia Resident
    RE/MAX International Inc.
    http://www.TonyLewis.com

    Quote: Use a professional Photographer and Videographer. Let the public know that you are a professional.

    Real Estate Agent
    Annette Lawrence , Palm Harbor, FL 727-420-4041
    Making FLORIDA Real Estate EZ
    Palm Harbor, FL — ReMax Realtec Group
    RE/MAX International Inc.
    http://www.AnnetteLawrence.com

    1. What smartphone are you using to take real estate photos?
    – iPhone 9. Hey, it was the ‘new thing’ when I got it. Cell is used ONLY for temporary web posting. Be aware web optimized images do not have the same requirement as print. A cell is more than capable however the one holding it may not have the ability.

    2. Do you have a professional camera? What is it and when is the best time to use it?
    – Canon 80D. Needed when an agent does real marketing in print. Preferably leveraging CR2 formats. If all they do is stick a sign and put in mls, the cell is all they need.

    3. How important is it for you to beautify the photos for real estate?
    – Knowing the capability of the tech and one own skill levels, post editing is the secret sauce. 90% of the corrects needed by a conscientious agent requires only minor adjustment. However, egos require a bigger investment.

    4. Do you upload your photos without editing them on your website and to other listing channels?
    – Upload without editing? That’s like publishing with clicking ‘spell check.’

    5. Do you know how to edit your photos or do you hire an editor to do it?
    – Naaa….I just like to talk about it.

    6. Do you hire a professional real estate photography to take your photos?
    – When the tech I own won’t to the job I hire those with the big guns.

    7. Can you share your editing software or apps which you use in editing your real estate photos?
    – For web stuff I use the native edit stuff free with Microsoft. For the good stuff I use Gimp, Gravit, RawTherapy and Inkscape. Video is Wondershare…. Hmm, NA.

  • 7 Basic Adobe Lightroom Tips to Enhance your Real Estate Photos

    7 Basic Adobe Lightroom Tips to Enhance your Real Estate Photos

    Professional real estate photographers are growing in numbers very fast because of the increased interest of many people in the real estate industry niche. Adobe Lightroom, considered by most editors as the most popular post-processing tool, is an excellent aid in creating high quality photos and videos in just clicks of fingers. It consists of a long list of plugins and presets that can help save a lot of time in the post-production tasks.

    Lightroom is a very important retouching tool. This software is filled basically with great features that can make every editor’s life easier. This app is for everyone to enjoy – from ordinary people working at home, to students finishing their projects from their respective subjects, down to office workers who need to submit reports to their boss. In general, Lightroom is for everybody. The moment you learn how to manipulate and apply these excellent features, you can do countless editing of different photos the way you like them to become.

    Enhance your Photos in No Time: 60 Second Tips in Using Lightroom

    1. Adding a Lightening Background

    If you want to add a lightening background, click the   in the Develop section, select the size of the Brush (Brush A is preferable), add a Feather, and enable Auto. You also need to set the Density to 100 to start painting the background with the chosen Brush.

    You can decrease the density to 30 because you need to select the background and check which part is partially painted. You can eventually go to 100% density to finish the background.

    Lightening Background adobe lightroom
    photo via https://www.naturettl.com/

    2. Straighten a Kinked Horizon

    This technique is about recreating the horizon of a photo straight. Frankly, it is very hard to avoid shooting uneven lines. Straightening these lines using Lightroom is an easy trick. Locate Crop Overlay by clicking its icon or simply pressing R on the keyboard. You can also opt to use Auto straightening function. This will automatically level crooked horizons.

    Crop Overlay Adobe Lightroom

    3. Straighten Crop Orientation

    There’s this secret cropping tip on how to straighten crop orientation using Lightroom. In Crop mode, just press X and everything will proceed to crop orientation automatically. If it is horizontally oriented, this tool will make it vertical. On the other hand, if it’s vertical, crop orientation mode will turn it into horizontal.

    Straighten Crop Orientation

    4. Make use of the Transform Tool

    Transform Tool is a feature in Lighthouse where it corrects distorted horizontal and vertical lines, and change the perspectives or anything that needs to be straightened. Scrolling down to Transform Tool, you can just choose whether it is vertical or horizontal lines that you want to be corrected. This is a perfect tool to make lines symmetrical to each other.

    Transform Tool Adobe

    5. View Photos in Different Modes

    You can follow these keyboard shortcuts to view photos in different modes using Lightroom.

    • Grid view (press G) – displays all your images as thumbnails at the center
    • Loupe view (press E) – seeing image to look something bigger
    • Side Panel Removal (press Tab) – this is a shortcut to hide panels from Lightroom
    • Lights Out (press L) – consider this shortcut to dim the lights
    • Full Screen (press F) – to view the largest possible image on the computer screen, pressing F is your only choice
    • Survey View (press N) – to view specific images together, Survey View Mode is the answer

    6. Bringing Panels back to the Screen

    This feature is similar to photo isolation. Here you need to click the Develop module and you want to have your left side bar show its presets. You need to hit the Tab bar and the left side of the screen will show all its presets. To close both the left and right bar, just hit the Tab once again and the photo will be shown against the same background that you set.

    Also, if you think you lost your panels forever, they are not gone at all. They are just hidden somewhere. To show them again, you can easily do this in a lightning mode, so to speak. You can do right-clicking over one of the panels that are visible. All you need is to create a small drop-down menu and click on the one that is missing!

    Another trick is through the main menu at the top of Lightroom. You can click on Window, proceed to Panels, and click the panel that you want to see. Missing panels will quickly reappear.

    7. Slider Adjustment

    To make small adjustment to the sliders, all you need to do is to bring your curser to the slider and go to the Up and Down Arrow Key. If you want to make higher increments of adjustment, press Shift + Up and Down Arrow Key.

    There are also different ways to move sliders in Lightroom. You can use the mouse for handling and dragging. By clicking the slider ramp together with the handle, it will go to the destination you clicked on. To enter a value, just click on the text-entry portion. You can also hover the cursor and use the plus and minus keys.

  • The 9 Best Adobe Photoshop Tools to Edit Real Estate Photos

    The 9 Best Adobe Photoshop Tools to Edit Real Estate Photos

    What is it like to be working in a real estate photograph editing world? In a business like real property photo editing, it is necessary to look for the best opportunities that are relatively promising in this exciting industry. It is every photographer’s responsibility to analyze and understand his chosen editor’s abilities, strengths, and weaknesses. In this way, he can set expectations as to how his editor can work on the task on hand.

    In a very similar way, it is also the obligation of the editing service company to know in-depth the things that his photographer wanted in order to build a mutual understanding between the photographer and his client.

    realtors
    Once an understanding for both parties is established, there are things that they must focus on. Because image enhancing takes time to process, patience is the virtue that both of them must possess. Always consider that the first few edits are not acceptable right away. As a buyer of their services, the photographer has to realize that editing of photos needs time to become close to perfection.

    Some of the things that can be achieved when editing a real estate photo include the changing and improving of colors. Unwanted background can also be removed and replaced. Photo enhancement may also call for the adjustment of contrast, brightness and sharpness. These basic techniques are very important especially if you are making presentations for promotional purpose and advertising.

    real esate photo

    Because of the surging popularity of the online atmosphere, today is the perfect time for a photographer to establish his name online. This can be done by creating attractive real estate imagery. It involves real estate marketing that may include photograph or video advertising to gain audience not only with fellow agents but more importantly, gain the trust of big real estate companies.

    The best opportunity why a video or photography for promotion and advertising is made is to gain audience. But there are instances where it only discusses the experiences they have with such videos. Always get the ideas of what the realtors really wanted and find out the bad practices they made before so that you can pinpoint what these people really wished for.

    Image editing is done by experts with the use of photo-editing software. They know all the tricks and techniques behind making your photo look spectacular. These people are skilled in a way that they know all the different angles of editing software like Photoshop. They are familiar of all the features and functionalities of such tool. The in-depth understanding of these photo editors of the software they use will be their great advantage to create an improved photo and deliver it in the most efficient way.

    Basic Photoshop Image Editing Tools

    The work of a photographer is just a speck of the many tasks he does beyond the shoot. There are image retouching works that will take a lot of time to enhance. These skills are essential to create magnificent photos for potential clients to become interested in the property being offering. Below are nine (9) basic Adobe Photoshop tools needed in real estate photo editing.

    Move Tool
    move tool psd - phixer

    In the keyboard, you can simply press V and it will let you move objects around the canvas. It is a click-and-drag tool.

    Marquee
    Marquee tool - phixer

    It’s the letter M. Marquee allows you to choose a certain part in the Photoshop canvas. Its default shape is rectangular yet you may pick a perfect square or an ellipse, depending on your preference.

    Free-form Selection Tool in Lasso
    Lasso psd - phixer

    The lasso is a selection tool for you to select the area covered by lasso. Because of lasso, you can have the access to the polygonal lasso that allows you to create a particular selection. This can be done by clicking the canvas around and create points. In the keyboard, you can just click L.

    Eyedropper
    Eyedropper psd - phixer

    The Eyedropper tool is used to sample color in the canvas. Sampling of color designates a better foreground or backdrop color of your liking. You can just simply select the Eyedropper tool (I) and click any part of the canvas for your testing.

    Paintbrush and Pencil
    Paintbrush and Pencil psd - phixer

    It’s S in the keyboard. Paintbrush tool mimics what a real paintbrush works. And so is the Pencil tool. In editing photos using this tool, you can set assortments of brushes of different kinds. You can even paint with different shapes as well.

    Brush your History (Keyboard: Y)
    Brush your History psd - phixer

    History brush allows you to turn back the hands of clock by painting back in time. Because Photoshop can track all the moves you make, this tool lets you paint the past back into the present photo.

    Eraser Tool (E)
    eraser tool psd - phixer

    Eraser tool is just the same as to how a paintbrush works. The big difference is that Eraser tool erases while paintbrush paints.

    Type Tool (Keyboard: T)
    type tool psd - phixer

    Type tool is one of the most noticeable tools in Photoshop that is important in editing photos. Its main function is to create text inside. It is located in the Tools panel. Type tool has many settings which include Type Panels, Type Preferences, Character Panel, and Paragraph Panel. The Options Bar is where you can change every setting of your typing jobs like font family, font size, and font color.

    Shape Tool
    shape tool psd - phixer

    The Shape Tool is U in the keyboard. It lets you make rectangles, circles, lines, polygons, and even custom shapes. Shape tools are beneficial the moment there will be a need to create shape masks for your real estate photos.

    More tips here:

    http://54.201.150.30/real-estate-photographer-basic-filters/

    http://54.201.150.30/basic-color-correction-tutorial/

    http://54.201.150.30/background-enhancement-photoshop-tutorial/

    http://54.201.150.30/object-removal-using-photoshop/

    http://54.201.150.30/photo-editing-youtube-tutorial/

    http://54.201.150.30/real-estate-image-editing-tutorial-001/