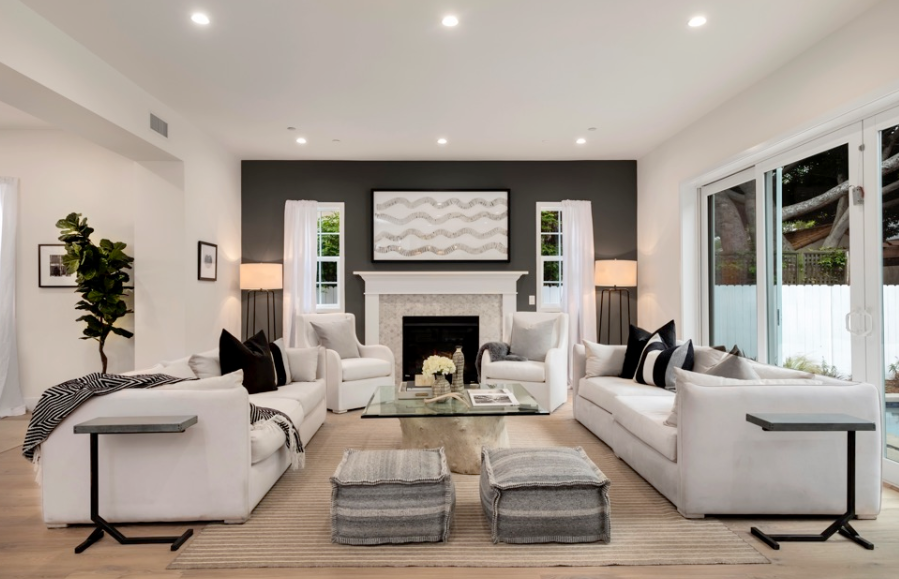
Author: Rachelle Moore

  • Basic Image Enhancement for Your Real Estate Photos

    Basic Image Enhancement for Your Real Estate Photos

    Photography has never been more important to venture real estate than it is these days. The markets are always in demand. Hence, this also creates demand to photography. For professional photographers, real estate business entails patience because there are lots of competitions in this business.

    Although real estate properties, most especially houses, go on and off the market on a daily basis. And every agent must have the perfect strategy to get the attention of every homeowner. Because of this, real estate agents resort to photography. This task is a little tricky. This is why doing photography for real estate is one best option to make selling fast.

    Being a real estate photographer entails lots of days for photo shoot not only as part of marketing purpose but also to perfecting the small details of some common mistakes. A photographer does not only consider the right time of day to create good shots. Other factors like correct lighting and good angle are also important in developing good quality real estate photos.

    [lwptoc]


    Since most buyers are already using online for their home search, uploading of stunning photos is a factor that will make your listing get noticed. There are times when photos were taken on a cloudy day and this kind of photo needs enhancement. In order to make listing photos stand out and gain that elusive attention.

    Digitization has made everything possible at the tip of the fingers. Picture editing and enhancement is one of the most common tasks to be done when it comes to improvement of pictures. Image restoration of old photos and videos ultimately needs a particular set of skill. With proper knowledge on photo editing, it can be guaranteed that profits can grow exponentially when used in a correct and professional manner.

    Photo editing is valuable to portraits for personal representation of pictures. It can be utilized for special occasions like birthdays, anniversaries, weddings and other eventful ceremonies. It is also suitable for commercial projects and businesses, like real estate, in particular. Photo editing can also help service and advertising firms for real estate companies and brokerage systems. It can increase the aesthetic beauty of properties by the enhancement and enrichment of images.

    Mastering Real Estate Image Enhancement

    Giving your clients a number of high-quality images will not only give you the edge. Captivating photos are what homebuyers are always looking for. They can simply attract buyers. This is the very reason why photo editing is an important inclusion in real estate photography. It allows you to improve colors, crop objects, upgrade lighting, change settings, adjust dimensions, and more. Below are some of the basic techniques to master real estate image enhancement.

    • Correct the color

    In shooting photos, always consider the weather conditions, interior and exterior lightings, window tints, camera model and camera settings, and many more. These factors clearly affect the color of the photo. Color correction is very essential to significantly change the color of the photos to new and invigorating ones.

    • Cropping

    Even professional photographers usually fail to shoot the best image they imagine. By means of cropping out the unnecessary parts of the image, it means improving the framing of the photo as well as changing its aspect ratio. Bear in mind though that it is not proper to include permanent fixtures to be cropped out. These may include electrical posts, piping systems, water tanks, etc.

    • Check vertical alignment

    It is also an essential element in basic image enhancement to address the vertical alignment of the property. Make it a point that the image undergoes vertical correction because this is one of the most common editing processes for real estate photos.

    • Replace the sky above

    Sky replacement is a common thing in real estate photo enhancement. When skies look dreary, it is without question that they must be replaced with clear, sunny skies. By doing this, it will completely change the outlook for the property.

    • Removal of unnecessary things

    Items like cars, bins, electrical equipment, gardening tools, and the like must be removed during the editing procedure. And in doing so, it will make the surrounding area clean. This will also pave the way for customers to see the whole property without any distractions.

  • Master Guide: How Real Estate Photo Editing Helps Sell Homes the Quickest Way

    Master Guide: How Real Estate Photo Editing Helps Sell Homes the Quickest Way

    In ensuring that the images of the property on catalogues and websites can attract potential customers, the use of real estate photo retouching tools are very important. Even if it is for a fact that real estate business mainly focuses on skills on marketing and selling, maximizing the use of the different techniques in enhancing real estate photos is another interesting strategy to increase sales.

    There are customized services that can offer high quality real estate retouching jobs in order for your business to have the edge in the market. In utilizing the assistance of these services, it does not only aim to deliver high quality services to customers. Because these photos can capture the attention of buyers, it also helps increase sales.

    Real estate retouching process are techniques using different software applications. Adobe’s Photoshop and Lightroom are two of the most common software applications used to enhance and recreate captivating photos for the business. These are two powerful applications for photo restoration, retouch, photo masking, and more.

    To recreate photos means many things. Recreating photos can be the removal of undesired objects, color enhancement, tidying up the area, balancing of light sources, just to name a few. For a real estate photographer, he will only shoot the property the best possible way and leave all the retouching works to the editors.

    Likewise, for real estate agents and brokers, edited real estate photos can attract more buyers because they will be presenting attractive property images. Buyers would like to see spacious areas. This is the reason why there was a removal of unwanted things during the editing process. In this way, it pushes up the selling process because the photos will be presented with those unwanted things eradicated.

    Statistics would reveal that high quality photos of homes sell 32 percent faster. Furthermore, homes with more photos also sell faster. Eighty-nine percent of homebuyers who used the internet are likely to be looking for photos. These photos, according to study, are the most useful and powerful feature of most of real estate websites. Many sales agents believe that a single photo can sell a thousand homes because, ultimately, photos attract buyers.

    It is always a good option for photographers and editors to make the photos attractive so that listings are always fresh. This can be a reason for them to avoid reshooting and make their business stay at the top of the game.

    How to Take Crucial Shots to Sell Homes the Quickest Way

    For a photographer, he has these innate tricks on how to make shots correctly. In reality, he has no control over what he wanted to include in his photos and what he does not want. There are things that he needed to highlight but he does not know how. This is where the tricky works of a real estate photo editor come in.

    Below are some of the techniques on how to capture shots for your listing needs that will help sell homes the quickest way.

    1. Make the curb appealing

    This is the foremost consideration to gain an excellent impression. One of the most common ways to do this is by simply removing the vehicles in the driveway. The street leading to the house must always be clear of anything including trash bins and other unnecessary things that will cause buyers’ withdrawal from the transaction.

    2. Create a room with a view

    To ensure buyer’s interests, focus the attention in making the rooms with views. Make sure that the windows can capture the views outside. In addition to this, always create spaces of the exterior landscapes.

    3. Shoot the biggest bathroom

    This is the tone-setter of any house, a great hiding place, and perhaps the most important room of any house but is sometimes, taken for granted. When you want to shoot the biggest bathroom, take the shot right from the doorway. One way to make the bathroom big is using lots of white – from tiles to paint to any other elements inside your bathroom.

    4. Showcase the master bedroom

    When taking images of the master bedroom, pull up the blinds. For curtains, make sure that it is styled in a pleated way to show views from the outside. Also, ensure that covers are free from creases and folds, and pillows are in their proper places.

    5. Make the ambience of the living and dining rooms perfect

    Before taking shots at the dining area, ensure that the chairs and tables are spaced evenly to create a better atmosphere. The living room is another area that is a separate zone from the dining area. Accent type of lighting is a good alternative when shooting a living room. As for the furniture, it is important to straighten out sofas and must face away from the dining area.

    6. Kitchen

    Just like the dining area, the kitchen needs to be free from any unsightly objects. Ensure that chairs and stools are arranged properly.

    7. Backyard and entertainment room

    When shooting the pool or the patio, always position at the rear-view to obtain two different angles in a single frame. This technique is a common practice among real estate photographers.

  • Everything about a Real Estate Photo Editor that You Need to Know

    Everything about a Real Estate Photo Editor that You Need to Know

    It takes a lot of time, effort, and perseverance to become an excellent real estate photo editor. He has to equip himself enough knowledge of some great photo editing applications. He should also work with various editing services because they have the capacity to provide him with different benefits and advantages that he may use for this type of job.

    Lack of time in editing real estate photos is perhaps the biggest problem that any photographer faces. Every potential buyer wanted high-quality photos of the property. For this reason, editing the photo is the main concern. Every photo should undergo editing process like color correction, adjusting shadows and perfecting the tones.
    Speeding up the process of editing is a major problem as far as producing professional photos for real estate is concerned. Every photographer is obliged to face his computer and always sits at night to finalize the photos through various editing processes. Being equipped with the best editing software is always an advantage.

    These days, it is common that photo-editing services are outsourced. There are unlimited number of people who can work on this kind of job who can deliver real estate editing made in a professional manner. They have the skills in the different applications like presets, filters, HDR including color enhancement using the different real estate editing software.

    Outsourcing the editing works of your photos will benefit your business. In this way, you can have more time shooting other real estate properties. You can also enjoy spending time with your families and friends, enjoying your time doing your hobbies during leisure time, and many more.

    The Relationship of a Photographer and Real Estate Photo Editor Explained

    Just like any relationship, clear line of communication is vital in this business. Before working with any real estate photo editor, it is important to finalize an agreement so that the flow of the work will commence smoothly. It ensures that no complaints will emerge just because of failure to fulfill the contract. Assure that the client has agreed to certain terms. One of them is the amount he will receive during the duration of the project so that there will be no confusion once the project is finished.

    real estate photo editor

    To make the relationship flow smoothly, you need to specify instructions clearly. If you intend to make the turnaround time faster and enjoy the results afterwards, you must also arm yourself with the knowledge about some of the technicalities regarding editing languages and terminology. Understanding the technicalities of the business so that you can communicate very effectively with your clients.

    In the business like real estate photo editing, it is the photographer’s responsibility to analyze and understand his chosen editor’s abilities, strengths, and weaknesses. In this way, you can set expectations as to how your editor can work on the task on hand. In a very similar way, it is also the responsibility of the editing service company to know in-depth the things that you wanted in order to build a mutual understanding between you and your client.

    Once an agreement and understanding is established, things that both of them must focus on. Since editing works take time to develop, patience is an important virtue that both parties must possess. Always consider that the first few edits are not acceptable right away. As a buyer of their services, you have to realize that editing of photos needs time to become perfect.

    Format Used by Real Estate Photographers

    It would be beneficial for both parties to gain the trust of each other. On the part of the editor, it is his responsibility to put together everything he knows in order to satisfy the needs of his clients. Apart from his knowledge of the editing software, he is going to use, both parties should agree on the type of output format or the correct file type he will be working on.

    Listed below are some of the more common file types that an editor must be familiar.

    1. JPEG

    Short for Joint Photographic Experts Group this is the most common file type we have seen. It is versatile because it is user-friendly. It is great for all kinds of use. You need to observe the resolution and file size for you to achieve the highest editing looks possible.

    2. PNG

    This type of file can be workable to any kind of works – printing, Word docs, and the Internet. One of the advantages of PNG is that you can save more colors on a transparent background, thus creating sharper image on the web. It uses level of transparency that makes the format intact even using larger files.

    3. GIF

    Graphics Interchange Format is popular on social media use. Specifically for Facebook ads, it is appropriate when you are using graphics, diagrams, logos, and cartoons that has restricted color range.

    4. PDF

    This type of file was developed by Adobe and is popular among e-book authors. For real estate photo editors, they can use this format to save the final design and view it without using any editing software. Portable Document Format is popular for sharing documents.

  • Under 10-Minute Photo Editing YouTube Tutorial

    Under 10-Minute Photo Editing YouTube Tutorial

    The problem facing a real estate photographer is always the absence of time. Producing high-quality photos is the ultimate goal of every photographer. When quality is non-existent, color correction, and adjusting tones and shadows are done in clearly and full of expression. Photo-editors may use patch tools to clean up any imperfections, their burn and dodge tool to create beautiful eyes, hue and saturation for whitening several areas of the photo, and many more. Color correcting is also important to differentiate a dull photo from a photo that sells.

    Because Adobe has an unrivaled reputation in terms of photo editing, its products are undoubtedly the most preferred options among professional photograph editors. Adobe Photoshop makes synchronization of photos between devices possible without transferring the photos manually from one device to another. Being a user-friendly software, Adobe offers the Lightroom CC and Photoshop to edit an create photo effects in an almost similar manner.

    Photo editing is essential in the business. It is very hard to get the perfect shot of a property, an event, or even a simple occasion. These days, photo retouching is an integral part of digital photography. Retouching services is very essential to bring out the natural beauty of the photo.

    The following are guidelines and tips from different YouTube links.

    1. Milky Way Photography – Make your Photos Look Awesome in 5 Minutes

    This tutorial is effective in turning dark and average into a colorful picture using the classic Photoshop CC. It teaches how to bring out the true colors of the stars by bringing down the temperature as well as the highlights, and bringing up the contrast and white.

    YouTuber: YuriFineart

    2. Master the Pen Tool in 8 Minutes (Photoshop)

    This video will teach viewers how to use the pen tool and to help you cut out anything in Photoshop. The pen tool is said to be the most accurate way to create cutouts and paths are always editable. You can create simple points and curves from beginning to end and you can cover long distances using long curves.

    YouTuber: PHLEARN

    3. Learn the Tone Curve in 5 Minutes: Lightroom Tutorial

    This video will teach you how to use the Tone Curve tool. It will show how functional and important the S-Curve is. Starting with the shadow, as the video suggests, is one of the most essential thing when starting editing using Lightroom.

    YouTuber: Nu Two Times

    4. How to Own Tone Curves to Edit and Color Grade Photos Like a Pro

    This video will show you how to master editing photos using curves in Photoshop and Lightroom to move beyond simple contrast adjustments and create your own basic photography editing flair without using presets. It requires a knowledge of using RGB Curves.

    YouTuber: Chelsea Nicole Photography

    5. Cityscape Night Photography – From Raw File to Final Photo in 5 Minutes Lightroom Tutorial

    This video gives you an idea on how to create cool and astounding city picture by bringing out the white while manipulating the shadow. One trick that will best create a cool view of skyscrapers is to lower the highlight control button. Depending on how you will look at the photos, it is still appropriate to find the best adjustment tool possible for the Cityscape look more attractive.

    YouTuber: YuriFineart

    6. I Wish I Knew this When I started Editing In Lightroom

    This video is all about a series of tips and tricks using Lightroom. It teaches the viewer how to shoot panorama in Landscape Mode, how to use Perspective and Boundary Wrap Option, how to use White Balance, and many more. On the equipment that you will be using, it also talks about how to calibrate your camera to produce better colors.

    YouTuber: Serge Ramelli Photography

    7. How to Use the HSL/Color Panel in Lightroom

    This video shows how to break down the Color Panel. It explains the three most important elements in the Color Panel, which is the HSL or the Color – Saturation – Luminance. An in-depth discussion about how the three mentioned elements create an impact to photos. It also mentions that HSL and Color Panel are both exact same thing. What differs is how they are used.

    YouTuber: Lucy Martin

    8. How to Use Transform Tool in Lightroom

    This video tutorial show how to use the Transform Tool to shift the perspectives of the photos you are going to edit using Lightroom to get crisp and clean lines. Because lines are the main characters of Transform Tool, this is good for architects and draftsman, who are people specializing on hard lines to design buildings and skyscrapers.T he tutorial shows how to use the different clickable options and assortment of sliders under the Transform Tool.

    YouTuber: Lucy Martin

  • Real Estate Photo Editors: Making your Photos Perfect

    Real Estate Photo Editors: Making your Photos Perfect

    It is familiar to everyone that a picture can paint a thousand words. In this way, it is imperative to create great photos to make the property look attractive. In the advancement of technology, everything can be made amazing and spectacular in the snap of a finger. This means that we technology can literally make unlimited and astounding photos that are enticing to buyers.

    Potential buyers wanted a vibrant photograph to refer to whenever they want to own a new property. They wanted a clear, crisp and cool images by referring to high-quality photos of the property they are interested in buying. Real estate photographs and videos are vital parts in the marketing and sales viewpoint.

    For these photos to be processed to its best quality, they needed to be improved. Enhancement of photos requires the services of the different photo-editing applications, tools, and techniques because this job is very critical in a real estate photography business. Furthermore, in the advent of the social media like Instagram, Tumblr and Flickr, photos and videos alike are greatly shared for business promotion.

    Photo-editing jobs today are commonly outsourced. There are many advantages of outsourcing someone to professionally edit and process a real estate photo. There are perhaps thousands of real estate photo editing companies that we can see online and they have the best equipment and the most skilled people to do the job.

    Reasons behind the Need of Professional Real Estate Photo Editors

    The creation of high-quality, saleable, stunning, and professionally-made photos is the primary goal for a real estate photographer. Below are the reasons why photo-editing is in demand these days.

    1. It saves you time

    real-estate photo-editing company
    photo via Capterra Blog

    Hiring a professional real-estate photo-editing company saves you the much-needed time for your other works. Exhausting most of your time editing photos to make them look good is not that advisable for a photographer because there are experts in this field that have a faster turnaround time to edit photos.

    Even if your photos would show that they only needed basic enhancement, tasks such as window masking, sky replacement, or object cropping not only double but triple your time doing these special tasks.

    2. Process the way you want

    One of the better reasons why there is always a need for professional photo editors is that they can enhance your photos the way you want. Photo editors are trained to specifically cater the needs of their clients. They have the capability to easily edit the photos and deliver them exactly the way you want. All they needed is thorough explanation and giving them the checklist of the parts of the photos you want to be edited.

    3. Photo editors are experts in their own field

    Since photo editors are experts in the use of photo-editing software, they know all the tricks and techniques behind making your photo look spectacular. These people are skilled in a way that they know the ins and out of the different editing software such as Photoshop and Adobe Lightroom. They are familiar of all the features and functionalities of these tools. The know-how of these photo editors will be their advantage to create an improved photo and deliver it in the most efficient way.

    4. Creation of profit

    With the help of the skilled and professional photo editors, your business can create more sales. Instead of spending much time in trying to improve your photos by your own, you can exert much of your time and effort in actual shooting real estate photos. The benefits of hiring an expert can expand your time closing out better deals and transactions. As photographer, you can also work on other business matters.

    5. High-quality image

    Because of the experience of professional and skilled photo editors, they can produce very high quality images because of the latest technology they possess. These people work all day long improving their skills in using different editing tools. The only thing their minds are set into is how to produce tons of quality images the best and quickest way possible.

    6. Gets you ahead of the competition

    Outsourcing your photo-editing experts from around the world will let you choose the best and highly-skilled person to do the job. In this way, you can have the edge that will help you get ahead of the over-saturated real estate photography business. While others are spending much in producing processed photos, it will be your advantage when you outsource editing jobs at a reasonable price. In this way, upon selecting the right person who will work for you for over a long period and minimize time looking for someone to entrust your photo-editing jobs, the distinct advantage of getting ahead of your competitors is enjoyed.

    7. Photography Website

    Digitization is the culprit why a website for real estate photography is important. This is not part of the gear you are bringing to the site. It is also not the equipment you are using during photo shoot but it is self-explanatory why one needs to have his own website. Having the right tools and equipment is essential it is also viable to have an online space in the Internet.

    Having an attractive website is what entices clients to visit it. Make it a point that the template you are using for your website will offer a correct and complete package for every individual visiting your website.

  • Edit your HDR Real Estate Photography the Quickest Way

    Edit your HDR Real Estate Photography the Quickest Way

    High Dynamic Range Photography or commonly called HDR in the world of photography is a procedure in which a photographer can replicate or even replace what a standard photography can offer. This technique makes use of illumination as the main concept of photography which creates different exposures. These exposures are blended together to develop a better shot than what the original photo shows.

    HDR is also used in real estate photography. There are moments when the photos taken are over-exposed which means some parts are brightly taken while there are dark parts somewhere. Many photographers make proper use of sunlight to avoid using lighting equipment. But in reality, sunlight exposure has its limitations. Time is of great importance when using sunlight as exposure source.

    In photography, sunlight is usually good when you are shooting outdoors. It would be very hard taking photos indoors. A good HDR photography must always be accompanied by different equipment common to photographers. He needs to have a remote trigger to minimize movement, a tripod to stabilize the shots taken, a flash for indoor shoots and a trusted software like Photoshop CC for easier real estate photo editing.

    Simple HDR Editing Guide

    According to this post, there are countless techniques that photographers can utilize in order to make editing touches. This is for the purpose of making the photos look better. It is always time-consuming to edit real estate photography and this huge amount of time you devote in editing is the most important time in the post-processing of the photos.

    According to appolicious, High Dynamic Range is the difference between the brightest and the darkest parts of photo. HDR Exposures Calculator on the other hand is an application where it automatically does the calculations to optimize the settings of the camera. This is a perfect tool to simplify the HDR feature of photography.

    Below are the HDR steps in editing real estate photos.

    • Turn off the flash of the camera, set to Aperture priority mode and switch the camera to metering mode. Metering is used to calculate the brightness of the real estate interiors and exteriors. This is responsible in maximizing the exposure of the shot taken by shutter speed adjustment.

    • By positioning the focal point over the brightest part of the scene to avoid sunlight reflection. This is the time that you can open the HDR Exposure Calculator and make sure of the shutter speeds is properly entered. By automating the HDR Exposure Calculator, you can optimize HDR automatically. Since photography is both technical and a confusing context of artistry, HDR is essential to maximize the potential of the technical aspect of editing.

    • After switching the camera to Manual mode and setting the Shutter Speed for the bracketed set, you have the option to use the AEB. HDR Interior Tutorial, you can see the Exposure Bracketing Setup page. You can even consult the manual of the equipment you are using.

    • Choose the Continuous Shooting and press the shutter button to get the first few sets of the bracketed photos. Make use of the bracketed sets by the HDR Exposure Calculator.

    • Make it a point to merge these photos once that the darkest part of the interior and brightest parts are determined using Photomatix Pro. You have the choice to open this app and click Browse and Load to choose the photos you wanted to merge. Then finally choose Merge Options.

    • Align the source image and Reduce noise on the Merge to HDR Options dialog. You can find the Preset thumbnails panel and select Architecture on top of the thumbnails. Select the preset thumbnails on the Preview Image. With the sliders on the left, you can click Next: Finish if you are pleased with the effects applied on the merged photos.

  • Real Estate Photoshop Retouching Guide for Newbies

    Real Estate Photoshop Retouching Guide for Newbies

    Being a real estate photographer entails lots of days of photo shoot not only as part of marketing purpose but also to perfecting the small details of some common mistakes. A photographer does not only consider the right time of day to create good shots. Other factors like right lighting and good angle are also important in developing good quality real estate photos.

    According to this post, the work of a photographer however is just a speck of the many tasks he does beyond the shoot. There are editing and retouching works that will take a lot of time to enhance real estate photography. These skills are essential to create magnificent photos for potential clients to become interested in the property you are offering.

    Photoshop Retouching Guides for Neophytes

    • Hue and Saturation

    hue and saturation

    Photoshop has many different options that you can play around with. Hue and Saturation is a great tool to correct colors. Adjusting greens is a common color error in real estate photography. You need to capture the dynamics of the exteriors that can be challenging to newbies.

    What you will do is choose Adjustment after selecting Image. Select Yellow afterwards from the drop down menu to adjust the Hue to +15 and Saturation to -5. You can also adjust the hue, saturation and lightness by selecting Green from the drop-down menu.

    • Adjust the Brightness

    brightness adjustment lightroom

    Getting balanced light is important when shooting exteriors especially when shooting under a direct sunlight. To balance light, edit the photo in Photoshop is the best solution so far. Opening the Image menu, choose Adjustments then click Levels. By dragging the center bar to the right tones down the overexposed areas.

    • Darken the Bright Grass Colors

    Garden is always a part of the exteriors of real estate photography. Seeing grass a bit bright definitely needs retouching. Going to the Toolbar, you need to click the Burn tool. Select the right size of the brush and drag over the brush to the grass afterwards to darken the area.

    • Adjust Curves

    According to InMan, Curves is a powerful Photoshop tool that is used for a color correction. Just open Image and Adjustments followed by Curves. After seeing the dialog window, click Auto. To brighten the curves, pull up the diagonal line at the center. To darken, pull it down otherwise. Click OK afterwards. You may also opt to use the eyedropper to choose for the black and white tones of the photo. Any slight difference will be corrected.

    • Straighten Property

    Straightening the home or property

    A straight line is always important in making the property look great. This happens when the camera is not angled properly. That is why diagonal and slant lines are visible. From http://54.201.150.30/real-estate-photography-using-photoshop/,you need to click on the Rectangular Marquee from the Toolbar and select the entire image. Click the Edit and Transform. From there, click the Skew from the drop-down menu.

    Drag the corner of the picture to the left if the property is leaning to the right. Make it a point that you need not to pull too far because this might be very unrealistic. Click the Check button after the edges are aligned and are all straight.

    • Lighting up the Corner

    interior editing using lightroom 3

    Lighting up the corners of the interiors of any property is always a challenge. It is always needed to even out the lighting of the interior because there are always situations when part of the photo is darker that the other part.

    To balance and even out lighting, go to Dodge tool. Select the right size of the brush to work with. To add brightness to the darker part, drag the Dodge tool over the darker area. You then need to go to Filter menu and select Sharpen and click on Unsharpen Mask. To get clearer and quality details, increase the amount then finally click OK.

  • Blending Exposures of Interior Photos using Photoshop

    Blending Exposures of Interior Photos using Photoshop

    The techniques in blending exposures using Photoshop’s Lightroom seem endless. These techniques will actually allow you to blend interior photos perfectly. They are also great in editing photos seen in any exposure blend.

    With the proper use of Photoshop CC of Adobe, you can easily blend interior designs under the city lights. The primary concern in this modification task is to develop the skills in the familiarization of Adobe Photoshop with the use of Raya Pro.

    Tips on How to Blend Exposures of Interior Photos

    This article is more about preparing for exposure blending than the actual exposure blending itself.


    video credit to Jimmy McIntyre
    1. Creating new photos from dark and overexposed highlights

    One basic technique when the photo is a little bit dark and some areas are partly exposed. You can immediately change the character of the picture with some few simple steps using Photoshop. When comparing the exposures of three identical photos with different exposure blends.

    They can be dark picture which covers the highlights, a normal picture with basic exposure, and a picture with brighter exposure that needs to bring back some of the shadows. One of the purposes of this tutorial article is to push the knowledge of any individual about exposure blending to the highest level.

    To start the editing process, select all the images and hold down SHIFT. Notice that the Open Images at the lower right of the screen changes to Open Objects. You need to press Open Objects and use the Stack button in Raya Pro. With the use of the Stack button, all the images will appear over the spaces below the panel.

    You can make adjustments and editing in your normal photo by retrieving some of the highlights included in your dark and bright photos. Especially for the photo to blend with the normal, it would be very hard at some point to do it.The main objective of this exposure blend is to avoid making the contrast look flat. To fix this problem, go to How to use Precision Masks and click AUTO BLEND DARK.

    There are instances wherein we need to have a very contrasting photo and the only way to do this is by clicking the value of your desire. The greater the value of the AUTO BLEND DARK, the darker the picture becomes. The resulting photo will highlight the parts that are overexposed.

    To compare the previous photo with the new one, press Select under Precision Masks and bring down the Capacity back. You can press the Thumbnail to make adjustment to the Exposure, Highlights and Contrast.

    After the correct adjustment has been made, just press OK and you will see the natural blend of the picture. You will notice that the critical parts in the image before exposure blend are very well edited after modifications were done. Make it sure that you will zoom in to check the picture before and after modification.

    2. Check the blend of contrast

    By clicking the Thumbnail that you want to edit, you need to zoom in and check every small detail of the picture. Check the contrast masks if they match your taste. Adjust it to your liking by pressing either the exposure or the contrasting buttons.

    There is also a better and quicker way to do contrasting masks without Raya Pro. You only need to select the thumbnail, press Image, Apply Image and Press OK afterwards.You need to do this few times to create a much contrasting masks.

    Or if you want to, you can make the dark image visible once again. Choose the actual mask itself by pressing the Command and L in the micro-control and you just can create a more contrasting mask while the Level control pops out.

    This is just a pretty easy task to do because you can actually invert the situation by pressing Image and selecting Apply image. This time around, you will be selecting the Invert, and press OK.This is done for the photos with brighter exposure. Once this is done, you will notice that you have created an inverted mask.If you are not happy and contented with the result, you need not to panic. There is the Adjustment button to press to and all you have to do is adjust the levels of exposure and highlights.

    For more tutorials, you may check this out.


    Good reads:

  • 13 Mysteries of Real Estate Photography that Few Only Know

    13 Mysteries of Real Estate Photography that Few Only Know

    Being a complete beginner in real estate photography is like a toddler attending his very first day in school. One of the requirements in this business is by using quality photos and this happens to be the big difference and great advantage. Many would say that they have read and heard about the tried and tested formulas in real estate photography but the real recommendation here is how to apply these formulas.

    Quality photos really matter in real estate.It helps people jumpstart their imagination that becomes a trigger to their emotions especially when they are in search of another place to stay. Majority of those home seekers will look for photos first and read property specifications before deciding to have an ocular trip. This is where quality photos become so important.

    Having the perfect equipment is the initial phase in this business. And everything boils down to four objects – the camera, lens, tripod, and flash. Every photographer does not need to spend much buying these things. Real estate photography is less demanding. Just use wide lenses, a camera with good ISO and sensitivity performance, a stable tripod and off-camera flash and wireless triggers.

    Real Estate Photography Mysteries

    There are so many mysteries with regard to real estate photography. Instead of hiring a professional photographer, you can do it on your own. This venture is not as challenging as rocket science. But the demand and money is there. It only takes effort to get where want to go. Spending time mastering photography skills is the only thing you need.

    Instead of hiring a skilled professional, why not consider the thirteen (13) mysteries of real estate photography listed below?

    1. Photo Editing from Day to Dusk Lighting

    There are countless ways to edit photos from day to dusk lighting. Dusk is the time of the day when photographers find it hard to get a perfect image of the property.

    2. Wide Angle Lens is a Good Investment

    The use of wide angle lens is important to get the best description of the space. It allows wider shots and this is what potential buyers are usually looking for.

    photo via AliExpress.com

    3. Maximize the Use of Tripod

    To get sharper image when shooting using natural light, the use of the tripod is all what you need. Most pictures taken with the use of tripod become appealing because it is better to use them rather than taking chances on steady hands. Tripods will let you shoot at slower shutter speeds.

    shooting using natural light
    Quote “Erin Spain, Home and DIY Blogger” http://ErinSpain.com

    4. Use Landscape Mode

    Although real estate photography is about choices and creativity, it is always better to decide all the necessities during a shoot – lenses to bring, angles to make, the depth using correct aperture and more. Since almost all real estates are taken as horizontal subjects, horizontal viewing is more preferred than the portrait mode.

    5. Prepare 3D Presentation

    Another great visual choice to present to potential buyers is 3D model. Most clients wanted to see a virtual tour of the property, not only on the property itself but they also wanted to look what surrounds the property. This should be a part of the many services that you offer them.

    6. Making Persuasive Videos

    Presenting traditional photos might be a brilliant way of presenting the rooms and other parts of the house. But with the advancement in technology, people wanted to include compelling videos as part of the service you offer.

    7. Make Emphasis of the Property’s Best Features

    One good trick for real estate photography is making emphasis of each location’s selling points. You can take pictures of the best features of every corner of a room, a kitchen and even the lawn, and show how spacious the place is.

    8. Prepare the Room for a Shooting Schedule

    This is one of the mysteries on hoe to sell properties quick. It is advisable to prepare all the rooms included for a photo shoot. It is always good to see clean areas as a preparation for your photo. Kitchen’s counter must be cleared of anything and free from dirt. Bathrooms, on the other hand, should have its toiletries hidden, being backed up by clean mirrors and any glass surfaces.

    9. Proper Timing at Dusk

    Timing is everything when it comes to real estate photography. It is either you, as photographer, create perfect timing, or anticipate it. When shooting the exteriors of a property, the so-called magic hour at dusk can yield dramatic results.

    10. Straighten the Distorted

    If you want to learn the real essence of real estate photography, do not end the photo at the shot. Most of the time, the human eye is very tricky. Make it sure that the real estate photos are well reviewed because there are architectural features, called the keystone effect, that occur unintentionally. Sometimes there are distorted lines that are being added to the photo, making tall lines appear bowed. All you need to do is consult Photoshop.

    11. Always Begin with the Preset Buttons

    Starting with preset editing buttons will make your photos professionally made. This is the key in producing quality real estate photos. When Photoshop’s Lightroom is properly used, it is noted that your real estate photos are crafted designs and styles that will give you the professional edge.

    12. Utilize the Capability of Modern Technology

    Aside from editing pictures using Photoshop, increase you real estate photography a notch higher. Drones are used to show the proper aerial view of the property. Moreover, it aesthetically shows the correct perspective and range of space that traditional photos cannot take.Hence, with the use of modern technology like drones, it creates a positive impact to potential buyers.

    13. Create Space by moving Furniture

    As a preparation for a photo shoot, shooting the interiors of the property is not as easy as everyone thinks. Aside from using the natural light and shooting in a RAW mode, you can shoot directly straight into the room. You can capture the real beauty of the room when furniture is moved from one place to another to create the space you desire. After which, you can now manipulate the aperture and the depth of field.