Author: Rachelle Moore

  • A Straightforward Guide to Effectively Remove Shadows From Photos

    A Straightforward Guide to Effectively Remove Shadows From Photos

    Regardless of how much lighting you have during your photoshoot, your real estate photos will unavoidably have distracting dark areas depending on the angle and time of the day. Your exterior images will likely have shadows that can cover or distort some of the home’s best exterior features.

    You can avail of professional editing services from Phixer, or you can remove shadows from pictures using Photoshop. By spending a little time practicing the tips listed below, you can eventually produce realistic and high-quality real estate photos to wow clients!

    [lwptoc]

    Method 1: Removing Shadows Using the Fill Tool Content-Aware

    If you’re wondering how to remove shadows from pictures in Photoshop, using the content-aware fill method, such as the Patch tool, is one. This method provides realistic results when deleting shadows with concise lines and shadows on a definite background.

    Step 1: Import the image or file you want to edit on Photoshop. Once done, right-click on the background layer and choose the duplicate layer option. It is essential for easily removing shadows from the photo without damaging the quality of the original image.

    Step 2: Choose the Patch Tool option available on the toolbar. Don’t forget to select the “Content-Aware” option in the dropdown navigation for Patch Fill to make it easier to create fresh pixels, which also ensures that your transition in applying edits to the photos goes smoothly.

    Step 3: Select the part you want to displace from the photo and move the selection to a section or area with similar features. As you’re pulling, you will immediately notice that the particular area will start to change. Once you’re happy with the size you’ve chosen, let go and let Photoshop smoothen your edits.

    If you’re unsatisfied or unhappy with the changes made in the photo, you can always change the Color and Structure option, which can be accessed from the Patch toolbar. By using Color, you can control the intensity of the color blending in your photos. By using Structure, you can control how similarly Photoshop should coordinate the outlines or shapes.

    Don’t forget to review your work after using the Patch tool. You can do this by using the Clone Stamp or Healing Brush to remove repeating patterns on the photo. Aside from learning how to remove shadows from pictures in Photoshop, these tools will help you produce realistic and high-quality images without shadows.

    Method 2: Soften Sharp Shadows with Layers

    There are instances when the shadows you captured on the photo work well with the subject but are just too prominent. In situations like these, you can reduce harsh shadows using layers.

    Step 1: Mask the dark area with the Object Selection Tool and then separate the shadow.

    Step 2: Copy the portion to a brand new layer by choosing Edit > Copy or pressing Ctrl + C on your keyboard. After, paste the shadow by selecting the layer, New, and then Layer via Copy.

    Step 3: Lightening the shadows is one of the easiest and fastest ways to reduce harsh shadows on your photos. However, when the shadows are cooler than the surrounding light, it might be best to warm up the temperature. This is a great way to ensure that the shadow blends in with the surrounding area, making your photos look more natural.

    Perform the following steps:

    • Adjust the Brightness and Color Balance on Photoshop.
    • Move the shadow slider to warm up the temperature.
    • Try different settings to assess which one works best for your photo.
    • Once you’re happy with the edits, click OK for the adjustments to blend to your image.

    When shadows in your photos are too harsh and using Brightness and Color Balance adjustments don’t create any drastic changes, try adjusting the Dehaze and Clarity. Dehaze can remove atmospheric haze from the photo while Clarity improves the saturation.

    Method 3: Making Adjustments to The Shadows on a Subject’s Face

    If you want to remove shadows from pictures, particularly harsh shadows on the subject’s face, this method is for you. Seeing harsh shadows on faces is common in travel and street photography as you can’t always control the amount of light and where the light falls.

    You need to use two different tools when removing shadows on faces. When reducing harsh shadows from the front, the Dodge Tool is ideal. If you want to remove harsh shadows from the subject’s face altogether, you need to use the Clone Tool.

    Removing Harsh Shadows Using The Clone Tool

    Step 1: Open the photo on Photoshop, click on the background layer, and then choose the Duplicate Layer.

    Step 2: Select the Clone Stamp available from the left toolbar and choose a medium-sized brush. This brush has soft edges, allowing you to produce realistic photos. If the brush size isn’t enough, you can constantly adjust the size using your bracket keys.

    Step 3: Choose a non-shaded area of the subject’s face and press the Alt button. This action confirms the source pixels. Your cursor will automatically change into crosshairs.

    Step 4: Zoom in and paint over the shade to remove shadows from the photo. Depending on the size and location of the darkness, you might need to repeat the third and fourth steps several times.

    To generate the best results from your photos, use various clone sources to cover the shadow. If it doesn’t look natural, you can always take pixels from another section of the photo.

    Reducing Harsh Shadows Using Dodge Tool

    Step 1: Open the photo on Photoshop, click on the background layer, and then select Duplicate Layer.

    Step 2: Select the Dodge Tool found available from the left toolbar. Once the Dodge menu pops, select Shadow under Range and then pick a number between 10 and 50. It’s best to put a small number first and then increase the number as you go along.

    Step 3: Zoom in and brush over the shadow you want to remove. If you don’t see any significant changes, increase the Opacity or adjust the Range.

    If you commit a mistake, say painted over on the subject’s hair, use the Burn Tool. This will darken the area again.

    Final Thoughts

    Who says you need years of experience or plenty of tools to remove unwanted or unappealing shadows from photos? The tips presented in this article will help you produce the best real estate photos as if they’re taken by pros who have years of experience in the industry!

  • How to Create Green Lawn in Photoshop for Attractive Real Estate Photo Editing

    How to Create Green Lawn in Photoshop for Attractive Real Estate Photo Editing

    Human beings are highly visual creatures, which is why imagery is crucial, especially in digital platforms like ecommerce or real estate listings. How your home looks in photos can create an impression – and this impression can significantly influence a buyer’s final decision.

    A well-maintained property won’t sell if it’s not translated well in the photos. If you want to impress homebuyers with your real estate photos, avail of real estate grass change services from pros, like Phixer, or master how to create a green lawn using Photoshop. This article will help you with the latter.

    [lwptoc]

    Method 1: Use Hue And Saturation Parameters

    Everything in your real estate photos should be perfect – and that includes the details present in your real estate exterior photos. Yellow- or brown-colored grasses will make potential homebuyers think that the property isn’t maintained and will likely look for other options.

    If your real estate photos show yellow- or brown-colored grasses, lawn replacement editing using hue and saturation parameters in Photoshop can help.

    Step 1: After opening an image in Photoshop, create a new layer.

    Step 2: Select the “Adjustment” panel located in the right corner of the editor.

    Step 3: Click the “Hue/Saturation” icon. To replace grass in Photoshop using this method, you need to adjust the tone, intensity, and brightness of colors. Generally, this section has three parameters that you need to change.

    Step 4: Choose the yellow color and adjust the settings accordingly. This setting will depend on how light or dark the yellow is in your photos.

    Step 5: Merge all the layers, and don’t forget to save your work

    Pro tip: When it comes to grass replacement editing, you can’t miss a single detail. The lawn on your photos should look even to increase your chances of finding a homebuyer and earning profits fast.

    Method 2: Turn Yellow Grass Into Green Using Brushes

    To make your real estate photos look like real estate grass change services have edited them, you can also use brushes on Photoshop. This method is straightforward and doesn’t require years of experience in using Photoshop.

    Step 1: Upload the photo in Photoshop.

    Step 2: Create a new layer and choose “Soft Light” as your blending mode.

    Step 3: Set your desired green tone. This setting depends on the overall lighting of the photo and the existing color of the grass.

    Step 4: Select the brush tool located in the standard toolbar.

    Step 5: Draw all over the area where you want to fix using the brush. This action will apply new color (in this case, color green) without affecting the grass’s original texture and brightness.

    Step 6: If you accidentally drew over other areas, choose the “eraser” tool found in the second group of icons in the toolbox. Selecting this option will restore the damaged parts.

    Step 7: On the layers panel, open “Levels” by pressing the right mouse button or using the Ctrl+L combination. Move the right control point to the left to make the grass layer brighter.

    Step 8: Adjust the “Opacity” of the grass to achieve a more realistic effect. Ideally, the opacity of the grass should be around 60% or 70%.

    If the grass still looks bleak or unrealistic after adjusting the opacity, consider using special brushes that allow you to fill in empty spaces, imitate grass bunches, or make the lawn denser.

    Step 9: Once you’re happy with how your grass looks, merge all the layers and save your work.

    Method 3: Make Grass Greener Using Camera Raw Filter

    If this is your first time creating a green lawn in Photoshop, this method is for you. Unlike the previous two scenarios presented, you’ll only need to make a few mouse clicks to replace grass in Photoshop using this method.

    Step 1: Upload your RAW photo in Photoshop.

    Step 2: Click “Filter” and then “Raw Camera Filter.”

    Step 3: Click “Channel Mixer” and adjust the yellow and green colors in the three tabs. Every photo is unique, so make sure that you change these colors carefully.

    Practice Makes Perfect

    As you can see, lawn replacement editing using Photoshop isn’t as difficult as you thought it would be. By spending some time to practice, it won’t be long before you can master grass replacement editing and produce the best photos to impress homebuyers!

  • 10 Best Photoshop Plugins For Real Estate Photographers in 2022

    10 Best Photoshop Plugins For Real Estate Photographers in 2022

    Real estate photographers should prioritize post-production on property images to generate high-quality photos that attract homebuyers. There are many free real estate photo editing software, and their built-in features can create breathtaking real estate photos with the help of Photoshop plugins.

    You may need to avail yourself of high-quality real estate photo editing services, such as Phixer, or learn the ropes in using editing software, like Adobe Photoshop and Lightroom.

    [lwptoc]


    TL;DR: Here is a list of the best Adobe Photoshop plugins for real estate photographers to significantly improve the image output:

    1. PixelSquid

    PixelSquid enables you to add 3D objects to your real estate photos if you want to try your hand at virtual staging. It’s one of the best Photoshop plugins for photographers for free download today because it allows you to access a library of 3D objects and overlay them on your design projects.

    You can easily manipulate 3D objects to find the right angle and then download them in transparent background. PixelSquid has paid features; you can still access its 3D library by downloading the plugin and making an account.

    2. Tych Panel 2

    As an open-source Photoshop extension, Tych Panel 2 allows you to automatically diptych and triptych real estate photos. With this plugin, you can divide any image you’ve edited in Photoshop into two or three panels and create different layouts of columns and rows.

    Tych Panel 2 comes with an easy-to-use interface, so you don’t have to spend much time learning how each of its tools works.

    3. Texture Anarchy

    Are you looking for a free real estate photo editing software that allows you to create borders and textures on your images? Or want to access a wide range of present borders and textures? The Texture Anarchy might be the plugin you need.

    Texture Anarchy provides tools to help you make create and edit borders and textures. These tools include different color gradients, color wells, fractal noise, layers, and lighting. This plugin also offers blend modes so you can easily combine different colors and patterns.

    4. Pathfinder

    Pathfinder for Photoshop allows you to merge different shapes, making it one of the best free Photoshop plugins for real estate photographers. With this plugin, you can easily click on two figures on Photoshop and merge them to create a new form. Pathfinder is available on Adobe’s creative cloud app store that you can access on the Pathfinder Panel.

    5. Composer

    Composer is another Photoshop plugin that works by updating multiple layer comps with just one click. With this plugin, you can easily update your multiple-layer comps’ layer visibility, style, and position. Layer comps in Photoshop record three different types of layer options, and editing every single one can be time-consuming. Fortunately, you can now install and use Composer to make the task easier.

    To use Composer, select which layer comps you want to change and then choose the update command on the Composer ribbon.

    6. Camera Raw

    Camera Raw makes it to our list of free Photoshop plugins for real estate photographers. This plugin functions as an image processor to turn raw information from the camera into an image. Camera Raw allows you to sharpen photos, adjust contrasts, set white balance, and even set tonal range. After, you can easily manipulate the image using Photoshop.

    This plugin is very versatile as you can play with it in different ways to improve the quality of your photos!

    7. HDR Sharpener Tool

    High dynamic range imaging or HDR reveals lost details while keeping your photos look realistic. You can use HDR to improve the brightness and overall appeal of your photos. You can quickly produce HDR images when you use the HDR sharpener tool.

    As a Photoshop plugin, you can apply HDR-like effects to your real estate photos within minutes using the HDR Sharpener Tool. This plugin can also sharpen your images without compromising the quality and increase its dynamic range!

    8. White Balance / Highlight Recovery Plugin

    White balance is crucial in real estate photos because it allows you to manipulate colors to match the light source’s color so white objects will appear whiter. The white balance/highlight recovery plugin in Photoshop can achieve white balance in your real estate photos and more.

    The white balance/highlight recovery plugin helps countless professionals and aspiring photographers set the white balance in their photos and recover highlight details quickly. This feature is essential in producing the best pictures.

    9. Composition Grid Plugin

    Perspective and ratio are essential for real estate photographs. Do you want to apply the Rule of Thirds in your real estate photos but don’t know how? Or maybe you’re interested in following the principles of Dynamic Symmetry or Golden Ratio? Whatever the case is, the Composition Grid plugin can help.

    The Composition Grid plugin generates a grid that you can easily use and apply to your photos for easier editing. Since each grid turns into a separate layer, you won’t need to add design elements to a specific layer and follow various photography guidelines.

    10. Highpass Sharpen Photoshop Plugin

    Images contain high and low-frequency details, and high pass filters work by retaining high frequencies while reducing the low frequencies in the picture. A high pass filter is one of the bases for many sharpening techniques.

    If you’re looking for a more innovative way to sharpen your real estate photos, try using Highpass Sharpen Photoshop plugin right away. This plugin uses high-fidelity methods in sharpening images and is a technique favored by many professional photographers.

    Download the Best Plugins

    Ultimately, the goal is to create a beautiful real estate photo that sells well on a listing site. Instead of typing in “Photoshop plugins for photographers free download” in your browser, immediately download the plugins mentioned in this article.

    You can produce the best real estate photos when you know the right plugins to use. If all else fails, you can leave the post-production to professionals that specialize in real estate editing.

  • Virtual Staging in Real Estate: Top 7 Ways to Dress Up Emptiness

    Virtual Staging in Real Estate: Top 7 Ways to Dress Up Emptiness

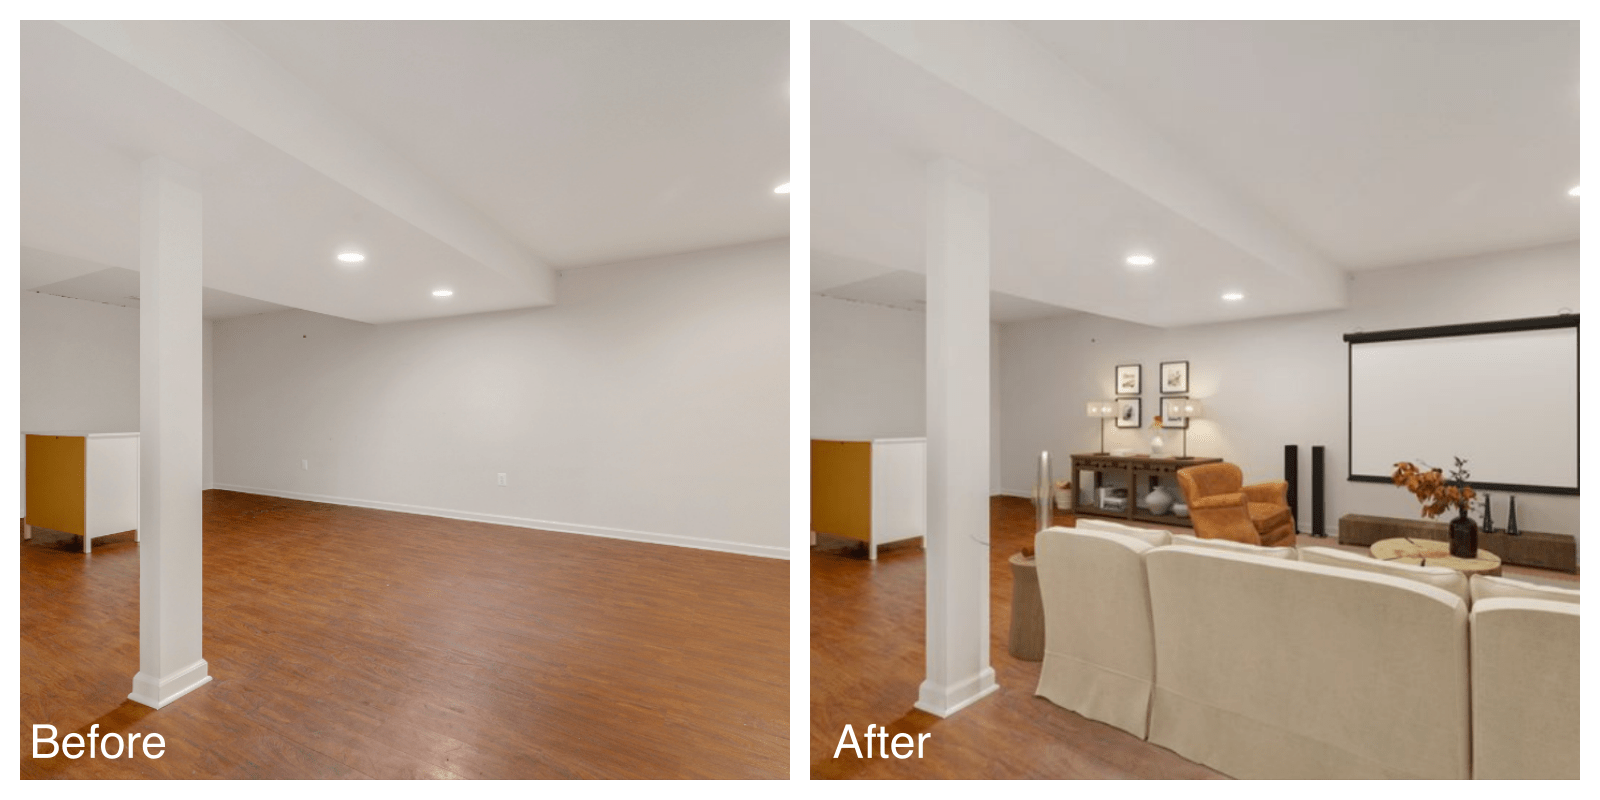
    In the real estate industry, home staging develops a residence for sale by making the property look appealing. The staging method allows potential buyers to visualize themselves in the space, increase the property’s value, and demonstrate the home’s potential through visual appeal.

    Traditional home staging is now a thing of the past as more and more sellers are using virtual home staging services, like Phixer, to create high-quality images of residential properties. Digital staging provides more benefits over traditional home staging, as the former is more cost-efficient.

    [lwptoc]


    TL;DR: If you want to sell your property fast through digital staging, dress up the space through these tips:

    1. Add Virtual Decors and Furniture

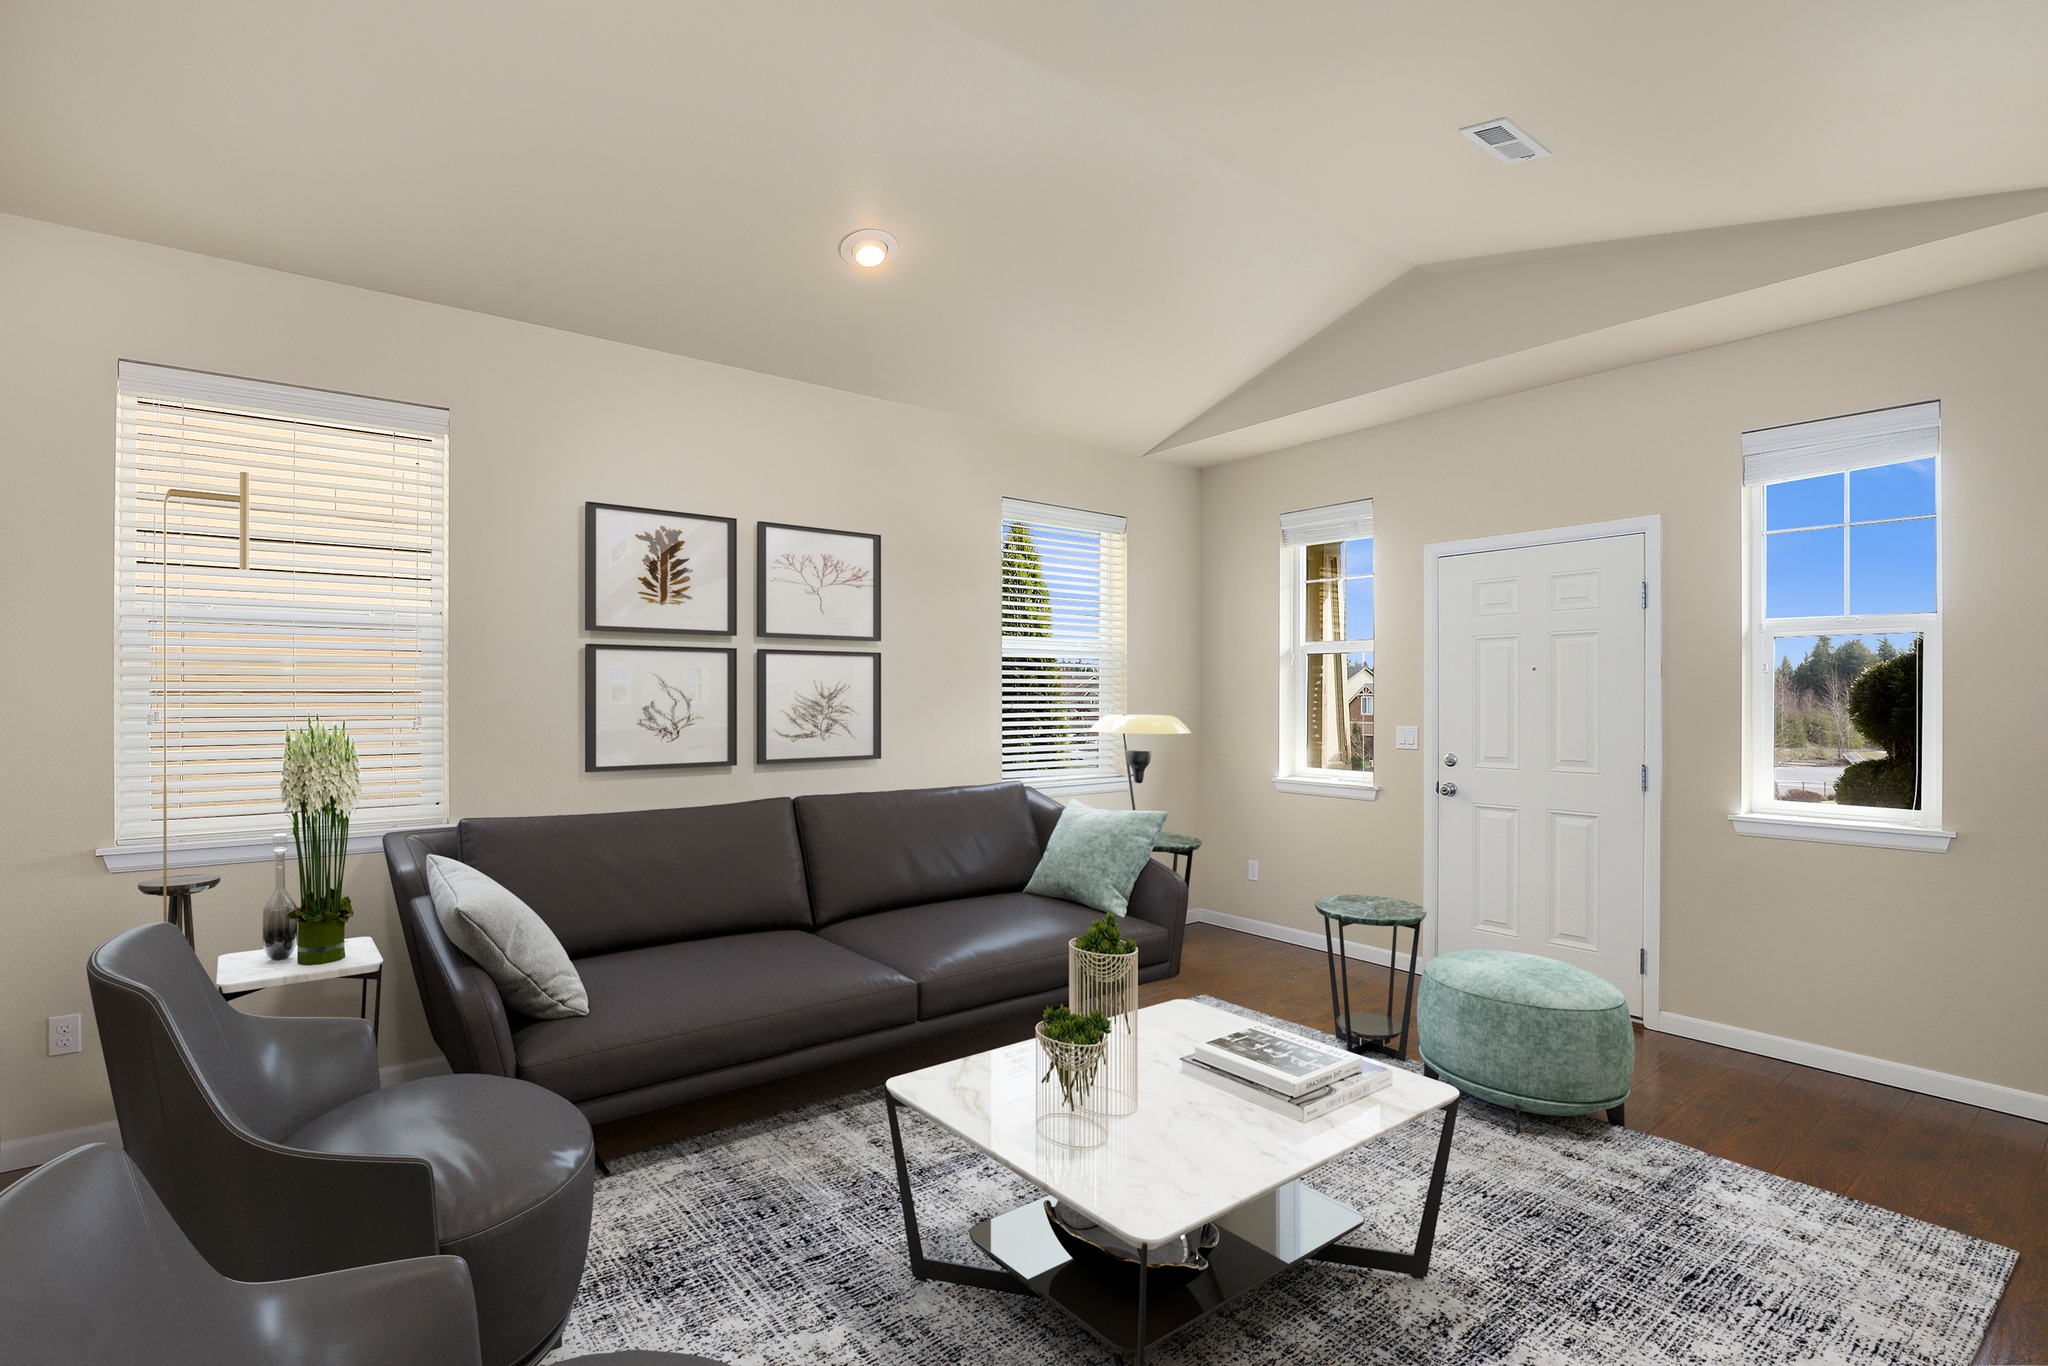
    In virtual staging, you need to make the property feel and look inviting. You can’t bring in new customers if the space seems unsafe or feels like someone else’s home. Before using a full-blown virtual property enhancement, add small decors and furniture to empty spaces first. You can add seating furniture, hanging sets, and even plants depending on the space size. Consider the room’s overall size, as adding too many fittings will make the space look cramped and feel uninviting.

    You can do this by editing via Photoshop or availing virtual staging services. Virtual staging is versatile so that you won’t have any problems adding different elements to a vacant room or area inside a residential property.

    2. Determine a Focal Point

    Determine a focal point to catch the attention of potential homebuyers once they view your photos when adding virtual decors and furniture. You can achieve this by placing a red-colored seat in a living room filled with cream-colored furniture or adding a large chandelier in the kitchen.

    The focal point can help emphasize the point of interest in the room and ensure harmony between design elements added to the photos. You’ll have the liberty to add as many virtual decors and furniture in empty spaces, but this doesn’t mean that you should. As mentioned earlier, going overboard when adding design elements will only make the room feel and look small.

    Generally, your photos should include your fireplaces, windows, and shelving. If the rooms have multiple unique features, such as statement chairs in bold colors or hand-painted accent walls, highlight them in your photos, as well.

    3. Focus On the Angles

    You should capture as many details as you can when virtually staging a home. For instance, when taking photos of the bedroom, pay attention to your angles so you can include significant furniture and appliances in one image. Perspective is essential to virtual staging because it allows potential buyers to see the entire room and its features.

    The more visual elements you provide to potential buyers, the easier it’ll be for them to assess whether the property suits their lifestyle, needs, and budget.

    4. Shoot in Landscape

    Your image orientation is essential in virtual staging, especially when using the images for listing or banners. It’ll be challenging for you to capture as many facilities present on the property if you’re shooting photos using the wrong orientation.

    When it comes to virtual staging, it’s best to shoot photos in the landscape. Photos taken in this orientation are more comprehensive than tall, allowing you to show more about the property’s rooms and use the maximum amount of space to add virtual decors and furniture.

    Landscape photos look better on the MLS and other real estate websites and significantly increase your chances of finding buyers and earning profits fast.

    5. Use a Neutral Background

    Virtual decors and furniture are great accessories to dress up a space. You need to pay attention to the colors in editing photos to succeed with your efforts. The wrong color combination can adversely affect the visual appeal of your pictures and your viewers’ attention and emotions.

    If you want your visual decors and furniture to stand out, opt to use a neutral background. Neutral palettes, such as beige, gray, taupe, ivory, and different shades of white, blend well with other colors within the room. Using a neutral background, any visual décor or furniture you add to the room will surely pop out!

    The combination of a neutral background and decors and furniture in different colors will make any space more appealing and excite potential homebuyers.

    6. Keep the Lights On

    Light plays a vital role in photos. Particularly in virtual staging, light can alter the mood of the viewers and significantly affect the quality of your photos. Keep the lights on even if you’re taking pictures with the abundance of natural light to impress homebuyers with your virtual stage, which will bring more warmth to your photos and make your photos look more natural.

    Lights will also make it easier for you to edit your photos. The sufficient lighting in photos can quickly eliminate shadows and make the rooms look more realistic, especially when adding virtual items.

    7. Create a Striking Balance

    Virtual staging is making waves in the real estate industry today due to its manipulation of how every room in the house looks and feels. Strive to create a striking balance to make your photos look more appealing in the eyes of the homebuyers when editing photos. Keep in mind that some buyers want their properties to feel more inviting. These individuals might need to see some furniture to visualize themselves living in the property quickly.

    For example, instead of going with the trend and sticking to a minimalist home design in editing photos, consider that not everyone appreciates living in a property that only has the bare essentials.

    Takeaway Points

    There are a million ways to dress up the emptiness, especially in a real estate setting. Virtual staging is a good technique for filling up a space and creating a homey atmosphere without buying new furniture. You don’t need to be a professional to succeed. By following the tips presented in this article, you can easily create the most realistic, stunning photos and sell your property fast.

  • 10 Amazingly Best-Kept Secrets for Selling Your Home

    10 Amazingly Best-Kept Secrets for Selling Your Home

    Regardless of how appealing or valuable you think your home is, you shouldn’t expect to sell it off quickly, primarily due to the highly competitive real estate industry. Home buying is a long and often complicated process that requires skills and strategies to succeed.

    If you’ve been asking yourself the question, “I want to sell my house, where do I start?” for months now, you came to the right place. In this post, we will discuss how you can improve your chances of finding a buyer – whether it’s about finding the right photo editing company like Phixer or improving the overall aesthetics of your home.

    [lwptoc]


    TL;DR: Here are ten amazingly best-kept secrets that can teach you how to sell your house fast:

    1. Make a Positive and Lasting Impression

    No matter how well-decorated the interiors of your home are, buyers will already judge your property even before they walk through the front door. How your home looks from the outside will already affect their decision to buy from you.

    One answer to the question, “I want to sell my house, where do I start?” is to make a first impression by improving your curb appeal. Your exteriors will significantly look and feel better when you clean your driveway, apply a new coat of paint, add flower boxes, and install outdoor lighting. You can also purchase a home warranty to reassure potential buyers that repairs and improvements will be covered.

    2. Remove Personal Items

    De-personalizing your home is a critical step when selling it. Before you take photos and list your home for sale on various online and offline platforms, you should remove personal items such as unique keepsakes, photos, exceptional family items, and even pets. It’ll be challenging for potential homebuyers to visualize themselves living in the property if it’s still filled with your family’s trophies and pictures.

    3. Price it Appropriately

    If you want to know how to sell your house fast, have it appraised. Listing your home with an expensive price tag will likely shoo away potential homebuyers while pricing it too low will prevent you from earning profits.

    To price your home right, you should look into other similar properties in your area and assess their prices. This information can tell you a lot about what local homebuyers can afford, making it easier for you to price your home accordingly.

    4. Invest in Proper Lighting

    The quality and quantity of the lighting fixtures can affect a person’s mood and the space’s ambiance. You can positively impact the perspective of potential homebuyers and create a welcoming atmosphere by using the right type and amount of lights in your home.

    Improve the lighting in your home by investing in various lighting fixtures to ensure that every room in the house is well-lit. You can open the curtains to let natural light in, especially when you’re planning to stage your home virtually.

    5. Spend More Time in the Kitchen

    The kitchen is the heart of every home, which is why you should exert more time and effort in improving how it looks and functions. Some people use a clean kitchen to entertain guests, so you should consider remodeling it before selling your house.

    Minor kitchen remodeling projects include repainting kitchen cabinets, updating hardware, or installing a new backsplash. On average, you’ll spend around $23,452 for a bit of kitchen remodel, but you’ll be able to recoup $77.6% of the cost and increase the resale value of your property by up to $18,206.

    6. Showcase Your Home’s Best Features

    Another way to sell your house fast is to showcase your home’s best features when listing it online or to take photos. Familiarize your home’s best features before selling it. You need to know what makes your house different from others in the area.

    If your home is accessible to various schools, hospitals, and supermarkets, include this information when listing the property. Don’t forget to take photos of recently integrated innovative technology and smart home devices.

    7. Offer More Storage

    Sell your home fast by offering as many storage spaces to homebuyers. Storage areas are crucial to a healthy, happy, and organized home. The amount of storage space available in the home can influence the buyer’s decision. You can do this by taking out your belongings from your closets and investing in innovative storage solutions, like installing drawers in the unused space under the stairs or adding more hanging shelves in the kitchen.

    8. Upgrade Suitably

    Not all remodeling or renovation projects can add value and appeal to your home. Extending a room, installing a swimming pool, and adding a wine cellar might seem like an exciting project, but these won’t do anything to your home.

    When deciding which remodeling project to invest in, take the time to assess which ones will pay off. Aside from minor kitchen upgrades, upgrading door handles, replacing curtains with inexpensive ones, and fixing leaking faucets are great investments that will get you the best bang for your buck.

    9. Create a Strong Digital Presence

    You’ll be able to sell your home fast if you maximize technology when marketing it. You can upload information about your property on real estate websites and utilize social media to sell your house.

    To create a strong internet presence, make sure to list accurate information about your property and use high-quality photos, as well. These will surely attract home buyers from different parts of the world, allowing you to sell your home fast!

    10. Take Great Photos

    Photos can visually represent your home to potential buyers. Keep in mind that you will use photos for marketing your property – and the quality of these materials can leave an impression and affect a homebuyer’s decision to buy from you. Work with a professional photographer since they can highlight your home’s best amenities and produce stunning photos. Photographers also have the skills and tools to edit photos to remove any unwanted items from your property.

    Knowledge is Power

    Selling your house fast will require time, effort, and commitment. A house is an expensive investment, and no one wants to spend their hard-earned money on a property that looks unkempt or run-down. Fortunately, by incorporating the tips presented in this article, you won’t have problems finding homebuyers and getting your property off the market!

  • How to Set Your Real Estate Photography Pricing: 10 Effective Tips for 2021

    How to Set Your Real Estate Photography Pricing: 10 Effective Tips for 2021

    Working as a real estate photographer is a great way to earn money but keep in mind that you can only profit from this career if you know how to price your offerings. Setting the price of your photos too low can prevent you from earning while setting it too high will likely encourage clients to look for cheaper options.

    Aside from investing in companies that provide real estate photo editing services, such as Phixer, knowing how much to charge for real estate photography also contributes to your success. With the right price, you can earn profits and attract more clients in the long run!

    [lwptoc]


    TL;DR: To help you set your real estate photography pricing, take note of the tips below:

    1. Study the Competition

    One of the first steps in setting your pricing is determining how much do real estate photographers charge in your area. Study your competitors and assess how they charge their services. This figure will help you define your offerings and know where you fit in the market.

    If you plan on charging more than local real estate photographer prices in your area, make sure that you can justify it. You need to show the local market why your services are worth paying for.

    2. Add Quick Turnaround Option for an Extra Fee

    After finding out how much do real estate photographers charge in your area, consider if this amount covers the quality of your photos and services. You can always charge more than the average rates if it doesn’t, but you need to offer something that your competitors don’t have. For instance, you can set your clients extra as long as you can guarantee a faster turnaround.

    You can also demand higher fees if clients require edited photos after 24 or 48 hours of shooting them. Charge clients rush rates when they want edits done faster than your standard service.

    3. Set Several Images for Clients

    Generally, real estate photographers produce around 25-50 photos for their clients. However, there will be instances when they need to provide more, especially when taking pictures of large properties or properties with more amenities.

    Determine how many images you will provide to your clients when setting your prices. Consider the time and effort you’ll need to shoot and edit them if you plan to give them more than the average.

    4. Charge for Premium Services

    Increase your real estate photography pricing if you can offer more than just high-quality photos to your clients. Use these premium services to determine how much to charge for real estate photography. For example, if you have the equipment to produce real estate videos or drone photography, charge your clients more for your premium services.

    Videos require more editing time than photos.

    On the other hand, drone photography involves using more and often expensive equipment and might even require you to secure licenses or permits first.

    5. Consider the Size of the House

    Your real estate photography costs should vary depending on the size of the property you’re shooting. Keep in mind that more significant properties will require more resources in taking and editing photos. Generally, it would help if you had different price ranges when shooting for a 4,000 or 6,000 square feet home, which will ensure that the client pays for all of your efforts.

    6. Add a Travel Fee

    When a client wants you to travel outside your city or state to take real estate photos, always charge them a travel fee. Traveling requires you to spend more time and gas money, which is why you should need additional fees from your clients.

    Make sure to consider the average costs of commuting to the client’s location and use this information as the basis of your travel fee. For example, you can add a travel fee to your pricing after 50 KM or 31 miles from your residence.

    7. Create a Fee for Surrounding Area Photos

    Some clients will ask you to take photos of attractions near their properties. For instance, if the property is near the beach, clients might ask you to take photos of nearby cafes and shops, as well as the beautiful pier. If you have to drive more than a couple of minutes to reach these areas, create a fee for surrounding area photos. Setting a price like this protects your time and energy in taking pictures.

    8. Charge for Key Pick Up or Drop Off

    Does your client want you to pick up the key to their properties from their offices and then drop them off afterward? Since picking up and dropping off keys requires more effort, charge clients who ask for these services. A few extra dollars, like $20 to $25, is a reasonable fee to charge when doing tasks other than taking and editing real estate photos.

    9. Charge Different Rates for Twilight vs. Midday Shoots

    Real estate photos during twilight and the golden hour often stand out in the listings. The light is best during this day, and the property creates a unique and appealing look. If clients want to capture the twilight or golden hour in their real estate photos, charge them more in your real estate photography pricing as taking these shots requires more effort.

    Taking these photos will need you to be on location during a specific time window because you only have two opportunities in a day to capture these lights – during sunrise and sunset.

    10. Test Your Offers and See if Your Rates Work

    Setting your photography prices is a trial and error process – you need to test your costs and see if it appeals to your local market. After announcing the price of your services, pay attention to the reaction of potential clients. Are they happy with your rates, or do they find it too expensive?

    Consider the feedback of your potential clients and change your prices accordingly. Have an open mind to adjust your rate as you can’t always get it right the first time.

    Knowledge Is Power

    Knowing your real estate photographer prices is essential because it can determine how much you can earn in the industry. Keep in mind that your real estate photography costs a lot as you need to invest in specific equipment, which is why you should price your services correctly to earn returns from your investment.

  • A Complete Step-by-Step Tutorial on Exterior Object Removal

    A Complete Step-by-Step Tutorial on Exterior Object Removal

    Using a clutter-free photo is vital in real estate photography. A property free of disarray will look bigger and brighter in pictures and leave a lasting and positive impression on potential homebuyers. However, you can’t always declutter before taking photos; it’s best to use professional editing services like Phixer or practice specific techniques in Photoshop to achieve that goal. Both of these techniques are easy to use and effective.

    There are different techniques on how to remove objects from a picture using Photoshop. This article will provide step-by-step guides on every process so you can quickly determine which works best for you.

    [lwptoc]


    TL;DR: Here are some of the techniques for exterior object removals:

    Technique #1: Spot Healing Brush

    spot healing brush

    One unwanted object removal technique available in Photoshop is the use of the spot healing brush. This technique is ideal in removing small objects in a photo, namely socket holes in the walls or visible spots in pieces of furniture.

    Step 1: Prepare Your Photo in Photoshop

    To learn how to remove objects from a picture with this technique, start by opening your product photo in Photoshop. Open Photoshop and then select the image you want to work on in the software artboard.

    Step 2: Generate a New Retouching Layer

    Once you insert the photo, the software will automatically create a background primary layer.

    Duplicate a new layer on top of the primary background layer to use for retouching.

    Step 3: Close in on the Object for Removal

    Select the layer you’ve made and zoom on the clutter so that you can plan how to remove it precisely.

    Step 4: Choose the Spot Healing Brush Tool

    After zooming in on the object that you want to remove from the image or picture, click on the spot healing brush tool available in the left toolbar of Photoshop. This tool is vital to complete the unwanted objects removal process.

    Select the appropriate brush size depending on the size of the object you want to remove. If this is your first time using the spot healing brush tool, take the time to play around with different brush sizes so you can discover one that suits the size of the object you want to remove.

    Step 5: Target the Object You Want To Remove

    Move your brush to the object you want to erase from your photo. With the spot healing brush tool, any unwanted item on your image will magically disappear.

    However, for your photos to look realistic and natural even when using this tool, pay careful attention to the size of the brush you’re going to use and the size of the object you want to remove. Using a brush tool that’s too big will likely erase other essential elements in your photo while using one that’s too small will not remove the clutter altogether.

    Technique #2: Clone Stamp

    The clone stamp Photoshop tool copies an area into another part of the image. Using the clone stamp tool in Photoshop is also a great way to declutter unwanted items in your photo. This technique removes larger objects as you can select an entire area and replace it with another item. It’s good for copying textures and covering up areas of the property that need work.

    Step 1: Open Your Photo in Photoshop

    After you’ve selected the image you want to edit, select the model photography images in Photoshop. Go to File and then click on Open New image. A window will automatically appear after you select this option. After that, you can navigate to your image, and click Ok to insert it in the artboard.

    Step 2: Click on the Clone Stamp

    Click on the clone stamp from the tool panel of Photoshop. Then, hold the Alt key and target the area where you want to use as a sample away from the unwanted objects. It should have the appropriate texture and lighting because that part will be copied as it is.

    Step 3: Focus on the Object You Want To Remove

    Paint over the object you want to remove from your photo or image, and the clone stamp will automatically fill this area with the sample area you selected earlier.

    Technique #3: The Patch Tool

    photoshop patch tool

    You can also use Photoshop to remove objects using the patch tool. This is another handy object-removing tool that works best with solid backgrounds, like black and white.

    Step 1: Open Your Photo in Photoshop

    After selecting the image you want to edit, create a duplicate layer in Photoshop.

    Step 2: Click on the Patch Tool

    Move your cursor to the left toolbar and click on the patch tool. Unlike the clone stamp tool, you must choose the area you want to remove first and then select a sample area next.

    Step 3: Create a Line Around the Unwanted Object

    Zero in on the area you want to remove and draw a line around it. Try your best to draw straight lines around the object to get perfect and natural-looking photos.

    Step 4: Drag the Selection to an Area You Want To Use as Patch Sample

    After completing drawing lines around the unwanted object, click on the selected area and drag it towards the section you want to use as a patch sample. This will automatically cover the sample area with the selected area.

    Save Your Work

    You should save your work once you’re done removing the unwanted exterior objects from your photo. You can do this by pressing the control and S keys on your keyboard or manually selecting Save or Save As from the Photoshop File option. Make a habit of saving your work especially when you’re in the middle of a complicated edit.

    Key Takeaway

    Contrary to popular belief, using Photoshop to remove objects from your photos isn’t impossible to accomplish. As long as you’re willing to learn and exert time and effort, it won’t be long before you can master the art of removing external objects using Photoshop! You can also outsource this service if you have limited time.

  • How to Sell Your House: A Complete Competitive Guide for Sellers in 2021

    How to Sell Your House: A Complete Competitive Guide for Sellers in 2021

    Selling your house is a great way to earn profits, especially if you invested in home upgrades that warrant high ROIs for the past years. A homestead is an essential commodity, so you can expect interested buyers to assume ownership of your property.

    However, you shouldn’t be hasty especially and take photographs just yet. It would help if you prepared several things before hiring companies like Phixer to edit your real estate listing photos. These steps are essential for attracting buyers, providing a smooth buying experience to them, and earning the most profits from your home.

    [lwptoc]

    TL;DR: If you want to know how to sell your house quickly, follow the guide below:

    1. Plan Ahead

    Proper planning is the key to accomplishing your real estate sales goal, especially if it’s your first time. It would help if you considered the current market value, decide on upgrades, and established a marketing plan at the beginning. These steps will help make a more pleasant home selling experience.

    Here are some of the steps involved in the planning stage:

    Price it according to market value or have it appraised by a professional

    The selling price is one of the most important considerations when selling a house because pricing too high will likely shoo away potential buyers, and pricing too low will prevent you from earning the most profits. Set a realistic price for your home by looking at properties around your neighborhood.

    Look for homes with the same size and amenities as your home, and use this information to set the right price. If you’re at a loss, contact an expert real estate appraisal service.

    Decide on repairs or home improvements

    Avoid wasting money on unnecessary upgrades. Instead, pay attention to what local buyers are looking for and plan your improvements accordingly. For example, if local homebuyers aren’t looking for a steam shower or skylight, then don’t add them to your home.

    Create a marketing plan

    A marketing plan is essential to stand out from the competition. The real estate industry is thriving worldwide and regardless of where you’re going to sell your house, expect that you’ll have to compete with various companies and agents.

    Don’t just at the first chance to list your property online since learning how to sell your house quickly is a long process that requires extensive planning.

    2. Prepare the Necessary Paperwork

    The bulk of any real estate venture involves compliance and documents. You should prepare the necessary paperwork ahead of time to sell your house efficiently. You’ll typically need several papers before you list your home, when you launch your home sale, while you’re on the market, and once a buyer makes an offer. You will also need to prepare another set of documents before and after closing the sale.

    Make sure to prepare these documents as these are what you need to sell your house:

    Pre-listing

    • Original sales contract
    • Professional appraisal form
    • Home repair and maintenance reports

    Upon Listing

    • Mandatory disclosure
    • Initial title report
    • Pre-inspection report

    Pre-launching

    • Comparative market analysis
    • Listing agreement
    • Proposed marketing plan

    Buyer Offer

    • Purchase offer/counteroffer
    • Contingency removal form
    • Finalized purchase and sale agreement

    Upon Purchase

    • Home inspection and appraisal report
    • Most recent tax statement
    • 1099-S tax form

    Getting the documents ready beforehand will ensure a smooth selling process.

    3. Stage Your Home

    In real estate, home staging is the process of home makeover or preparation to appeal to the most potential buyers who will pay the highest price for your property. Customers are attracted to visual imagery, and they are attracted to beautiful scenery and homey vibes where they can imagine staying a long time.

    Therefore, home or virtual staging is what you need to sell your house faster than average. Virtual staging gains popularity in recent years because it empowers sellers to reach more individuals without exerting more time and effort.

    Take note of these home staging tips to sell your property quickly:

    • Stage where it counts: All the rooms in your house aren’t equal in home staging. Ideally, it would help to focus your efforts on staging rooms that have the most significant impact on a potential buyer’s decision.
    • De-personalize the space: Take out personal items, such as your family photos and kid’s trophies, from your home before staging it. When you de-personalize the room, you’ll make it easier for potential homebuyers to envision themselves living in the property.
    • Get rid of clutter: You won’t be able to highlight your home’s best features if the space has mess all over. Instead of creating a positive impression, clutter will only discourage potential buyers from investing in your property. A clutter-free home will look bigger and brighter. You can digitally declutter your images with Phixer’s unwanted objects removal service.

    According to the National Association of Realtors, the most important rooms for buyers are the kitchen, living room, and master’s bedroom. Exert more time and effort to stage these homes, so you won’t have any problems convincing potential buyers to invest in your property.

    4. Produce High-Quality Photos

    If you want to learn how to sell your house successfully, invest in high-quality photos. How your property looks in these photos can significantly affect a buyer’s decision. You will need these photos for listings, marketing, and other purposes. Regardless of how functional and appealing your home is in real life, you cannot expect buyers to see it without illustration. You can take high-quality photos by investing in a great camera, using a wide-angle lens, and maximizing natural light. You can also hire a company that offers real estate photography editing services, like Phixer.

    5. Process the Listing

    After ticking off the tasks from numbers one to four, it’s time to list your property. Listing your home on the right platforms will increase your chances of attracting buyers and selling your house fast. You can register your home on different online listing sites, such as Zillow, Realtor, or FSBO. The more online platforms you’ll use to advertise your home, the faster you can find your buyer.

    Key Takeaways

    Learning how to sell your house is challenging, but you can always do it as long as you’re willing to follow specific guides and stay committed to your efforts; it won’t be long before you can enjoy the profits from your newly sold home! Prepare all the documents, photos and listings to ensure a smooth selling process.

  • What are Top 5 Fascinating Facts About Real Estate Twilight Photo Editing?

    What are Top 5 Fascinating Facts About Real Estate Twilight Photo Editing?

    The real estate photography industry is fast-paced and continuously evolving to fit the needs of both agents and buyers. There are many techniques born out of changing market preferences and standards. In recent years, social-media-inspired aesthetics inspired trends that led photo editing companies to offer services like virtual twilight.

    While there have been no formal studies or statistics on the psychological effects of dusk editing in real estate photography settings, sunrise and sunsets have undeniable appeal aspects.

    Why did twilight photo editing become a trend, and what fascinating facts should you know about it?

    [lwptoc]

    Twilight Photo Editing

    Most expert photographers would tell you that lighting plays a massive part in the overall appeal. While real estate photography is different from live model shoots, it still follows the same lighting and color aesthetic principles. Instagram influencers rave about the importance of the golden hour, which is around an hour after sunrise and an hour before sunset.

    This hour also gives free ambiance lighting for your listing when you’re doing outdoor photographs. There are many ways to attain this effect. To find out more, check out this Twilight photo blog post by Phixer.

    Fascinating Real Estate Twilight Photo Editing Facts

    1. Special service offered by professionals

    Most photography professionals know about the golden hour, but it’s challenging to capture all shots within a limited timeframe. The demand for these unique golden hour lighting conditions inspired day to dusk photo editing from premier real estate photography editing companies.

    It may be shocking to know that there is such as thing as a virtual twilight or digital twilight effect.

    2. Twilight drives up curb appeal

    People often look for properties in the hopes of permanence, so they want a sneak preview of what they look like in different lighting conditions. Twilight shots could also showcase accessories and fixtures that look better in darker states.

    Shots from different times will help buyers decide if they like how the property feels in the daytime or even in the dark.

    3. Twilight improves your listing’s the luxurious vibe

    Buyers often choose properties with excellent value for money, especially those with foreseen long-term rates. However, they may not be ready to spend too much money. Luxury does not usually come with a particular price point but with an emotional aspect.

    You might need a day to dusk photo editing service to improve the overall effect. Clients will be more likely to purchase a house or land if they can have luxurious days with the property’s views.

    4. The actual act of taking photos during twilight is challenging

    The golden hour lasts for at most 60 minutes, and there may be issues during that time. Aside from the actual technical problems, the tricky lighting may require additional reflectors or lighting equipment. Even the most competent photographers may have difficulties in creating the desired output.

    Most photographers shoot the property during different times to attain the perfect twilight effect by combining them in post-production.

    5. You don’t have to be a twilight photo editing expert

    You may want a twilight photo, but you already conducted your photography sessions. Fortunately, experts like Phixer can offer Twilight editing to enhance your current photosets. You don’t have to learn about the complicated processes because they can do it for you and perform the necessary changes.

    Final Thoughts

    Real estate photo editing companies have improved their offers to include advanced techniques like virtual twilight and home staging. Check out twilight editing if you’re looking for ways to enhance your property appeal in a listing thumbnail or improve your aesthetic pull for a marketing campaign.