Category: Photo Editing

  • How to Add Fire to a Fireplace Using Photoshop

    How to Add Fire to a Fireplace Using Photoshop

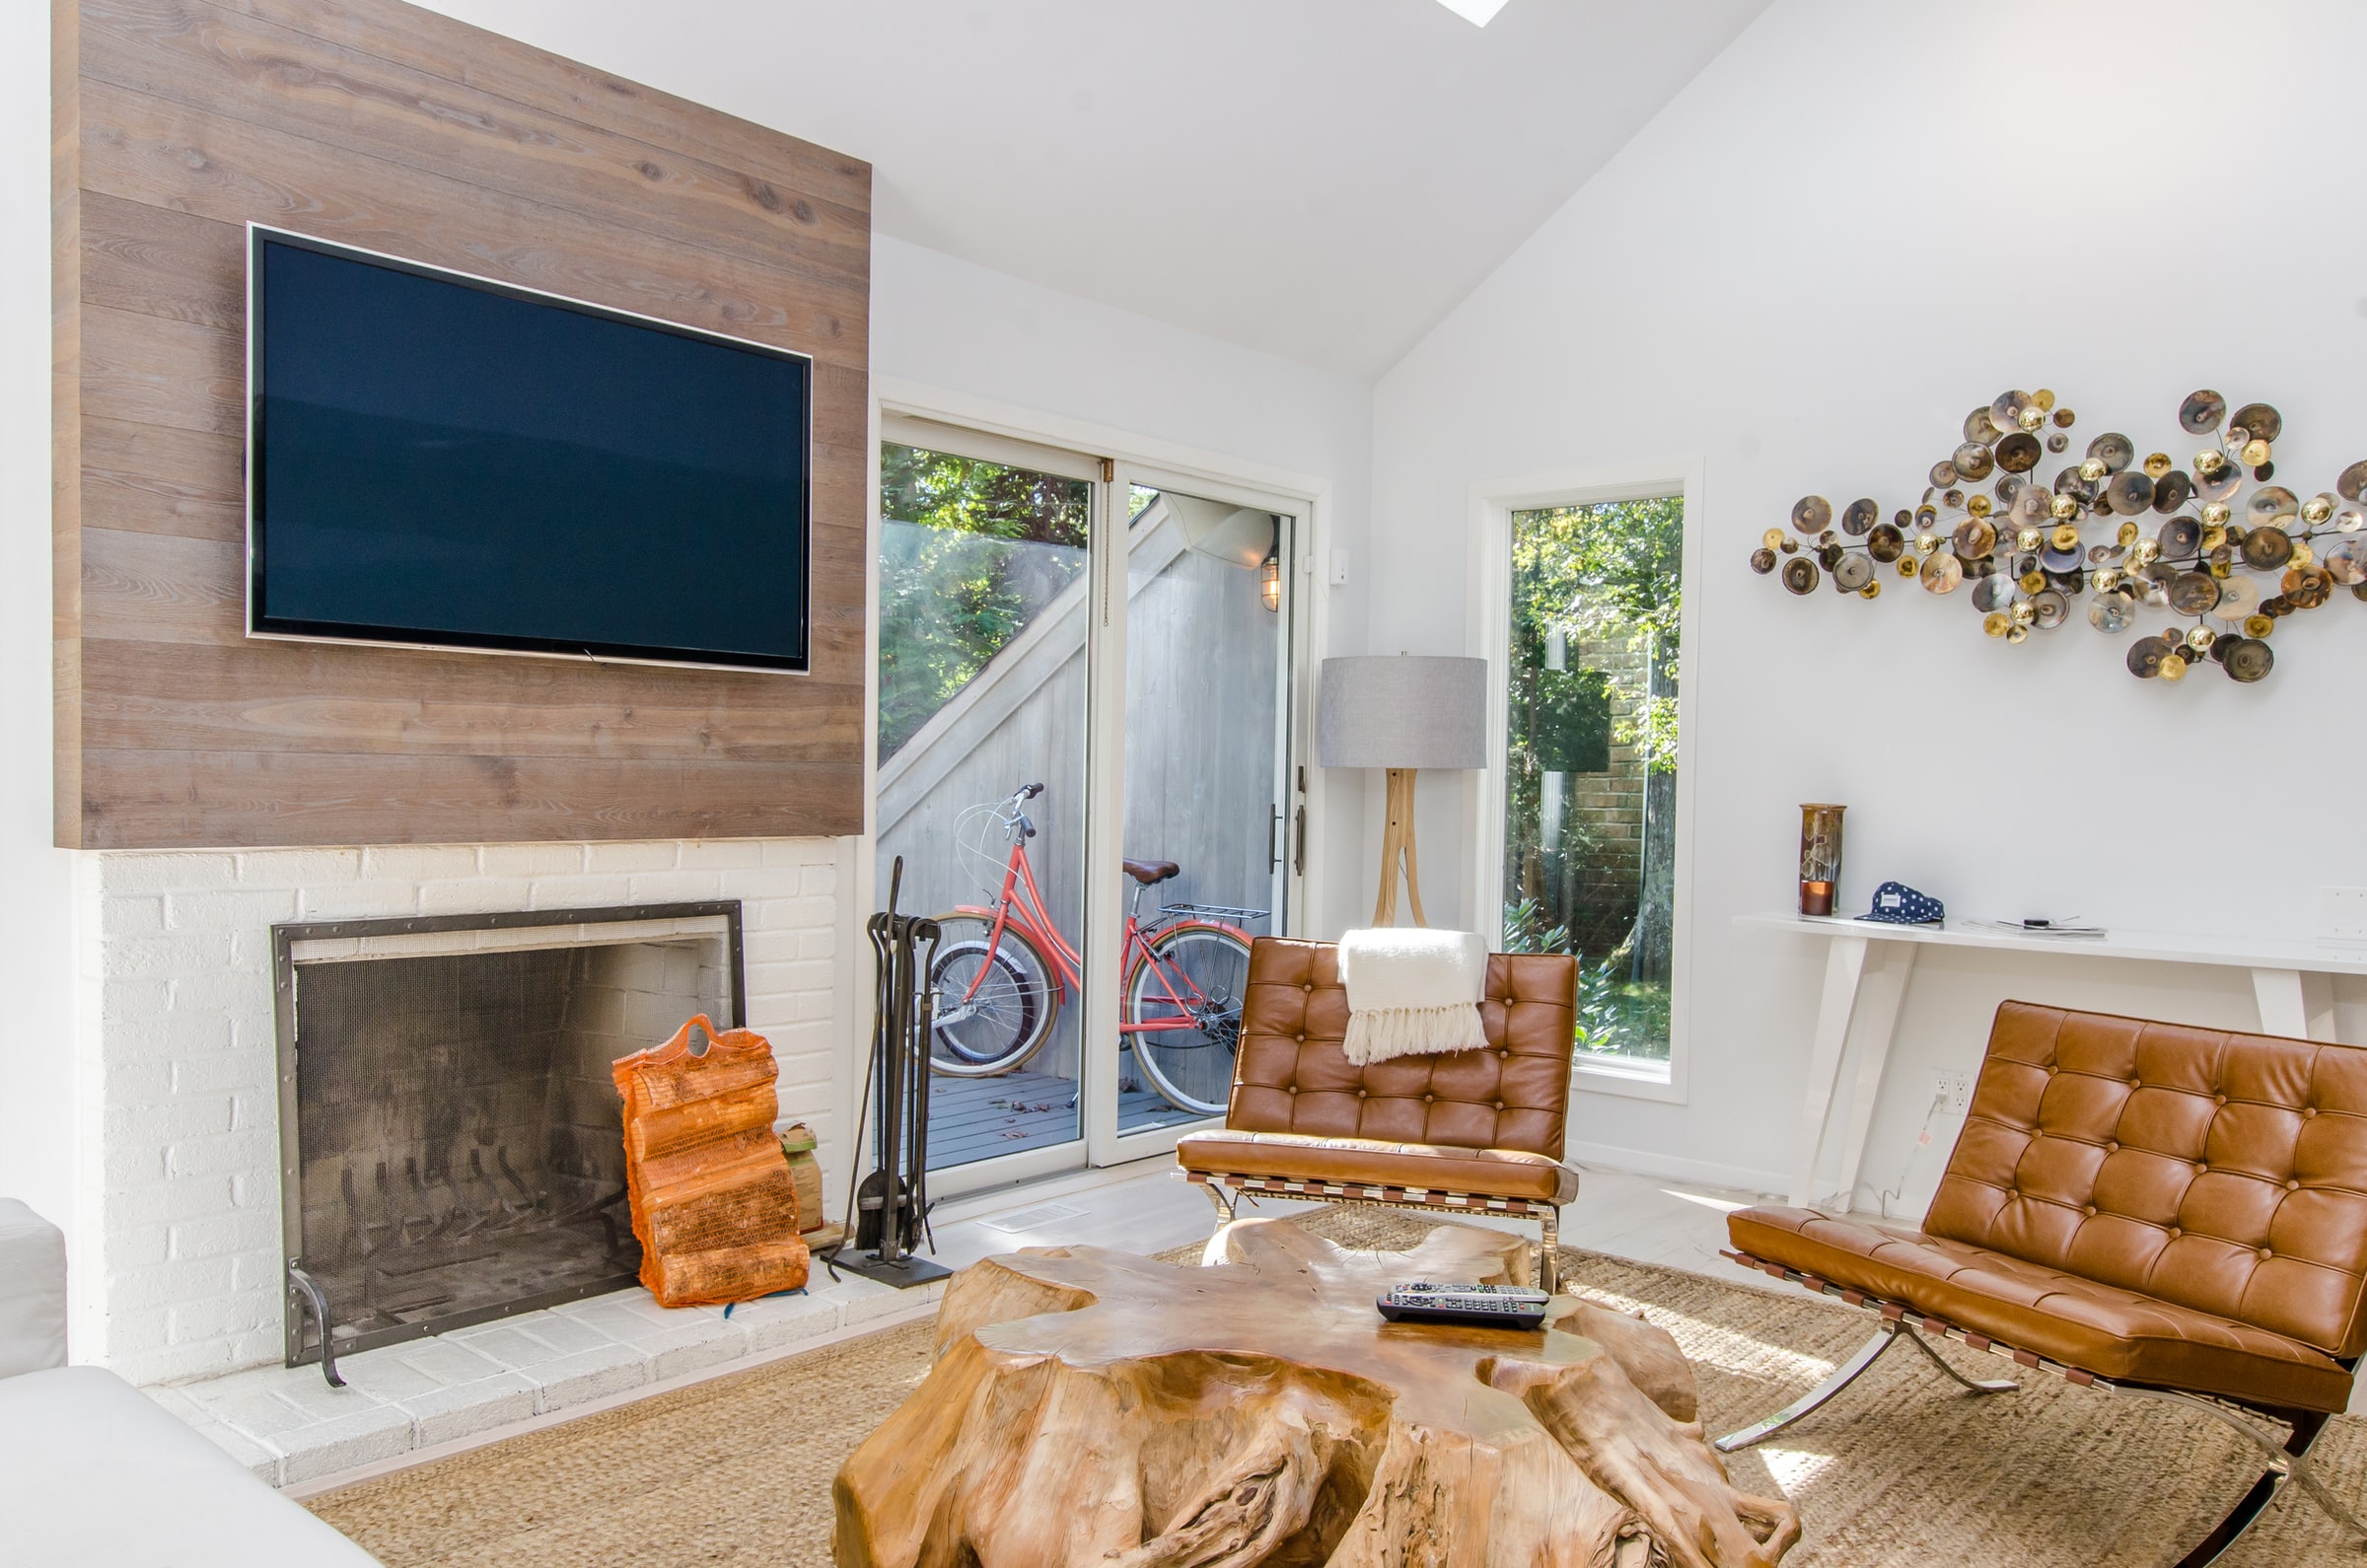
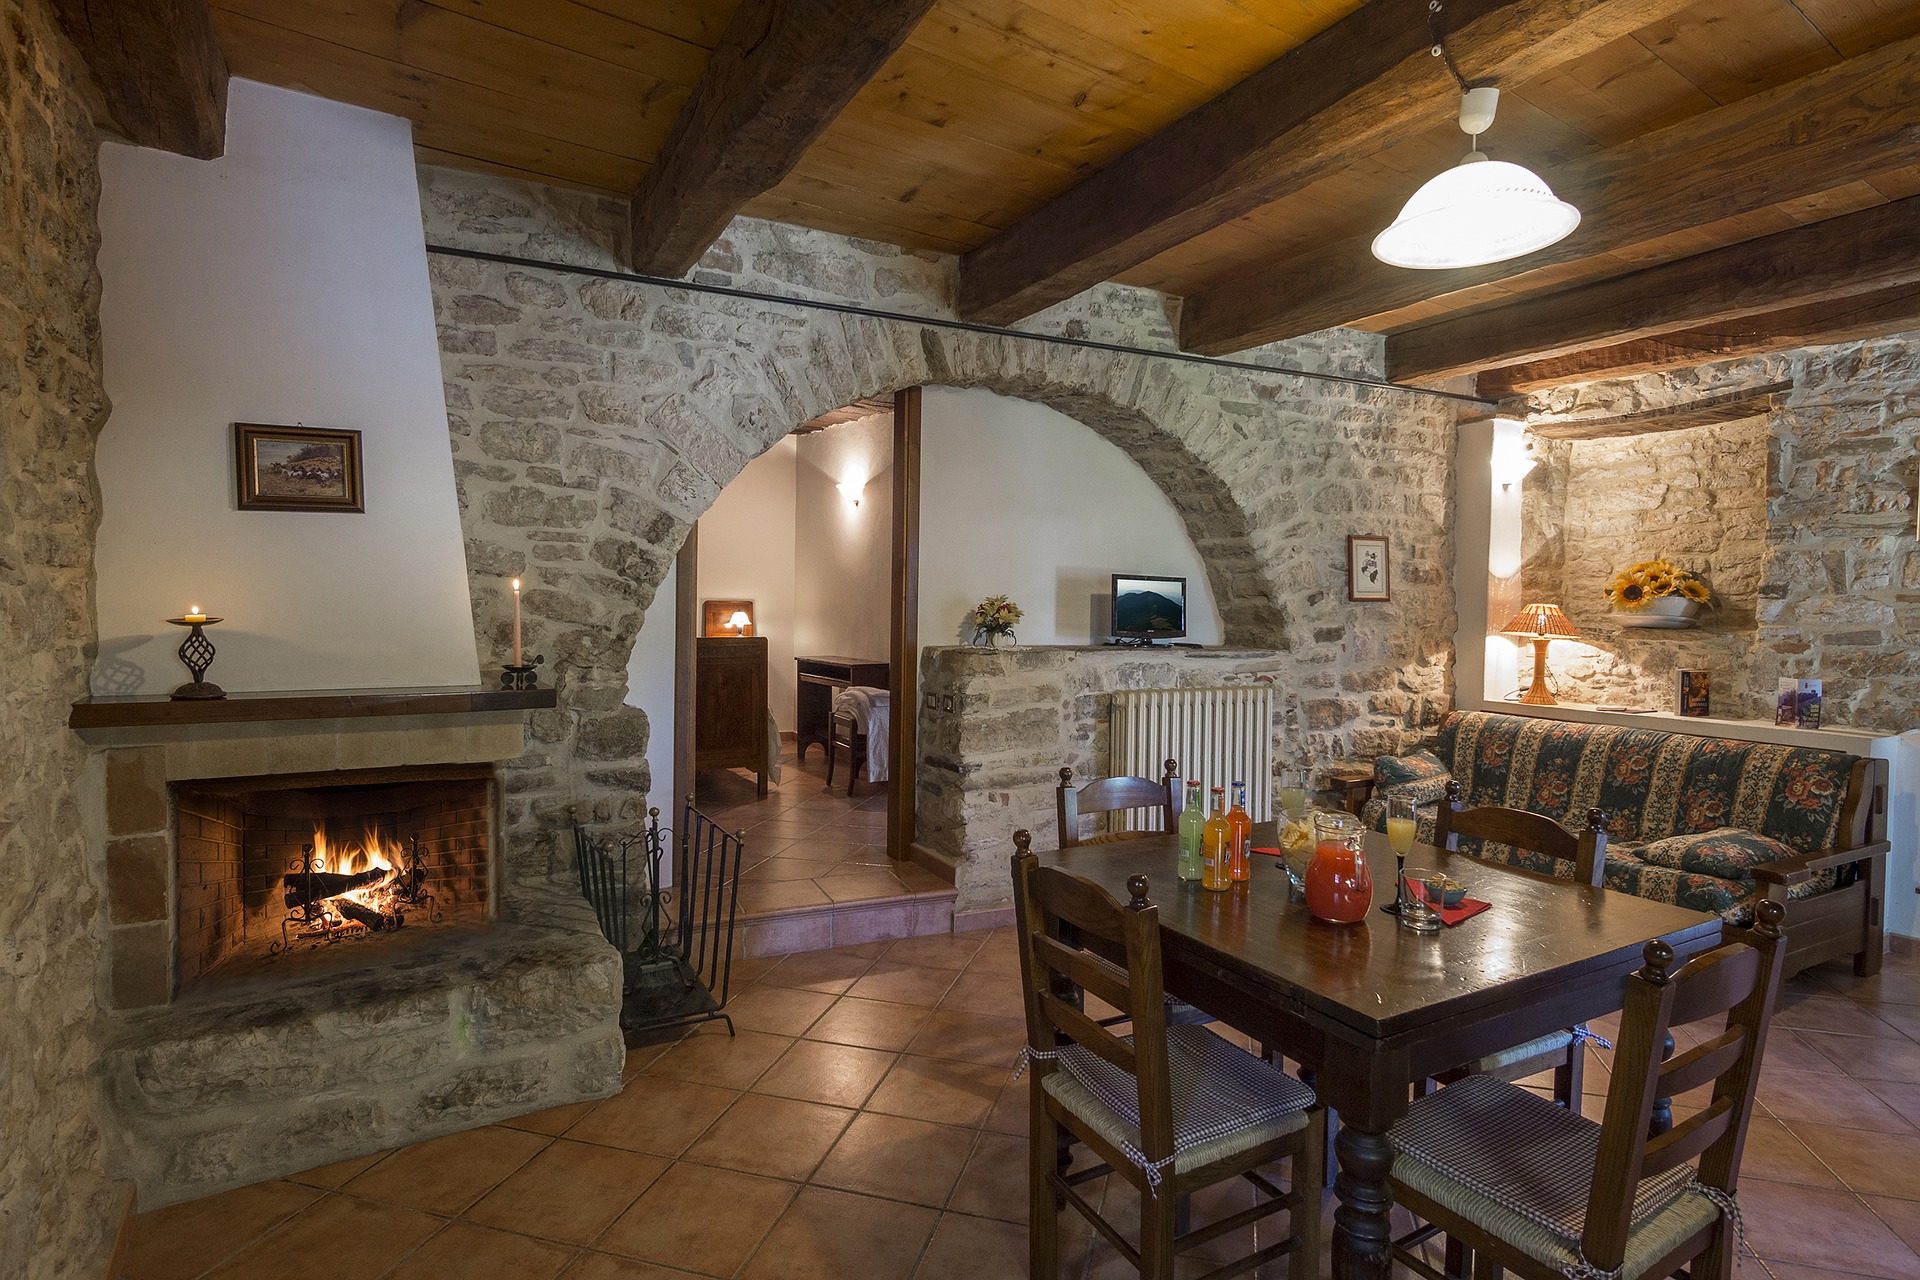
    Are you trying to add fire to your real estate images?

    Well, it sounds a bit odd but not impossible. With some properties with a built-in fireplace, it is never an issue to have a real fire in photos.

    But what if it is not the case?

    Do not worry! Your expert real estate photo editors can definitely help you add that specific detail in your images.

    Why should you make use of the fireplace?

    For sure, your real estate photos should convey the warmth and coziness of the place.

    Your clients should get this feeling at a glance. Many home sellers want to light up the fireplace because it makes the images look real and appeal to a buyer’s decision.

    In this case, it is best to seek the help of your trusted real estate photo editor and photoshop fire in your real estate photos.

    Here are three proven and tested steps that work well when modifying images to add that iconic fire beneath a chimney.

    Step 1: Prepare the Materials

    The very first thing you need to secure is a high quality image of the fireplace.

    You need this picture so that your real estate photo editor will not have a hard time polishing pixelated parts of the photo.

    Moreover, you need to secure a high-resolution image of flames that you can easily get online on stock photos website.

    It is best to choose a fire image that looks natural and not photoshopped.

    Step 2: Open Adobe Photoshop

    When it comes to photo manipulation, Photoshop is a known tool.

    However, you can use any software you like. There is no rule of thumb that it should be Photoshop all the time.

    Then, open both photos in Photoshop. On the photo with the fireplace, start creating an outline for the fire by using the Pen Tool.

    Then, copy the fire flame photo you want to add in the existing picture by using the shortcuts Ctrl +A and Ctrl + C.

    On the interior photo, use Alt + Shift + Ctrl V or choose Paste Special to place the image in the frame.

    Now, your fireplace has a visible fire already! All you need to do is to resize it properly so it will appear natural.

    Here is a quick way to fir the flame in the fireplace: use Ctrl + T, right mouse, and then choose Distort.

    It will drag the flame to fit the fireplace.

    Step 3: Use Screen Effect

    At this point, he flame should be visible in the fireplace already.

    The next thing you need to do is create screen effect by changing the blending mode.

    You should choose Normal to Screen and have an 80% capacity.

    If you want to make the flame more natural, get rid of the fire’s sharp edges by utilizing the Brush Tool.

    Are you able to follow everything?

    If yes, great! You should now have an enticing fireplace image.

    Bonus Tip

    Here is one more photo manipulation tip for you – replacing a TV’s LCD.

    You may think that this is a tedious work to follow but it is similar to the process mentioned in this article with the exceptions of the kind of images to use.

    It is quite simple and easy. Just continue to practice the skills everyday.

    So, what do you think?

    Is this something that you can pull off? If yes, then go ahead and start creating that wonderful fireplace image.

    Remember to include a fireplace photo in your listing, especially if the property you are trying to sell or advertise has one.

    Doing this can help you attract more buyers and close a deal successfully.

  • Getting to Know Clipping Path vs. Masking

    Getting to Know Clipping Path vs. Masking

    As a real estate photo editor, you have to learn many tricks and editing techniques just to perfect an image.

    With different available editing software, you need to become a versatile editor. You should be able to edit images regardless of what software you have.

    So, how do you do it?

    You just need to master the practical editing skills.

    There are so many editing tools present in a single software, but in this article, we will focus on clipping path and masking, what they use for, and how they differ from one another.

    Let us discuss first the similarity of these two.

    Clipping path and masking are all photoshop techniques. Both are used to cut out the subject from the background.

    However, using the clipping path and masking is an essential strategy to maximize these techniques’ benefit in photo editing.

    We’ll tackle the steps on how to use them, but let us define each first.

    What is a clipping path, and how to use it?

    Clipping Path is a photoshop technique mostly used in photo retouching, color correction, and background removal.

    Using this editing option starts with utilizing the pen tool to cut hard and sharp images or patterns. This requires real estate photo editors to be extremely precise and careful.

    If you have hand tremors, it is likely to have cropped images that look unnatural. It is best to practice a steady hand-work to avoid this kind of unwanted result.

    Here is a pro tip.

    Try cropping the photo out as best as possible by getting close to the edges and cutting the straight lines.

    What is masking, and how to use it?

    Now, what about image masking?

    Image Masking or Layer Masking is used for retouching more intricate details of images. For example, those photos with smoke, fur, human hair, lighting, and flames need a professional editor who masters the masking process.

    Remember, this is an intricate process. It involves different editing tools combined just to make sure you do this correctly.

    Among these tools are the background eraser, magic eraser, and color separation technique. If combined well, expect to have well-done masked images.

    Given its complexity, image masking offers good quality images than what the clipping path does. This is one reason why editors who know masking are more preferred, especially when editing materials intended for real estate or commercial purposes.

    How do they differ?

    At the beginning of this article, we discussed the similarity between these two techniques.

    From the definitions and explanations above, you can immediately spot the difference as well. Yet, as part of the recap, let us highlight it this time.

    • Clipping Path uses the pen tool to remove the background.
    • It is best for editing small and straightforward shapes and patterns.
    • Image Layer requires various tools and is mainly applied for complex images.
    • They can be interchangeable with each other.

    Then again, you should remember that using a clipping path for images with many turns and curves can yield unrealistic images compared to image masking.

    Still, both of these techniques are helpful in photo editing, especially in real estate photo editing. Make sure to secure compelling property images that generate leads and create conversions.

    Remember that listings without any accompanying visuals are dull. Furthermore, they are more likely not to be performing at all.

    If you need professional photo editors to help you in real estate photo editing, get in touch with Phixer’s team of expert editors, anytime and anywhere.


    We’ve made everything easy for you, too! Try Phixer today and discover the endless possibilities you can have without spending much time and money.

  • How to master removing color casts from real estate photos?

    How to master removing color casts from real estate photos?

    In real estate photo editing, different techniques contribute to a lot of stunning listing images online. It needs a skilled real estate photo editor to achieve compelling photos that can be used for both online listings and traditional marketing materials. This editor must know the basics of editing and the advanced methods used in the industry, and one of these is mastering color cast removals.

    For better understanding, let us define first what is a color cast.

    What is a color cast?

    A color cast is an unwanted tint of a specific color seen in certain parts or the whole picture. It causes a color shift of the entire image, which is technically unpleasant to see in a photo, and that is why it needs to be corrected.

    Now, let us try to take a look at what causes a color cast.

    Causes of Color Cast in an Image

    The common reason for a color cast is the reflection by a nearby object. However, certain light types can also cause this problem and low illumination of items with different color temperatures.

    This time, it will also help to know some color cast basics that can help you as a real estate photo editor.

    The Basics of Color Cast

    When shooting images, it helps to remember the following basics of color cast. It is one way to minimize its presence in your raw shots and make real estate photo editing easier.

    • Reduce your use of ambient light. Remember that the more ambient light you use, the more color casts you will be capturing on the images.
    • The flash helps. When you add flash in your shots, it dominates the other light sources in the room, helping minimize the color casts.
    • Use large umbrellas or giant white reflectors to avoid bouncing flashes directly from the wall.
    • Utilize the best editing software like Photoshop and Lightroom in adjusting colors during the post-processing of the raw images. Doing this can help a lot in improving the shots.

    This time, here are some of the pro tips you should know to master the art of color cast removal using software like Photoshop.

    Four Expert Tips to Master Color Cast Removal

    Indeed, learning how to do the proper way of doing color cast removal is not easy. It would help if you had constant practice before you can become a master of the craft. Here are some pro tips you can use to enhance your skills.

    Remember the necessary parts of an image

    For real estate images, you should also remove color casting on the walls and parts of the rooms, composite the windows, the ceiling, and all the hard flash shadows in brighter areas of the images.

    Always begin by adding an adjustment layer

    You need to import first the image then lock the original layer. After, create a new layer for photo filter adjustment, label it, and duplicate it as well before starting the editing process.

    Adjust the opacity

    Set the opacity on your layer between 50 and 75%, but do not merge any layers yet.

    Edit the other elements

    This time, adjust the vibrance, exposure, temperature, and contrast in-camera, so the raw file looks clear and without noise.

    These four tips pretty much sum up the overall process you need to do when doing color cast removal. You can also check this guide if you want to learn a more neutral way of doing the technique. We hope that this article can help you become a master in color cast removal in no time. Keep on practicing!

  • 7 Picture Editing Tips to Make Your Real Estate Drone Images Stand Out

    7 Picture Editing Tips to Make Your Real Estate Drone Images Stand Out

    As aerial shots in real estate photography become more in-demand, the rising need for skilled real estate photo editors has increased over time since they can enhance drone images.

    Using a high-end drone camera does not necessarily mean getting the best images right away. At times, your shots may seem okay, but if you take a closer look, you can notice that something is not right, or there are some lacking aspects that you want to see on the images.

    [lwptoc]


    These observations are standard and are part of the improvements you should focus on to have aesthetically presentable drone images of a property. TL;DR: Here are six proven editing tips for drone images that can improve your shots.

    Crop the image properly

    Regardless of the kind of property, it is part of photography basics to crop an image. Doing this can add a dramatic effect on the photo. It also emphasizes the subject of the picture. Make sure that your real estate photo editor knows the rule of thirds well, so the picture’s focal point will be along the vertical or horizontal line intersection.

    Make use of the healing brush

    When taking drone images, expect that there are some unnecessary things captured in the photos. However, you do not have to worry because eliminating these unuseful things is comfortable using the healing brush tool. This tool is standard in Adobe Photoshop and other photo editing software.

    Balance the levels

    One great key in editing drone images is to balance the photo elements accordingly. Being able to adjust the brightness, contrast, saturation, sharpness, and other aspects of the image grab people’s attention. The editors may not get it right the first try, but they can perfect the outputs by playing with the presets and the right levels of adjustments.

    Tweak the saturation

    As mentioned previously, saturation is part of an image’s elements that can bring tremendous changes to the photos, if used correctly. Saturation is responsible for getting those intense colors that add more vibrance to the images. However, be careful and remember that with color saturation, less is more. Please do not turn the photos into something so dark and dull, like the shots we had decades ago.

    Sharpen the image

    Since drone photos are taken from high altitude, sharpening them highlights the edges in your photos. This process also adds a little more contrast to your masterpiece. When using this feature, one pro advice is not to overdo it because it can make the images look unnatural, which is a big no for real estate images.

    Don’t apply the same setting

    In real estate photography, every photo captured by your camera is different. The same thing remains true in editing. What works on one image may not work with other pictures. Technically, this means editing the pictures from scratch and making manual adjustments that fit the photos well.

    Do final touches

    After following the first six steps, it is best to do the final touches to the images, ready them for printing (for magazines), save the soft copies right away, and use them for your online listings. It is best to recheck every picture and spot other parts of the photos that need enhancements during the final retouching stage. Once done, apply the necessary edits and save the images.


    In the end, these seven editing tips should help you create the best real estate images that capture buyers’ attention and sell properties. It is best to use these pointers for aerial shots and the usual interior and exterior photography of the property. Above anything else, always look for the best photo editor to take care of your images, unless you have photo editing knowledge.

  • How virtual renovation help realtors and homebuyers?

    How virtual renovation help realtors and homebuyers?

    Aside from the attractive innovation on the traditional home staging method known as virtual staging, there is another useful and highly regarded technique in the real estate marketing scheme that has proven its worth over time – virtual renovation.

    The idea of this method is very similar to virtual staging, except for the purpose. Technically, virtual renovation is a form of real estate photo editing that uses 3D designs to polish images with “virtual things” such as furniture and fixtures (usually done in virtual staging) inserted into the pictures. However, in the virtual renovation, it is not about how to fill a space. Instead, it is all about how future homeowners can visualize the home renovations the original owner is planning to accomplish.

    This technique is a lifesaver for realtors, mainly if the property to sell needs a major revamp, but needs to have some prospective buyers already. The not-quite-real shots are meant to show the house’s potential to a buyer with a renovation budget to bring it to life. This method helps future buyers see what the property will look like finally with all the necessary changes in the yard or garage, primary room revamp, additional furniture, wall paints, etc.

    Yet, how effective are virtual renovation pictures when it comes to selling? Here are some facts that support the effectiveness of inserting virtual renovation photos in an online listing.

    An efficient tool for selling homes

    If you are wondering if this technique is useful,  the answer is a big “yes.” With home staging’s popularity, buyers now have a way to imagine what the place might look like if it is empty or if the furniture is unattractive. Then, virtual renovation takes the guesswork out of homes that need massive renovations. Even with the need for repairing some parts of the house, buyers still find them fascinating because of the value it creates after all the work is done.

    Gives homebuyers time to decide and have enough budget

    Adding some renovation photos in the listing allows buyers to evaluate their choices based on their capability and budget. The realtor’s job is to make them aware that a particular property needs this kind of restoration and know if they are willing to shoulder the proposed repair expenses. This paves the way for a more transparent transaction and helps the buyer make a more sound decision.

    Builds realtor’s credibility and partnership

    Over time, some realtors build their credibility through the way they deal with buyers. By providing renovation photos, they can clearly show that they are selling the property in good faith by not hiding any possible repairs that the buyer may have to do as soon as they become under their responsibility. Moreover, realtors and real estate photo editing companies can strengthen their existing partnership, since more trusted clients will be seeking the realtors help already.

    Helps home buyers find their dream home

    Sometimes, home buyers do not have enough funds to buy a brand new home. In this case, they are eyeing for an alternative option in fixer-upper houses or those properties that need repairs. Buyers on a strict budget often choose this kind of stuff because they can still save a lot of money, even with all the renovations compared to buying a new home.

    In the end, doing a virtual house renovation is an enticing option for both realtors, homeowners, and prospective buyers. It benefits them in a way or two, makes house renovations easier, provides better visualization available for viewing, and is cost-effective since it does not require homeowners to spend more dime in doing the actual renovations beforehand.

  • Twilight Real Estate Photography and Editing Tutorial

    Twilight Real Estate Photography and Editing Tutorial

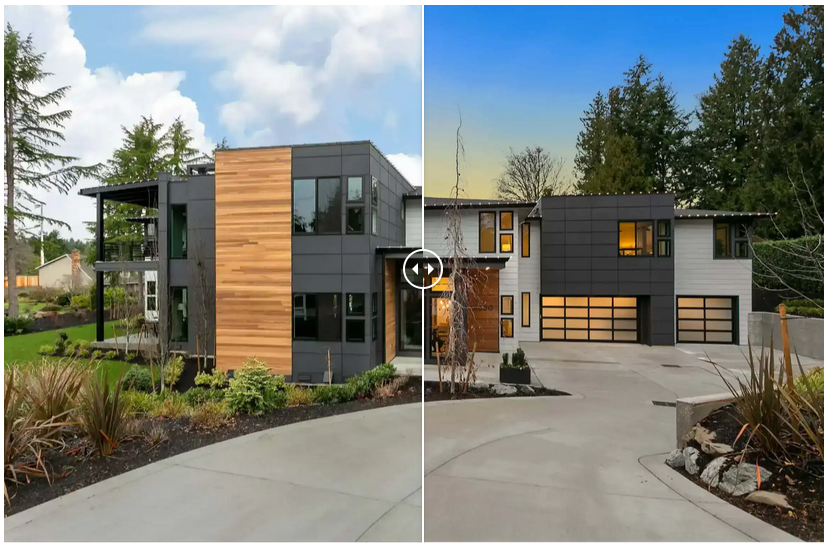
    Impressing potential buyers by showcasing beauty and creativity from you photos will make your house sell fast. You must show exciting portfolio once you put your house on sale online. Taking pictures of the exterior and the interior of the property are the first important things one must do. With virtual twilight readily available to add effects on your photos, it lessens the hassle of rescheduling appointments just to catch the sunset view. Moreover, if the weather does not permit to give you that spectacular sunset for your backdrop, virtual twilight photography will answer all of this.

    Virtual twilight basically highlights the exterior part of the house that is transformed by special effects. This method not only makes the property more presentable but it also makes the property more appealing to buyers. Virtual twilight can increase the beauty and charm of the property most especially on the exterior. Because of the filters and assortment of colors, it enhances the property’s aesthetics to satisfy every human’s eye.

    Tutorial on How to Master the Basics of Editing Twilights for Real Estate

    You will master in this tutorial the basics of editing twilights for real estate and highlight both the outside part of the house as well as the modified warm indoor lights and cool saturation of the property at dusk. Other than improving the property’s image at this particular time of day, you could create emotions out of the property and make it more likeable for buyers. Virtual twilight will make your real estate photos stand out because it helps present a home under the evening glow.

    Check out the instructions below on how to master the basics of editing twilights for real estate.

    1. Pick two images with the best ambient exposures

    • Choose two photos with the best ambient exposures
    • Correct the luminance of a twilight exposure
    • Consider making changes in temperature, exposure, contrast, shadows, etc.

    The first thing to do is to select the best two images with the best ambient exposures, one for the sky and one for the foreground. Open these two images in Camera Raw. Although you will still need to correct the lens and increase the luminance of every twilight exposure, twilight shots require editing each of them differently in Camera Raw.

    images with the best ambient exposures

      • Some of the changes that you can make in the Camera Raw for the sky include
        • White Balance (Temperature is almost blue)
        • Exposure +60
        • Contrast +25
        • Highlights -25
        • Shadows 0
        • clarity +30
        • Vibrance +50
        • Saturation +30
        • Add Noise Reductio
        • Lens Profile Correction

    In general, the sky exposure is cooler in temperature than the foreground exposure. You can use the Auto-White Balance as a good starting point.

    2. Import HDR fused image, foreground exposure and sky exposure in the Photoshop

    • Place fused images on layers and label them
    • Duplicate layers before editing works start

    Import HDR fused image

    You may now import HDR fused image, foreground exposure and sky exposure in the Photoshop as a backup and you may put your fused file on layer zero and label it. Place your foreground image on layer one and label it, and finally put your sky image on layer two. It is important to duplicate these layers before you begin editing.

    3. Masking the sky layer

    • Mask the blue sky using a paint brush
    • Set paint brush to a lower opacity

    Masking the sky layer

    Mask the blue sky using a paint brush

    Once the layers are duplicated, create an all-black layer mask on your sky layer and use a white paint brush to mask in the blue sky. You may consider setting your paint brush to a lower opacity so that the lines on the mask will not become obvious and the layers look seamless.

    4. Merge the sky and foreground layers

    Merge sky layer and foreground layer
    • Fused layer should be placed underneath the merged layer
    • Decrease opacity of the merged layer

    Once you’ve finished masking the sky layer into the foreground layer, merge these two layers and duplicate your merged layer. If the lightings in the images still need to be more balanced, place your fused layer underneath the merged and decrease the opacity on the merged layer to a desired amount and then merge these two layers.

    5. Open file in five ASA

    • Set nodes on the sky, house and windows, and elsewhere
    • Increase saturation and decrease temperature in the sky
    • Increase warmth and vibrance for the house and windows

    Open your final merge in five ASA and set nodes on the sky, on the house and in the larger glowing windows. For the sky, increase saturation and decrease the temperature to make it bluer. For the house and windows, increase warmth and vibrance so that the windows will shine nicely against the backdrop of blue. You also considering setting nodes elsewhere in the house if there are dark shadows that are too intense, or if there are greeneries that needed to be more vibrant and saturated.

    Watch this full tutorial below:


  • Learning Adobe Photoshop CC with Zero Knowledge for Real Estate Editing

    Learning Adobe Photoshop CC with Zero Knowledge for Real Estate Editing

    If you have zero knowledge in editing photos for your real estate business, Adobe Photoshop CC can help you acquire basic editing skills and tools such as Photoshop, brushes, navigation, and selection. Some of the skills you will learn include improving image quality, using special effects, retouching photos, and editing images using Camera Raw.

    So if you’re ready to explore this beginner-friendly photo editing tool, read this guide.

    [lwptoc]

    What You Need to Edit Photos

    The photo editing essentials you need to have before you start learning how to use Adobe Photoshop CC are the following:

    • A Macbook, personal computer, or a laptop.
    • Adobe Photoshop CC software.
    • Eagerness to learn this new skill.

    How to Use Adobe Photoshop CC for Beginners

    Here’s a step-by-step guide on how to use Adobe Photoshop CC software to edit your real estate photos:

    1. Download the Adobe Photoshop Creative Cloud.

    Assuming you already have your computer set up to download the Adobe Photoshop CC, the first step is to download the software.

    References Below:

    2. Open up canvas and edit.

    To open a canvas, click on the FILE button then go to “New”. The page layout or canvas must be in your preferred size. The recommended resolution for standard canvas is 300. Once you have already opened the application, make sure to save your layout.

    click on the FILE button then go to New

    You can use a large drive to save your real estate projects. If you want to ensure you got everything saved to avoid corrupted files, a backup drive is the best solution. Remember, Photoshop or psd files require large memory.

    3. Preview your page layout.

    To make sure your work is ready for saving, you need to preview your canvas. That way, you can see areas that still need further editing or require some changes to make them look even better.

    4. Check out the essential tools.

    In your tool box, there are plenty of things you can use to improve the overall appeal of your real estate images. You can find this on your screen’s left side. It’s important to understand how these tools work in order to take advantage of their special features when editing photos. Perhaps, you need to be more familiar with the Click tool.

    adobe photoshop cc tools

    5. Explore the folders, grouping, and colors setting.

    On your screen, check the right side to see the artwork and file storage settings. You will also find a wide range of colors including figures and shapes on that side. The Layer setting is available for adjusting images while keeping your layout separate in the artwork.

    color settings

    You can rearrange the layers to properly position images in front or behind other images. Again, don’t forget to click “Save” to make sure the actions you’ve made are saved.

    6. Unlock background layers.

    A locked layer will show a lock symbol. If you want to unlock it, then you need to double click on the layer until a new layer appears on your screen. To avoid getting confused, name your files while adding more layers on your canvas. If you want to add more layers, right click on the layer and then “Duplicate Layer or New Layer”.

    unlock layer adobe cc
    photo www.lifewire.com

    7. Familiarize the layers.

    When editing a project, you need to use multiple layers in order to separate colors, background, or circle. This makes editing much easier and manageable. In the setting, the top layer is automatically in front of other layers. Don’t worry because the layers can be moved according to the order you want.

    8. Make your circle.

    Select a layer by clicking on it. From the Edit tab, go to Stroke and then Stroke Pixel to change the colors on your foreground or background. On that layer, click on the Edit and then scroll down in order to fill it with your preferred color. Click OK and see if the shape looks like a circle before you can click select and deselect.

    9. Choose a second new layer.

    Choose a new layer and name it if you want. Select the gradient in your tool box, but there are other options you can choose if you want to create more colors at a specific angle. After creating a gradient, don’t forget to click Save. After that, you can work on another background.

    10. Create a more interesting layout.

    Once you have created your folders and arranged them in proper order, it’s time to stylize your masterpiece. Take the file in which you set gradient to and then right click to duplicate layer. It’s important to duplicate the layer so that you can easily remove any styling options when needed.

    For some layers that are not in use, go to the duplicate layer and then click on the Eye symbol. Click Filter at the top of the screen to search for styling options. Save your work once you’re done.

    Conclusion:

    If you’re just beginning to learn how to use Adobe Photoshop CC in editing your images, these basic steps are helpful. However, there are so many ways you can use this editing software in order to achieve the exact design you need for your real estate projects.

    This simple guide provides the basic editing skills you can learn from using Adobe Photoshop CC program—the perfect solution for beginners.

    For real estate photo editing services, please visit this link.

    Featured photo credit: https://colorlib.com/wp/free-photoshop-actions/

  • How to Make a High Dynamic Range Real Estate Photo using Lightroom

    How to Make a High Dynamic Range Real Estate Photo using Lightroom

    In taking photographs of houses and other real estate properties, there are always challenging things that photographers face. The technique called High Dynamic Range (HDR) makes the work of the photographer easier. When he shoots photos from the inside, all the details of the room are obviously visible. What is remarkable is that the view outside the window does not look overexposed.

    Basic HDR - Photo Editing 2

    The use of light is the primary idea when it comes to photography. Yet many of the photographers nowadays are making use of HDR as a solution and emerging alternative to flash guns and the use of multiple lights. In using HDR Photography, the delivery of a fresh and great looking image is exemplary but has a natural feel to it. By the way, an HDR is a set of photos taken at different exposures.

    What to Expect when Making an HDR Real Estate Photo?

    When real estate photos are made in HDR, you will expect that textures are enhanced through manual contrast. When the textures are enhanced, the quality of the photo becomes better. You can add different details for a total makeover of the photo. Similarly, HDR can bring down the brightness of the real estate photo by balancing the inside part with the brightness of the outside.

    In HDR, tone mapping is done after achieving a final product. Real estate properties that underwent HDR, require fine tuning and perfect adjustment. The final product does not rely much on the skills of the editor but on his familiarity in using Lightroom. Agents are always in the hunt for this kind of editor who can really create more appealing and stunning photos that will increase their chances of a sale.

    [lwptoc]

    Simple Steps to Make HDR Real Estate Photos using Lightroom

    1. Import the Photos

    The most basic thing to do if you want to make HDR real estate photos using Lightroom is to import the photos that you’re going to use. These photos are taken at different exposures usually in 5 shots: underexposed, a little less underexposed, photo categorized somewhere in between, overexposed, and the one that’s completely blown out. The purpose is to smash all the properties of these different shots into one amazing super photo.

    Choose import settings [source guide]

    You can import from a computer, hard drive, or camera into your Lightroom Classic catalog.

    Importing from a computer or hard drive:

    • On the left, select folder(s) of photos to import. If you don’t see your photos, make sure Include Subfolders is checked.

    • At the top, click Add to import without moving photos.

    • You can uncheck photos you don’t want to import.

    • On the right, you can choose additional import options.

    import photos on lightroom

    2. Collecting all the Photos

    • To get all the photos.
    • Click the first one.
    • Hold Shift.
    • And click on the last photo.

    You need to Right click your Lightroom screen, to come up with Photo Merge then choose HDR. HDR auto-aligns and auto-tones all the merged photos. You will see in the Preview the raw HDR.

    HDR Merge for Real Estate

    3. Making Adjustment

    If you’re taking multiple exposures and something’s moving through that frame, the Deghost Amount is going to eliminate that problem. In case no movement is seen in the raw HDR, simply hit the Merge button to generate an HDR photo and drop that into the timeline. At this point, you had just edited 5 photos simultaneously to produce one single photo. The shadows are exposed properly and all the other spaces in the picture have exposures that are perfectly balanced. Take note that this photo is still raw in nature as you still need to add Black or White points.

    Video tutorial credit to Peter McKinnon

    In the current picture, Lightroom will suggest the best Black point and White point would be. All you need to do is hold Shift and double-click on Black. Just do the same with White point. And instantly, you will see the new HDR photo. You now have the option to Export this photo or edit the photo to your liking by selecting the preset that best fits your photo before you Export.

    More tips here: https://helpx.adobe.com/lightroom-classic/help/hdr-photo-merge.html

    For photo editing services contact us at this page.

  • 10 Remarkable Skills and Attitudes of a Real Estate Photo Editor

    10 Remarkable Skills and Attitudes of a Real Estate Photo Editor

    Real estate photography is a profitable business at its best. However, to be successful in this field, it requires more than just having the perfect lens and essential photography skills. That is because given that the industry of real estate photography has a lot of competition, one has to be at least better than the average to experience the decent and stable income that this kind of business offers.

    sky replacement - phixer photo editing

    With that said, honing one’s skills with experience is highly recommended. Yet, any novice real estate photographer should recognize that for these experiences to count, each must always be done smartly—making sure that all the remarkable skills and attitudes are always tapped, if not thoroughly enhanced.

    To help you become that real estate photographer every client would come running after, you must take note of having the following:

    1. Color Correction

    Preserving the authenticity of an image is one of the most necessary aspect of creating a good real estate shot. Capturing a variety of color contamination issues, on the other hand, is what makes capturing the rawness of your shot reference a challenging pursuit. To achieve a realistic image without having to sacrifice the quality of your photo, you should be able to practice employing color correction skills.

    color correction - phixer photo editing

    In correcting the overall tone and color, you must opt for manually doing the color blending than simply using Photoshop’s Normal Blend Mode so as not to lose the texture while being able to keep the authenticity of the image.

    2. Image Enhancement

    As much as you need to keep the details of the shot similar to the original, real estate photography is also about assuring that the property’s selling points are emphasized.

    The enhancement of these selling points to the peak of its glory and beauty is a result of incorporating the following editing techniques so that every aspect of the photo adds up exactly to how you envisioned these selling points:

    • Photo manipulation
    • Perspective correction
    • Color cast removal
    • Noise reduction

    3. Addition of Details

    Persuading potential buyers through photography necessitates the element of providing them the ‘feel’ of how living is like in such a place. Hence, adding more details through decoration such as furniture and smaller details within the said could help feed the buyers’ nature of attention to detail. For example, when positioned properly, furniture could help improve the flow of light in that said space and in turn, exposing how much space is left and what use could be made out of it.

    4. HDR Photography Editing

    Basic HDR - Photo Editing 1

    With this technique, a unique shot is made upon achieving sharper details with the use of balancing the brightest spots captured by different lighting. HDR photography editing is done by blending multiple exposures to match the captured image to what is closer to what a human eye can see. Other than that, this method is also used for balancing the external view with the intensity of light found inside the interior space.

    5. Removes Imperfection

    Removing unnecessary objects together with the use of working on white balance, hues, saturation, and alignment of vertical and horizontal lines are all considered necessary for correcting the effects of external factors on the captured image.

    6. Offers a Reasonable Price

    Aside from delivering top quality photos, offering affordable rates for your service not only boosts your sales due to increased market attraction, but also helps you build connection in the field of real estate photography—a combination of which is sure to pay you back several folds than putting out sky-high pricing on a single project.

    7. Easy to work with

    Your portfolio might not reflect how well you’ve worked with your clients, but the number of your future projects will surely communicate it. So, aside from committing to the agreed-upon contract, you should also make necessary adjustments, if the situation calls for it. Clarifying details about the copyright to your image should also be addressed at the earliest possible time to avoid confusion and possible conflicts of interest.

    8. Creative and Flexible

    Understandably, you have your style of doing things and a working process where you’re most effective. However, not all clients are the same inasmuch as their preferences. Therefore, you should always be open to exploration and avoid limiting your creativity just to what you’re comfortable with.

    9. Great Time Management Skills

    Submitting your work on time or earlier is an edge to any industry especially to the likes of real estate photography—which is not only challenging but also a competitive field. Agree on a deadline you know you can pull off, and complete the project in a timely fashion.

    10. Passionate and Committed

    Real Estate Photographer
    Photo By Udemy.com

    Completing every project as a real estate photographer includes practicing a wide variety of photography and editing skills, as well as people skills—there are lot of ways to be discouraged in such setting that’s why if you want to stand out from the crowd, you should learn not to lean on the expectation that everything will go smoothly as planned. Rather, on your passion and commitment especially when unexpected problems arise.