Author: Rachelle Moore

  • Must-Read Ebooks to Improve Your Real Estate Photography Skills and Set Up Your Property for Success

    Must-Read Ebooks to Improve Your Real Estate Photography Skills and Set Up Your Property for Success

    When it comes to real estate, it is no longer enough to focus on renovations, decluttering, and open house tours to market the property to its target audience. Photography plays a crucial role in advertising every angle of the home and its surrounding area, providing potential homeowners with a realistic view of the property while also maintaining its visual appeal.

    As such, a previous post entitled ‘Top 10 Mind-Blowing Real Estate Photo Editing Facts You Didn’t Know’ highlights the importance of investing in photography and post-production for property listings. It was found that homebuyers spend 60% of their time viewing photos when looking for properties online, compared to only 40% spent on reading agent descriptions and listing details. Additionally, over four-fifths (83%) of homebuyers also consider real estate photos in their decision-making process — once again emphasizing the need for high-quality images that grab their attention and keep them engaged.

    Such figures demonstrate the potential of unlocking property sales and success through professional photography and editing, but deploying this marketing tactic is easier said than done. Considering the competitive and ever-growing real estate market, you need to continuously improve your photography skills and overall professional strategy to stay ahead of your industry peers. Fortunately, you can rely on ebooks as learning materials to truly leverage the benefits of real estate photography.

    Benefits of ebooks for skills development

    As previously mentioned, ebooks can be a helpful resource for acquiring and developing skills essential for real estate photography. To start, Technavio’s report on the ebook market notes that this format is being increasingly adopted in the digital age where people use smartphones, tablets, and laptops in work and daily life. Combined with growing internet penetration, this means individuals can download and access ebooks for learning and development, anytime and anywhere. Another important factor in the continued growth of ebooks into an eight-billion-dollar industry is the lower cost compared to traditional books, allowing anyone to read and learn regardless of their budget.

    What’s more, such benefits of accessibility, convenience, and affordability are provided by the digital subscription service Everand. Besides unlimited access to millions of audiobooks, magazines, and podcasts, subscribing to the monthly plan allows you to build a digital library of Everand’s ebooks on art and photography — from trending titles by authors like Molly Bang to curated archives that provide visual stimulation without crowding your shelves. You can also leaf through these ebooks on the go with Everand’s offline reading feature, so consider adding the titles outlined in the following section.

    Ebook recommendations for improved real estate photography

    Photography 101 by David Johnston

    If you’re still a beginner in the field of real estate photography, you need not be intimidated as David Johnston has prepared a handy guide for using a DSLR camera to capture high-quality images. In the short but insightful Photography 101: The Digital Photography Guide for Beginners, you can learn fundamental photography skills like switching between camera modes, exploring lighting and composition, and saving different file types. Overall, the guide enables you to progress your photography skills and gain confidence even when you aren’t shooting in automatic mode.

    Architectural Photography by Adrian Schulz

    Once you’ve gotten the basic photography skills down pat, you can start tailoring your technique to the niche of real estate, architecture, and interior design. In this light, Architectural Photography, 3rd Edition: Composition, Capture, and Digital Image Processing teaches you how to showcase the form and appeal of a building, inside and out. As a trained architect and photographer, author Jason Schulz uses real-world examples to equip you with the skills to choose the right camera equipment, compose architectural shots, work with ambient and artificial lighting, and process images with an efficient digital photography workflow. Learning from a real-life architectural photographer can also help you gain insights on how to better present and market your property listings through outstanding images.

    Best Business Practices for Photographers by John Harrington

    While photography is a craft in and of itself, using images as a real estate marketing tool requires awareness and knowledge of strategic business practices. For example, real estate photographer Eli Jones highlights the importance of building a brand reputation and selling an experience through social media marketing and meaningful client relationships. As such, you can rely on the third edition of Best Business Practices for Photographers as a comprehensive guide for figuring out the photography equipment you need, strategies for marketing, branding, and social media, and digital asset management to ensure your photographs remain financially successful and sustainable.

    The Business of Real Estate Photography by Steven Ungermann

    For a closer look at how real estate photography businesses operate, refer to tips and lessons included in The Business of Real Estate Photography by Steven Ungermann. As a definitive guide on developing a marketing plan and understanding the financial and legal aspects of real estate photography, it can help you save time and money when entering this industry niche and sharing its gains. The book also includes the author’s own experiences in marketing their professional photography services, encouraging you to express your passion for both real estate and digital photography while also enjoying a flexible lifestyle.

    Mastering Drones by Adidas Wilson

    Lastly, utilizing photographs for real estate growth and success involves keeping up with the latest industry trends. In this regard, a Biz article on drone photography explains the growing trend of using drones for real estate marketing and its benefits for both realtors and homebuyers. As homes displayed with aerial shots of the property are 68% more likely to sell, you can read Adidas Wilson’s Mastering Drones – A Beginner’s Guide To Start Making Money With Drones to accurately capture wide-angle shots of the property and its surrounding amenities. Besides including a chapter dedicated to drone use in real estate, the book can also assist you in utilizing cloud-based applications to store and manage your aerial footage.

    While most of these titles already cover the basics of real estate photography from capturing to post-processing, consider working with Phixer for advanced software and techniques for editing and processing your listing’s photos and videos. Feel free to explore our website to learn more about our offerings.


  • 7 Best Tripod for Real Estate Photography in 2024: Top Picks for Perfect Shots

    7 Best Tripod for Real Estate Photography in 2024: Top Picks for Perfect Shots

    As real estate photographers, we know the importance of capturing stunning property images. The right tripod can make a significant difference in the quality of our photos.

    With so many options available, it can be challenging to find the best tripod to suit our specific needs.

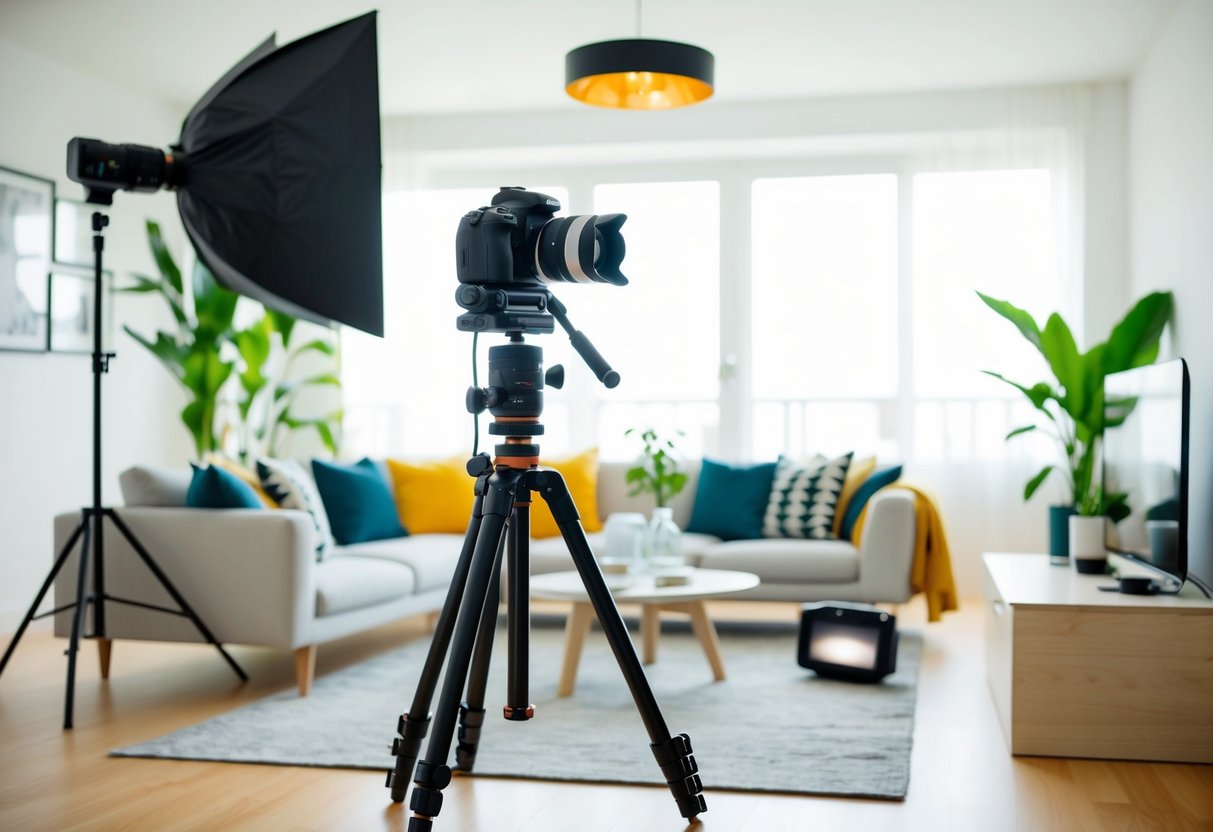
    A camera on a stable tripod positioned in a well-lit room with wide-angle lens and adjustable height for capturing real estate interiors

    What are the best tripods for real estate photography in 2024? We will explore various options, considering factors such as stability, portability, and budget. This guide aims to provide practical recommendations for both beginners and experienced photographers looking to enhance their real estate photography.

    1) Manfrotto MT190XPRO4

    The Manfrotto MT190XPRO4 is an excellent choice for real estate photography. Its aluminum build is both sturdy and lightweight, making it easy for us to carry around.

    One of its standout features is the 90° column system. This allows us to shoot from unique angles without moving the tripod. We can easily switch from horizontal to vertical positions.

    We appreciate its quick power locks. These locks secure the legs quickly and firmly. Setting up and taking down the tripod becomes a breeze, saving us time during shoots.

    The tripod also comes with an Easy Link connector. This feature allows us to attach various accessories, such as an LED light or reflector. It increases the versatility of our setup.

    Additionally, the Manfrotto MT190XPRO4 offers impressive stability. Its rubber feet ensure that the tripod stays in place, even on slippery surfaces. This stability helps us capture sharp, clear images.

    For those who require precise adjustments, the leg-angle selectors are very practical. We can independently adjust each leg to three different angles. This adaptability is useful in uneven terrain.

    Finally, the tripod is compatible with various heads, giving us flexibility in choosing the right head for our camera. This compatibility makes it a versatile tool in our photography kit.

    For more information about the Manfrotto MT190XPRO4, visit Manfrotto MT190XPRO4 Tripod Review.

    2) Joby Gorillapod 5K

    The Joby Gorillapod 5K is one of the best tripod options for real estate photographers. It offers unmatched flexibility with its wrap-around legs, allowing us to mount our cameras virtually anywhere. This is particularly useful for capturing unique angles in tight spaces.

    Its ability to hold up to 11 pounds of equipment makes it a robust choice for heavier DSLR cameras. The BallHead 5K provides smooth adjustments, which lets us make precise compositions effortlessly. The knobs on the BallHead 5K have a soft, grippy texture, adding to the ease of use.

    The Gorillapod 5K is not just flexible but also portable and lightweight, making it easy for us to carry it around on various shoots. Its compact size means it won’t be a burden in our camera bags. For those who need the versatility to switch from floor to wall mounts, the flexible legs are game changers.

    The stable design helps to reduce shaky shots, providing better image clarity. In summary, the Joby Gorillapod 5K is a versatile, durable, and highly portable tripod that fits well within the needs of real estate photographers looking for reliability and flexibility. For more on its features, you can visit Imaging Resource’s review of the Joby Gorillapod 5K.

    3) Neewer Carbon Fiber Tripod

    The Neewer Carbon Fiber Tripod is a top choice for real estate photography. This tripod is lightweight yet durable, thanks to its carbon fiber construction. We find it easy to carry around during shoots, making it perfect for both indoor and outdoor settings.

    One of the standout features is its adjustable central column. It allows us to capture shots from different heights, giving more flexibility. The legs are also adjustable, which helps in achieving stable shots even on uneven surfaces.

    Another advantage is the tripod’s quick release plate. This feature makes it simple to mount and dismount the camera. We can quickly switch between different camera setups, saving valuable time during shoots.

    The Neewer Carbon Fiber Tripod also comes with a carrying bag. This adds to its portability, helping us keep the tripod protected when not in use. The bag is padded, offering extra protection against bumps and scratches.

    This tripod can support a significant amount of weight. It can handle our heavy DSLR cameras and lenses comfortably, without compromising stability. The Neewer Carbon Fiber Tripod is an excellent tool for achieving high-quality, professional real estate photos. For more details, you can refer to the Neewer Carbon Fiber Tripod.

    4) Vanguard Alta Pro 263AB

    The Vanguard Alta Pro 263AB is a versatile and reliable tripod. It is ideal for our real estate photography needs. This tripod is highly praised for its flexibility and stability.

    One of its key features is the multi-angle central column system. This allows us to set the camera at various angles, perfect for capturing unique shots. The tripod legs adjust to 25°, 50°, and 80° angles.

    The Alta Pro 263AB is made from aluminum, making it sturdy yet lightweight. This construction supports up to 15 pounds, which is useful for heavier camera equipment. Its legs stay steady even in windy conditions, offering reliable performance in various environments as noted by Photography Talk.

    Another notable feature is the quick-flip leg locks. These allow us to set up and adjust the tripod quickly, saving valuable time on shoots. The non-slip, spiked rubber feet enhance stability on different surfaces.

    The Vanguard Alta Pro 263AB includes a smooth ball head, ensuring seamless camera movements. This makes it easy to capture panoramic shots, which are often crucial in real estate photography. The tripod’s bubble level helps maintain an even frame, crucial for quality shots.

    5) Benro Mach3 TMA38CL

    The Benro Mach3 TMA38CL is a solid choice for real estate photography. It extends to a height of 153 cm with the column down. This feature makes it perfect for capturing images at various heights without compromising stability.

    We appreciate the carbon fiber build. This material is not only durable but also lightweight, making it easier to carry around during shoots.

    One detail we find handy is the set of spikes included with this tripod. These can be screwed into the bottom for extra grip on uneven surfaces, ensuring stable shots in any environment.

    It also comes with a nice carrying bag. Although most users might not use this often, it’s a thoughtful addition for those who do like to keep their equipment organized.

    Many professional photographers recommend this model. It’s praised for its rugged construction and reliability, especially for those who need consistent performance in varied conditions.

    For anyone looking for a dependable and well-built tripod, the Benro Mach3 TMA38CL is worth considering. Check out this detailed Benro TMA38CL Mach 3 Tripod Review for more insights.

    6) Gitzo GK1555T-82TQD

    The Gitzo GK1555T-82TQD is a reliable choice for real estate photography. This tripod is crafted from carbon fiber, making it both strong and lightweight. It’s capable of holding a full-frame DSLR and a large zoom lens, with a load capacity of 10kg.

    One of the standout features is its compact design. The legs can reverse-fold around the center column and head, reducing its size to just 35.5 cm. This makes it highly portable and easy to fit into travel bags.

    The tripod comes with the GH1382TQD Center Ball Head. Although opinions vary, it performs well and integrates cleverly with the legs for efficient packing.

    Its narrow chassis can reach a relatively tall height, providing good stability. However, balanced placement can be a bit tricky due to the higher camera weight over the apex. Still, its rigidity helps in maintaining steady shots.

    For those looking for quality and compactness, the Gitzo GK1555T-82TQD is a great match. Check out the in-depth review on Amateur Photographer for more details. For purchasing options and additional specs, visit the Gitzo product page.

    7) MeFOTO RoadTrip Classic

    The MeFOTO RoadTrip Classic is a versatile option for real estate photography. This tripod is compact and easy to carry, making it ideal for photographers who move between different properties.

    One feature we appreciate is its ability to convert into a monopod. This adds to its versatility without needing extra tools.

    The tripod supports point-and-shoot, mirrorless, and DSLR cameras with zoom lenses.

    The RoadTrip Classic has a solid build quality. Even in challenging conditions, it remains stable.

    The twist locks, while taking a bit more effort, ensure the legs stay secure.

    We find the tripod’s carrying case useful. It protects the tripod during travel.

    Its multiple color options let you choose one that suits your style.

    One drawback is the twist locks require several turns to tighten. This might be inconvenient for quick setups.

    The uniform design of the control knobs can be confusing at times, especially when adjustments are needed on-the-fly.

    Despite these minor issues, the MeFOTO RoadTrip Classic remains a strong contender. It’s a reliable and flexible choice for real estate photographers. More details can be found on the MeFOTO website.

    Importance Of A Good Tripod

    When we talk about real estate photography, having a good tripod is critical.

    Stability matters, especially when capturing sharp images in low light.

    A high-quality tripod keeps our camera steady. This allows for long exposure shots, which can make a big difference in poorly-lit rooms.

    No more blurry photos due to camera shake.

    Using a tripod also helps with composition.

    We can frame our shots perfectly, ensuring all lines and angles are just right.

    This is a key to making rooms look spacious and appealing to potential buyers.

    Having a good tripod makes it easier to take HDR (High Dynamic Range) photos.

    By keeping the camera steady, we can take multiple shots with different exposures and blend them for a perfect photo.

    Portability is another important factor.

    Some of the best tripods for real estate photography are lightweight and easy to carry, making our job more convenient without compromising stability.

    Key Features To Look For

    A tripod set up in a spacious, well-lit room with large windows, capturing the interior of a modern, stylish home

    When choosing the best tripod for real estate photography, we need to focus on three main features: stability, height adjustability, and portability.

    These aspects are crucial for capturing clear, high-quality images in various settings.

    Stability

    Stability is paramount because it directly affects the sharpness of our photos.

    A well-built tripod minimizes camera shake and movement.

    Look for tripods made from durable materials like aluminum or carbon fiber, offering a solid, stable foundation.

    Tripod legs should have non-slip rubber feet or spikes for different surfaces.

    Additionally, a tripod with a center weight hook allows us to add extra weight, increasing its steadiness in windy conditions.

    Leg locks also play a crucial role.

    Twist or flip locks should be dependable and easy to use, ensuring the tripod does not collapse unintentionally during a shoot.

    Height Adjustability

    Height adjustability ensures we can capture shots from various angles.

    Ideal tripods offer a wide range of height settings, from very low to high.

    This versatility helps us shoot different perspectives, whether it’s a close-up detail or an overarching room view.

    Tripods with adjustable leg angles let us position the camera at low heights.

    Models with a center column can extend further, giving extra height when needed.

    Remember to consider the maximum and minimum height specifications.

    A good tripod should meet our height needs without compromising stability.

    Portability

    Portability is essential, especially when moving between different properties.

    A lightweight tripod is easier to carry without sacrificing stability.

    Carbon fiber tripods are often lighter than aluminum ones, though they can be more expensive.

    Folded length is another factor.

    Compact tripods that fold down small are easier to transport and store.

    Features like quick-release mechanisms for the camera and easy folding systems for the legs enhance convenience.

    Some tripods come with carry bags, making transportation even simpler.

    Lightweight, compact, and easy to set up tripods save us time and effort during our busy shooting schedule.

    Tips For Using A Tripod In Real Estate Photography

    To get the most out of your tripod in real estate photography, it’s important to focus on camera angles, lighting, and specific shots like floor plans.

    Paying attention to these aspects will enhance the quality and clarity of your photos.

    Optimal Camera Angles

    When setting up your tripod, we should place the camera at eye level.

    This helps to create a natural perspective and is especially useful in living rooms or bedrooms.

    Using a wide-angle lens can capture more of the room, but we need to be cautious to avoid distortion.

    Place the tripod in the corner of the room to get the most comprehensive shots.

    Adjusting the height of the tripod can also provide better angles for different spaces.

    For instance, lowering the tripod can make small rooms seem more spacious.

    Lighting Considerations

    Lighting can make or break a real estate photograph.

    We should aim to shoot during the daytime when there’s plenty of natural light.

    Using a tripod allows us to take longer exposures without any blurriness, which is ideal for low-light conditions.

    Balance artificial and natural light for the best results.

    Position the tripod where shadows are minimal, as harsh shadows can distract from the room’s features.

    If we need to use artificial lights, softboxes can help diffuse the light and create a more even spread.

    Floor Plan Shoots

    For floor plan shots, we should place the tripod directly above the area to be photographed.

    This often means getting an overhead shot, which can be tricky without the right equipment.

    Using a tripod with an adjustable center column can allow us to angle the camera downwards easily.

    We should ensure that the floor plan is well-lit and free from clutter to make the layout clear.

    Adjust our camera settings to a smaller aperture for these shots to keep everything in focus.

    This ensures that every detail in the floor plan is sharp and easy to read.

    Frequently Asked Questions

    In real estate photography, selecting the right tripod is essential for achieving stable and high-quality images. Here, we address some common questions to guide you in choosing the best tripod for your needs.

    What features should I look for in a tripod for real estate photography?

    Key features to look for include stability, adjustable height, weight capacity, and ease of use.

    Look for a tripod with a sturdy build and smooth adjustments.

    It’s helpful if the tripod is lightweight yet strong, as we often need to move it around.

    Which Manfrotto tripod models are the best for architectural and real estate photography?

    The Manfrotto MT190XPRO4 is highly recommended. It offers stability, flexibility, and easy adjustments.

    Another good option is the Manfrotto 475B Pro, known for its robust build and reliable performance.

    Can the Manfrotto 055 Aluminum 3-section Tripod Kit meet the needs of real estate photographers?

    Yes, the Manfrotto 055 Aluminum 3-Section Tripod Kit is an excellent choice.

    It provides durability, stability, and versatile head options, making it suitable for various angles and heights needed in real estate photography.

    Is there a preferred tripod that professionals recommend for real estate photography on Amazon?

    The Victiv Joilcan 80-Inch Tripod is often recommended for its affordability and versatility.

    It’s a great starting tripod that can handle different photographic demands.

    What are the ideal tripod height and angle settings for capturing high-quality real estate photos?

    Ideal height settings vary, but typically, a tripod that allows the camera to be positioned at eye level or slightly above is preferred.

    Angle settings should be adjusted to minimize distortion and capture straight lines, giving an accurate representation of the space.

    Why is it important to use a tripod in real estate photography, and what difference does it make?

    Using a tripod ensures stability, reducing the risk of blurry images. It also helps maintain consistent framing and allows for longer exposure times without camera shake.

    This results in sharper, clearer images that better showcase the property.

  • Expert Tips: How to Photograph Bathrooms for Stunning Real Estate Listings

    Expert Tips: How to Photograph Bathrooms for Stunning Real Estate Listings

    Capturing beautiful bathroom photos can transform even the simplest spaces into eye-catching visuals. Bathrooms present unique challenges for photographers with their tight spaces and reflective surfaces. The key to stunning bathroom photography is proper lighting and staging. Whether you’re snapping photos for real estate listings, home improvement blogs, or social media, these elements can make your images stand out.

    A modern bathroom with sleek fixtures and soft lighting. A camera on a tripod faces a large mirror. Toiletries and towels neatly arranged

    We’ll explore various techniques and tips that are essential for high-quality bathroom photography. From using natural light to arranging decor thoughtfully, these strategies help create appealing and professional photos. By learning how to manipulate light and design elements, we can turn any bathroom into a masterpiece worth sharing.

    Stay tuned as we dive into more details about the best practices for bathroom photography. From shooting techniques to post-production tips, we’ve got everything you need to elevate your photography game. Understanding these basics will not only improve your skills but also impress your audience with stunning bathroom images.

    Key Takeaways

    Bathroom Photography Essentials

    To master bathroom photography, we need to understand the layout of the space, select the right camera gear, emphasize good lighting, and make effective use of natural light and bathroom fixtures. These elements come together to create visually appealing and professional images.

    Understanding Bathroom Layouts

    When photographing bathrooms, knowing the layout is key. By understanding the space, we can choose the best angles to capture it. For small bathrooms, consider using a focal length of around 24-35mm. This range allows us to include more of the room in the shot.

    Positioning the camera just outside the door can help capture more of the space. Always ensure that any curves, like those of sinks or tubs, are visible to create a natural look in our photos.

    Choosing the Right Camera Equipment

    Selecting the right camera equipment is crucial. Wide-angle lenses are great for capturing entire rooms, making them essential for bathroom photography. A lens with a 24-35mm focal length works well to show both the space and the details.

    Using a tripod can stabilize the camera, especially in low light conditions or when using a narrow aperture. A narrow aperture, like f/11 or higher, helps in getting sharp details throughout the image.

    Importance of Lighting

    Lighting can make or break a bathroom photo. Proper lighting highlights the features and aesthetics of the bathroom. Soft, diffused light is usually best for indoor spaces to avoid harsh shadows and glare.

    Natural light from windows often creates the most flattering and true-to-life images. If natural light is limited, using portable lights can help. Always avoid using overhead lights that are too harsh.

    Utilizing Natural Light and Fixtures

    Maximizing natural light is one of the best techniques in bathroom photography. Opening windows and doors can flood the space with soft, even light. This type of light helps in avoiding sharp shadows and brings out the natural colors and textures.

    Bathroom fixtures, such as mirrors and lights, can also be used creatively. Mirrors can reflect light and add depth to the photographs. Using the bathroom’s own lighting fixtures, like wall sconces, can create a warm and inviting atmosphere in our images.

    Preparation for Shooting

    A camera on a tripod, softbox lights, and a mirror in a clean, modern bathroom

    When preparing to photograph a bathroom, we focus on cleanliness, decor, and optimal positioning to enhance the space and highlight its best features. This involves thorough cleaning, thoughtful styling, and careful consideration of angles.

    Cleaning and Organization

    A spotless bathroom is crucial. We start by cleaning mirrors, wiping surfaces, and making sure there is no visible dirt or grime. It’s important to clean every corner, including the shower, sink, and toilet.

    Clutter can make a space look smaller. We remove personal items like toothbrushes, toiletries, and bathrobes. We also ensure towels are neatly folded and all toiletries are hidden. This creates an inviting and spacious environment for the photos.

    Styling and Bathroom Decor

    Styling the bathroom is about creating a welcoming yet elegant space. Small touches, such as neatly folded towels and a stylish soap dispenser, can make a big difference. We often add fresh flowers or a plant to bring a touch of nature.

    Choosing a clear color palette helps to avoid a busy look. We match towels and accessories to complement the main color scheme of the bathroom. Less is more in this case; too many items can make the space look cluttered.

    Positioning and Angles

    The right positioning is essential to capture the bathroom’s best features. We usually place the camera at a height that covers both the floor and ceiling to show the entire space. Experimenting with different angles can also lead to surprising results.

    We often shoot from the doorway to get a wide view of the room. Taking shots from different corners can highlight various aspects of the bathroom. Playing with angles helps us find the most flattering perspective.

    Shooting Techniques

    When photographing bathrooms, different techniques help capture the space effectively. We focus on capturing wide shots, detail shots, close-ups, and using reflective surfaces creatively.

    Capturing Wide Shots

    To make a bathroom look spacious, we often use a wide angle lens. A focal length of around 24-35mm works well. This lens captures more of the room in a single shot, making it feel larger.

    Sometimes, taking a panorama shot can help when the space is particularly tight. By stitching several images together, we can create a wide, sweeping view of the room.

    We ensure the bathroom is clean and staged properly before shooting. Towels should be folded, the toilet seat down, and clutter removed.

    Detail Shots and Close-Ups

    Highlighting specific features requires close-ups and detail shots. For this, we select a narrow aperture, such as f/11, to keep details sharp. Focus on unique fixtures like faucets, tiles, or decor items.

    To emphasize these elements, we often use a macro lens or simply zoom in. This approach allows viewers to appreciate the craftsmanship and design choices even in a small space.

    We also ensure good lighting, sometimes using a small LED light to remove any shadows, bringing out the textures and colors more vividly.

    Using Reflective Surfaces Creatively

    Reflective surfaces such as mirrors and tiles can add depth and interest to bathroom photos. We position ourselves to use mirrors to our advantage, capturing reflections that can show more of the room or highlight key features.

    Lighting is crucial when working with reflective surfaces. We avoid direct flashes which cause harsh reflections and instead use soft, diffused lighting. This technique reduces glare and highlights the reflective nature of surfaces without overwhelming the image.

    Angles are important too. By trying different angles, we can find the most flattering and functional reflection for our shot, creating striking and dynamic photographs that capture the full beauty of the bathroom.

    Post-Production Tips

    In post-production, we can enhance our bathroom photography by focusing on clarity, contrast, brightness, and saturation. Using the right editing software is crucial for achieving professional results.

    Editing for Clarity and Contrast

    To make our bathroom photos stand out, we should first address clarity and contrast. Reducing noise and sharpening details can bring out the best in our images. Clarity adjustments help in making textures, like tiles and fixtures, pop.

    Contrast adjustments can define light and shadow areas, making the elements in our photo more pronounced. It’s important to strike a balance to maintain a natural look. Adding too much contrast can make images look unnatural.

    Using tools like the Curves feature in Photoshop can help us fine-tune these aspects. Curves allow us to adjust the light levels separately, providing more control over the final output.

    Adjusting Brightness and Saturation

    Correct brightness and saturation levels are vital for bathroom photography post-production. Bathrooms often have uneven lighting, so adjusting brightness can help ensure our images look even and vibrant. Brightening shadowed areas can reveal important details.

    Saturation adjustments ensure that colors appear vibrant but still realistic. Over-saturating can result in colors looking fake and unappealing. It’s essential to keep skin tones natural if they appear in the shot.

    We might use tools like Lightroom to make these adjustments, ensuring each photo achieves a balanced look. Lightroom offers precise control over highlights, shadows, and overall exposure, perfect for different lighting scenarios in bathrooms.

    Choosing the Right Editing Software

    Selecting the proper editing software is crucial for effective post-production. Popular choices include Lightroom and Photoshop, each offering a wide range of editing capabilities tailored to our needs.

    Lightroom is excellent for batch processing and managing large numbers of photos. It offers extensive tools for adjustments and is user-friendly. Photoshop, on the other hand, provides an in-depth arsenal for detailed edits, like retouching specific areas and using layers to enhance particular elements.

    Deciding which software to use depends on our workflow and specific editing needs. Using both can sometimes offer the best results, combining Lightroom’s ease of use with Photoshop’s detailed controls.

    Additional Elements to Enhance Bathroom Photos

    By carefully adding thoughtful elements like artwork, plants, and candles, we can make bathroom photos more inviting and visually appealing. These elements can add depth, warmth, and character to the space.

    Incorporating Artwork and Plants

    Incorporating artwork into bathroom photography can add a unique touch and elevate the overall look. We can choose pieces that reflect the style of the bathroom, whether it’s modern, rustic, or elegant. Placing artwork above the bathtub or near the vanity can create a focal point.

    Plants can bring a touch of nature and freshness into the bathroom. Small potted plants on the windowsill or shelves are great options. We can also use hanging plants to save space while adding greenery. Both artwork and plants help to break the monotony of tiles and fixtures, making the bathroom feel more like a personal sanctuary.

    Adding Elements like Candles for Ambiance

    Candles are excellent for creating a cozy and relaxing atmosphere. Strategically placing candles on the edge of the bathtub, around the sink, or on a shelf can enhance the ambiance. We can use scented candles to add another sensory element to the space, making it more inviting.

    It’s important to arrange candles in a way that they highlight key areas without cluttering the space. Using candle holders that match the bathroom’s decor can tie the look together. The soft, flickering light from candles can make the bathroom look warm and welcoming in photos, adding an element of comfort and luxury.

    Bathroom Remodel Photography

    A modern bathroom with a freestanding bathtub, glass-enclosed shower, marble countertops, and sleek fixtures. Light streams in through a large window, highlighting the clean, minimalist design

    Capturing the beauty and functionality of a bathroom remodel involves focusing on the design ideas, fixtures, and unique features. We aim to highlight everything from intricate details to standout elements like double vanities.

    Showcasing Bathroom Designs

    When photographing bathroom remodels, it’s essential to show the overall design theme. We capture wide shots to provide a full view of updated layouts and color schemes.

    Close-ups are useful for emphasizing textures such as tile patterns and countertop materials. Lighting plays a significant role in photography to bring out the room’s best features. Using natural light where possible enhances the true colors and textures.

    Photography of Modern Fixtures and Hardware

    Highlighting modern fixtures and hardware gives homeowners a clear view of the latest trends and styles. We focus on capturing high-quality images of popular items such as sleek faucets, minimalist showerheads, and elegant light fixtures.

    By incorporating different angles and lighting, we can emphasize the finish and detail of each piece. Including these close-ups helps to show the craftsmanship and design precision that set them apart.

    Highlighting Features like Double Vanities

    Double vanities are a popular feature in modern bathroom remodels, offering both practicality and style. We take care to photograph these from multiple perspectives.

    We highlight unique characteristics such as custom cabinetry, countertop materials, and sink designs. Proper lighting is crucial to showcase the vanity’s functionality and aesthetic appeal. By focusing on the storage solutions and accessory layouts, we can convey the benefits of this feature in everyday use.

    Optimizing Bathroom Photography for Social Media

    To captivate our social media audience, we need to focus on three key elements: cleanliness, lighting, and composition.

    1. Cleanliness:
    Before snapping any pictures, we should ensure the bathroom is spotless. This includes wiping down mirrors and glass, ensuring the toilet seat is down, and neatly arranging towels.

    2. Lighting:
    Natural light is our best friend. Taking photos during the day when natural light illuminates the room can create a warmer, more inviting feel. If natural light isn’t available, using soft white bulbs can mimic natural light effectively.

    3. Composition:
    We want to avoid taking photos from eye level or too high up. Instead, try capturing the bathroom from just above waist height. This angle prevents the space from looking cramped and creates a more flattering perspective as suggested by Drench.

    4. Staging:
    Good staging is crucial. We should make sure towels are nicely folded and that no toiletries clutter the counter. A simple, clean look works best. Dreamline Showers recommends setting the scene before taking any shots.

    5. Editing:
    Even the best photos can benefit from a bit of real estate editing. Adjusting brightness, contrast, and sharpness can enhance our images. Let’s be subtle in our edits to keep things looking natural.

    Frequently Asked Questions

    A well-lit bathroom with a camera and tripod set up, a stack of clean towels, and shelves filled with neatly organized photography equipment

    In this section, we address common questions related to bathroom photography, including lighting techniques, legal considerations, and creative themes.

    How can you effectively light a bathroom for a photographic shoot?

    Effective lighting is key. Use natural light when possible, but if the bathroom lacks windows, use soft, diffused artificial light. Position lights to eliminate shadows and highlight key features.

    What are the legal considerations for taking photographs in public restrooms?

    It’s important to respect privacy and obtain necessary permissions when photographing in public restrooms. Check local regulations and ensure no identifiable individuals are captured without consent.

    Can you recommend any creative themes for decorating a bathroom with photography?

    Consider themes like aquatic life, botanical prints, or vintage bathroom scenes. Match the theme to the bathroom’s color scheme and decor to create a cohesive look.

    What are the best techniques for photographing the small space of a bathroom?

    Using a wide-angle lens can capture the entirety of small spaces effectively. Additionally, shoot from waist height to avoid a cramped look, and use mirrors to add depth and dimension.

    What type of photography works well for a bathroom’s wall art?

    Black and white photography or serene landscapes can add a calming effect. Abstract art and minimalist compositions also work well in maintaining a clean, modern look.

    How should one choose and position photographs to complement bathroom decor?

    Select photos that match or contrast tastefully with the bathroom’s color palette. Position them at eye level for the best visual impact, and use frames that resist moisture to ensure longevity.


    Editor’s note: This post was originally published in September 2017 and has been updated for comprehensiveness.

  • How to Quickly Clear the Background Using Photoshop

    How to Quickly Clear the Background Using Photoshop

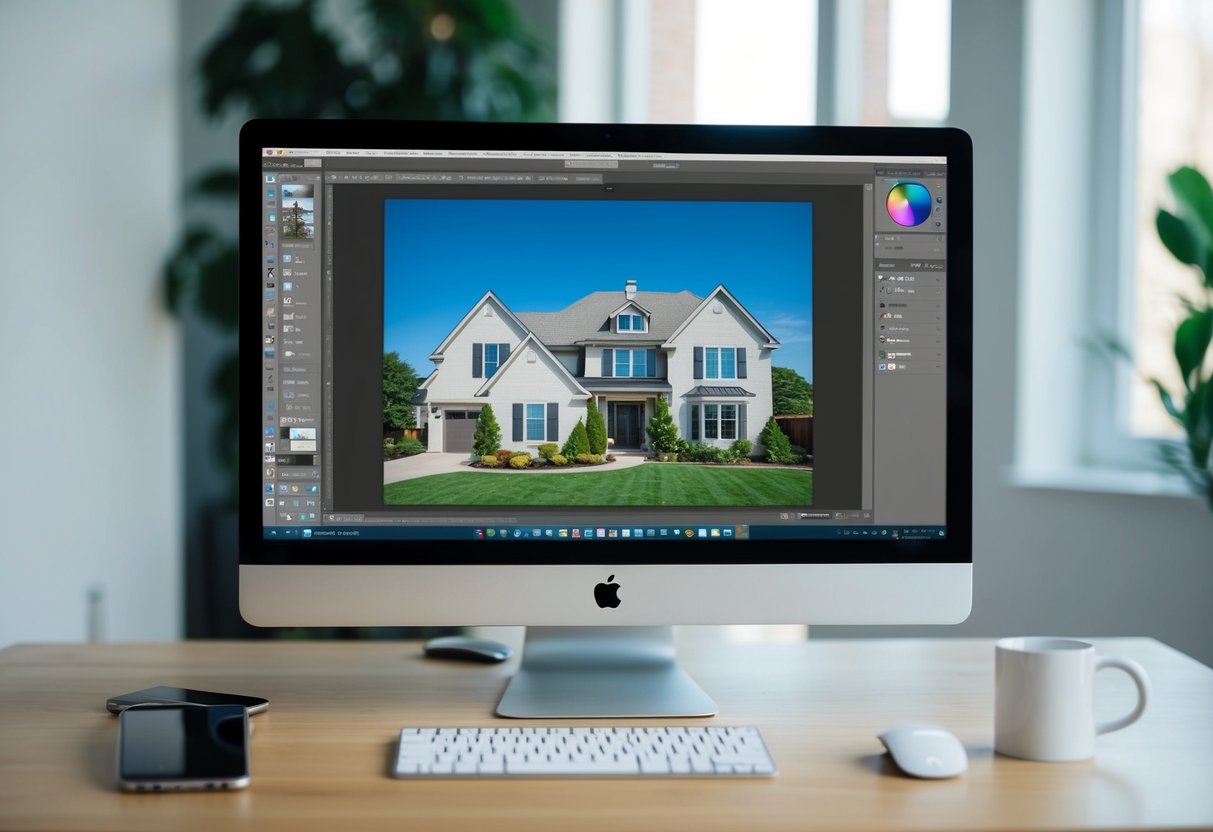
    Real estate photography is one of the essential parts of creating effective real estate listing promotions that convert well. Therefore, you should spend time doing post-production, especially removing distracting parts of the image. It may be tempting to ask a real estate post-production professional to do object removal for you, but you may be short on time or budget.

    Using different methods, you can quickly determine how to remove background in Photoshop 2024 to improve your listing image effectively. Anyone can do it even with limited technical knowledge or experience in photo editing.

    Here are some of the many ways to remove background from image Photoshop:

    1. Removal using the Object Selection Tool

    One of the simplest ways to remove image background is using the Object Selection tool. It is an intuitive tool that allows you to select apparent objects in the foreground or backdrop, and you can choose to isolate or delete the selected objects. You can select items out of place and remove them from the background.

    How to remove backgrounds in Photoshop using the Object Selection tool

    Here are the steps using the Object Selection tool:

    1. Open your image file in Photoshop.
    2. Select the Object Selection Tool in the left toolbar.
    3. Hold over your mouse cursor on the object you want to choose until it turns blue.
    4. Drag your mouse in small circles if it doesn’t instantly turn blue.
    5. Hold shift to include or exclude parts in the selection.

    Once you have selected an area, you can choose to delete the object itself or the background using inverse selection. For this purpose, you can use the brush-based Eraser Tool, Cut option, or deletion with the Delete key. You can change the settings to fit how you want the tool to perform.

    2. Quick Action Background Removal

    You can use the Quick Action tool to remove background photo in high-contrast objects where the background is already defined. It’s one of the fastest methods, but its accuracy is not the best, so you may need to clean up the lines after. If you are confident about your line cleanups and lasso skills, you can use Quick Action to clear the background quickly.

    How to remove backgrounds in Photoshop using the Quick Action tool

    Here are the steps on how to use Quick Action:

    1. Open your photo file in Photoshop.
    2. Duplicate your image layer, and turn off the original layer by clicking the eye icon.
    3. Turn on the Properties panel by going to Windows, then selecting Properties.
    4. Select the new layer and click the Remove Background button under the Quick Action.

    You have removed the background at that point, and you can refine it by checking the edges and ensuring everything in the scene is completely gone. After background removal, you can use other real estate photo editing apps to improve the image quality.

    3. Background Eraser Tool for background removal

    The Background Eraser Tool gives a bit more control over the opacity and intensity of background removal. Similar to the Quick Action method, your image should already have high contrast, and it takes more effort to create clean background removal.

    How to remove backgrounds with the Background Eraser tool

    Here are the steps for using the Background Eraser tool to remove background Photoshop online:

    1. Open your image file in Photoshop.
    2. Duplicate your image layer, and turn off the original layer by clicking the eye icon.
    3. Select the Background Eraser tool, an option under the Eraser tool.
    4. Click the Brush icon at the top of the screen to reveal the Brush panel and modify the size, hardness, spacing, angle, roundness, and tolerance.
    5. Modify other settings such as sampling, limits, and tolerance. The lower tolerance you set, the tool will select the fewer color variations, and the higher tolerance, the more colors.

    You can start erasing the background, occasionally adjusting the size and consistency of the brush. You can delete the environment faster with enough practice and experience, so don’t hesitate to experiment with the different settings.

    4. Removal using The Pen Tool

    Using the Pen Tool, you can easily remove a background from an image in Photoshop. First, open your image in Photoshop and select the Pen Tool from the toolbar. Next, carefully trace around the subject and background that you want to remove. Once you have made a complete path, right-click and choose “Make Selection.” Then, create a new layer mask to isolate the subject from the background. You can also use quick selection, magic wand, and brush tool to refine the selection. After deleting the background, you can add a new background to your image. Finally, save your image with a transparent background for future use or add a 2024 white background if needed.

    How to delete backgrounds in Photoshop with the Pen tool

    Adobe Photoshop offers a variety of tools to help you remove backgrounds from your images. One of the most popular ways to remove a background in Photoshop is by using the Pen tool. To do this, first open your image in Photoshop and make sure the background layer is unlocked. Next, select the Pen tool from the toolbar and click and hold to create points around the subject you want to keep. Once you have created a path around your subject, right-click and choose “Make Selection.” You can then click Remove Background to easily remove the background and make it transparent. Another way to remove a background in Photoshop is by using a Photoshop plugin that uses AI technology to detect the contrast between the subject and background and remove it for you. Finally, save your image as a PNG file to preserve the transparent background.

    Alternatively, if you want to remove the background manually, you can use the remove background tool in Photoshop. Simply select the tool and draw a box around the subject you want to keep. Photoshop will then automatically remove the background for you. This method is great for simple images with a clear contrast between the subject and background. Learning how to remove backgrounds in Photoshop with the Pen tool may be a bit more time-consuming, but it offers more control and precision over the final result. Whichever method you choose, removing backgrounds in Photoshop can help you create a clean and professional look for your images.

    Takeaway

    Companies like Phixer can quickly remove background HD quality real estate photos, but there are minor fixes that you can do on your own through simple Photoshop editing. The different object removal methods are suited for real estate agents with beginner to advanced technical photo editing knowledge. You can save time and money by doing it yourself, but you can also guarantee the output by letting pros do it.


    Frequently Asked Questions

    How do I remove the background from an image?

    The process of removing the background from an image can be done using various tools and techniques. Photoshop offers several options such as using a background remover tool or a plugin for Photoshop to help you easily remove the background color of your image. One method is to create a layer mask to remove the background of a picture while keeping the subject intact. Another way is to use the contrast between subject and background to manually remove the background image. You can also use an online background remover to swiftly change the background of your image. Regardless of the complexity of the image, anytime you want to remove the background, Photoshop has a quick action to help you create a new image with a transparent background.

    How can I get rid of a background on a picture?

    Photoshop is a popular tool used to remove backgrounds from images. One way to make a background transparent is by using the mask feature in the Photoshop toolbox. Another method is to use a quick action in Photoshop to swiftly remove the background from an image. By uploading your image to Photoshop, you can easily remove or restore the background using these tools. While some versions of Photoshop require payment, there are also free versions available. Photoshop is free to use with a free credit that offers 50 free API calls for preview. You can use these free API calls to remove the remaining background from your image, leaving only the desired elements. Whether you want to remove a background image or restore the original background, Photoshop provides the tools necessary to achieve your desired result.

    How do I remove a white background in Photoshop?

    Photoshop offers multiple methods to remove a white background from an image. The quickest way is to use the Photoshop quick action tool that automatically removes the background from the currently opened image. Another method is to use a mask to remove or restore parts of the image, including the white background. To do this, select the image layer, click on the “Add Layer Mask” button at the bottom of the layers panel, and then use a brush tool to paint on the mask to remove the background. You can also use the magic wand tool to select and delete the white background image using the selection tool in Photoshop.

    How do you make the background white instead of transparent in Photoshop?

    Photoshop offers multiple ways to make the background white instead of transparent. One method is to use the remove background feature, which allows you to easily eliminate the transparent background and replace it with a solid color. To do this, simply open the image in Photoshop, select the background layer, and then use the remove background tool to erase the existing transparency. You can then fill the background with white using the paint bucket tool or by creating a new layer and filling it with white. Another option is to manually remove background image by using the eraser tool or the pen tool to carefully remove the transparent areas and fill them in with white. Whichever method you choose, making the background white in Photoshop is a quick and easy process.

  • Does Virtual Staging Help Sell a House? Unveiling the Impact on Real Estate Sales

    Does Virtual Staging Help Sell a House? Unveiling the Impact on Real Estate Sales

    In today’s competitive real estate market, sellers are continually looking for effective ways to present their homes in the best possible light to potential buyers.

    Virtual staging has emerged as a powerful tool in this regard, allowing you to digitally furnish and decorate your property to enhance its appeal.

    Unlike traditional home staging, which requires physical furniture and decor, virtual staging employs software to create inviting and realistic images of an interior, potentially saving time and money.

    A modern living room with virtual furniture and decor, displayed on a computer screen. A real estate agent and potential buyers discuss the virtual staging

    The effectiveness of virtual staging lies in its ability to help buyers visualize themselves living in the space, making it easier for them to connect emotionally to the property.

    It can be particularly useful for selling empty or cluttered homes where physical staging might be impractical or too expensive.

    By showcasing a home’s potential through professionally designed virtual interiors, you may increase the likelihood of attracting more offers and selling your home faster.

    Key Takeaways

    • Virtual staging is a digital alternative to traditional home staging, offering a cost-effective way to enhance a property’s appeal.
    • By creating realistic images of furnished interiors, virtual staging can help potential buyers visualize a home’s potential.
    • Employing virtual staging can assist in selling a property quicker and often leads to a more emotional connection from buyers.

    Understanding Virtual Staging

    A virtual staging scene: A bright and modern living room with virtual furniture and decor, showcasing the potential of the space to potential buyers

    When you’re considering selling your property, staging can be a pivotal factor in attracting potential buyers.

    Virtual staging presents a cost-effective and flexible alternative to traditional staging, utilizing technology to enhance the appearance of your home digitally.

    Virtual Staging vs. Traditional Staging

    Virtual staging allows you to furnish an empty space or reconfigure an existing room with digital furniture and decor, offering a glimpse into the potential of a home without the hefty price tag of traditional staging.

    Traditional staging requires renting physical furniture and accessories, which involves more effort and expense.

    The Technology Behind Virtual Staging

    Advanced software is the cornerstone of virtual staging, enabling designers to create realistic, furnished interiors from photographs of empty rooms.

    This technology makes use of 3D modeling and photo-editing tools to meticulously place digital furniture into the images, creating a welcoming and aesthetically pleasing environment.

    Types of Virtual Staging Services

    Numerous virtual staging services cater to varied needs, from residential to commercial spaces.

    Some services specialize in modern designs, while others might offer a range of styles from contemporary to traditional.

    Providers commonly deliver several design options for a room, giving you flexibility in presenting your space to prospective buyers.

    Selecting the right style and provider can significantly impact your property’s marketability.

    The Benefits of Virtual Staging

    A computer screen displaying a beautifully staged living room in a vacant house, with virtual furniture and decor creating an inviting atmosphere

    Virtual staging offers you a range of advantages to effectively showcase your home in the best light without the heavy investment traditionally associated with physical staging.

    From financial savings to aesthetic flexibility, let’s explore the specific benefits it can provide.


    Why Would You Virtually Stage a Property?

    Virtual staging is the process of digitally enhancing images of a property to make it more appealing to potential buyers. There are several reasons why virtual staging can be a valuable tool when trying to sell a home. One of the main pros of virtual staging is the cost – it is typically much more affordable than physically staging a home. In addition, virtual staging allows for more flexibility and creativity in showcasing the potential of a space, especially if a home for sale is vacant. On the other hand, some cons of virtual staging include the fact that it doesn’t have the same impact as real staging and can sometimes be perceived as misleading. However, when done properly, virtual staging can still significantly improve the presentation of a property in real estate photography.

    Staging has become an essential way to sell a property in today’s competitive market. While real staging involves physically decorating and arranging a staged home to showcase its potential, virtual staging is the process of digitally adding furniture and decor to a staged room in real estate photography. When considering the pros and cons of virtual staging, it is important to weigh the benefits of cost and flexibility against the potential drawbacks of authenticity and impact. Ultimately, whether virtual staging is worth it depends on the specific property and the target market.

    Cost-Effectiveness and Budget Considerations

    Virtual staging is a cost-effective solution for selling your home.

    Traditional staging has its costs, from renting furniture to employing a decorator.

    In contrast, virtual staging can save you thousands, with services ranging from $39 to $199 per room.

    This affordability allows you to allocate more of your budget to other aspects of selling your home.

    Appeal to Potential Buyers

    One significant advantage is the enhanced appeal virtual staging brings to your online listings.

    By presenting a furnished and styled property, potential buyers can better visualize themselves in the space, making your listing stand out.

    High-quality, virtually-staged photos can result in your home spending less time on the market, tapping into the buyers’ aspirations with impressive, yet realistic imagery.

    Convenience and Time Savings

    Virtual staging is not only affordable but also fast and convenient.

    Unlike physical staging, which requires transport, setup, and dismantling, the virtual process is done digitally, drastically reducing the turnaround time.

    This means you can have your home staged and listed in a matter of hours or days, which is ideal if you’re looking to sell quickly.

    Flexibility and Range of Design Choices

    With virtual staging, the design possibilities are nearly endless, offering you incredible flexibility.

    Customize each room according to the most recent trends or tailor it to a specific buyer demographic, all without physically altering your space.

    Virtual staging allows for numerous revisions and an array of design styles, helping prospective buyers envisage their own furniture and decor in the home.

    Preparing a Property for Virtual Staging

    A vacant room with neutral walls and hardwood floors. Furniture and decor are strategically placed to showcase the space's potential

    When you’re ready to employ virtual staging for selling your house, there are essential steps you must undertake to ensure that your property is depicted in the best light possible online.

    Photography Requirements for Virtual Staging

    High-resolution photos are the foundation of virtual staging.

    To create the most engaging and realistic staged images, you need to provide professional-quality photographs that capture the true essence of each room.

    It’s important to use a camera capable of producing high-resolution images and consider lighting conditions to avoid glares or shadows that could detract from the space’s potential.

    An empty space serves as a clean canvas for virtual staging experts to work their magic, so ensure the property is vacant before taking photos.

    Decluttering and Optimizing Space

    Decluttering is a critical step before photographing your property.

    A tidy and optimized space makes a significant difference in virtual staging.

    You should remove personal items, unnecessary furniture, and any clutter that disrupts the flow of the space.

    The aim is to present a harmonious, decluttered environment that allows potential buyers to visualize themselves in the home. This step helps virtual staging companies to effectively incorporate desirable furnishings and decor into your listing photos.

    Selecting the Right Virtual Staging Company

    Choosing a reputable virtual staging company is key to a successful digital presentation of your property.

    Look for companies that showcase an extensive portfolio of their work and provide clear pricing structures. Quality and turnaround time are also important factors to consider.

    You want a company that promises realistic staging results—ones that accentuate your home’s strengths and appeal to potential buyers’ taste and lifestyle preferences.

    Ensure that they can deliver images that blend well with the original photography, preserving angles and lighting for a seamless finish.

    Virtual Staging in the Selling Process

    A modern living room with virtual staging, showcasing stylish furniture and decor. A "For Sale" sign outside the window

    Virtual staging has revolutionized the way you can present homes in the real estate market, making it an integral component of the selling process. This approach allows for an efficient and versatile way to showcase a property’s potential.

    Integrating Virtual Staging with Real Estate Listings

    When integrating virtual staging into your real estate listings, you provide potential buyers with a clearer vision of an otherwise empty space.

    The process involves inserting furniture, decor, and fixtures into listing photos of an empty room.

    This digital enhancement is not just about filling space—it’s about creating a lifestyle that buyers can envision themselves living in.

    Real estate agents readily adopt this tactic as it can significantly sell faster, offering a visually appealing online presence without the higher costs associated with traditional staging.

    Enhancing Online Presence

    In today’s digital age, your online listing is often the first, and possibly the only, opportunity to catch a buyer’s eye.

    High-quality, virtually staged photos stand out in online searches, leading to more clicks and inquiries.

    They complement the property description, giving life to the listing and enabling potential buyers to imagine their future home.

    For you, the realtor, this means a more marketable listing that can attract a broader audience.

    The Impact of Virtual Staging on Sales

    The effectiveness of virtual staging in the sales process is measurable.

    Properties that are virtually staged not only tend to sell faster but often command a higher asking price.

    By leveraging the power of professionally styled listing photos, you are likely to garner more interest, leading to a quicker sale.

    The initial investment in virtual staging can be easily offset by the returns of a successful sale, making it a strategic choice in today’s competitive market.

    Ethical Considerations and Best Practices

    A virtual staging software being used to digitally furnish and decorate an empty room in a house for sale

    When delving into virtual staging to sell a house, your integrity and the trust of potential homebuyers are paramount.

    Ethical considerations and best practices focus on transparency, setting realistic expectations, and adhering to legal standards.

    These principles ensure that while you are showcasing the property’s potential, you are also upholding your responsibility to provide a truthful representation of the home.

    Transparency with Virtually Staged Photos

    Be Transparent: Always disclose that photos have been virtually staged. This allows buyers to differentiate between the actual condition of the property and enhancements made for marketing purposes.

    Visual Labels: Consider using subtle but clear labels or disclaimers on virtually staged photos to maintain transparency.

    Setting Realistic Expectations for Buyers

    Accurate Representation: Ensure that any virtual modifications, such as furniture and decor, are within reason. This prevents misleading your audience about the space’s actual size and potential.

    Virtual vs. Physical: Contrast staged images with current photos of the home. This gives buyers a clear understanding of its present state versus the potential after purchase.

    Navigating Legal and Ethical Boundaries

    MLS Compliance: Familiarize yourself with and follow all Multiple Listing Service (MLS) rules related to virtual staging to avoid any legal repercussions.

    Ethical Marketing: Engage in ethical marketing by keeping the alterations minimal. This holds especially true for the property’s inherent characteristics like layout and views.

    Frequently Asked Questions

    A computer displaying virtual staging software with a before and after image of a living room, surrounded by real estate brochures and a "For Sale" sign

    Virtual staging is increasingly popular in the real estate industry due to its convenience and cost-effectiveness. Consider these specifics to gain a better understanding of its role in home sales.

    What are the advantages of virtual staging over traditional staging?

    Virtual staging offers a cost-effective alternative to traditional staging. Services such as quick and affordable solutions. It removes the need for physical furniture and can be completed quickly, without the need for physical access to the property.

    Do homebuyers generally appreciate virtual staging when viewing properties?

    Yes, many homebuyers find virtual staging helpful as it can enhance the visual appeal of a property by showing its potential. Virtual staging allows buyers to imagine themselves in the space more easily.

    What are the potential downsides to using virtual staging for selling a home?

    The major downside is the possibility of misleading potential buyers if the virtual staging does not accurately represent the space. It may lead to disappointment upon seeing the property in person. Additionally, lack of disclosure that images have been virtually staged can result in trust issues.

    Can virtual staging significantly impact the sale price of a house?

    While virtual staging itself may not directly increase a home’s sale price, it can attract more buyers by showcasing a property’s potential. This leads to quicker sales which can indirectly positively influence the sale price due to higher demand.

    How can someone identify if a property has been virtually staged?

    Listings should indicate when photos have been virtually staged. You might notice that the digitally added furniture and decor look a bit too perfect or don’t cast shadows realistically, indicating a virtual modification.

    What are the best practices for implementing virtual staging effectively?

    To use virtual staging effectively, ensure that the staged images reflect a realistic interpretation of the space.

    Choose designs that align with the property’s layout and appeal to a broad audience without being overly specific.

    Transparently indicate the use of virtual staging in your listings.

    What Are the Pitfalls to Avoid in Virtual Staging?

    Virtual staging has become a popular alternative to real staging in the real estate industry. While virtual home staging can save time and money, there are pitfalls to avoid. One major drawback is the virtual staging cost, as digital staging software and services can be expensive. Another issue is that virtual staging may not accurately reflect the staging process and the actual look and feel of the property in real life. In some cases, virtual staging doesn’t showcase the potential of a home as well as real staging would. This is especially true for vacant homes and living in the home scenarios. It’s important to consider the profile of home staging when deciding if virtual staging is worth it for selling the home.

    Virtual staging also has its limitations when it comes to creating a home office or showcasing the majority of real estate photos online. While virtual staging can enhance the appearance of a home, it may not provide a complete picture of what the home could look like to potential buyers. Additionally, the costs of virtual staging can add up quickly, especially if multiple rooms need to be staged. When comparing the pros and cons of virtual staging vs real staging, it’s important to weigh the benefits of each and determine which option is best for your specific needs.

  • What Are Benefits of Editing Photographs in Real Estate? Enhancing Visual Appeal and Sales Potential

    What Are Benefits of Editing Photographs in Real Estate? Enhancing Visual Appeal and Sales Potential

    In the competitive arena of real estate, the significance of high-quality photography cannot be overstated. Visual aids play a pivotal role in buyers’ decision-making processes, and the meticulous editing of real estate photographs ensures that the first impression a property makes is both compelling and lasting.

    Through the refinement of images, editing can balance light and color, remove unwanted elements, and ultimately showcase properties in their best light, leading to higher engagement from potential buyers.

    A bright, spacious living room with natural light streaming in through large windows. The furniture is perfectly arranged, and the colors are enhanced to make the space feel warm and inviting

    Equally important is the strategic impact that well-edited photographs have on marketing efforts. Professionally edited photos do not just capture attention—they ensure a cohesive brand image that helps real estate professionals stand out in a crowded market.

    By optimizing images for various platforms and ensuring they highlight the property’s best features, photo editing becomes a key element in a successful real estate marketing strategy.

    Key Takeaways

    • Professionally edited photos create compelling first impressions.
    • Consistent, high-quality images strengthen branding and marketing efforts.
    • Optimized real estate photography attracts higher buyer engagement.

    Understanding the Basics of Real Estate Photo Editing

    A bright, spacious living room with natural light streaming in through large windows, highlighting the clean lines and modern furnishings

    Editing real estate photographs enhances the appearance of properties, attracting potential buyers. It sharpens the features and corrects lighting, color, and angles to present properties in the best possible way.

    Essential Equipment for Superior Shots

    As you prepare to capture real estate images, remember that superior shots start with the right equipment.

    A full-frame camera with a large sensor size is ideal for detailed wide-angle photos. Tilt-shift lenses help in correcting perspectives, making structures look straight and true-to-life.

    For capturing expansive interiors or virtual tours, a 360 camera can be effective. Keeping a tripod handy ensures stability and sharpness, enabling you to avoid blurriness in low-light conditions.

    The Role of Lighting in Property Photography

    Lighting can make or break real estate photos. Aim to photograph properties during the golden hour for soft, diffused natural light which minimizes harsh shadows.

    Combining natural light with flash helps to balance the lighting across the frame. A flash trigger comes in handy to control light remotely.

    Understanding the interplay of light will allow you to accentuate the best features of the property and create inviting images.

    Camera Settings and Techniques for Real Estate

    Your camera settings are crucial to capturing high-quality real estate images.

    Use a wide-angle lens to get more of the room into the frame, giving a sense of spaciousness.

    Adjust the aperture to get a wide depth of field, ensuring that everything from the foreground to the background is in focus.

    Fine-tuning the shutter speed will allow you to capture images with the right exposure, avoiding washed-out areas or overly dark shadows.

    Choosing the Right Real Estate Photographer

    Selecting a professional real estate photographer is pivotal for quality outcomes.

    They have the knowledge of the best angles and techniques to present a property in its best light.

    They understand the subtleties of color balance and are skilled at using editing software to bring out the charm of each space.

    Their expertise in camera handling and post-processing can elevate your property listings significantly.

    How important is an image in real estate?

    Real estate photography is crucial in the real estate industry, as it can make the difference between a property sitting on the market for months or selling quickly. High-quality photos are essential for attracting potential homebuyers and showcasing the property’s true potential. In today’s competitive real estate market, professional real estate photos can give agents and sellers a significant advantage. Photo editing services, such as professional real estate photo editing and real estate photo retouching, can help enhance a property and make it more appealing to potential buyers. By using editing for real estate, agents can ensure that their listings stand out and attract more attention.

    There are numerous benefits of real estate photography, including increased visibility, faster sales, and higher selling prices. Professional real estate photos can also help build trust with potential buyers and aid in business growth. Editing software and real estate photo editors can enhance images by removing imperfections and highlighting the property’s best features. Overall, investing in high-quality photos and image editing services is essential for success in the real estate business.

    Why is photo editing important in real estate?

    Photo editing has become one of the most crucial aspects of the best real estate property marketing. Editing can help enhance property photos and create visually appealing real estate listings that will attract potential buyers. There are 7 benefits to using real estate photo editing software such as adjusting lighting, colors, and angles to highlight the selling points of a property. Additionally, photo editing can help real estate companies save time and money by maintaining an in-house editing team to ensure all photos are edited to perfection. Photo editing can help real estate listings stand out from the competition and improve the overall look of the property.

    Professional editing can enhance the appearance of photos, making them more attractive to potential buyers and increasing the likelihood of a quick sale. With real estate photo editing software, agents can easily remove unwanted objects or adjust the photo look to highlight the best features of a property. In today’s competitive market, professionally edited real estate photos can make a significant difference in the overall look of the photo and ultimately help properties sell faster.

    Delving Into Advanced Editing Techniques

    A photographer meticulously edits a stunning real estate photo, enhancing details and colors, creating a captivating visual representation

    Advanced real estate photo editing techniques can significantly enhance the marketability of a property by creating visually striking images.

    By understanding how to expertly manipulate the elements of a photograph, you can transform an average shot into a compelling piece of visual storytelling, crucial for real estate marketing.

    The Art of Cropping and Composition

    When looking at cropping and composition, your main goal is to lead the eye.

    You want to remove any distracting elements that detract from the property’s best features.

    Cropping can reframe the image to emphasize space and create a more impactful composition.

    Aim for a balanced layout that draws potential buyers in, giving them a sense of place and the structure of the property.

    Balancing Colors and Contrast for Realism

    Color balance and contrast add depth and realism to your images.

    Carefully adjust these parameters to reflect the property’s true ambiance, making the photos accurate yet inviting.

    While enhancing saturation can make your images pop, it’s important to retain natural skin tones and realistic environmental hues to maintain credibility.

    Enhancing Images with Filters and Effects

    Employing filters and effects can bring out the character and uniqueness of a property.

    Use these tools sparingly to highlight the architecture or the property’s surroundings without making the image feel artificial.

    Consider subtle effects to enhance textures or the play of light within the space.

    Software and Tools for Real Estate Photo Editing

    Your choice of photo editing software is crucial.

    Adobe Lightroom and Photoshop are industry-standard tools that offer a wide array of editing features, from cropping and color balancing to advanced effects.

    Lightroom especially is favored for its intuitive color grading and batch processing capabilities, which are efficient for real estate photographers dealing with a large volume of images.

    The Visual Appeal of Post-Production

    A computer screen displaying before and after real estate photos, highlighting enhanced color, clarity, and detail

    Editing photographs in real estate can significantly enhance the presentation of a property by addressing visual elements that may otherwise detract from the intended impact. These targeted adjustments lead to a more appealing and engaging visual experience for potential buyers.

    Sky Replacement and Weather Correction

    If your property photos suffer from a gloomy sky or less-than-ideal weather conditions, sky replacement techniques allow you to showcase the property under a clear and sunny backdrop.

    Professionally edited skies make your listings stand out, presenting the home in the best possible light, regardless of the actual weather on the day of the shoot.

    Object Removal and Clutter Minimization

    Effective object removal can contribute to a cleaner look by eliminating distractions, such as unwanted items or vehicles that may be present in the frame.

    The process of decluttering reinforces the property’s features, making spaces appear larger and more inviting.

    Adding Virtual Staging Elements

    Virtual staging transforms an empty room into an attractive living space without the need for physical furniture.

    This technique demonstrates the potential of different areas within the home, which can help buyers envision themselves in the space.

    Improving Lawn and Landscaping Visibility

    The exterior shot benefits from lawn greening and landscaping enhancements, which accentuate the outdoor appeal.

    Adjustments to these areas ensure that the greenery looks vibrant, creating an inviting and well-cared-for impression of the property grounds.

    Optimizing Real Estate Photos for Marketing

    A bright, spacious living room with natural light streaming in through large windows. The furniture is tastefully arranged, and the room is impeccably clean and clutter-free. The colors are warm and inviting, creating a cozy atmosphere

    Effective marketing of real estate relies heavily on the visual appeal of property listings. By optimizing photographs, you enhance the best features of properties and grab the attention of potential buyers.

    Targeting Potential Buyers with Captivating Images

    When you enhance your real estate photos, you craft captivating images that are designed to catch the eye of potential buyers.

    An image with balanced colors, clear lighting, and a welcoming atmosphere can make the difference in whether a buyer decides to explore a listing further or scroll past it.

    The Importance of High-Quality Listings

    Listings of high quality are without a doubt more likely to stand out on real estate platforms like Zillow and Realtor.com.

    They signal to buyers that you are a professional who values presentation and detail, further instilling confidence in your property offerings.

    Effective Online Presentation Strategies

    In today’s digital age, the Internet is a powerful tool for marketing real estate.

    Utilizing single property websites and online listings with enhanced photos can drive more traffic and generate greater interest.

    High-quality images serve as a cornerstone for effective online marketing strategies.

    Strategic Workflow and Outsourcing Solutions

    A photographer editing real estate photos on a computer, with before and after images displayed on the screen

    In real estate, refining your photo editing process can be transformative, enhancing both the visual appeal of listings and operational efficiency. Outsourcing to specialized photo editing companies can harness global talent and streamline your workflow significantly.

    Streamlining Editing Workflow for Efficiency

    Your workflow is crucial. Implementing simple editing techniques can hasten routine tasks, allowing for a more rapid turnaround time on property images.

    By utilizing batch processing and preset editing templates, you can maintain a high level of consistency across all real estate photographs, reducing the need for repetitive adjustments.

    • Batch Processing: Apply edits to multiple photos at once.
    • Preset Templates: Use standard settings to achieve a consistent look quickly.

    Choosing Photo Editing Companies and Services

    It’s essential to select photo editing companies with a strong track record.

    Look for services like Phixer that offer a balance between cost-effectiveness and high-quality output.

    Ensure they provide robust customer support to resolve any issues swiftly, which is vital in maintaining a smooth workflow.

    • Customer Support: Prioritize companies with responsive and accessible support.
    • Service Range: Choose companies that offer a suite of editing options to meet your diverse needs.

    The Benefits of Outsourcing and Global Talent

    Outsourcing unlocks access to a pool of skilled professionals worldwide, especially in countries like the Philippines, known for its strong outsourcing industry.

    This strategic move not only saves you time but also ensures that you benefit from top-notch image quality produced by experts in real estate photo editing services.

    • Cost Savings: Reduce expenses as outsourcing often comes at a lower cost than local options.
    • Global Talent: Leverage the specialized skills of professionals from around the world.

    Understanding Legal Issues and Ethical Standards

    A real estate agent edits property photos on a computer, ensuring legal and ethical standards are met

    In real estate, editing photographs can be a powerful tool, but you must navigate legalities and uphold ethical standards to ensure that your marketing practices are beyond reproach.

    Ensuring Accuracy and Adhering to Real Estate Law

    Real Estate Law mandates that any photograph used to market a property must be an accurate representation of that property.

    In your editing process, it is important to make sure that any enhancements made to a photo, such as adjusting lighting or contrast, do not misrepresent the actual condition or features of the real estate.

    Remember:

    • Accuracy Over Alteration: Always present a realistic view of the property.
    • Disclosure: If significant edits are made, such as removing a permanent feature, you may be legally required to disclose these changes to potential buyers.

    Ethical Considerations in Photo Editing

    Ethical Standards in real estate photography editing are as crucial as legal compliances. These standards ensure that your reputation and integrity remain intact. When editing photos:

    • Realism: Keep your edits realistic; over-enhancement can lead to distrust.
    • Integrity: Maintain the ethical high ground by avoiding deceptive practices.

    By balancing the aesthetic improvement of your real estate photographs with a commitment to accuracy and ethical marketing, you strengthen trust with your clients and support a fair market.

    Diversifying Real Estate Visual Marketing

    A bright, modern living room with edited photographs displayed on the walls, showcasing various properties and amenities

    To stay competitive in a crowded market, diversifying your real estate visual marketing strategy is key.

    You’ll find that incorporating varied types of media not only showcases properties in their best light but also engages potential buyers in different, memorable ways.

    The Rise of Aerial and Drone Photography

    Aerial photography is soaring in popularity, offering a unique perspective of your listings.

    By utilizing drone photos, you reveal the scope of a property and the surrounding landscape, which can be a deciding factor for buyers. Such imagery provides a comprehensive view that ground-level photographs simply can’t match.

    Creating Virtual House Tours and Floor Plans

    Offering virtual house tours allows clients to navigate a property independently, providing them with a real feel of the space before they visit in person.

    Pairing tours with detailed floor plans gives potential buyers a clear, birds-eye understanding of the property’s layout, enabling them to imagine living there with greater ease.

    Designing Property Flyers and Promotional Videos

    Well-designed property flyers effectively summarize key details and visually captivate. Meanwhile, promotional videos can tell the property’s story, highlighting unique features in a dynamic way that static images cannot. These materials can be critical in generating interest and moving buyers towards a decision.

    The Business Benefits of Real Estate Photo Editing

    A before-and-after comparison of a real estate photo, showcasing improved lighting, color correction, and enhanced details

    When you step into the competitive realm of the real estate market, the quality of your listings’ visuals can make or break potential sales.

    By investing in professional photo editing, you’re not just enhancing images; you’re strategically positioning your properties to capture the attention of home buyers.

    • Increased Viewership: Quality images are pivotal for online listings. Aesthetic and stunning photos can significantly boost the number of views your listings receive, attracting more viewers.
    • Enhanced Presentation: Through expert editing, photos can represent the property in the best light. Properties appear cleaner, brighter, and more inviting, contributing to a high-quality portfolio that reflects your unique style.
    • Marketing Edge: Stand out in a saturated market with visuals that tell a compelling story. Bold, vibrant images capture interest, while video editing can bring the dynamic aspects of a property to life.
    • Cost-Effective: The right professional photo editor can turn average shots into premium imagery. This enhancement is often more budget-friendly than frequent shoots with professional photographers.
    • Optimized Pricing: Better imagery can influence a property’s perceived value, potentially justifying higher pricing and increasing your return on investment.
    • Emotional Connection: Compelling imagery fosters an emotional connection with potential buyers, making them more likely to pursue a property.

    Frequently Asked Questions

    A computer screen displaying before and after real estate photos being edited with software tools, a desk with a camera and props in the background

    In real estate, professional photography editing can significantly impact how properties are perceived by potential buyers. Here’s how it can make a difference.

    How does professional photo editing enhance online property listings?

    Professional photo editing can transform online property listings by creating striking images that grab attention.

    Brightness and color adjustments can make photos more vibrant and inviting, while perspective corrections ensure the property is presented accurately.

    What impact does photo retouching have on the sale price of a property?

    Photo retouching can potentially increase the sale price of a property by showcasing it in the best light, creating a compelling first impression that can translate to a higher perceived value among buyers.

    Why is it crucial to use high-quality images in real estate marketing?

    High-quality images are crucial in real estate marketing because they serve as the first point of contact between the property and the buyer.

    They create a sense of professionalism and trust, and can help potential buyers visualize the property as their future home.

    In what ways can editing real estate photos help to attract more buyers?

    Editing real estate photos can attract more buyers by enhancing key features and removing distractions, allowing buyers to focus on the attributes of the property that are most appealing to them.

    What are the advantages of using virtual staging in real estate photography?

    Virtual staging in real estate photography offers the advantage of visualizing the potential of an empty space without incurring the costs and time associated with physical staging, making it easier for buyers to imagine themselves in the home.

    How can photo editing contribute to a faster sale of a real estate property?

    Photo editing can contribute to a faster sale by producing visually appealing images that stand out in a crowded market.

    This can potentially lead to quicker buyer interest and accelerated decision-making.

  • How to Improve Green Grass Color for Real Estate Photo Editing

    How to Improve Green Grass Color for Real Estate Photo Editing

    It’s common practice for potential homeowners to thoroughly inspect the properties they want to buy because of the amount they need to spend. They often ask for photos of the property taken from different angles to assess if it’s appropriately priced and contains amenities suitable to their lifestyle.

    You should produce the best real estate photos. Improving the green grass color is easy and doesn’t require numerous equipment or years of experience. For this reason, it would help if you worked with professionals like Phixer and availed of real estate grass change services or exerted effort to learn the craft on your own. 

    Follow these grass replacement editing techniques below so you can present the best real estate photos to thousands of potential homebuyers.

    Method 1: Brush Tool

    This method can help you produce the best-looking exteriors made by professional real estate grass change services. This method works best if the grass is simple and doesn’t have any objects in the area. 

    1. Create a new layer in Photoshop and then set the blend mode to “Soft Light.” This option controls the darkness or lightness of the colors on your photos, depending on the blend color. It works by illuminating a diffused light on the image. 
    2. Choose a dark green paint color – the darker the shade, the better. Avoid using light green as this will make your grass unrealistic.
    3. Start painting with your green paint on that “Soft Light” layer over your grass, which applies color to the grass while retaining its original texture.
    4. After you’ve finished painting, choose the “Eraser” tool and erase areas where you accidentally painted green. For example, if you painted over some path or rocks near the grass, the “Eraser” tool will remove any shades of green. This tool can correct your photos and make them more realistic. 
    5. Although not essential, this tip can also help. Open up the green grass layer levels (you can access this by pressing Ctrl + L) and then drag the point on the far right-hand side. This trick can brighten the grass, so it doesn’t look too visually heavy in the photos. 
    6. Next, adjust the “Opacity” of the grass layer. Opacity set to 100% will make the color of the grass too firm, so make sure to adjust accordingly. Opacity set to 70% usually provides better results. 
    7. Flatten the Photoshop document, and you’re good to go!

    Method 2: Hue or Saturation

    If you don’t know how to replace grass in Photoshop, this method is a great starting point. The tool is the quickest and easiest method to make the grass green in your real estate photos. 

    1. Open the photo you want to edit in Photoshop. 
    2. Add a new adjustment layer and choose “Hue/Saturation.” You can access this setting in the properties panel of Photoshop. 
    3. Change the master color to Yellows. You need to adjust the yellow hues in the photo to make the image green. To do this, move the “Hue” slider to the right, and you’ll see that the grass in the photo will eventually get greener. 
    4. There are no set rules when using this lawn replacement editing technique. It would help if you considered the overall lighting of the picture to determine how you can adjust the hue, saturation, and lightness. 
    5. Once you’re happy with the adjustments, you can save your work, and that’s it! 

    Why Should You Improve The Green Grass Color Of Your Real Estate Photos?

    How a property looks from the outside can make or break a homebuyer’s decision. Buying a home is expensive, and homebuyers wouldn’t want to spend money on a property that will require them to pay more for repairs or renovations. 

    Nothing is more inviting than a green lawn outside of a home. This feature shows that the property is well-maintained, allowing you to attract homebuyers fast. If you want to leave a positive impression and convince homebuyers that your property is the best in the market, it’s crucial to master grass replacement editing techniques.

    Knowing lawn replacement editing tips and tricks can also increase the curb appeal of your listing. This skill can become your edge, especially when you’re selling properties in a very competitive housing market.

    Final Thoughts

    The lawn is an excellent indicator of a well-maintained property. If you want to succeed in the real estate industry, it’s vital to learn how to replace grass in Photoshop. Producing the most realistic photos can become your key to hauling in homebuyers and earning the most profits!

  • How to Stage a Dining Room for Real Estate Photography

    How to Stage a Dining Room for Real Estate Photography

    A house’s dining room can help spark a homebuyer’s interest in the property. As outlined in a previous post, dining rooms are also crucial in real estate photography, as they create an element of homeliness. In fact, 29% of homebuyers pay more than the asking price when they perceive a property as more than an asset but a home. Presenting and highlighting your dining room through real estate photography is crucial, as 97% of homebuyers look for properties online, making photos their first point of contact.

    Investing time and resources into staging your dining room for real estate photography can help frame your home’s aesthetic. This ranges from adjusting furniture pieces and lighting fixtures to playing around with decor and accessories. In this post, we’ll be sharing some tips for staging your dining room for real estate photography:

    Varying dining room seating

    Depending on the decor and the rest of the house, it may be wise to rethink your dining room seating plan. A conventional dining room setup may look cluttered in pictures if the rest of the room is busy with decor and other furniture. Instead, you can click here to see how a dining table with a bench setup can provide a new, refreshing aesthetic. For one, a single bench can look less cluttered than the usual number of chairs pushed up to the table. Functionally, a dining bench also provides flexibility as people won’t be restricted by the amount of chairs available.

    Additionally, dining sets with benches still use conventional chairs as part of the setup but help open up the furniture arrangement, making the whole dining room look more open in pictures. You can also experiment with dining chair designs and table sizes to go with the bench, such as the Mariko extendable dining with bench sets, which can work as six- and eight-seaters and use high or low backrests for the regular chairs.

    Paying attention to lighting

    While lighting is certainly essential for elevating various forms of photography, lighting can also help transform your dining room and make it more inviting and homely. Depending on the design of your house and how rooms are laid out, you can read this article to examine how strategically placed windows can create well-lit spaces for cooking, dining, and spending quality time with loved ones. Light-filled spaces for food are also flexible as they work across different finishes, from marble, concrete, and wood to glass.

    For example, if your dining room and kitchen are joined or share the same space, you can opt for skylights or ceiling glass windows to maximize lighting and warmth. Of course, there are other ways to light up your dining rooms, including artificial light fixtures like a hanging light over the table. If your kitchen and dining room are separated, you can also consider sliding glass doors so the two spaces can share light.

    Accessorizing the dining room

    Finally, aside from changing furnishing and lighting, it’s also important to take the time to accessorize the dining space. Even the most minimalist dining rooms can be elevated with a few decor pieces and accessories. Most of the finishing touches detailed here can liven up the dining space and work similarly with decor for other rooms, including indoor plants, light fixtures, wall decor, and a good old rug.

    A well-placed potted indoor plant can make for eye-catching photography as it can add a splash of color, especially if your dining room focuses on minimalist design. You can also accessorize your dining room’s walls with framed pictures, art prints, and mirrors to create the illusion of space. It’s also vital that you arrange any furniture on the floor — whether potted plants, a rug, or a floor lamp — so that people can still easily move around the dining space.

    Editing for Perfect Presentation

    Once you’ve snapped those stellar shots of your staged dining room, it’s time to jazz them up with a little digital magic through real estate photo editing. Even the best-styled spaces can benefit from a tweak or two to really make them shine online. Here are some tips to spruce up your photos:

    1. Tweak the Lighting and Exposure: Get those photos out of the shadows by fine-tuning the lighting and exposure. Brighten up the dim areas and balance out the exposure to make your dining room look like the inviting haven it is.
    2. Boost the Colors: Make those colors pop by adjusting the saturation and contrast. This’ll help draw attention to the standout features of your dining room, like those funky decor pieces or that sleek furniture.
    3. Banish Distractions: Whip out your editing tools to remove any pesky distractions from your photos. Say goodbye to unwanted objects, pesky reflections, or any other imperfections that might steal the spotlight from your dining room’s charm.
    4. Straighten and Crop: Get those photos perfectly aligned and cropped for maximum impact. Straighten out any wonky lines and crop out any unnecessary background clutter to keep the focus squarely on your dining room’s fabulousness.
    5. Add Depth and Dimension: Give your photos a bit of oomph by playing around with shadows and highlights. This’ll make your dining room feel more lifelike and immersive, like you could just step right into the picture and pull up a chair.

    By giving your photos a little digital TLC, you’ll ensure that your staged dining room looks its absolute best online, enticing potential buyers and leaving them itching to schedule a viewing.

  • How to Use Photoshop to Remove Cords and Wires from Real Estate Photos

    How to Use Photoshop to Remove Cords and Wires from Real Estate Photos

    High-quality real estate photos sell properties faster. Attractive listing photographs can make a good impression and significantly affect a buyer’s decision. Residential property is an expensive investment, and no one wants to spend money on something that looks unappealing in photos. 

    There will be instances when you capture clutter or unwanted objects. You can do it yourself through editing software. Photoshop is an excellent tool to use for real estate unwanted objects removal.

    If you’re wondering how to do the latter, we have the techniques to help you out:

    Spot Healing Tool Brush

    The spot healing tool brush in Photoshop works like a real estate declutter service that allows you to remove unwanted cords and wires within minutes. This technique is also straightforward to use.

    1. Select the Cords and Wires You Want to Remove

    To start, select the layer that contains the cords and wires you want to remove. Zoom as close as possible to these objects so you can easily remove them without compromising the quality of the photo.

    2. Choose the Spot Healing Tool Brush

    Once you’ve zoomed on the cords and wires, select the Spot Healing Tool Brush found in the tools panel. After, click the Content Aware Type. This tool synthesizes nearby content so you can seamlessly blend it with the surrounding content.

    3. Move the Brush to the Cords and Wires You Want to Remove

    Move the spot healing tool brush to the area of the cords and wires. Photoshop will automatically patch several pixels over the selected area as you brush over, concealing the objects you want to remove.

    This tool works best for removing small pieces of cords and wires in real estate photos.

    Patch Tool

    You can also use Photoshop’s patch tool in removing cords and wires from your real estate photos. As long as you know how to draw lines, you won’t have any problems using this too!

    1. Select the Patch Tool

    After importing the photo on Photoshop, select the Patch Tool in the Healing Brush tool in the Tools panel. Unlike the Spot Healing Tool Brush, the Patch Tool works well to repair more extensive areas of an image and remove significant distractions or clutters.

    2. Press the ALT Button

    Hold down the ALT button and move your cursor to an area where you intend to use a patch sample. Ideally, you should choose one section of the wall or a part of the furnishings as your patch sample where the cord or wire is lying on to ensure that your real estate photos look realistic after using the Patch Tool.

    Once you’ve selected your sample area, click your mouse. The cursor will immediately turn into a circle once you’ve made this action.

    3. Brush Over to the Items You Want to Remove

    Brush over the cords and wires until it disappears. Depending on the size or length of the items you want to remove, this process will take less than a minute.

    Don’t forget to use the crosshairs located beside the cursor to assess the cloned area.

    Clone Stamp Tool

    Utilizing the Clone Stamp is also a great way to remove cords and wires from your real estate photos.

    1. Select the Clone Stamp Tool

    Once your photo is on Photoshop, click the Clone Stamp Tool located in the toolbar on the left-hand side of the app. You can press the letter “S” on your Mac OS or Windows computers.

    2. Zoom to the Location of the Cords and Wires

    Once you’ve located and zoomed on the cords and wires on your photo, hold ALT until the cursor becomes a crosshair. Using the crosshair, select the area where you want to use a sample.

    3. Brush on the Cords and Wires

    Brush on the items you want to remove. This action will automatically copy the pixels of the sample area you selected earlier. You should see a plus sign as the brush is copying over the cords and wires you want to remove

    Maximize Photoshop

    Knowing how to use Photoshop for real estate unwanted objects removal is like using a decluttering service for photos. Alternately, you can hire a real estate declutter service or real estate photo editing service, like Phixer, to make sure each image appeals to potential buyers or improves them through post-production. 

    By following the techniques in this article, you can finally create and present the tidiest real estate photos to clients, as if you hired a professional cleaner before taking pictures.